This article shows how to install a tub that has its drain hole in the same place as the old tub you are replacing. Carefully plan how you will attach the waste-and-overflow assembly, especially at the tub’s drain hole. In the situation shown here, there is easy access to a trap from below, so you can install the assembly before dropping in the tub. If there isn’t an adjacent wall or ceiling that you can reach the drain assembly from after the tub is in place, you can buy some tubs with removable front panels that give access to make drain connections.
TIP: Be sure to buy a tub with either a right- or left-hand drain to match your plumbing. Most alcove tubs are 60 in. (5 ft.) long, but check to be sure; you may need to buy a 66-incher or another size. Also check the width. If the new tub is narrower than the old one, you may need to patch or redo the bathroom flooring. Also check to see that the drain hole (or outlet) is in the same position as the old tub; if not, you will have to modify the drain lines.
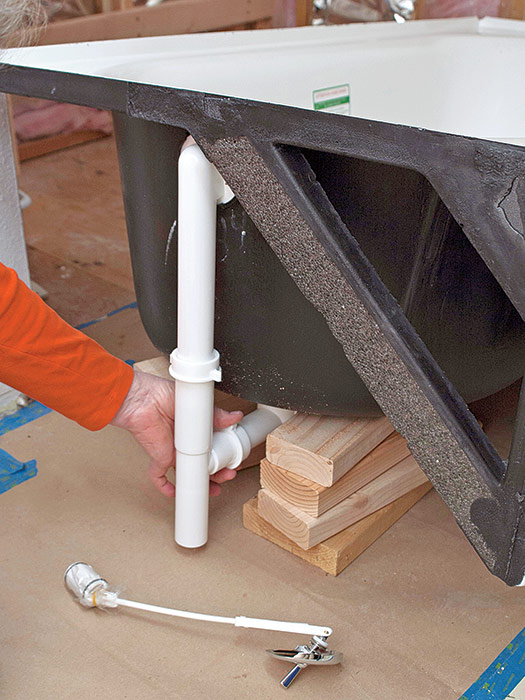
1. INSTALL THE WASTE ASSEMBLY. Before setting the tub, elevate it with scraps of wood and install the waste-and-overflow tube. The tube has a rubber gasket that seals it to the outside of the tub, held in place by a retainer plate on the inside of the tub. Position the drain tube and elbow under the tub.
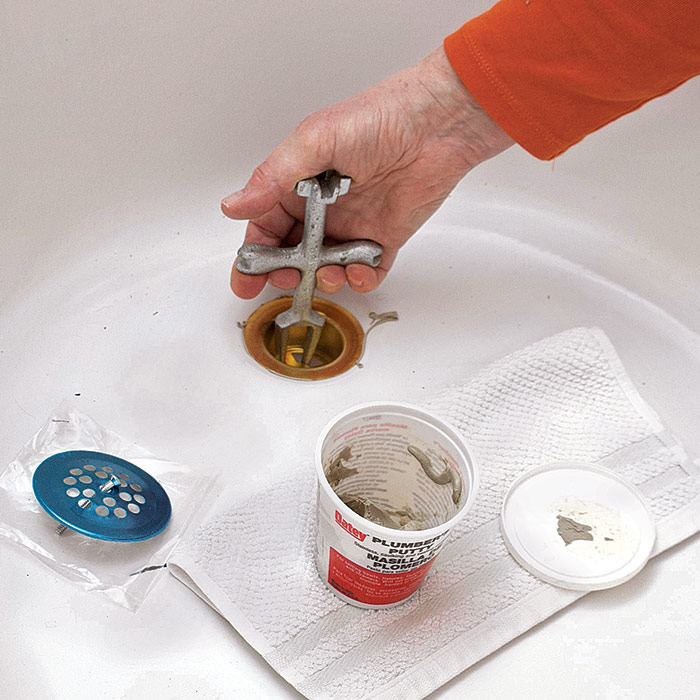
2. INSTALL THE DRAIN STRAINER. Position the rubber gasket on the drain-tube elbow. Apply a rope of plumber’s putty to the underside of the threaded strainer body’s flange. Using a strainer wrench or the handles of a small pair of pliers, tighten the strainer body into the drain-tube elbow. Attach the strainer cover.
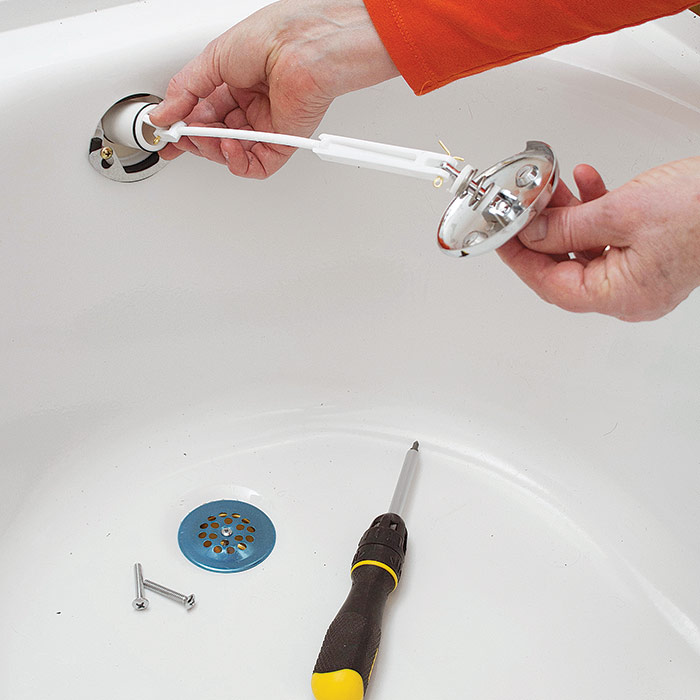
3. INSTALL THE DROP CYLINDER. Feed the drop cylinder and its linkage into the overflow opening. Adjust the linkage so the cylinder covers the drain tube when the overflow lever is up. Some units come with a handy gauge for making this adjustment. Attach the overflow plate.
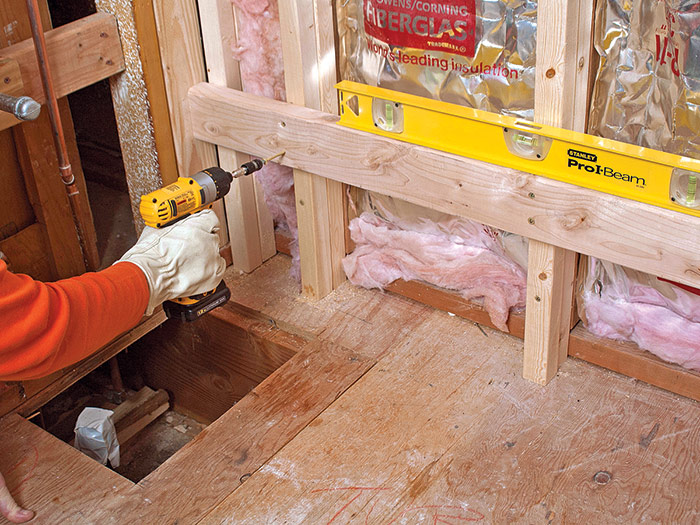
4. ADD A LEDGER. To support the inner edge of the tub, level and attach a 2×4 ledger to the framing at the height specified by the tub manufacturer. Fasten the ledger to each wall stud with two 3-in. deck screws.
5. CAULK ALONG THE LEDGER. Clear the area so you can slide or tilt the tub into place. This can be tricky—you won’t have much clearance between the studs. Once you are certain the tub will fit, apply a couple of beads of 100% silicone to the ledger as an adhesive and sealant.
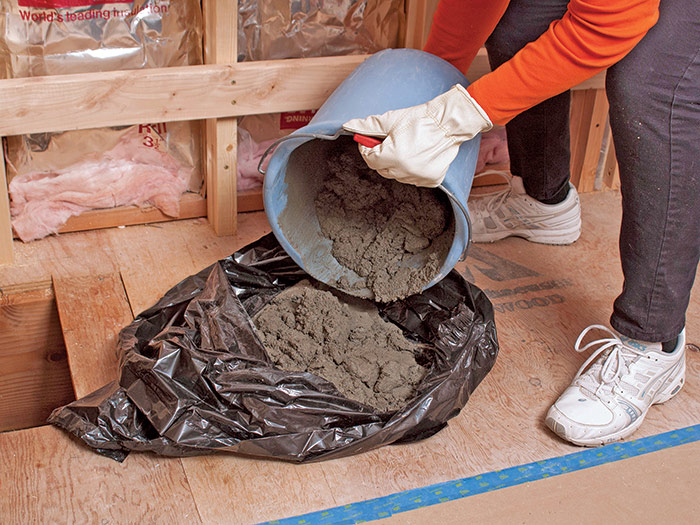
Support with Mortar as Needed
Some tubs have an integral base that stiffens the tub, but many tubs need a layer of mortar as support. (The tub should not flex at all when you stand on its floor.) To contain the mortar and keep your site clean, place about a square foot of mixed mortar in a large plastic bag, centered under the middle of the tub’s floor.
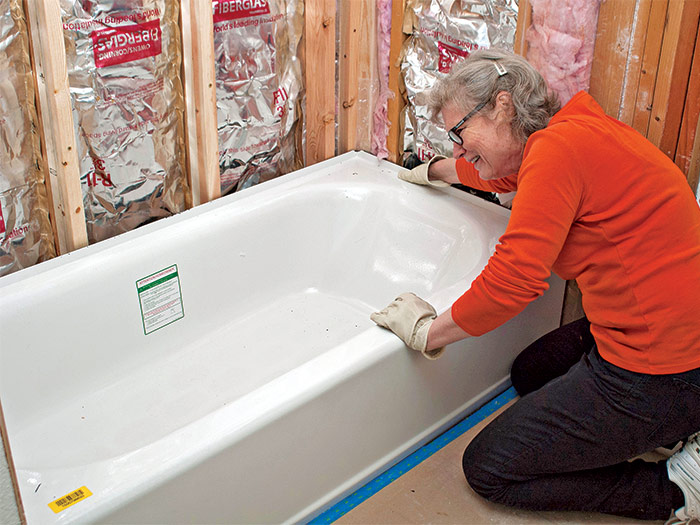
6. SET THE TUB. Set the inside edge on the ledger and push down to spread the bagged mortar (if used). Don’t stand inside the tub; that could push down too far, so the mortar will not support the tub when it dries.
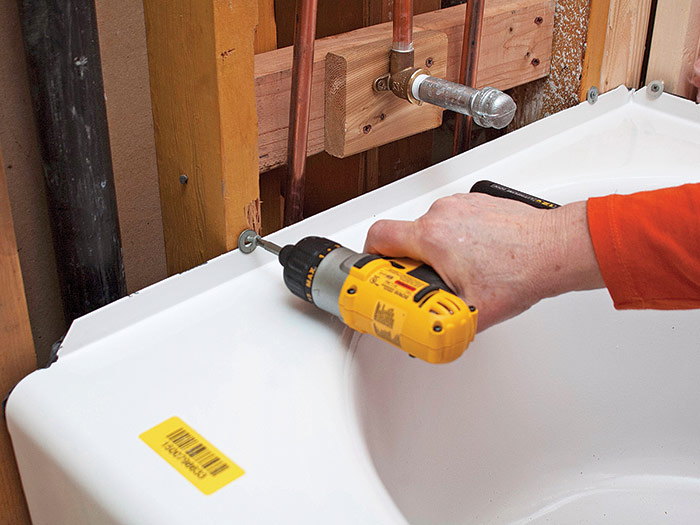
7. FASTEN THE TUB TO THE FRAMING. To secure the tub, install screws and washers at every stud just above the flange of the tub. Be careful not to damage the flange as you drive the screws.
TIP: Center the tub between the two end walls. At the back wall, install it tight to the studs. Test with scraps of backerboard to make sure the finish surface—either tiles or solid surface—will lie flat and clear the tub’s flange and the fasteners you install.
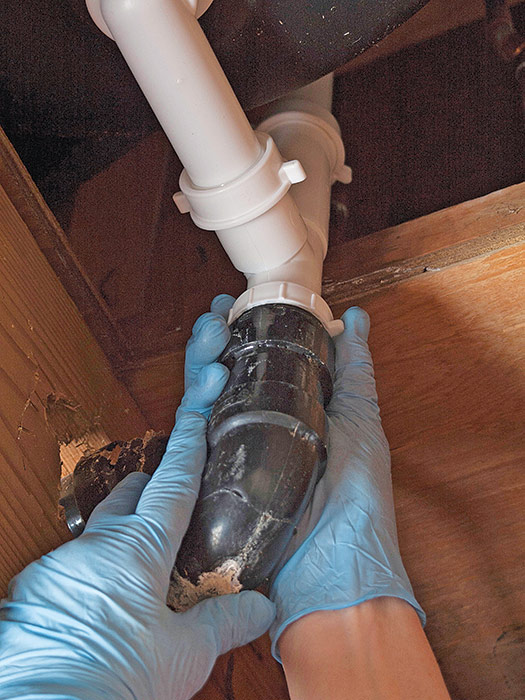
8. CONNECT THE DRAIN TO THE TRAP. Working from the basement or through a ceiling or wall access panel, connect the waste assembly to the trap. With luck, your waste assembly will line up with the trap. In some cases, you may need to cut a piece or add an extender to the assembly.
Excerpted from Plumbing (The Taunton Press, 2016) by Steve Cory.
This is a dialog window which overlays the main content of the page. The modal window is a 'site map' of the most critical areas of the site. Pressing the Escape (ESC) button will close the modal and bring you back to where you were on the page.
We use cookies, pixels, script and other tracking technologies to analyze and improve our service, to improve and personalize content, and for advertising to you.
We also share information about your use of our site with third-party social media, advertising and analytics partners.
You can view our Privacy Policy
here and our Terms of Use here.