FHB Logo Facebook LinkedIn Email Pinterest Twitter Instagram Plus Icon Close Icon Navigation Search Icon Navigation Search Icon Arrow Down Icon Video Guide Icon Article Guide Icon Modal Close Icon Guide Search Icon Skip to content
Subscribe

In every issue you'll find...

  • Expert insights on techniques and principles
  • Unbiased tool reviews
  • Step-by-step details to master the job
  • Field-tested advice and know-how
Subscribe Now!
Subscribe
  • How-To
  • Design
  • Tools & Materials
  • Videos
  • Blogs
  • Forum
  • Magazine
  • Members
  • FHB House
  • Podcast
  • Join
  • Log In
Subscribe

Fine Homebuilding Project Guides

Plumbing

Guide Home
Chapter
  • Plumbing Basics
  • Bathrooms
  • Kitchens
  • Roughing In
  • Water Heaters, Washers, and More
  • Maintenance and Repair
How-To

Replacing the Toilet-Tank Gasket and Overflow Pipe

Make this repair to fix leaks under the flush valve or between toilet tank and bowl.

By Rex Cauldwell

Every now and then an overflow pipe will crack or the flapper valve seat will become so ragged it needs to be replaced. Both conditions will create a leak under the flush valve or between tank and bowl and will require replacement of the overflow pipe and tank gasket.

To start the repair, drain and dry out the tank.

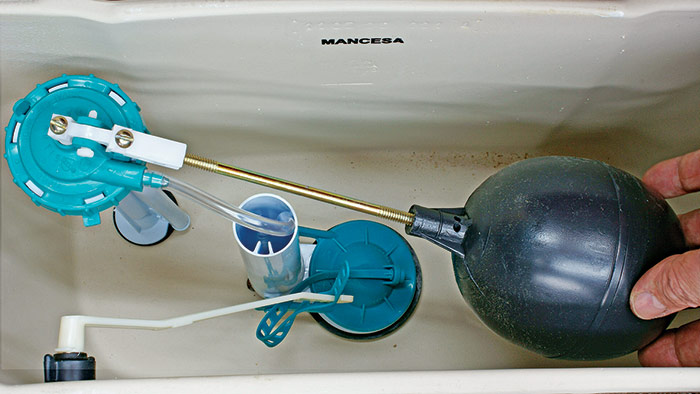
If your toilet has a float and arm, tape the position of the float on the arm, remove both, and set them aside. The tape will tell you how far to screw the float back on when reassembling 1.

removing the float and arm
1. If your tank uses a ball float, removing the float and arm isn’t absolutely necessary, but it will make the job go faster.

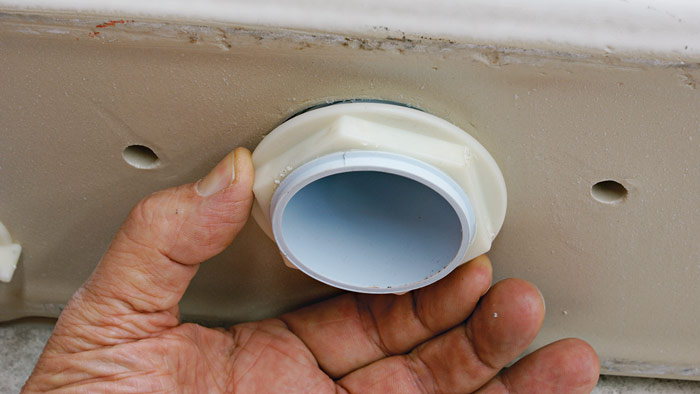
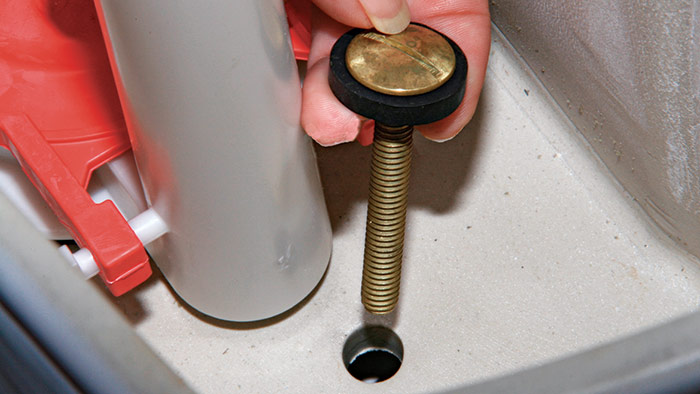
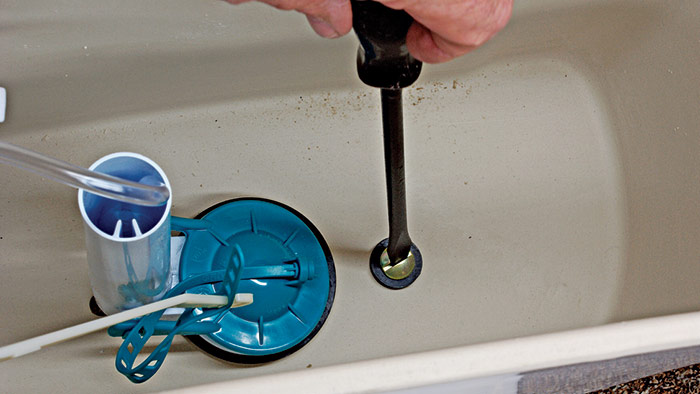
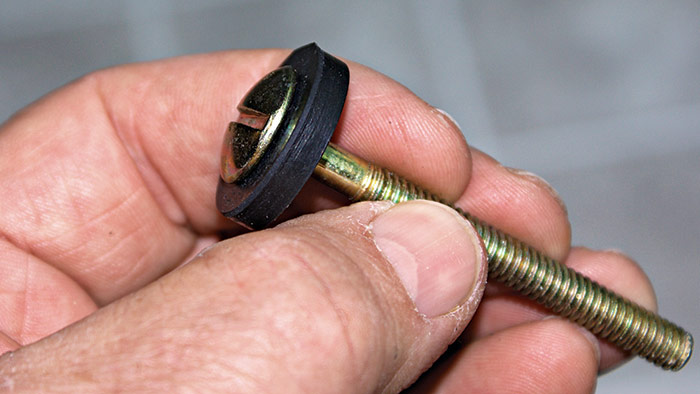
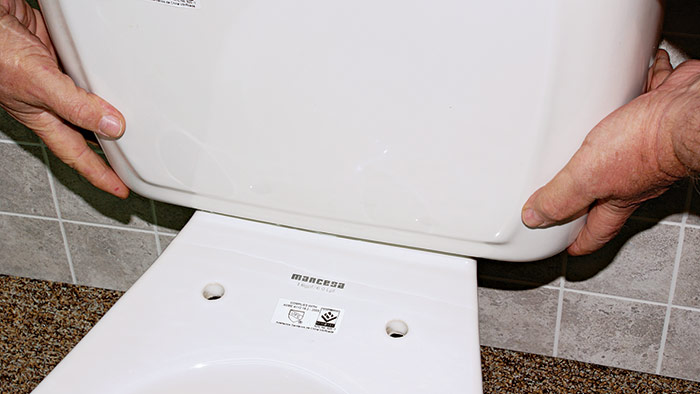
Remove each of the two bolts holding the tank to the base and examine the condition of the gasket under the bolt 2. If either gasket has hardened or is breaking apart, you’ll need to replace both bolts and gaskets 3. They come as a set at all hardware stores. With the bolts removed, the tank is loose, and you can remove it by grabbing it on both sides and pulling straight up 4. Set the tank on a rug on the floor, and remove the tank gasket.

loosen each bolt with a wide screwdriver
2. Slip an adjustable wrench on the nut on the underside of the tank and loosen each bolt with a wide screwdriver.
examine the gaskets
3. Remove the two bolts and examine the gaskets. If they’re hardened or deteriorating, replace them when reassembling the tank.
pull the tank straight up
4. Grabbing the tank on each side, pull it straight up and off the base.

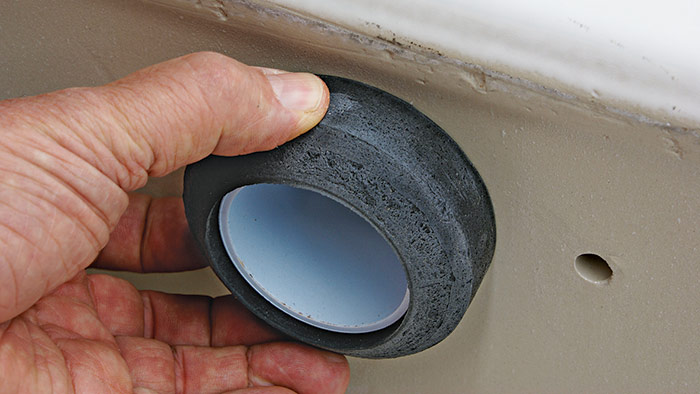
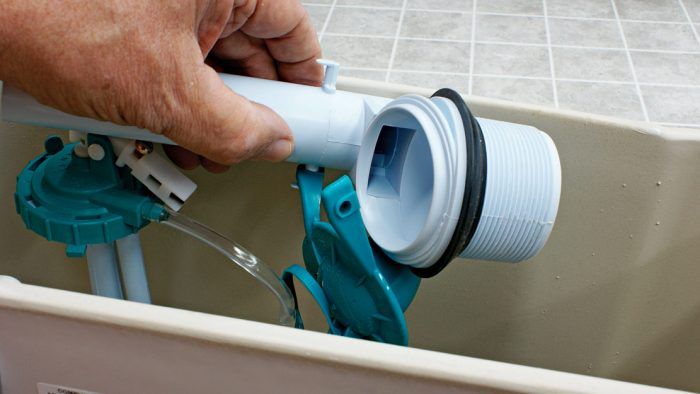
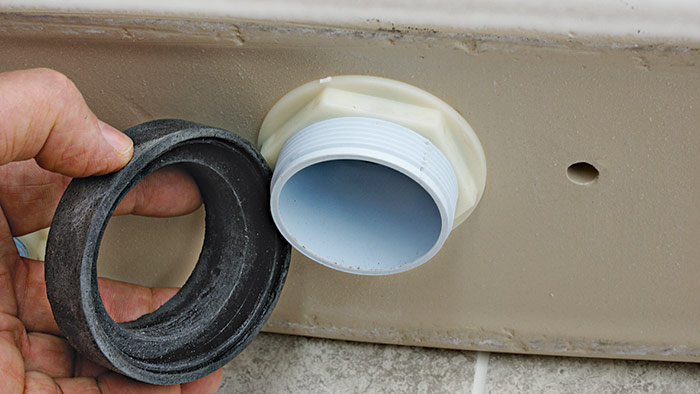
If the tank was leaking around the seal, replace the gasket 5. Then, using a large pipe wrench, loosen the nut that holds the overflow pipe to the tank 6. Remove the nut and set it aside. If the wrench won’t turn the nut, split it with a sharp chisel to remove it. Turn the tank top-side up and remove the refill tube from the overflow pipe by freeing it from its clip or unsnapping it from its grooved housing 7. Pull out the overflow assembly and replace it with the model of your choice 8. You’ll find replacement assemblies at all hardware stores.

pull off the tank gasket
5. Gently set the tank on the floor or rug and pull off the tank gasket.
remove overflow pipe nut
6. Loosen the nut holding the overflow pipe and then turn it by hand and remove it.
Remove the refill tube
7. Remove the refill tube from the overflow pipe.
pull overflow assembly out
8. Lift the overflow assembly up and pull it straight out. Set the replacement overflow pipe in the hole in the bottom of the tank.

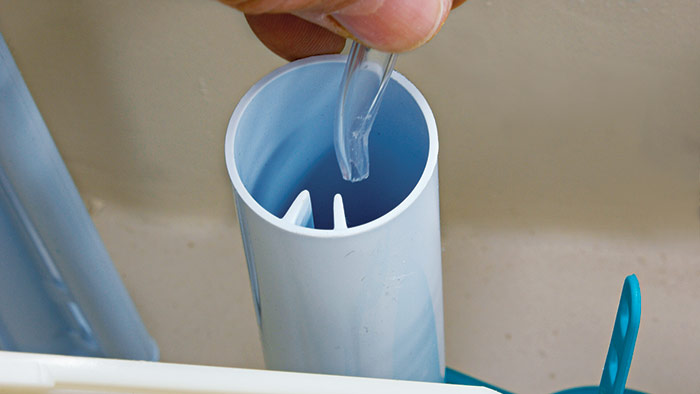
Turn the nut over the threads and against the tank bottom and tighten it with a wrench 9. Push the seal on the overflow pipe and set the tank on the bowl with the seal in the hole 10. Insert new tank bolts with gaskets and tighten the nuts under the tank flange 11. You can replace these nuts with wing nuts to make this job easier, but do not tighten them excessively. Level the tank if necessary. Place the refill tube in the overflow tube and replace the float and arm. Connect the supply line to the tank, turn the water on and adjust the water level. Check for leaks.

Screw the large nut tight against the tank
9. Screw the large nut tight against the tank. First finger tighten and then tighten slightly with a wrench.
Push the foam seal over the threads
10. Push the foam seal over the threads and up against the tank bottom.
replace tank bolts
11. Slip the tank bolts with gaskets into the holes and tighten them from underneath.


Sign up for eletters today and get the latest how-to from Fine Homebuilding, plus special offers.

Signing you up...

This site is protected by reCAPTCHA and the Google Privacy Policy and Terms of Service apply.
See all newsletters
See all newsletters
Previous: Fixing Toilet Fill-Valve and Flush-Valve Problems Next: Fix Your Tub Drain

Guide

Plumbing

Chapter

Maintenance and Repair

Log in or create an account to post a comment.

Sign up Log in

Become a member and get full access to FineHomebuilding.com

Plumbing

Plumbing

Trusted, comprehensive guidance from the pros for tackling any plumbing project

View Project Guide

View All Project Guides »

Become a member and get unlimited site access, including the Plumbing Project Guide.

Start Free Trial

Plumbing Basics
  • Plumbing Systems
  • Materials
  • Plumbing Tools
Bathrooms
  • Sinks
  • Showers & Tubs
  • Toilets
Kitchens
  • Kitchen Sinks
  • Water Filtration
  • Appliances
Roughing In
  • Layout
  • Installation
  • Copper Pipe
  • PEX Tubing
  • PVC Drainpipe
Water Heaters, Washers, and More
  • Water Heaters
  • Whole-House Filters
  • Sump Pumps
  • Washers
  • Sprinkler Systems
Maintenance and Repair
  • Sinks
  • Toilets
  • Showers & Tubs
  • Systems

Fine Homebuilding

Follow

  • twitter
  • facebook
  • instagram
  • pinterest

Newsletter

Get home building tips, offers, and expert advice in your inbox

Signing you up...

This site is protected by reCAPTCHA and the Google Privacy Policy and Terms of Service apply.
See all newsletters
See all newsletters

Membership & Magazine

  • Online Archive
  • Start Free Trial
  • Magazine Subscription
  • Magazine Renewal
  • Gift a Subscription
  • Customer Support
  • Privacy Preferences

Taunton Network

  • Green Building Advisor
  • Fine Woodworking
  • Fine Gardening
  • Threads
  • About
  • Contact
  • Advertise
  • Careers
  • Copyright
  • Terms of Use
  • Site Map
  • Do not sell my information
  • Privacy Policy
  • Accessibility
  • California Privacy Rights

© 2022 The Taunton Press, Inc. All rights reserved.

X
X
This is a dialog window which overlays the main content of the page. The modal window is a 'site map' of the most critical areas of the site. Pressing the Escape (ESC) button will close the modal and bring you back to where you were on the page.

Main Menu

  • How-To
  • Design
  • Tools & Materials
  • Video
  • Blogs
  • Forum
  • Reader Projects
  • Magazine
  • Members
  • FHB House

Podcasts

  • FHB Podcast
  • ProTalk

Webinars

  • Upcoming and On-Demand

Account

  • Log In
  • Join

Podcasts

  • FHB Podcast
  • ProTalk

Webinars

  • Upcoming and On-Demand

Popular Topics

  • Kitchens
  • Business
  • Bedrooms
  • Roofs
  • Architecture and Design
  • Green Building
  • Decks
  • Framing
  • Safety
  • Remodeling
  • Bathrooms
  • Windows
  • Tilework
  • Ceilings
  • HVAC

Magazine

  • Current Issue
  • Past Issues
  • Magazine Index
  • Subscribe
  • Online Archive
  • Author Guidelines

All Access

  • Member Home
  • Start Free Trial
  • Gift Membership

Shop the Store

  • Books
  • DVDs
  • Taunton Workshops

More

  • FHB Ambassadors
  • Reader Projects
  • Podcast
  • Customer Support

Account

  • Log In
  • Join

Newsletter

Get home building tips, offers, and expert advice in your inbox

Signing you up...

This site is protected by reCAPTCHA and the Google Privacy Policy and Terms of Service apply.
See all newsletters
See all newsletters

Follow

  • twitter
  • facebook
  • instagram
  • pinterest

Join All Access

Become a member and get instant access to thousands of videos, how-tos, tool reviews, and design features.

Start Your Free Trial

Subscribe

FHB Magazine

Start your subscription today and save up to 70%

Subscribe

We hope you’ve enjoyed your free articles. To keep reading, become a member today.

Get complete site access to expert advice, how-to videos, Code Check, and more, plus the print magazine.

Start your FREE trial

Already a member? Log in