
A Practical Approach to Installing Windows
This straightforward method focuses on water management, air infiltration, and smooth operation.
Synopsis: When it comes to installing windows, instruction manuals typically are based on somewhat generic situations. Although manuals should be followed, they don’t always address the real-world environment and some obstacles installers could face on the job site. Technical editor Mark Petersen talks through a construction project where he installed casement windows with jamb extensions, and discusses the installation of the water-resistive barrier, weep strips, and caulking to manage water and air infiltration, as well as how to set the window level in the opening.
When it comes to window installation, I’ve always been careful about following the manufacturer’s instructions. And that approach has paid off because I’ve only had a few windows fail, all of which were covered by the manufacturer’s warranty and repaired by the window company itself. However, many of the instruction manuals only include the bare minimum amount of information, and that has a lot to do with how windows are tested.
Windows achieve their performance ratings by being tested on very specific and somewhat generic wall assemblies, and the manufacturer’s installation instructions are designed to replicate those same conditions. But test conditions don’t always address the real-world environment and all the challenges installers face on the job site.
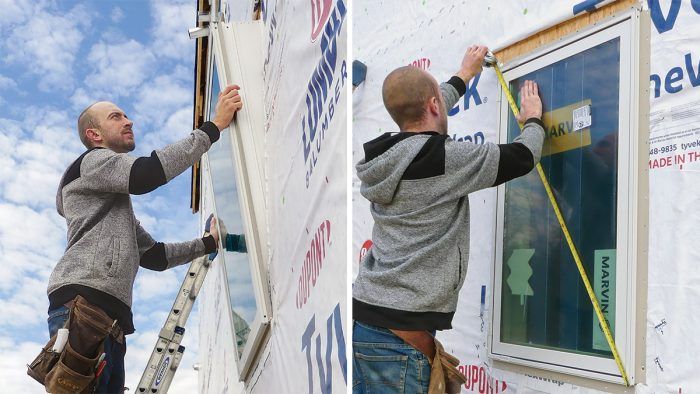
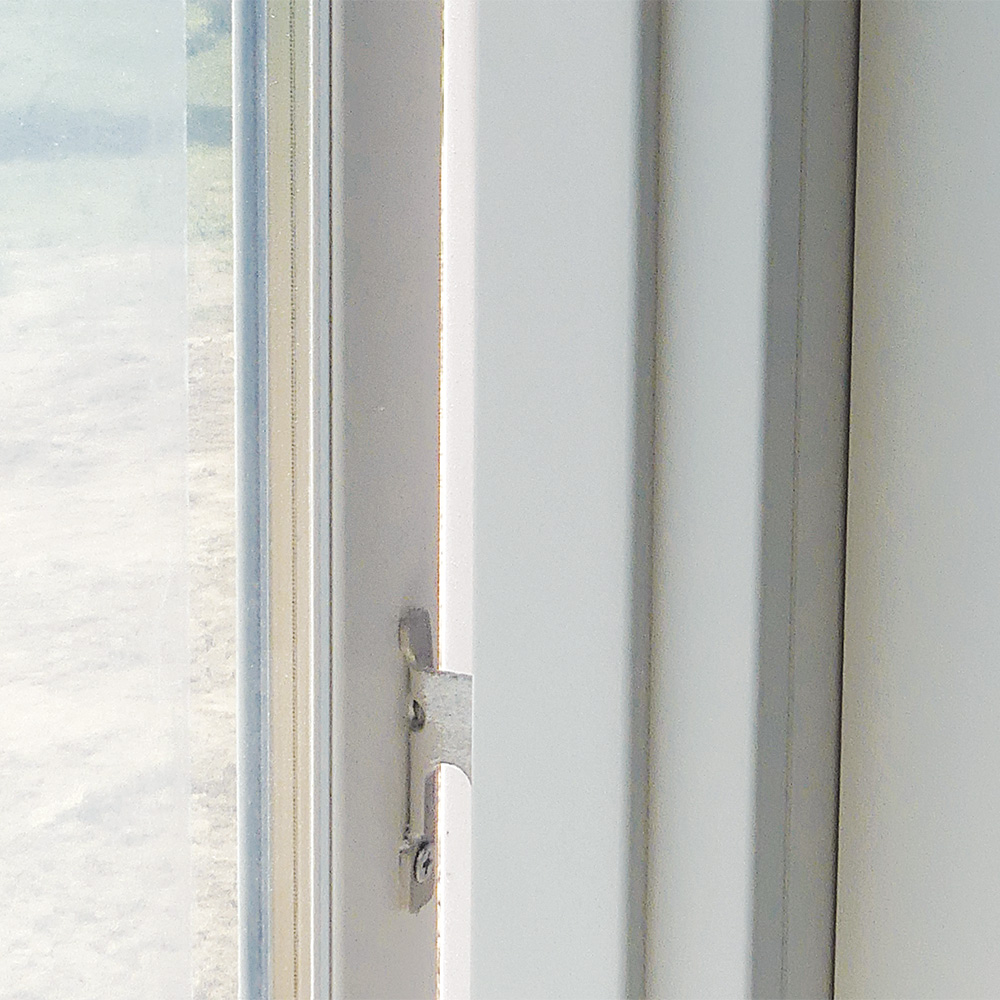
On this new construction project, I installed Marvin Essential Casement windows with 6-9/16-in. jamb extensions. Essential windows are fiberglass inside and out and have a nonintegral nailing flange. While you might be installing a different brand or style of window on your next project, most of the tips in this article apply to a wide variety of window installation scenarios.
Prepare the Rough Opening
Some manufacturers recommend that their windows have a 1/4-in. gap between the window and the rough opening, the same gap size that was used when the window was tested. I find that 3/8 in. on each side makes it easier to square up a large window in a less-than-perfectly-framed opening. If an opening was framed out of square, plumb, or level to even a moderate degree, the window will need to be rotated within the space, which means that the gaps at the corners will be reduced or eliminated altogether. With a clearance of only 1/4 in., there may not be enough room to fully correct the window. That small gap also makes it difficult to insert a spray-foam insulation tip/straw into the gap, especially on windows with jamb extensions.
Direct water out with a sloped sill
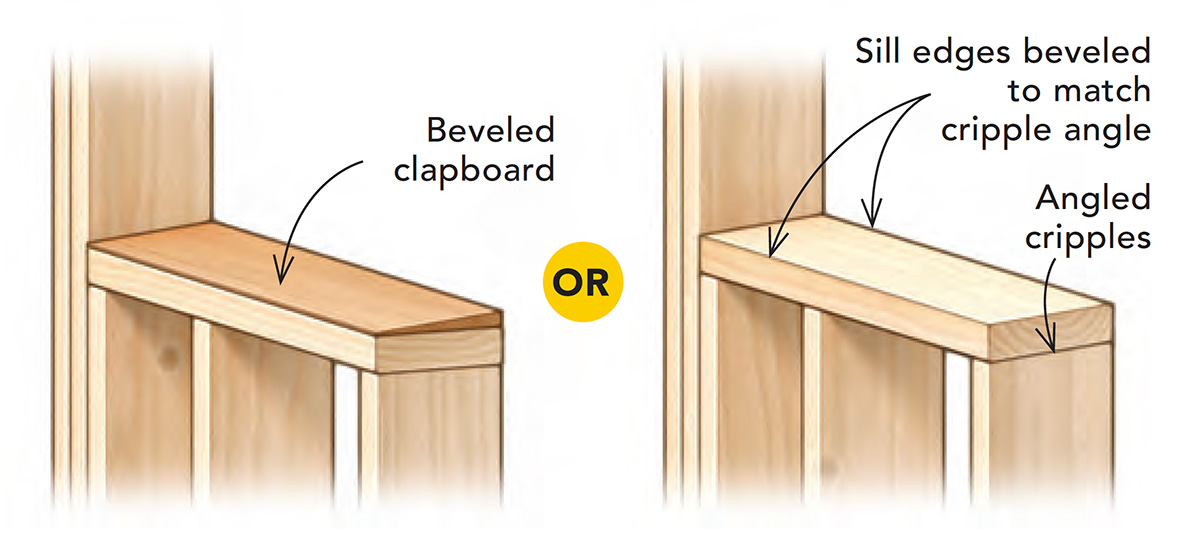
These sills were sloped by cutting the cripples underneath the sill at a 4° angle. To keep the rough sills in plane using this method, shave a bit off by ripping the edges on a tablesaw at the same angle of the slope, or install them in plane with the exterior and shave off the inside projection with a handheld power planer. If you use a presloped pan liner or piece of beveled siding, you’ll have to frame the openings larger to accommodate the additional thickness.
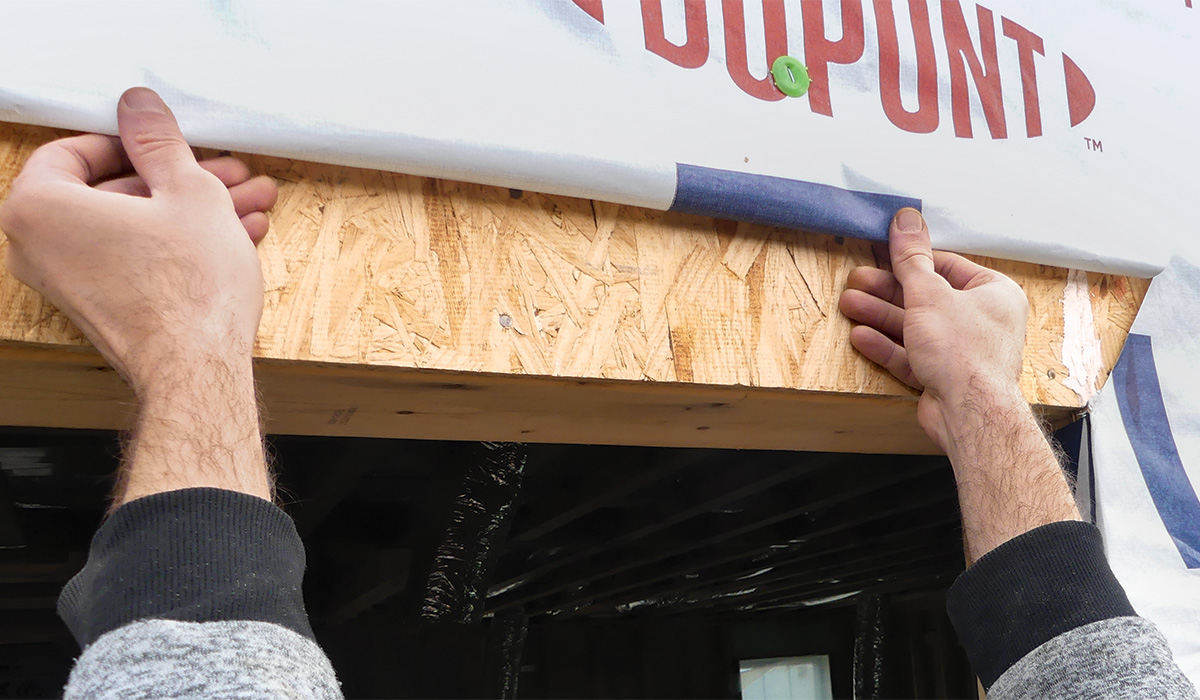
Cut and wrap the WRB
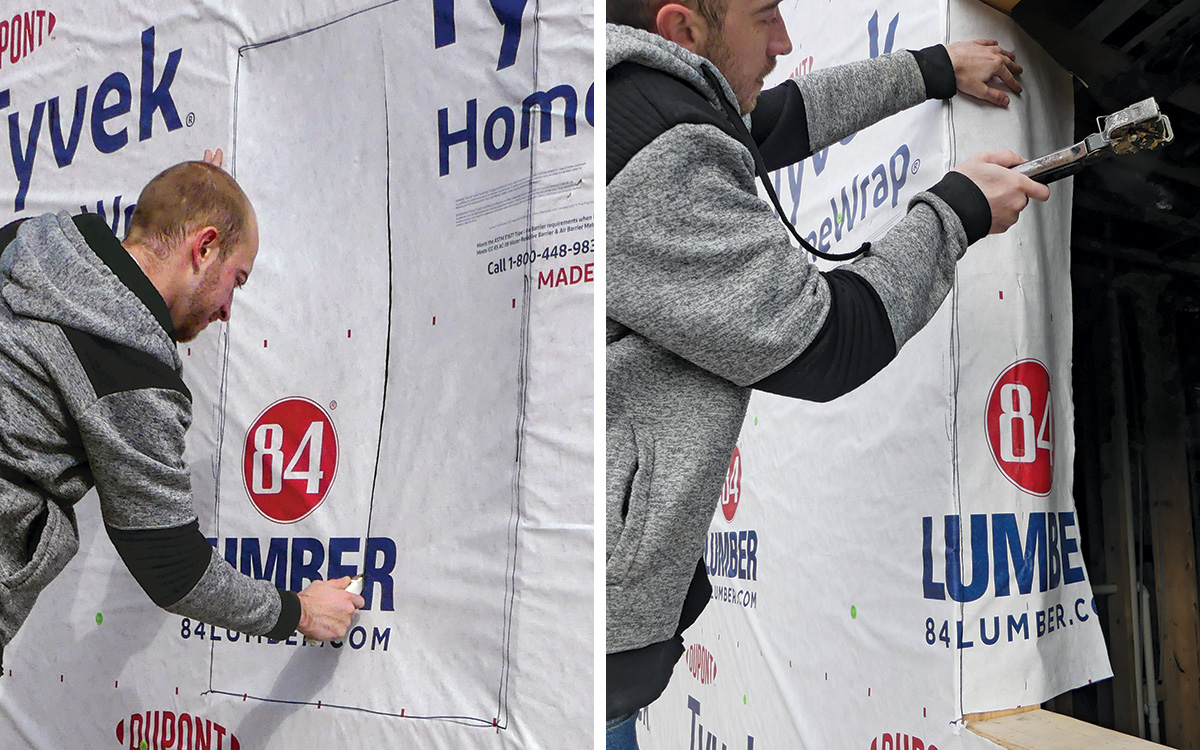
It’s best not to have seams in the plywood directly above rough openings, but this is not always reality. To prevent water that may find its way behind the water-resistive barrier (WRB) from funneling into a rough opening, caulk or tape intersecting plywood seams before installing the WRB. Once the WRB is fastened to the wall, cut across the top and bottom and down the middle of the opening. Fold the sides into the opening, trim them off flush with the inside of the jack studs, and fasten them in place near the inside edge.
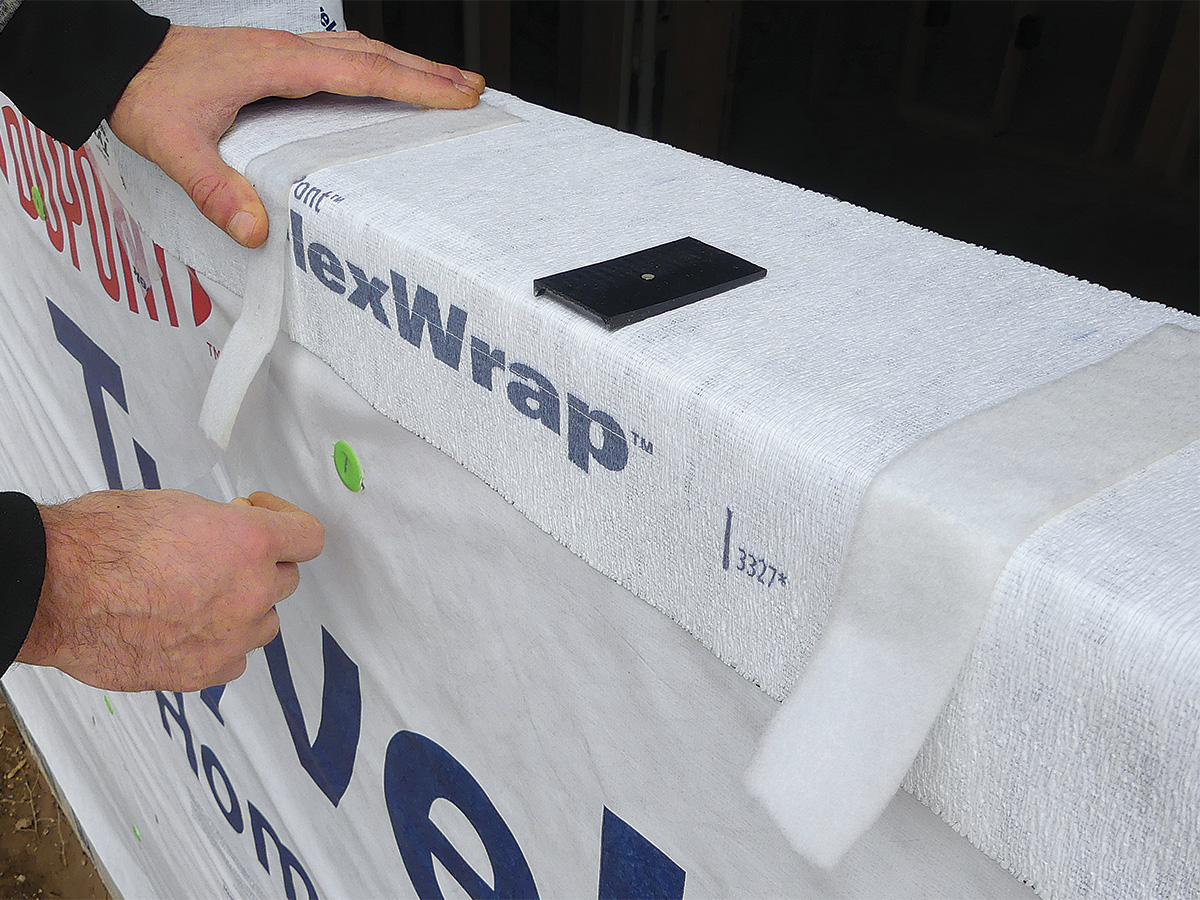
Install pan flashing
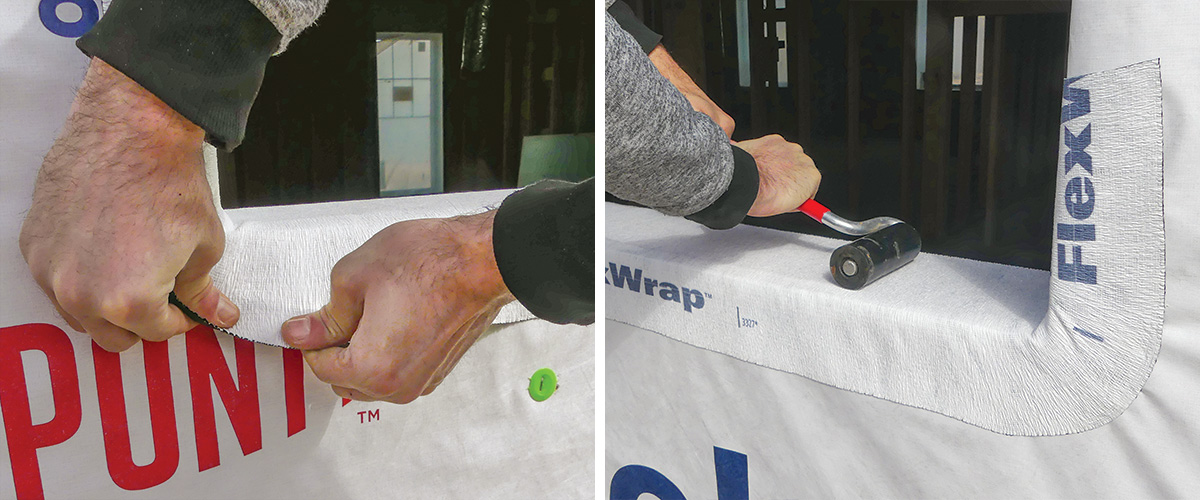
Whichever type of pan-flashing system you use, make sure that it’s compatible with the type of WRB you’re working with. In this scenario, I used all DuPont products to ensure they would all play together nicely. I installed 9-in. Flex Wrap pan flashing so it would cover the entire sill and lap onto the WRB at least 3 in. onto the wall. I cut the flashing 1 ft. longer than the sill so it would run 6 in. up onto each jack stud, and rolled it out after installation to achieve proper adhesion.
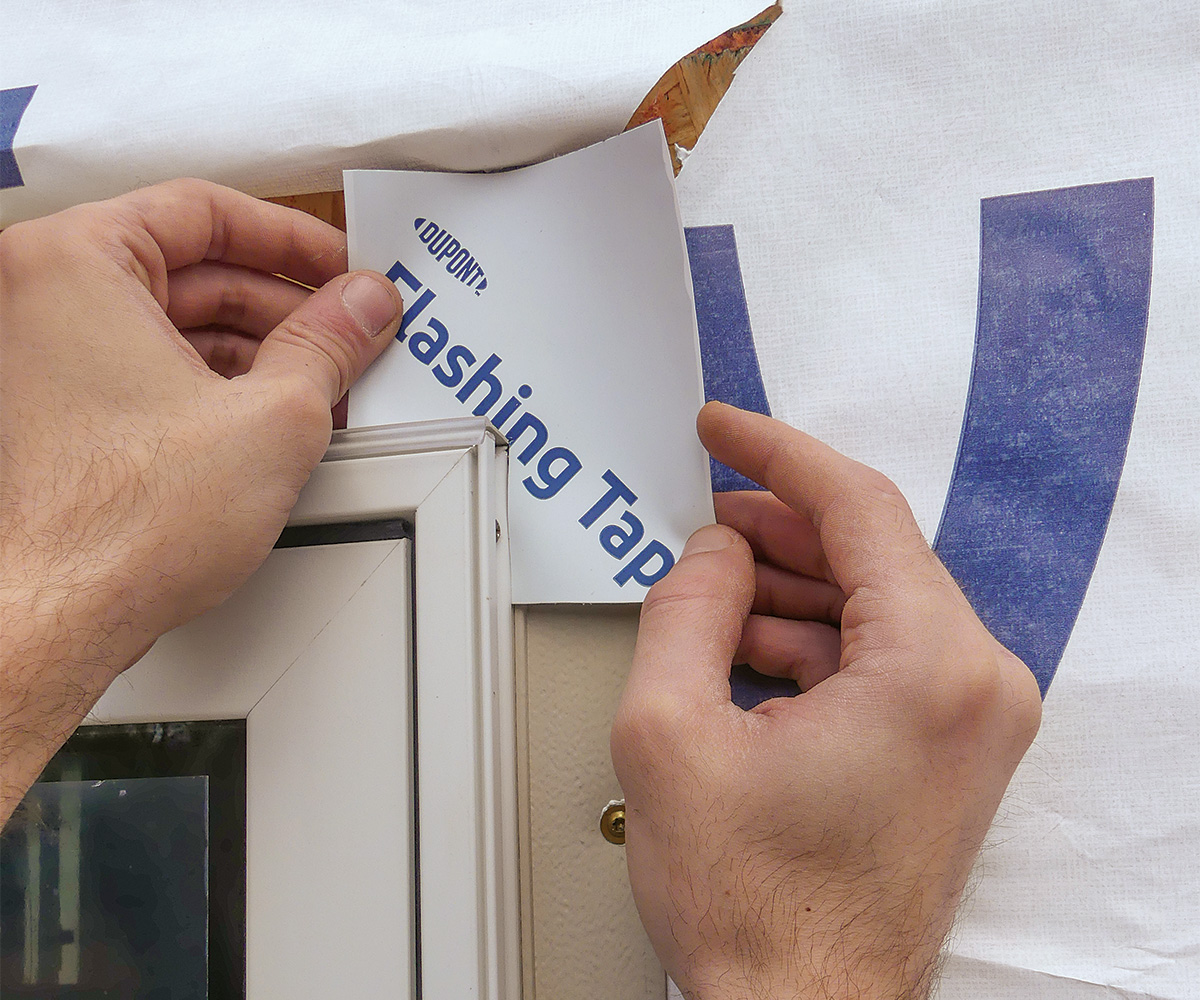
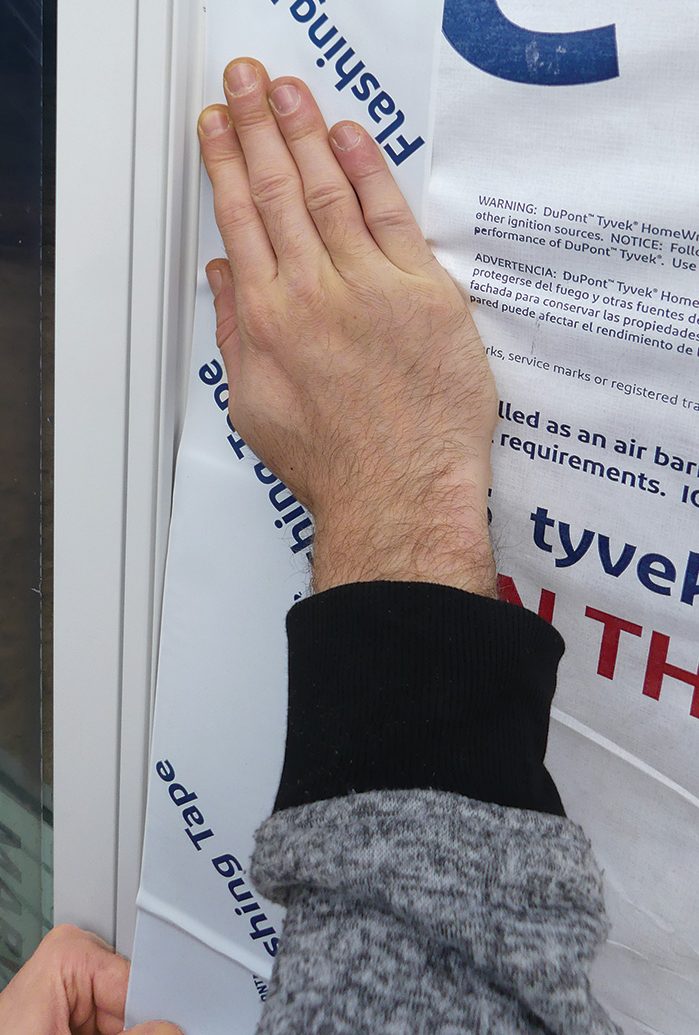
Seal with tape
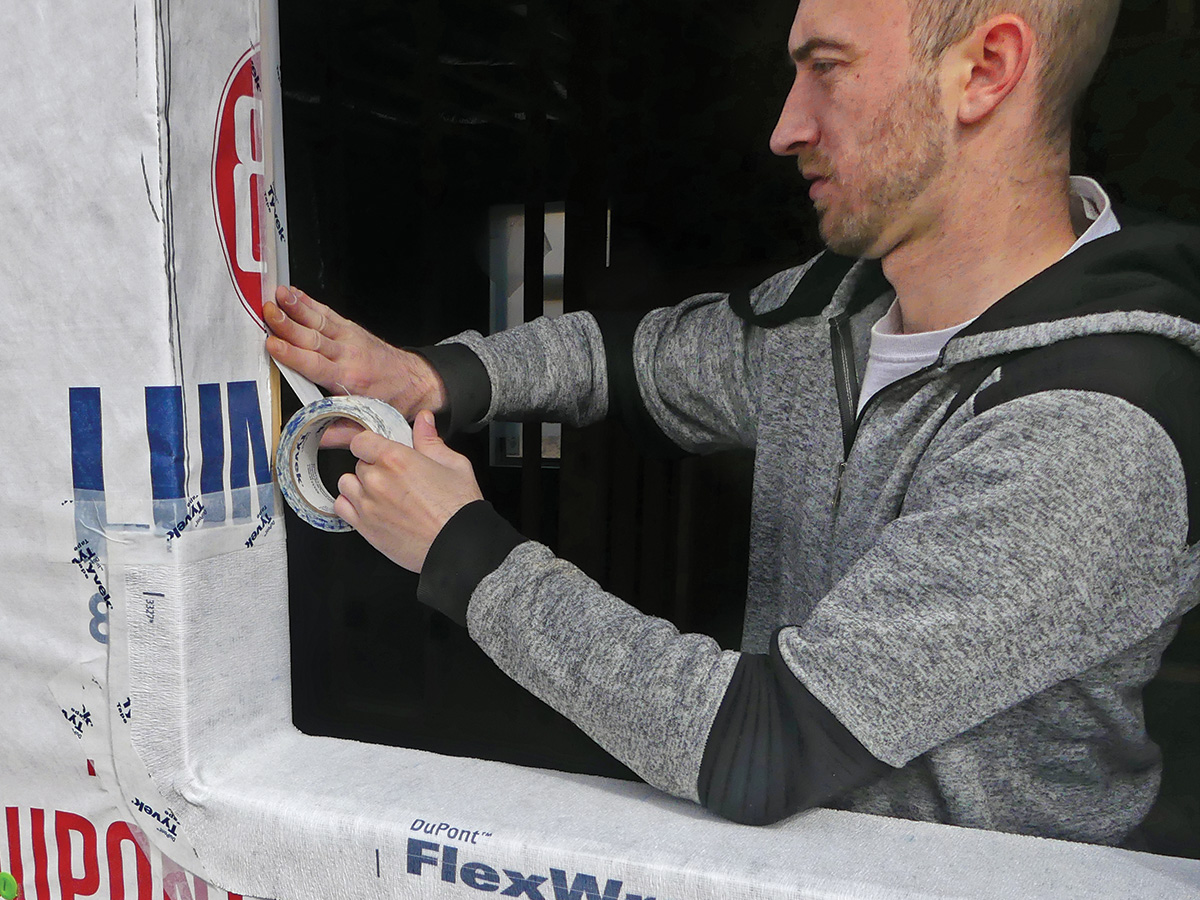
Use seam tape to seal the WRB to the jack studs. I also cover the edges of the pan flashing with seam tape, mainly to keep it in place until it gets covered with siding, which is especially important in cold-weather applications.
Before You Set the Window
Fold back the top of the WRB
Cut up and away about 6 in. at a 45° angle from each top corner. Fold the top flap up from underneath, or tape it up out of the way.
Tack level shims in place

It’s easier to install the shims perfectly level before setting the window. On mulled units, it’s critical that you install shims directly below the mulls so the window won’t distort over time.
Cut the shims just long enough that they fully support the entire window frame, but not so long that they become difficult to insulate around. And do yourself a huge favor and tack the shims in place with trim nails before you insert the window; there’s no chance that the shims will stay put through the installation process without nails.
Weep strips make a pathway for water
I recently discovered a drainage product called Wic-Dri, made by Weather-Bloc Systems. It’s an adhesive-backed strip of interwoven microfibers engineered to minimize air infiltration while creating a path for water to escape from a rough opening. The manufacturer recommends installing a strip on the wall under the entire length of the bottom nailing flange, but I ran it to the inner edge of the opening and down the face of the wall so that water will be able to pass right through the layer of spray-foam insulation.
Caulk behind the flange
Use caulk that’s compatible with the WRB to seal the area behind the nailing flange. Don’t caulk the bottom of the opening—if unwanted water does find its way in, a caulked bottom flange will prevent it from escaping.
Set, Secure, and Square
Tip the window into place
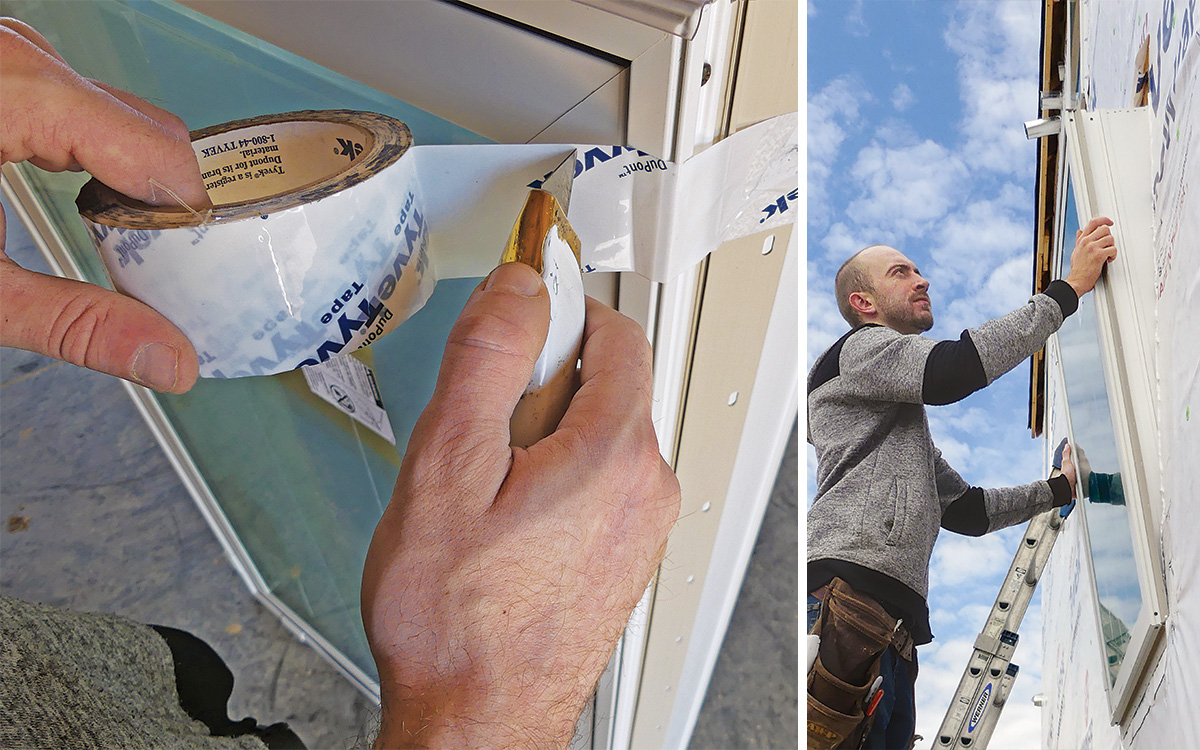
These windows have nonintegral nailing flanges, and the side flanges can sometimes slip out of alignment or slide out altogether. To prevent this, tape them in place with WRB seam tape before setting the window (photo left). If you know the opening is relatively square in relation to the sill, have a person inside center the window within the opening before tipping the window into place (photo right).
Secure the window bottom
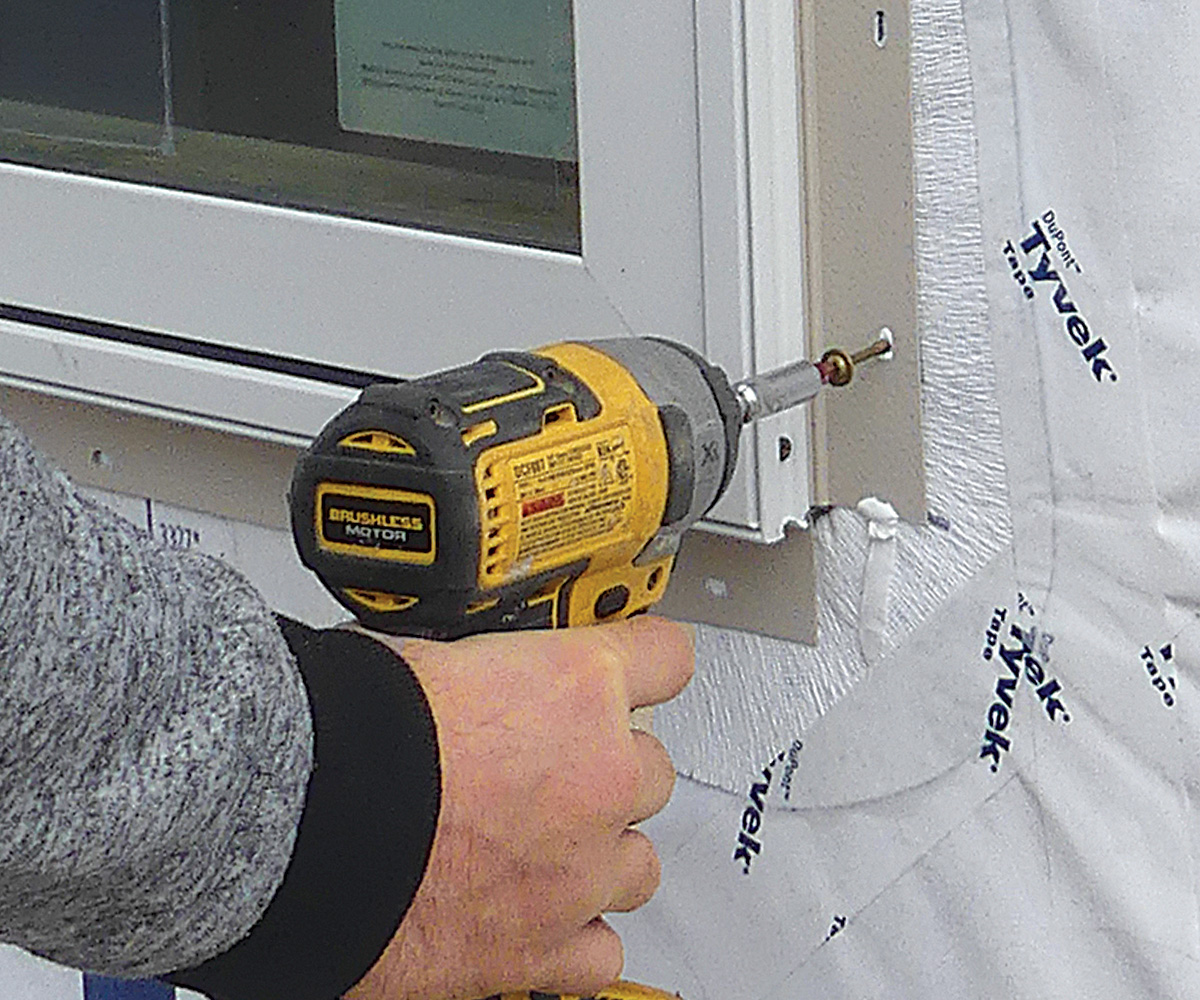
Start by installing a screw at the very bottom of the nailing flange on each side of the window. I prefer screws to nails for several reasons. Screws have more holding power, they eliminate the risk of errant hammer blows, and they make it easier to back up a step to make adjustments. Use screws long enough to sink at least 1 in. past the sheathing and into the framing.
Check for square
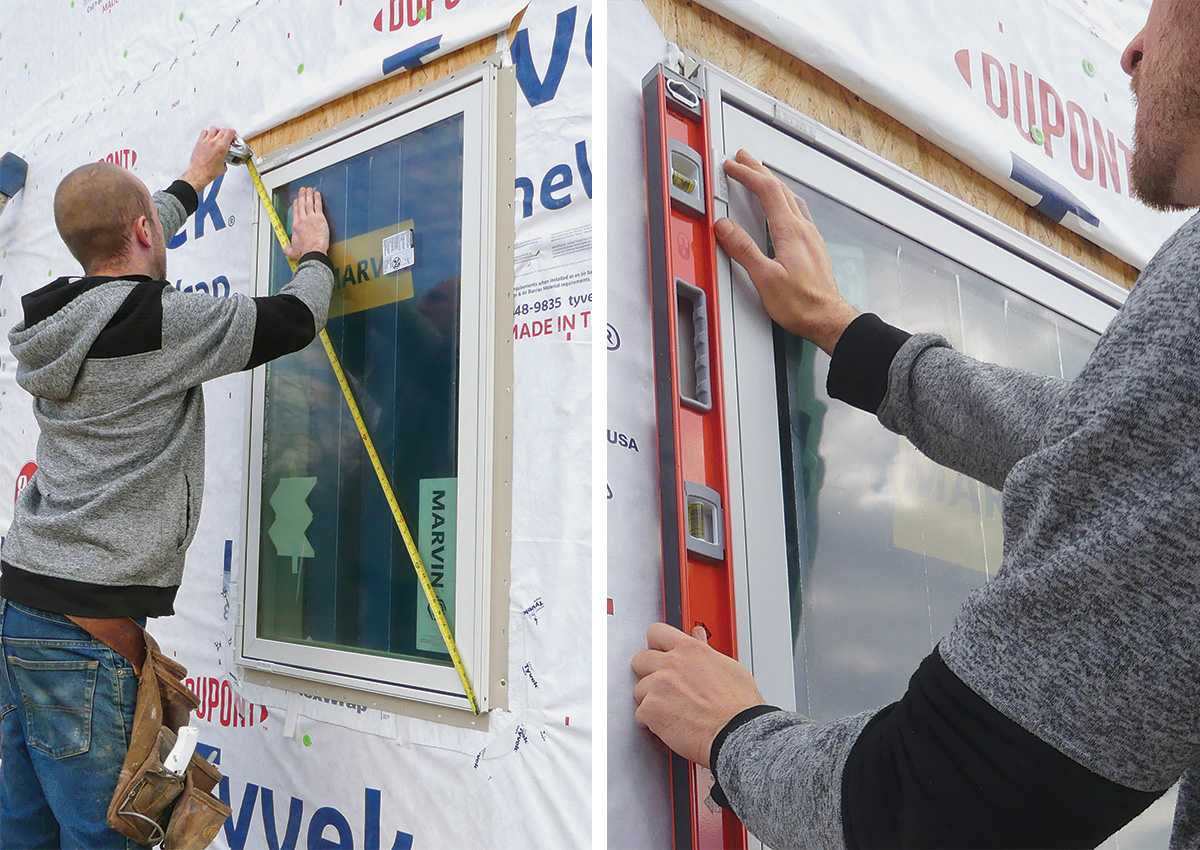
Windows are not always perfectly square when you set them (especially large windows), and so they need to be corrected within the opening. By setting a window on level shims and securing the bottom, you can achieve plumb, level, and square by moving the top to one side or the other. Check that the window is square by measuring diagonally in both directions. Push the top one way or the other until both measurements are the same, and then use a level to confirm that the sides are plumb and the top is level. When everything is in place, add one screw at the top of each corner. check your reveals
Line up jamb extensions with the drywall
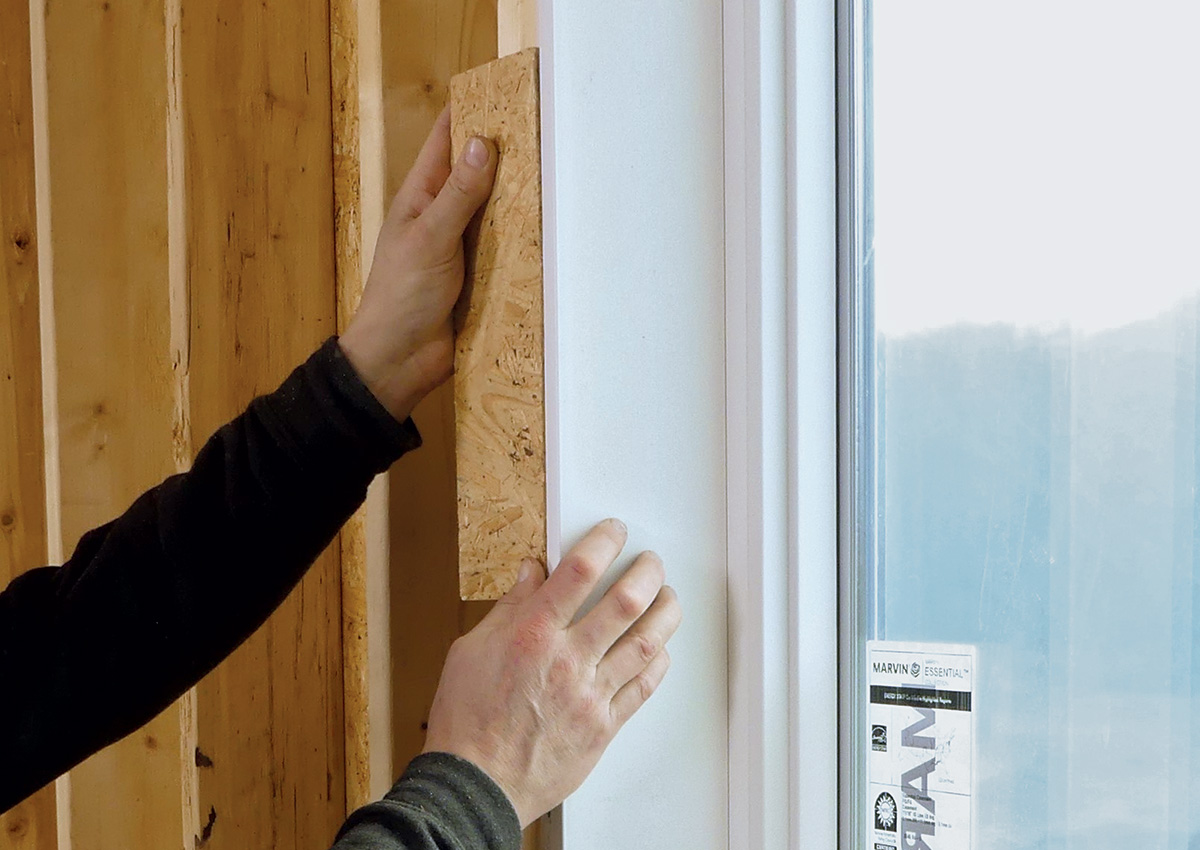
If you’ve ever installed window casing, you can appreciate how much easier the job is if the window jamb extension is in alignment with the drywall. The framing around windows is not always even, so instead of just measuring out from the jack studs, I prefer to have the person inside use a 1⁄2-in. piece of plywood to represent the missing drywall. If the window you’re installing does not have a jamb extension, simply measure in from the window to the block, and push in or pull out the window until everything lines up as you install the screws in the flange.
Check sash and frame alignment
To ensure smooth operation and to get the most energy efficiency from your windows, it’s important that all the gaskets and weatherstripping on the frames and sashes line up properly. The best way to accomplish this is to make sure that the space between the sash and the frame are consistent. Start with the exterior reveals on the sides and the top of the window. Make adjustments simply by pushing the frame to one side or the other until the gap between the frame and sash is even. Add a screw in the side flange near the middle to hold things in place.
Before securing the rest of the flange, check the operation and reveals on the inside. Open the window all the way, and check that the gap between the hinge side of the sash and the frame is even. Close the window as far as it will go, but don’t latch it. Check for consistent reveals between the nonhinged side of the sash and the frame.
If you are installing a window that requires shims and fasteners through the sides of the window jambs, now is the time to complete that process. Once everything is in alignment, finish fastening the nailing flange per your window manufacturer’s recommendations. These windows require a screw in every other hole in the nailing flange. seal it up
Seal the corners
Once the window is fully fastened, I fill all four corner gaps with caulking before covering them up with corner gaskets. Use the corner gaskets supplied by the manufacturer, or make your own out of window flashing tape if they’re not provided.
Seal the sides
One potential drawback to a nonintegrated nailing flange is that the connection between the window and the flange is not always 100% watertight. This is easily mitigated when installing the window flashing tape over the flanges. Simply roll the tape 1/4 in. up onto the window frame, completely covering the window/flange connection.
Run the flashing tape on the sides of the window just a bit longer than the top and bottom nailing flanges, and then run the top flashing tape 1 in. or so past the tape on the sides. You’ll have to make a notch where the tape meets the corners. Leave the bottom flange untaped to maintain a path for unwanted water to escape. Use a roller to adhere the tape fully.
Seal the top
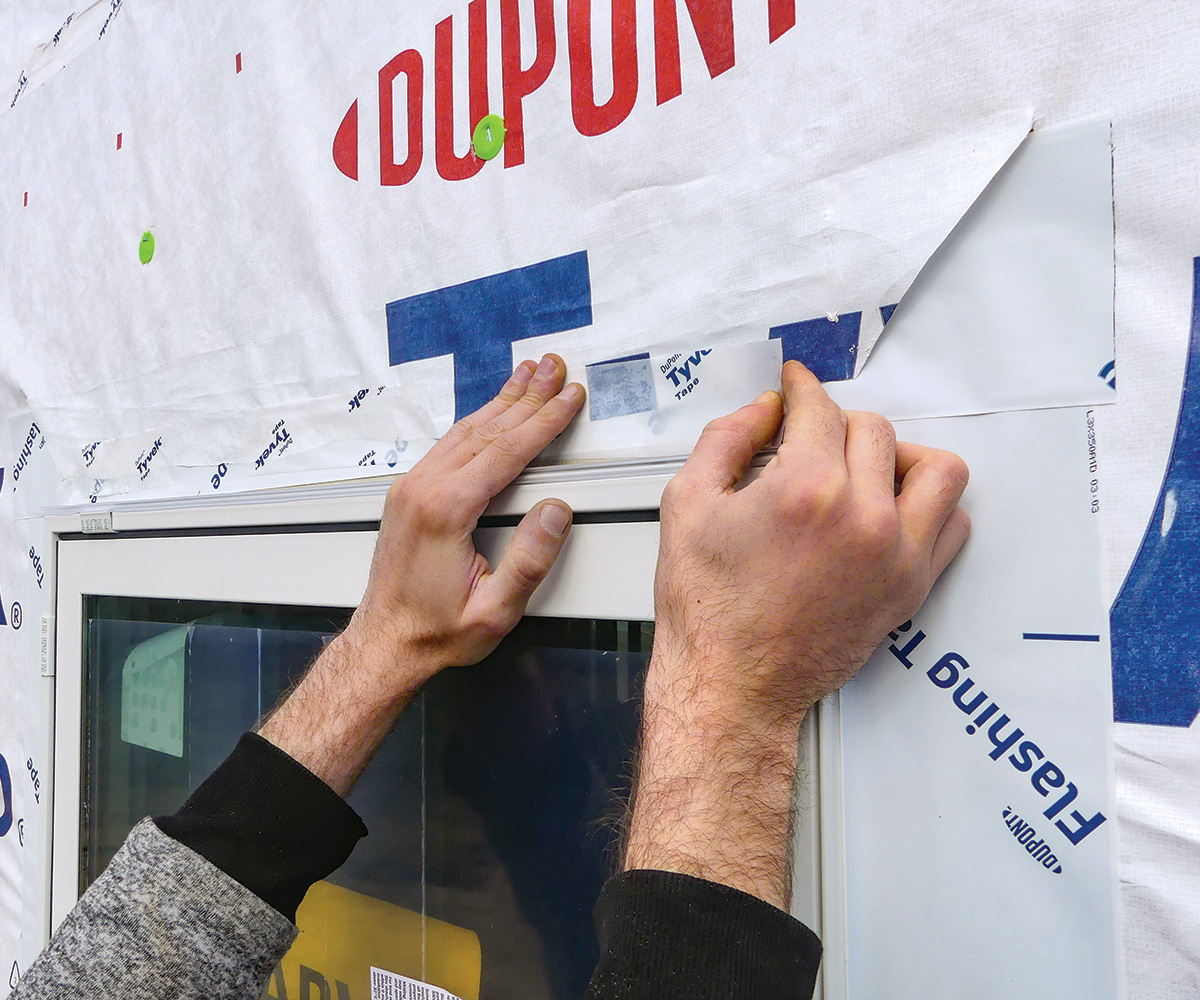
The last step on the outdoor portion of the install is to fold down the WRB flap at the top and use seam tape to secure it to the flashing tape. On windows that are protected by large eaves directly above, I run a continuous horizontal length of tape. For windows with a large area of exposed wall above them, I use the skip-tape method. That is, I tape about 8-in. to 1-ft. sections and leave a gap between them. The thought here is that any water that finds its way behind the WRB has a route back to the exterior.
Even though this window has a built-in drip cap, I have the siders add another Z-flashing/drip cap that will get taped to the WRB. The end detail (whether it gets bent up or down) of this final head flashing depends on the type of siding being installed, what the siding manufacturer recommends, and what the siding installation company prefers to do depending on their experience, preference, and warranty stipulations.
Seal up the inside
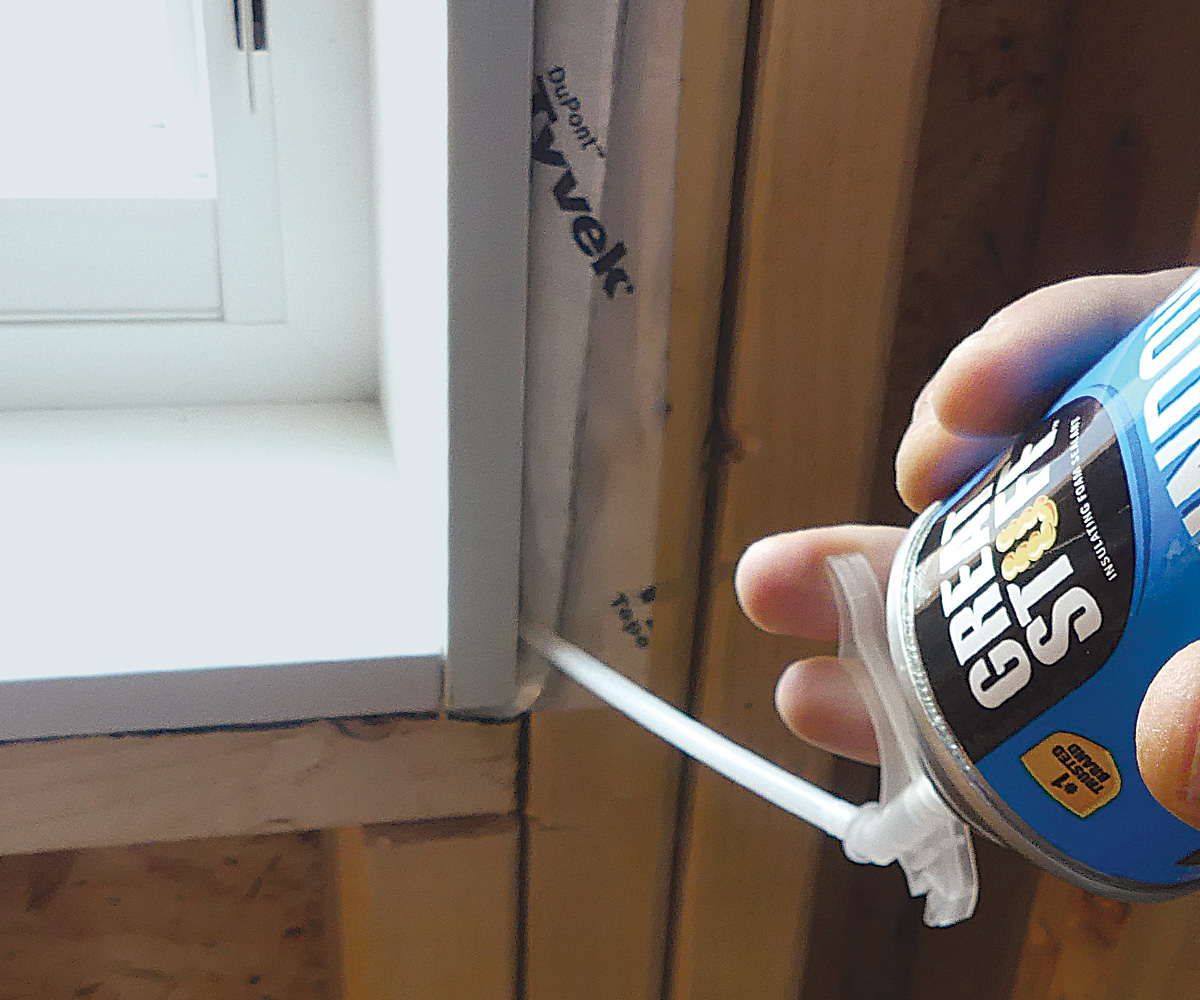
Because I’m relying on weep strips to usher uninvited water back outdoors, I simply fill the cavity between the window frame and the rough opening with spray foam. It’s not easy to see exactly what’s going on in that small space, but wearing a head lamp helps quite a bit. Only fill the space around the window frame; don’t fill the entire space behind the jamb extensions. Filling that whole gap with foam would conceal the weep strips, which would sort of defeat their purpose. Also, if the jamb extensions are warped or bowed, adding foam behind them would permanently lock in the distortion or could even make it worse.
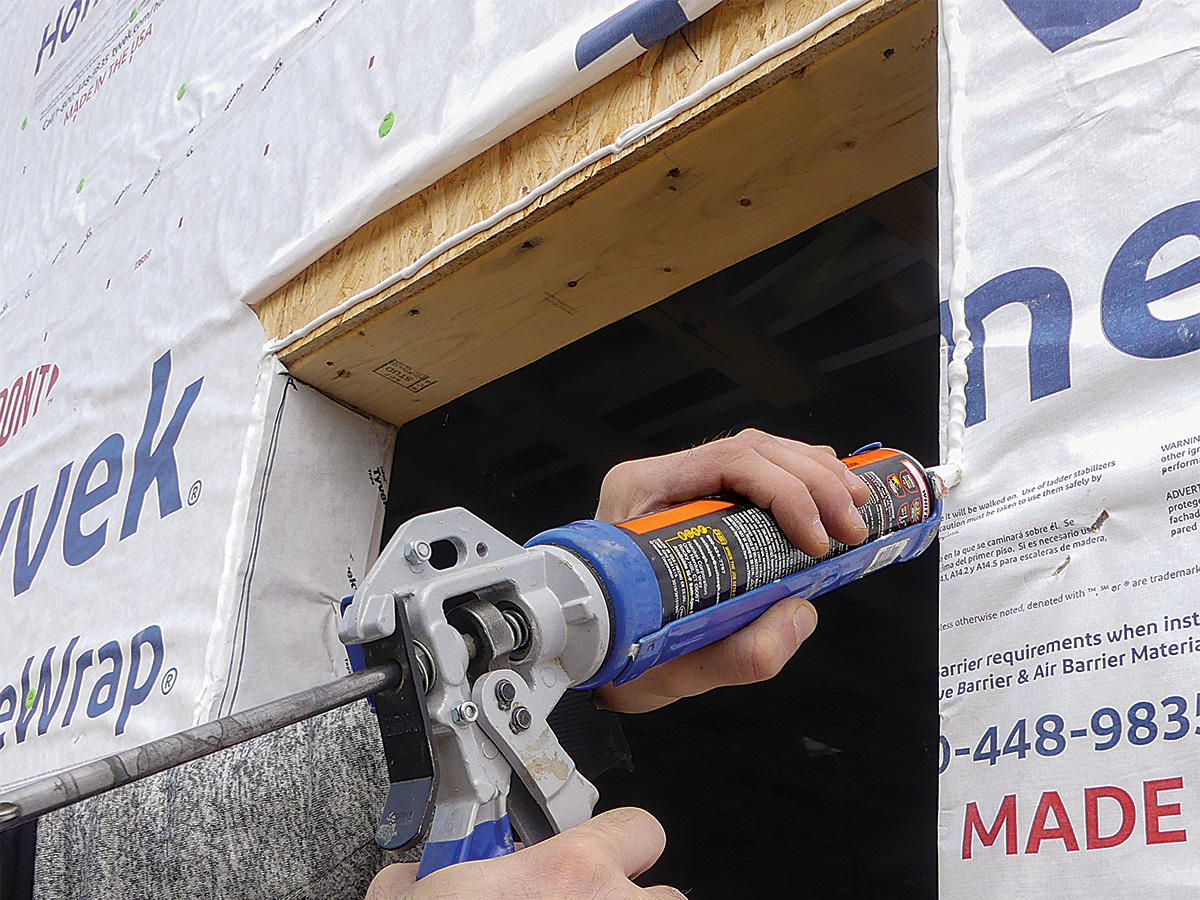
Create a back dam
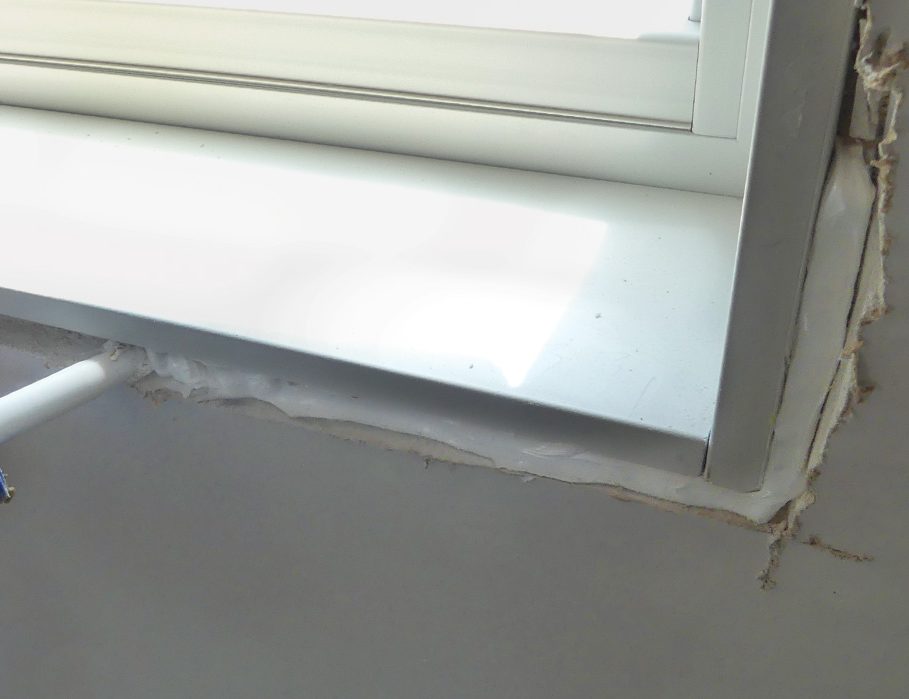
The last step in this installation process is to create a back dam by caulking the gap between the inside edge of the jamb extension and the rough opening on the bottom and up each side 6 in. or so. This will prevent infiltrating water from running down into the wall cavity below. If it seems that the bottom window jamb extension is not perfectly straight, which is often the case on large windows, you may want to wait to create a back dam until just before the casing is installed. Otherwise, the caulking will secure the jamb extension in place, and it won’t be able to be straightened out when it’s time for trim. Make sure to use a sealant that’s approved for indoor use, such as OSI Quad Max, to avoid harmful vapors.
If the jamb extension is going to be painted, or if you don’t mind putty-filled fastener holes, you could use shims and tack the bottom jamb extensions in place. If you do wait to create your back dam until just before installing the casing, you’ll likely have to trim off some drywall, which is easy enough to do with a multitool.
Mark Petersen is technical editor. Photos by the author.
From Fine Homebuilding #308
RELATED STORIES


View Comments
As builders become more experienced and learn more about window installation practices they change and add steps that improve the water deflection and drainage and the air tightness of the installation. This is a basic installation process. If you don't have a lot of experience installing windows following the steps layed out here is a good place to start. When you gain more experience and want to step up your installations look into these practices:
Back flashing the open corners of the flanges with flexible flashing tape in addition to the face-sealed corner patch.
Insulate the space between the window frame and the rough opening with drainable insulation like mineral wool from the flange to a point about 1/2 in. from the inside edge instead of spraying in foam - then run a foam backer rod and a bead of sealant. That way if any water breaches the flashing tape seal or leaks through a joint in the window frame it can drain freely drain down to the pan and weep out.
Add an apron of housewrap along the bottom edge of the rough opening before installing the flashing tape pan - this gives you the opportunity to lap the apron over lap siding so any draining water is redirected to the surface of the cladding rather than behind it.
Learn tricks (not shown in this article) for how to efficiently lap the flashing tape onto the jamb of the window - this will speed installation and enable you to get a tight inside corner where the flange meets the jamb.
Add a high wind skirt over the bottom flange to block wind-driven rain from blowing into the sill pan area.
And try fluid-applied flashing - it takes a little skill to master but once you get used to applying it you may find you prefer working with it for all the flashing functions during window installation.
What type of screws are recommended for the nail fin? I’ve always used nails and I’m interested in using screws.
It looks like they used GRK cabinet screws (but not the GRK vinyl window installation screw - that's a jack screw and not used for attaching flanged windows). I use the same screws - they're low profile pan head about 3/8 diameter (same as a roofing nail) and have an exterior galvanization coating. There are other brands that will work. Look for a screw with a pan head that is at least 1-3/4 in. long. And use stainless steel if the house is near saltwater.