
Flawless Drywall Finish
A final skim coat of compound creates a surface as smooth as plaster but at a lower cost.
Synopsis: Myron R. Ferguson is our go-to guy when it comes to drywall installation, finish, and repair. In this article, Ferguson demonstrates how to produce a flawless Level 5 drywall finish that can stand up to the brightest light and glossiest paint. Starting with a Level 4 finish, use a pole sander to smooth all joints, corners, and fastener heads. With a soft push broom, wipe down the walls, and remove any errant blobs of joint compound. Next, thin out the mud, and then use a thick-nap roller to apply a layer of joint compound on the wall. Roll on just enough so that it won’t dry before you have to scrape off the excess. This article includes a sidebar describing the six levels of board finishes as outlined by the Gypsum Association.
When I visit a job site to estimate a drywall project, the homeowner almost always wants what drywallers call a Level 4 finish: two sanded coats of compound over the embedded tape.
If the drywall is to be wallpapered, textured, or painted with flat paint, a Level 4 finish is perfectly acceptable. But at this level of finish, any joints and imperfections can show when they’re under a coat of glossy paint or flooded with bright light.
Another problem with a Level 4 finish occurs when sanding: The compound becomes smooth, but the drywall’s paper facing gets rough. If that weren’t enough, there are areas of the drywall that don’t get sanded, so every sheet ends up with three different textures and porosities. Each reflects light differently, which produces an inconsistent wall surface.
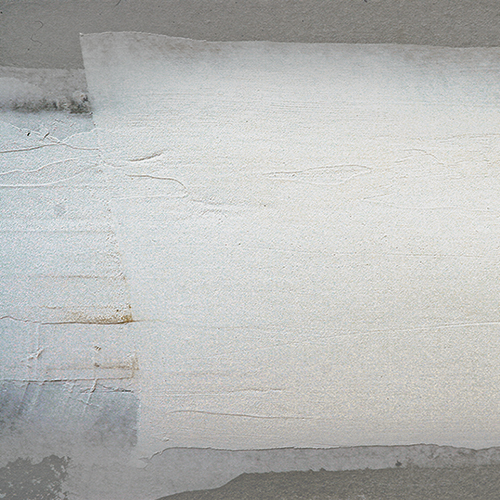
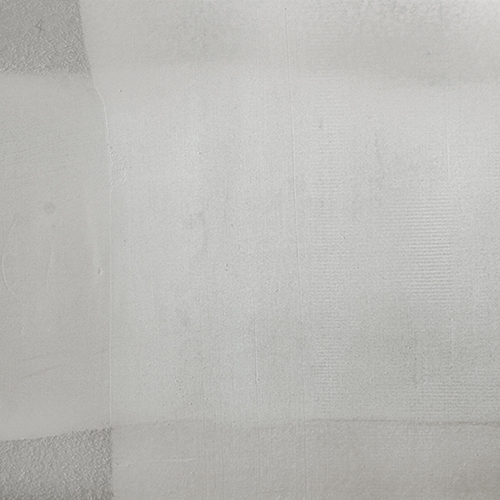
You can solve these problems by moving up to a Level 5 finish, which the Gypsum Association recommends for areas with severe lighting or glossy paint. A Level 5 finish has an additional skim coat of compound spread over the entire wall to give the wall a uniform surface and to make joints disappear.
Gypsum-board finishes
 |
 |
| Level 0: No taping, finishing, or accessories are required. This level of finish is useful for temporary construction or when the final level of finish has yet to be determined. | Level 1: All joints and interior angles have tape set in joint compound. The surface is free of excess compound. Tool marks and ridges are acceptable, and tape and fastener heads need not be covered with compound. This level of finish is often described as “fire taping” and is seen typically in garages and other unfinished areas that require a fire separation. Surface appearance doesn’t matter. |
 |
 |
| Level 2: All joints and interior angles have tape set in joint compound and wiped with a joint knife, with a thin coating of compound left on the joints and interior angles. Fastener heads are covered with one coat of compound, and tool marks and ridges are acceptable. This level of finish is often specified for use under tile and in mechanical areas where surface appearance is not a concern. | Level 3: A Level 3 finish has a second coat of compound on taped joints, interior angles, fastener heads, and accessories. The compound is smooth and free of tool marks and ridges. This level of finish is often specified when the finished surface will have a heavy texture. |
 |
 |
| Level 4: This level has joint tape embedded in compound and two additional coats of compound on top to hide the tape and to smooth the surface. Fasteners are concealed with three coats of compound. Finally, the compound is sanded with fine-grit paper and primed. This level of finish is not recommended under gloss, semigloss, or enamel paints. | Level 5: Level 5 finishing requires all the steps of a Level 4 finish, but with an additional skim coat of compound applied to the entire wall or ceiling. This level of finish is recommended where gloss, semigloss, and enamel paints are specified or where severe lighting conditions occur. |
There are several ways to get to a Level 5 finish, but perhaps the simplest is to skimcoat over a Level 4 finish with watered-down joint compound. The compound can be applied either by trowel or with a 1/2-in.-nap paint roller. The compound is then immediately removed with a wide knife.
There are also primer surfacers made by several drywall and paint companies. These super-thick coatings are applied in a single heavy layer (typically 15 mils to 20 mils wet) over a sanded Level 4 finish.
These primer surfacers offer both a Level 5 finish and a primed, ready-for-paint surface. While a product like USG’s Sheetrock TuffHide is more expensive than conventional primer, it costs less than a hand-applied Level 5 finish and one coat of primer.
Unfortunately, these new primer surfacers require a huge sprayer to apply them. USG says it takes a sprayer with a minimum output of 1 gal. per minute and a pump pressure of 2700 psi to 3000 psi to spray Tuff-Hide. A machine like this sells for $6000 and weighs 130 lb., which is why I apply a Level 5 finish by hand for all but the biggest jobs.
6 steps to level 5
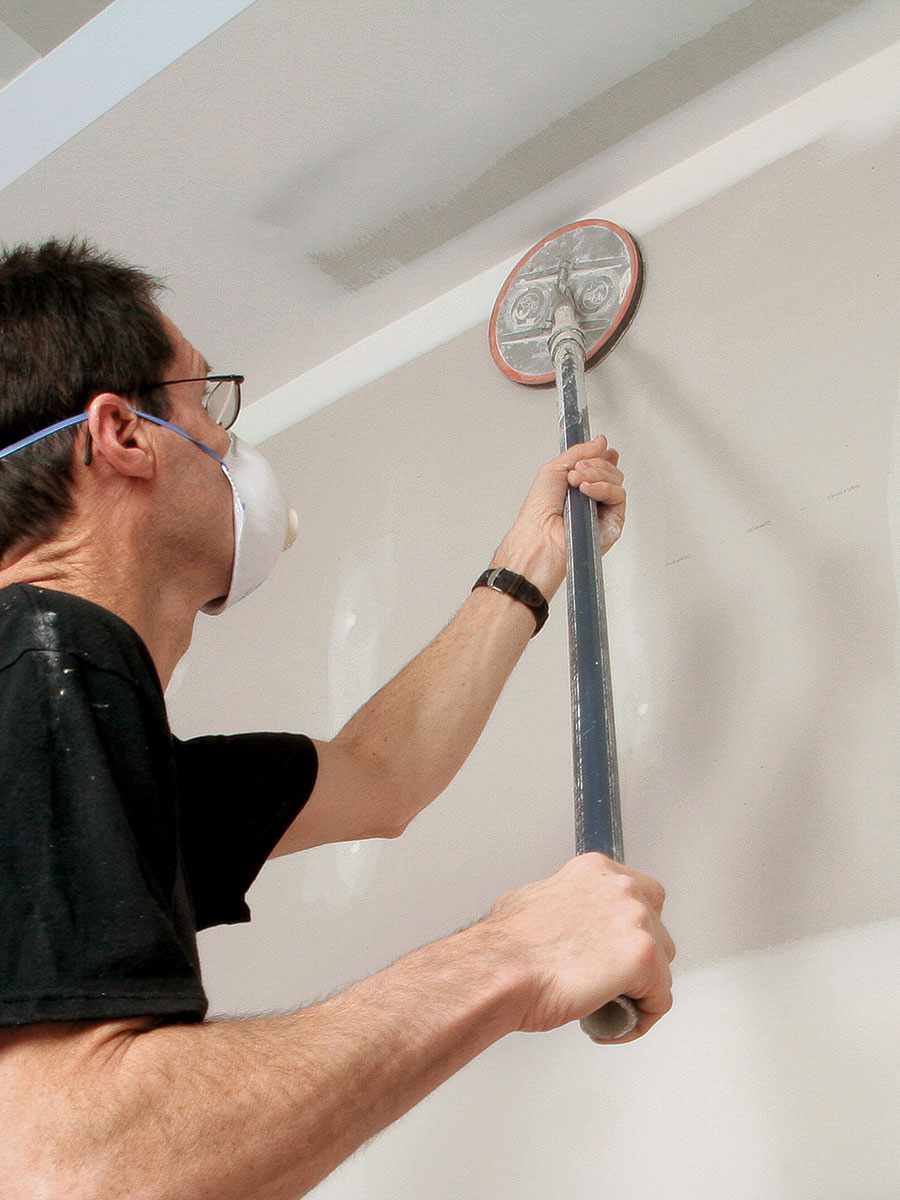
1. Sand first
Starting with a Level 4 finish, go over all the joints, corners, and fastener heads with 220-grit sandpaper. The author prefers a Radius 360 pole sander (fullcircleinternational.com) because of its large sanding head and its resistance to flipping over.
The Radius 360’s hook-and-loop disks (available in 150 and 220 grit) are almost twice as big as the paper on a conventional pole sander.
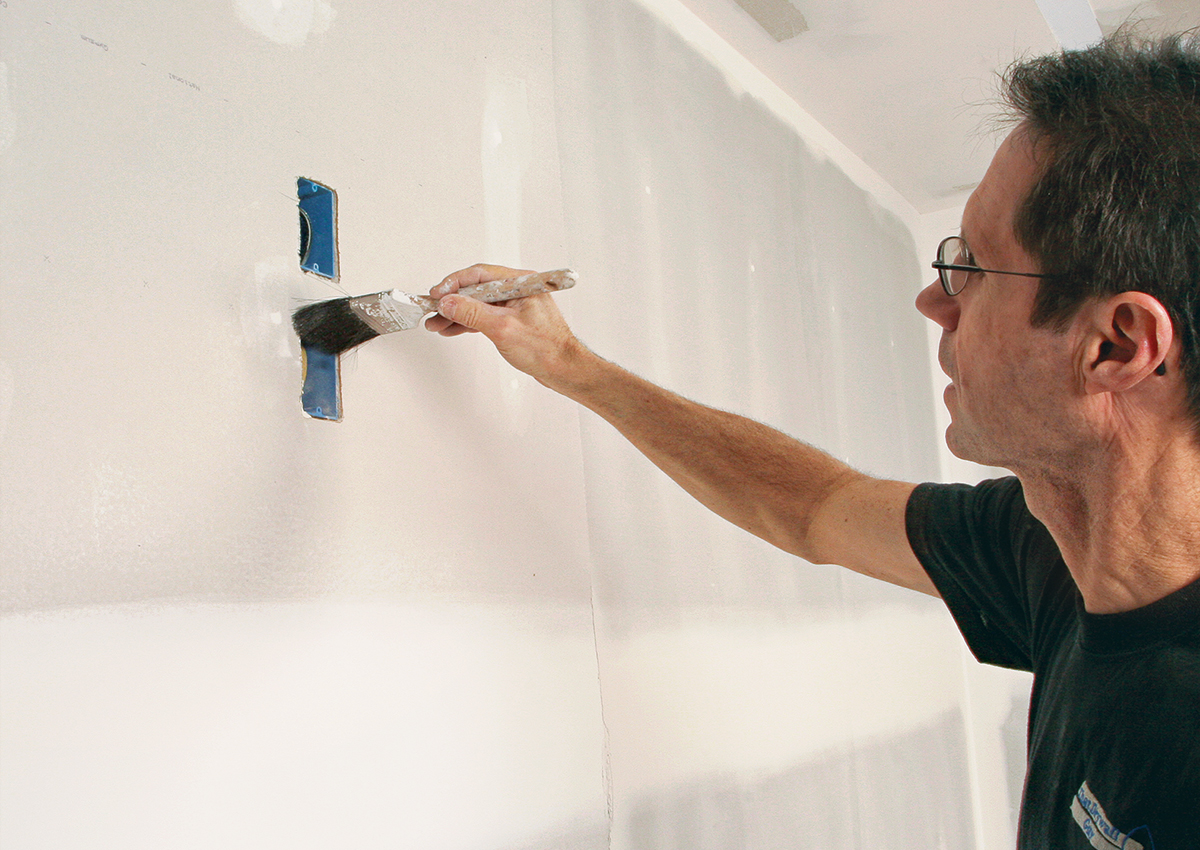
2. Wipe down the walls
Brush down the walls with a soft push broom, and scrape off any errant blobs of compound that could interfere with skim-coating. A 2-in. paintbrush is great for cleaning out electrical boxes.
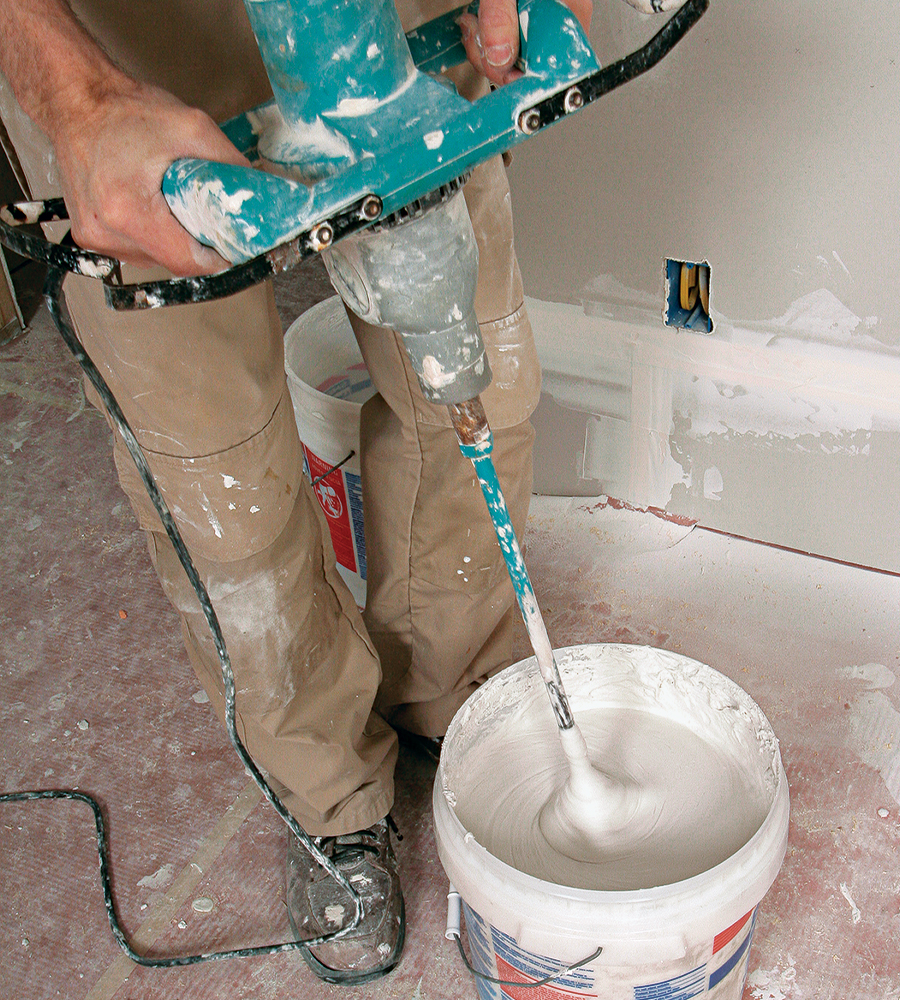
3. Thin out the mud
Use a heavy-duty drill with a paddle to mix up the compound. Add water a little at a time until the mud’s consistency is similar to pancake batter.
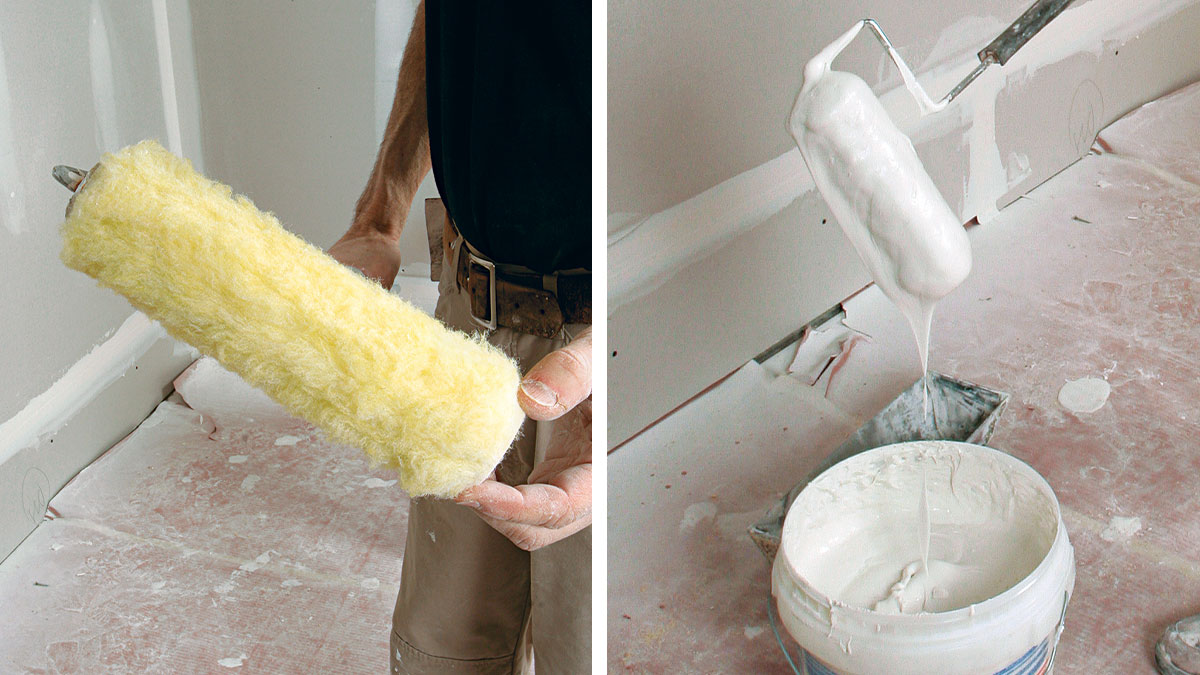
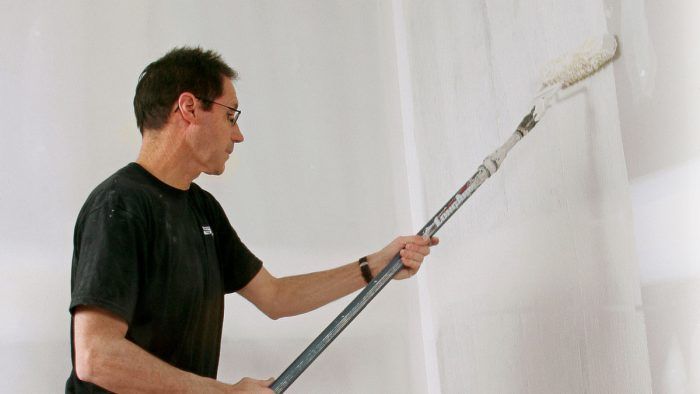
4. Use a thicknap roller
Dunk a 1/2-in. to 3/4-in.-nap roller into the joint compound, remove it, and let the compound pour off. Try to keep the floor relatively free of compound, which can be very slippery.

5. Get rolling
Start at a corner and work toward the opposite wall. You can coat about 24 sq. ft. to 30 sq. ft. before the compound starts drying. This room will get wainscoting, so the author isn’t skimming the bottom 3 ft. of the wall.
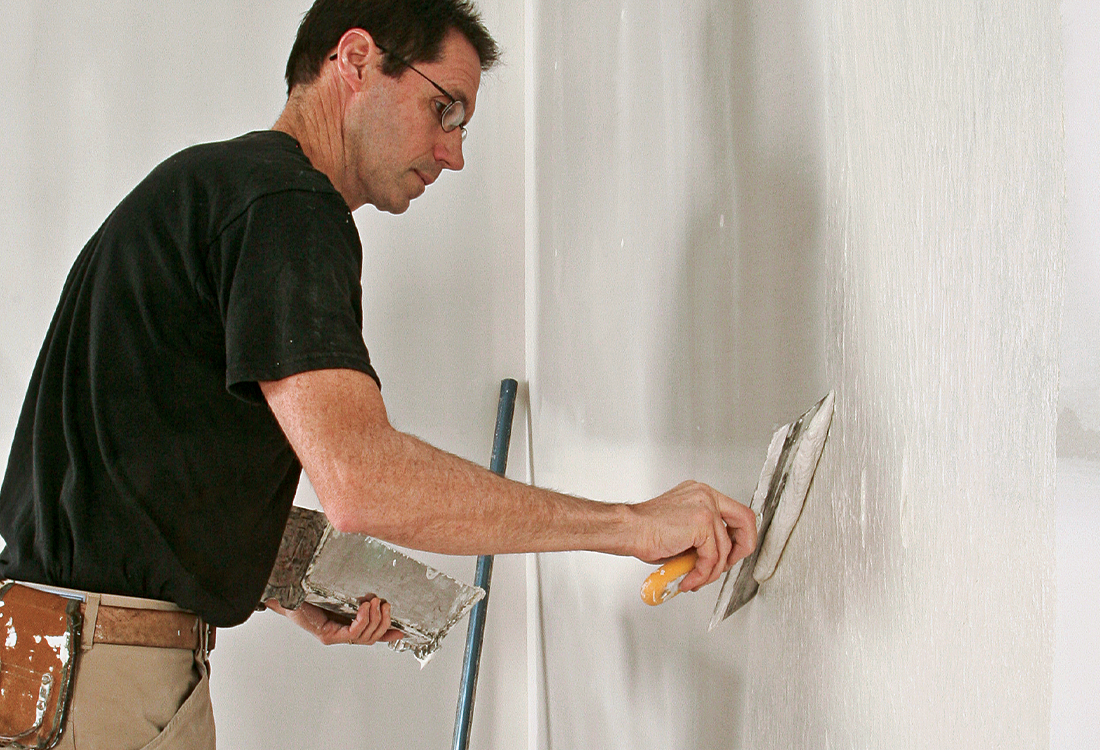
6. Scrape off the excess
Remove the excess compound with a 10-in. or 12-in. drywall finishing trowel held at a 45° angle. You can put the excess compound back into the bucket, but remix often to keep the mud at the proper consistency.
To view this article as a PDF, click the View PDF button below.
