
Install and Finish Drywall: 9 Secrets to an Effortless Install
These straightforward steps will make any drywall-hanging job easier.
Jump to all the videos in this series
Choosing when to cut, where to cut, and how to cut your sheets of drywall can make all the difference in getting the best fit and finish. Plus, using the right tools will put less strain on your body and more money in your pocket. Here are 9 tips that will help you get the job done right:
1. Cut through the good side to save time
When you’re hanging drywall, there is seldom a piece that doesn’t need to be cut to length. Most of our drywall is leaning against a wall; it’s standing on edge and easier to cut. Score along the edge of the t-square, and snap away from the cut. If you’re first cut is on the good face, stick your knife through the face right into the groove that has already been snapped. Cut through the back paper that way. If you’re cutting through the back side first, don’t do this, because you’ll tear the paper on the good face.
2. Trim drywall in place when possible
Don’t bother cutting the drywall to the exact length if there’s room to overhang past the end of the wall. Fasten it to the framing first; then take a utility knife and score along the outside corner, snap the panel away, and cut the other side.
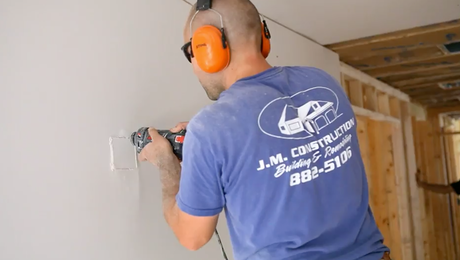
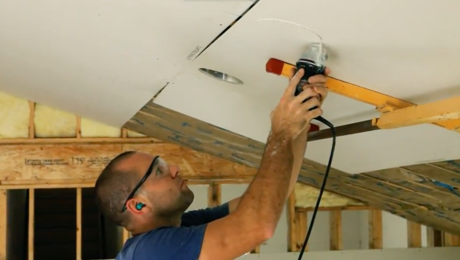
3. Cut openings after hanging the sheet
We typically cut out any penetrations through the wall after the drywall is attached. It’s more accurate to cut the drywall when it’s in place. This applies to any penetration through the wall: doors, windows, electrical boxes, and recessed lights.
4. Cut short to ensure the sheet will fit
You can cut sheets shorter by 3/8 in to 1/2 in without compromising the tape joints. It’s actually better to be a little short that too tight. Plus, you will save time by not having to make several attempts to fit a sheet of drywall.
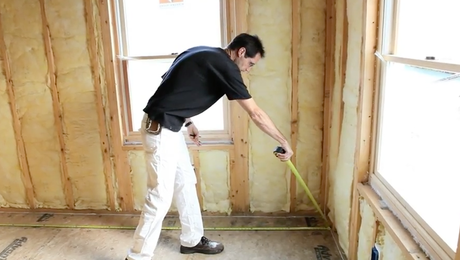
5. Before hanging, mark for electrical boxes, light fixtures, and framing
Put an “X” on the floor underneath each outlet. Also, measure the distance from two perpendicular walls to every ceiling box; mark these measurements on the top plates of the walls. Together, the marks will show help you find the center of each light fixture.
You can often mark framing locations with the panel tucked into the corner. Take your pencil and mark directly on the sheet at each stud.
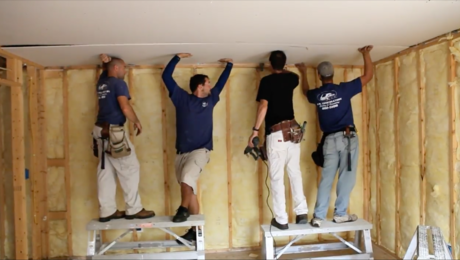
6. Use adjustable benches to work at the right height
Place your head right against the ceiling in case you need your head to support the panel. The legs of the benches are adjustable. In case of height difference each person would have their own individual bench to work off of.
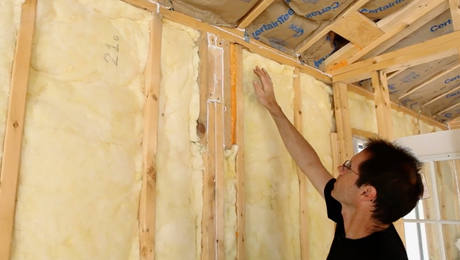
7. Use the drywall as an air barrier
On this job we’re using the drywall as an air barrier. On any of our exterior walls or ceilings the drywall is going to be placed into some adhesive so the air doesn’t get into the wall or ceiling cavity. All the ceiling fixtures and outlets are boxed in with foam insulations. When we hang the drywall over the fixtures or outlets we’re going use a bead of adhesive caulk and seal the fixture in.
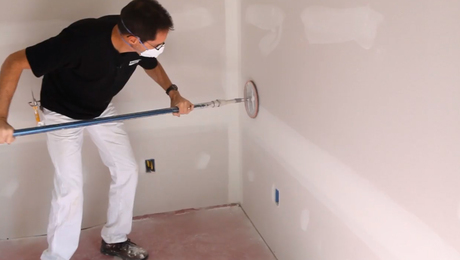
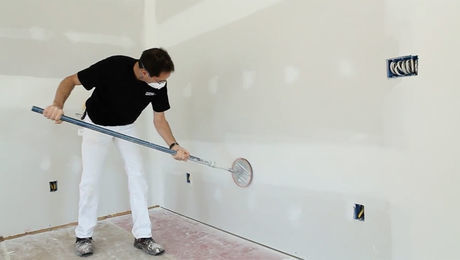
8. Remove screws that miss the mark
Using a hammer to remove screws is going to cause a little damage. Every time you have a miss you have to remove it. If you drive the screw in, it isn’t going to hit anything and it will work its way out. Every time you remove a screw by pulling it out you get a little fuzz raised up. It’ll be difficult to hide later so use the end of the screw driver to indent the frayed edge.
9. Use these five tools for an easier install:
- Drywall lift: Get the drywall to the ceiling faster and easier
- Auto-feed driver: Don’t waste time placing screws by hand
- Foot jack: Keep your hands free to drive the screws
- Mini router with a spiral bit: Cut electrical boxes and recessed lights in place for more accuracy and efficiency
- Auto-feed adhesive dispenser: Tape faster with less mess
Videos in the Series
-
 Series Introduction: Install and Finish Drywall
 -
 Install and Finish Drywall: 7 Tips for an Accurate Takeoff
 -
 Install and Finish Drywall: 7 Fixes Before Delivery
 -
 Install and Finish Drywall: 9 Secrets to an Effortless Install
 -
 Install and Finish Drywall: 9 Rules for Hanging a Vaulted Ceiling
 -
 Install and Finish Drywall Series: 7 Tips for the Best Basic Finish
 -
 Install and Finish Drywall Series: 6 Steps to a Level-5 Finish

View Comments
When cutting the penetrations after hanging, how do you avoid running the router bit into the sides of the receptacles?
Could you use a router bit with a bearing on the far end? That way the bearing would rub harmlessly along the inside of the electrical box and guide the cutting blade. I think they call them flush-trim bits. Not sure if I can post a link, but I'll try: https://www.homedepot.com/p/Diablo-1-4-in-Double-Bearing-Flush-Trim-Bit-DR50501/204073454?cm_mmc=Shopping%7CG%7CBase%7CD25T%7C25-7_POWER+TOOL+ACCESSORIES%7CNA%7CPLA%7c71700000034127227%7c58700003933021549%7c92700031755124913&gclid=CjwKCAjwnf7qBRAtEiwAseBO_EzbDLoiLhgpGkhvsu9iB4lz_H1O8xmX9uDXKPe7TMO0k6nQLm6MlhoCt5YQAvD_BwE&gclsrc=aw.ds
That first bearing wouldn't be able to bust through the drywall though. You'd have to go around and drill a hole at every penetration that would let you insert the bit.
You really shouldn't put board standing up against wall to cut, it's a saftey hazard they can fall towards you crushing you. A few sheets is one thing but the whole stack is another story.