
Installing Reglet Trim
This unique way to finish window and door openings without wood trim is a modern upgrade to a basic flush drywall return.

Synopsis: Reglet trim can be made of metal or vinyl and is used in place of traditional casing and base trim for a modern, clean look. The secret to a successful installation is ensuring the pieces don’t move, which can lead to cracks in the joint compound. In this article, builder Joe Milicia details the process of installing metal Fry Reglet trim with a series of detailed photographs and illustrations.
My company has focused on high-end finish carpentry for 25 years. Recently, a general contractor and regular customer approached us after he was unable to find a drywaller to install Fry Reglet trim in a modern home. It’s not surprising that our customer couldn’t find a drywaller—it’s fussy work, and I’ve heard other contractors complain of callbacks related to cracks around doors and windows. Reglet trim challenges the traditional construction sequence because unlike normal trim, it’s installed before the drywall is finished. It’s also a much more finicky process than most drywall contractors want to get involved in, and requires tools they’re not used to.
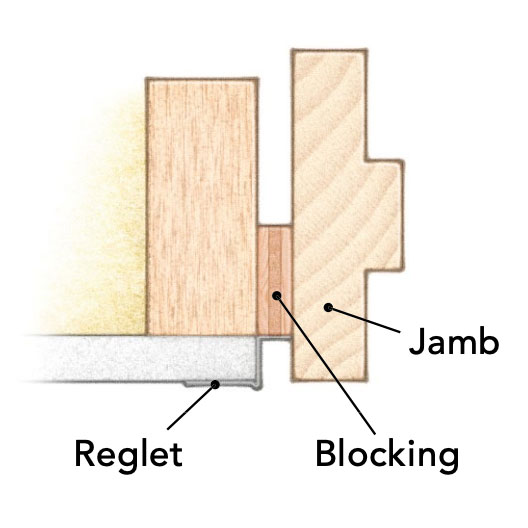
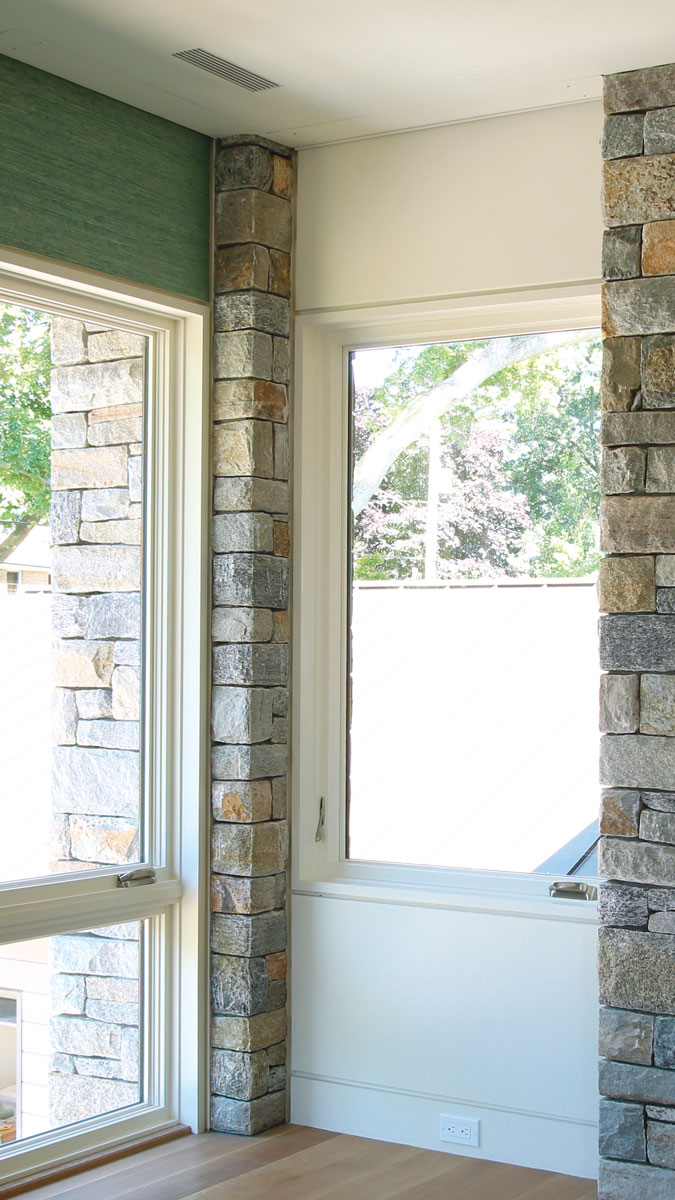
As you can see in the photos, a reglet detail often eliminates the casing around doors and windows. On this house, it’s also used as a transition above the baseboard, recessing the 3/4-in.-thick boards so they are just slightly proud of the wall. The biggest problem when you use reglet trim in a residential setting is cracked joint compound, especially around interior doors. To prevent cracks, you have to control the movement of the trim pieces and ensure that door and window jambs are rock solid. Any flexing of the jambs will show up as cracks in the compound.
Get the right pieces
Reglet trim requires a layout that minimizes splices and inconspicuously overlaps the horizontal and vertical pieces at corners and transitions. Make sure the trims selected by the designer match the drywall thickness. There are dozens of commonly used sizes and it’s easy to get them confused. For this project, we ordered the trims in 8-ft. and 10-ft. pieces to minimize splices. We followed the same principles of a good crown layout—never have a crown splice in a visible area, and always add blocking behind the joint.
An important difference from wood casing is that reglet trim is strictly decorative. So unlike casing, the trim doesn’t provide any structural support for the door. On this particular job, the 1-3/4-in.-thick solid-MDF interior doors were extremely heavy, so we convinced the contractor to use 1-in.-thick solid-stock jambs to handle the doors’ weight.
After the doors were hung with 15-ga. finish nails, we screwed the jambs to the framing with structural screws and plugged the holes. Then we added blocking—cut from scrap plywood and solid stock—to the jambs, attaching them with screws and construction adhesive. We held these pieces back from the edge of the jambs so they would align with the back of the reglet. The blocking is a key element of a good installation because it prevents the trim from flexing and stiffens the jambs. We followed the same steps for the home’s floor-to-ceiling windows. The finished project looks great—and nearly a year later, there have been no cracks.
Working with reglet
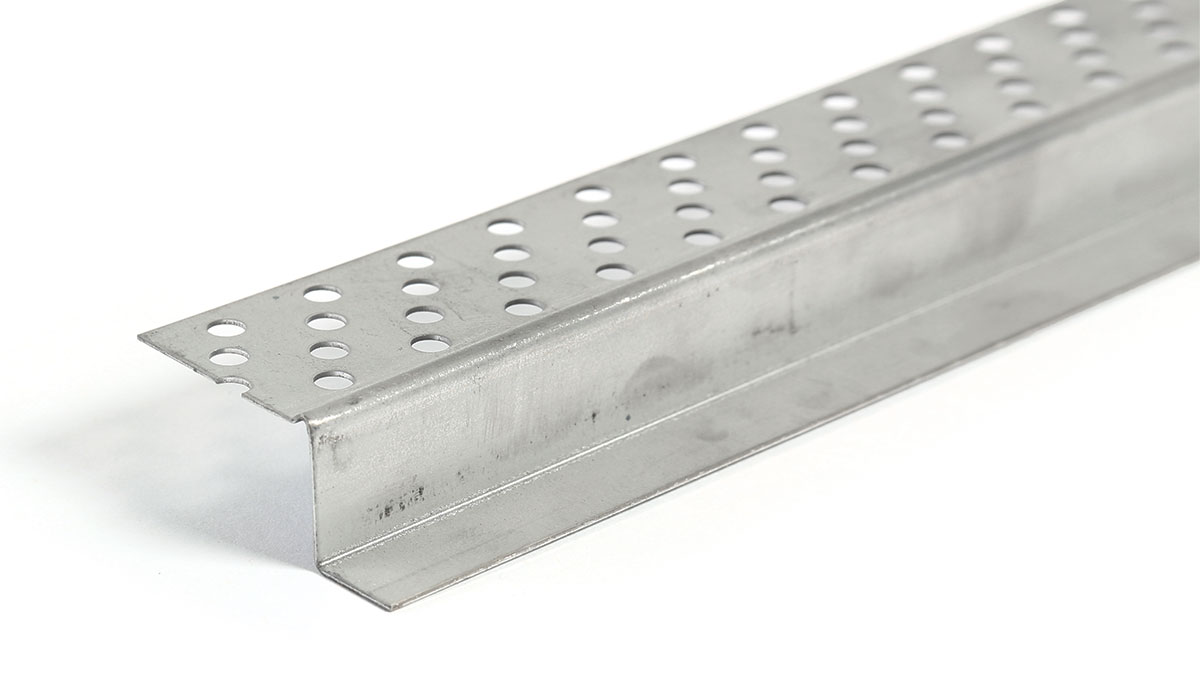
The term “reglet” comes from masonry and refers to the groove cut into a mortar joint to receive counterflashing. The clean lines and minimalist look of reglet trim originated in commercial buildings. Here we used Fry Reglet moldings (fryreglet.com). The company manufactures the trim in steel and aluminum—in unfinished and prefinished versions—for use with drywall, plaster, stucco, and fiber cement.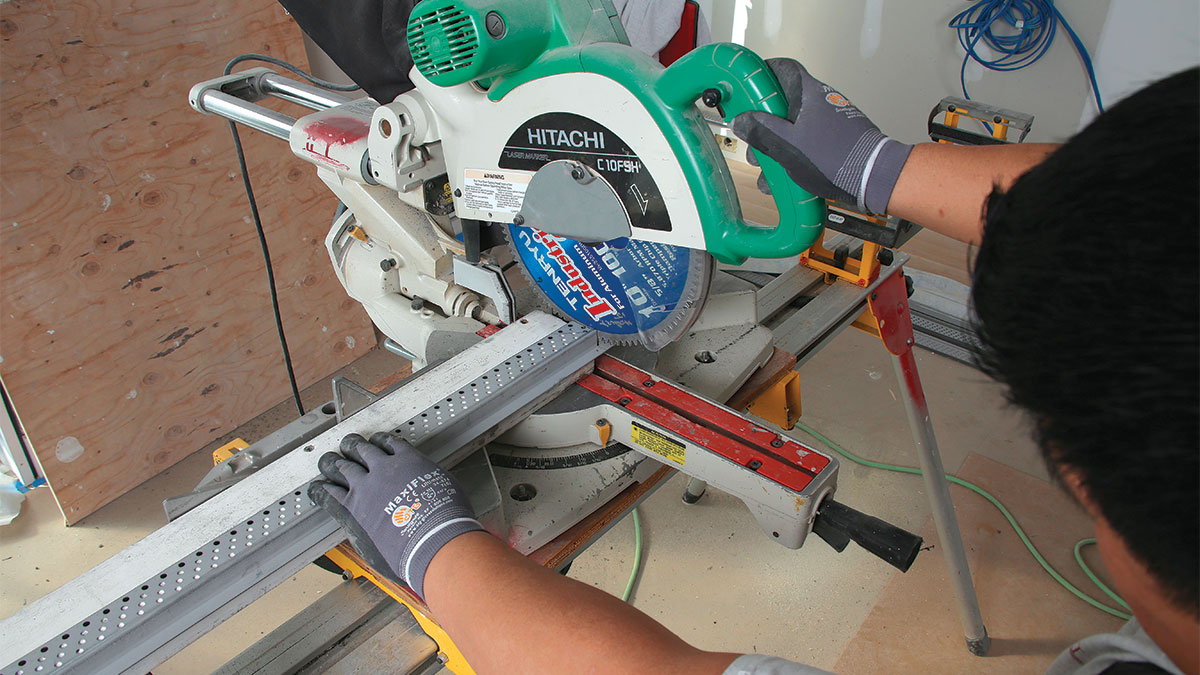
Use a miter saw for crosscuts. Cut metal reglet with a 100-tooth metal-cutting blade. Lube the blade with paraffin for smoother cuts, and add a piece of stock to the saw table for uniform support. Use your old miter saw; cutting the reglet is messy.

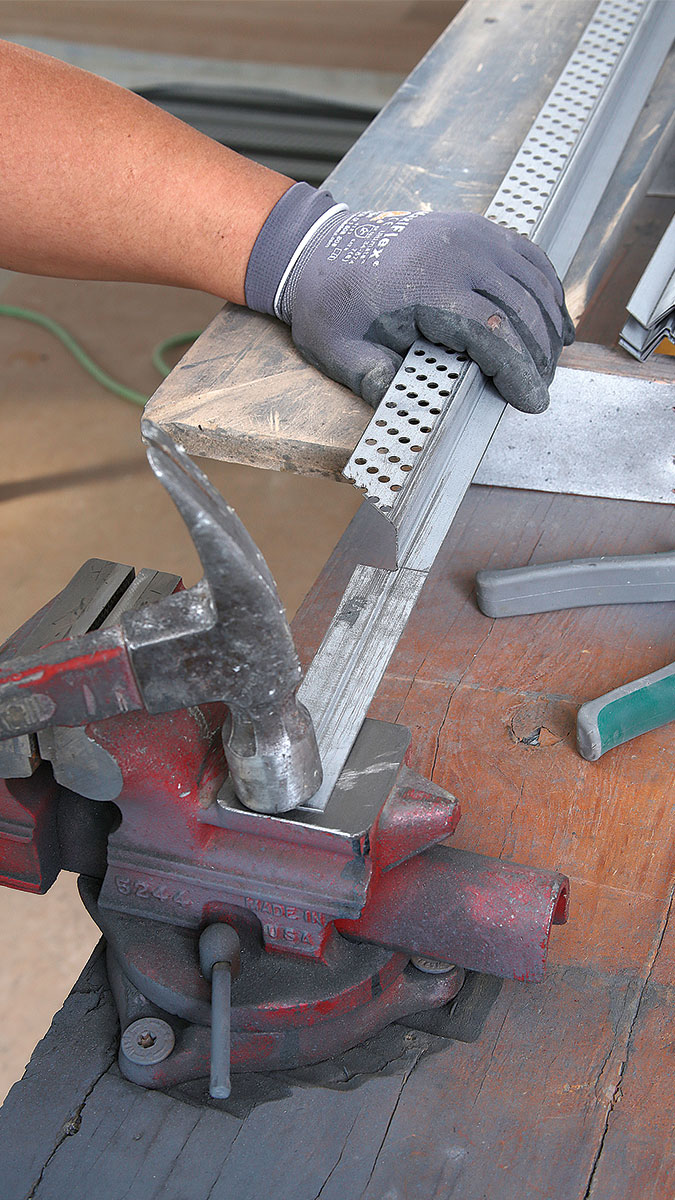
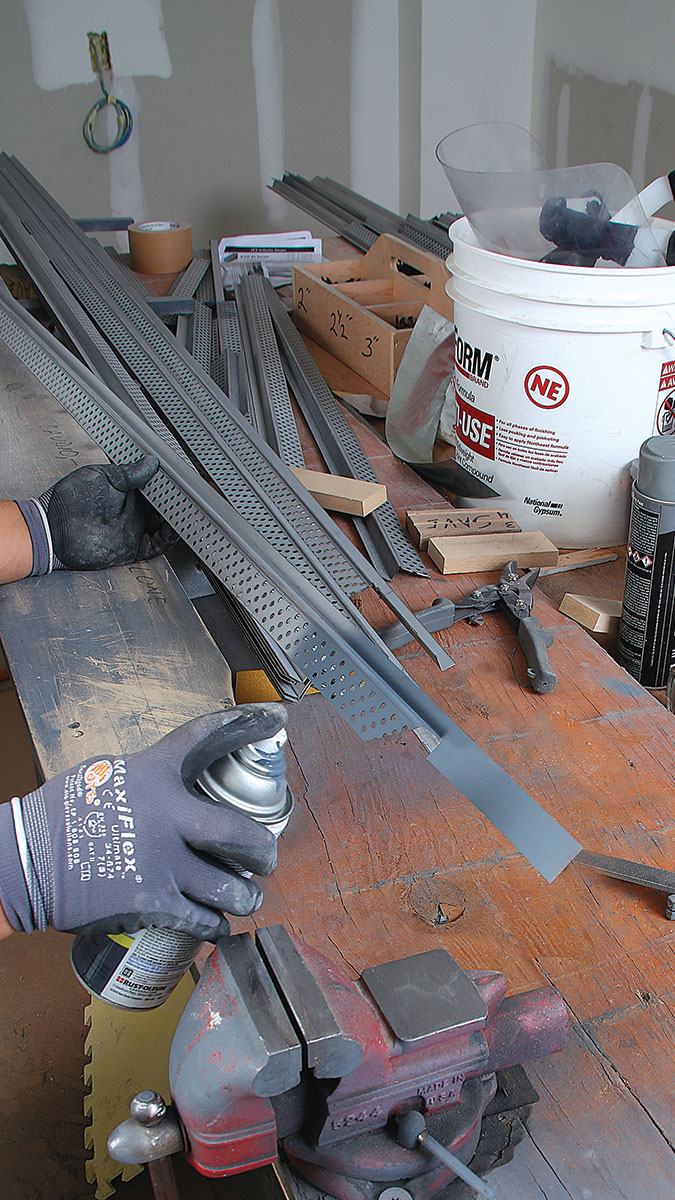
Use a grinder for rip cuts. An angle grinder with a steel-cutting abrasive blade is best for removing flanges and making stopped cuts. Remove burrs with a file or wire brush so joints are tight.
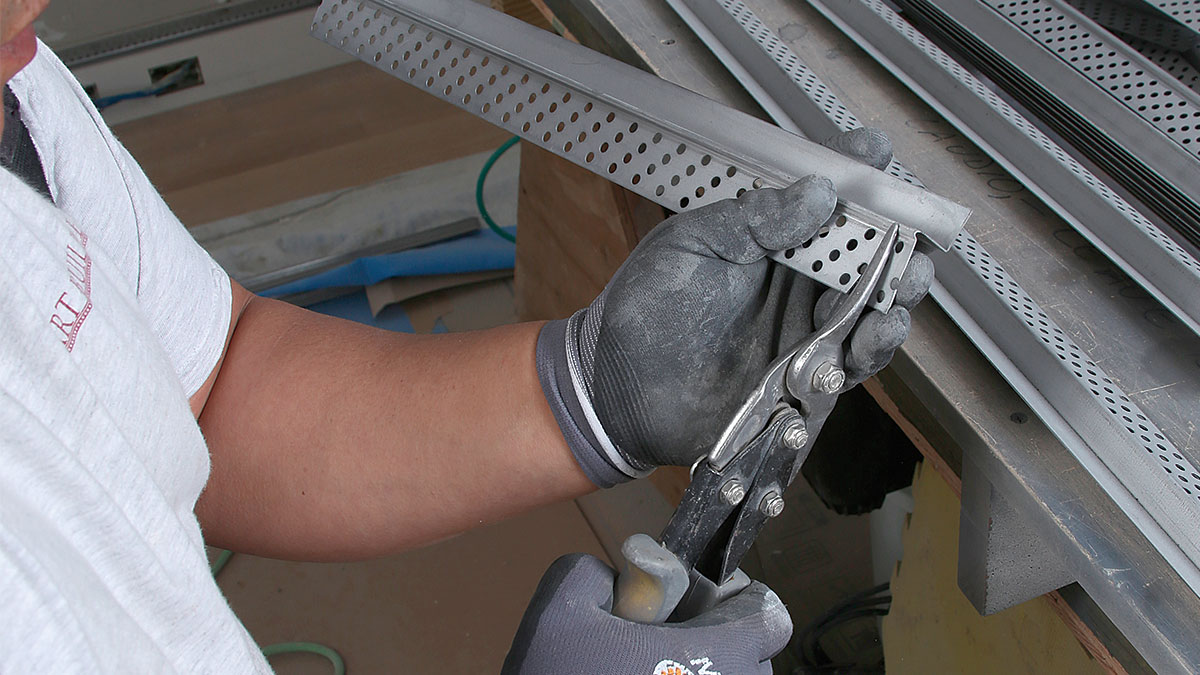
Use snips for small cuts. High-quality aviation snips also work for cuts. Wear gloves when handling the pieces because even the factory-cut edges are razor sharp.
 |
 |
 |
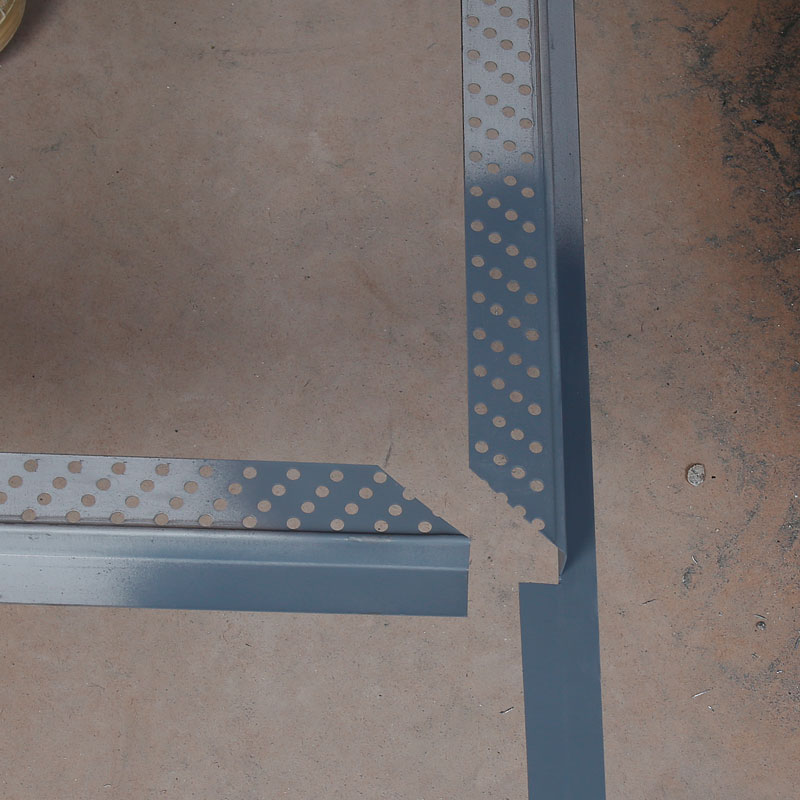 |
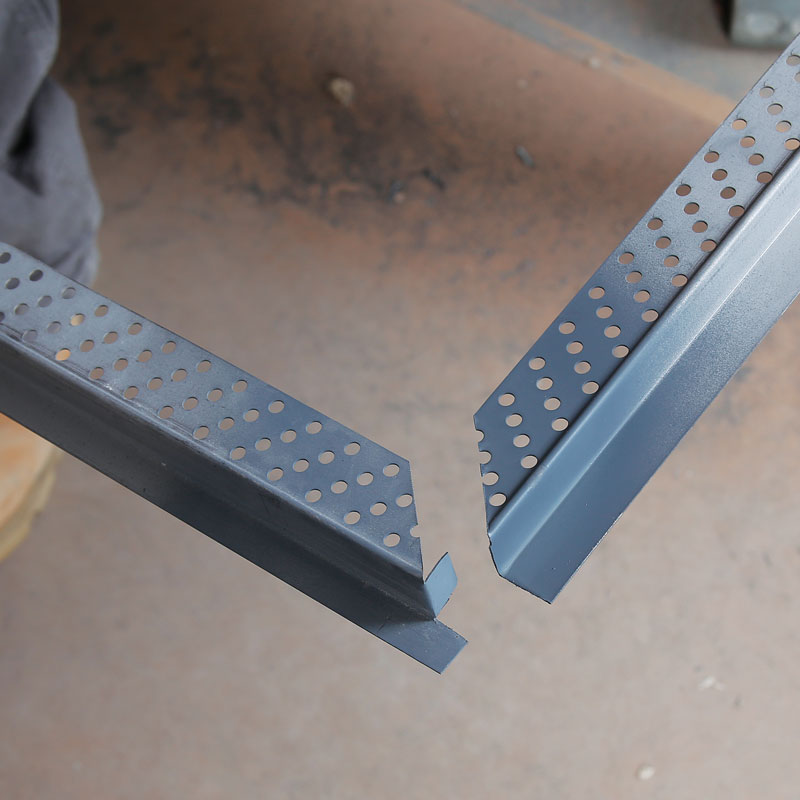
Plan for movement. Whenever two pieces meet, overlap the joint with a bent tab on one of the pieces to prevent gaps resulting from wood movement. Mud flanges are cut so they form a tight miter. Overlaps create a hump in the drywall that’s impossible to conceal.
Installing reglet
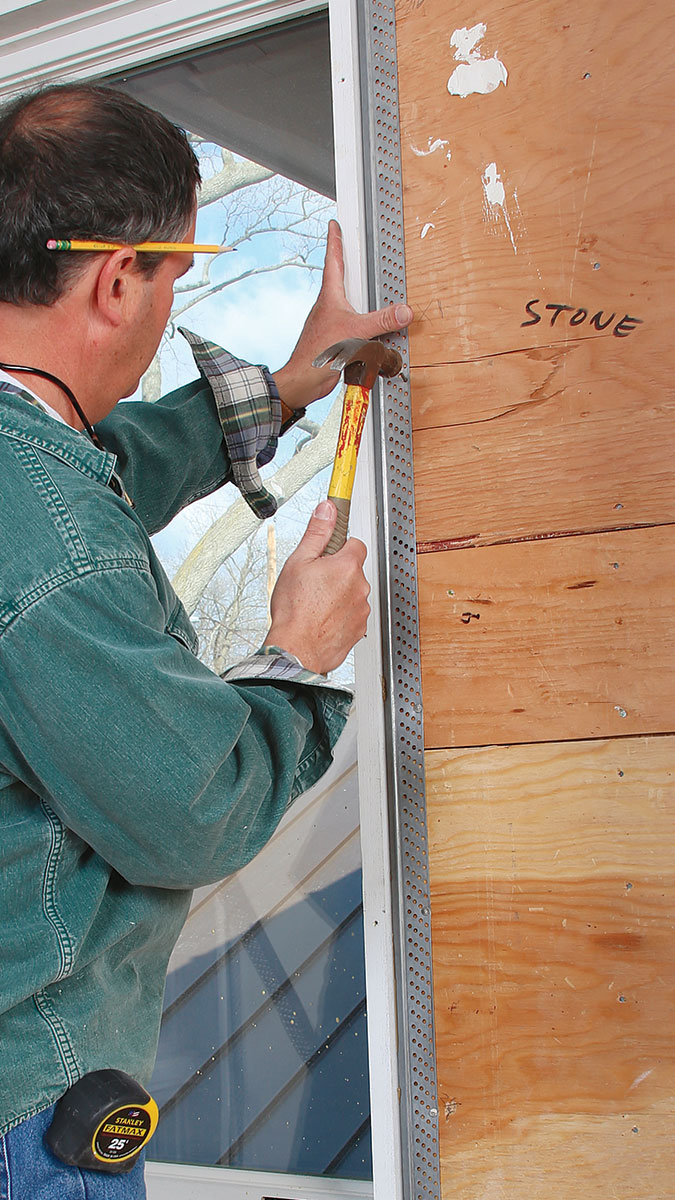
The secret to a successful reglet-trim installation is ensuring the pieces don’t move, which can lead to cracks in the joint compound that conceals the nailing flange. It’s also important to overlap the exposed part of the reglet in corners and transitions or you’ll end up with gaps that are impossible to conceal with caulk or filler.
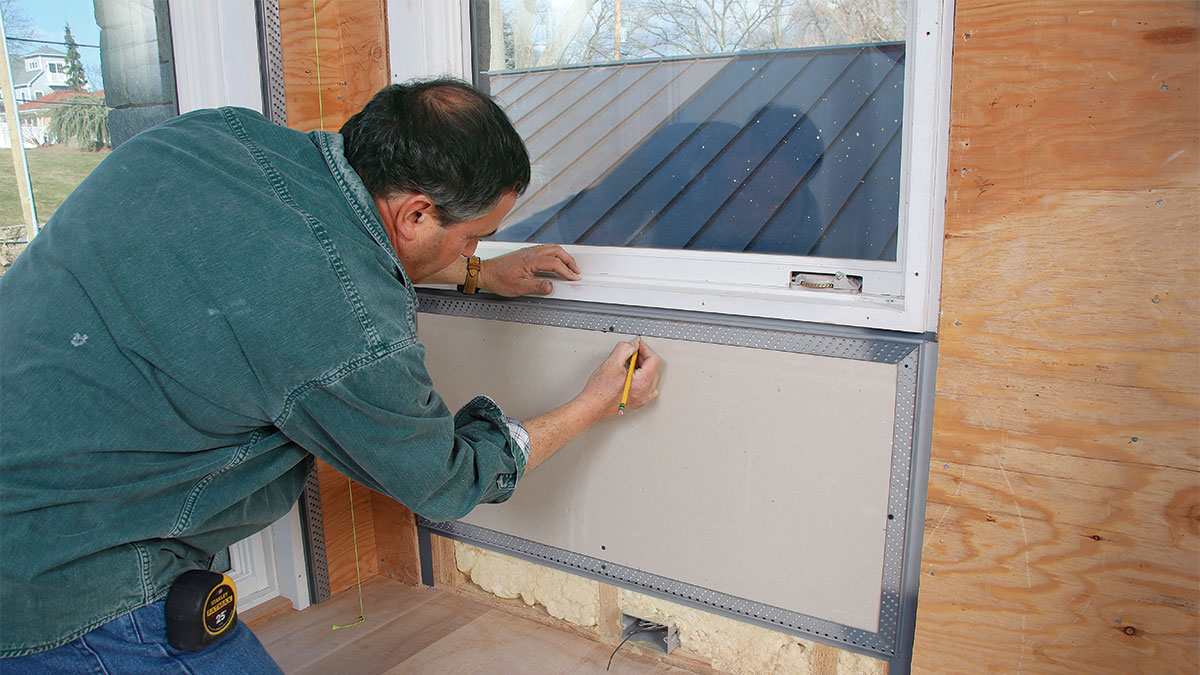
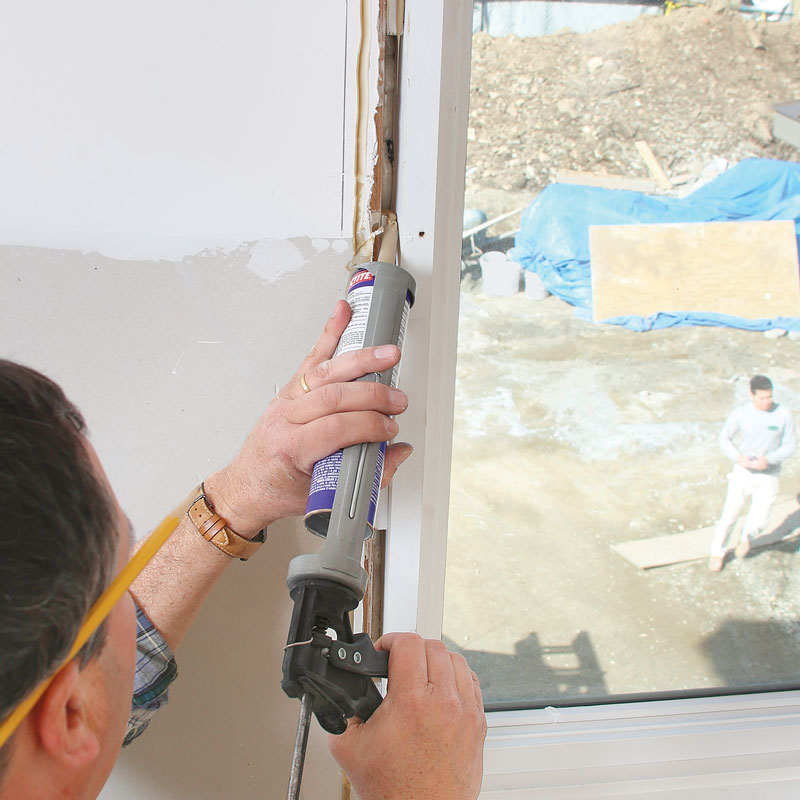
Dry-fit first. After cutting, dry-fit the reglet parts using drywall screws to temporarily hold them in place. Adjust the fit until all the miters are tight and then mark the inside perimeter to guide the placement of construction adhesive.
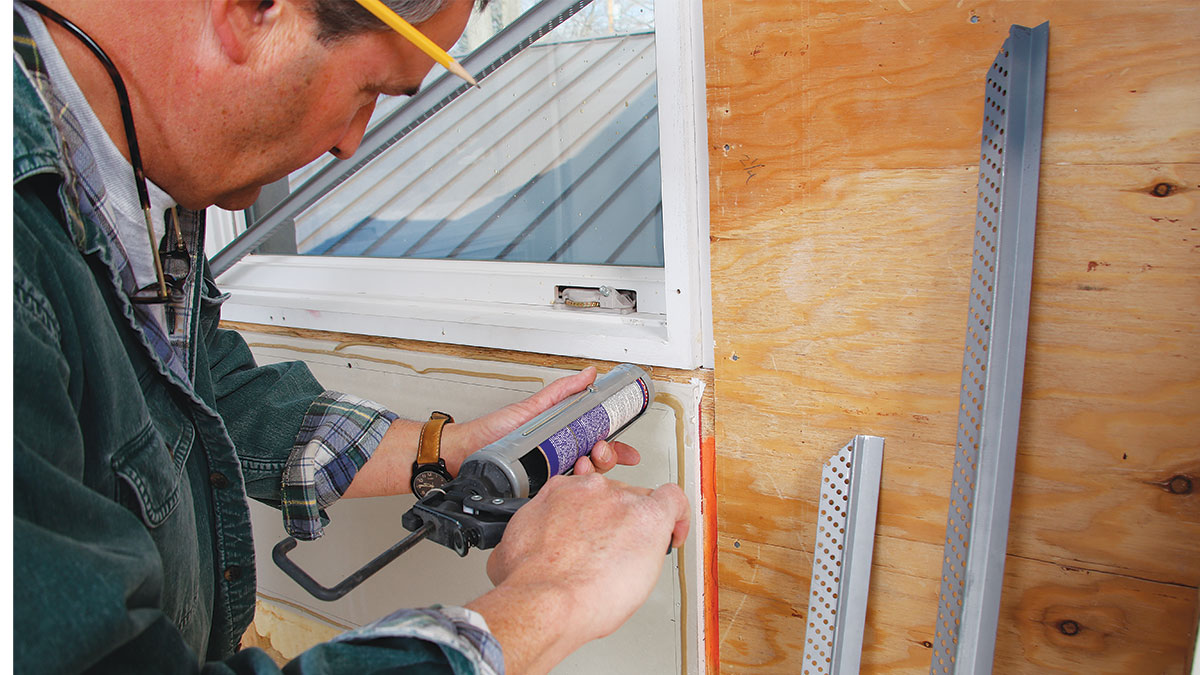
Use glue too. High-quality solvent-based construction adhesive holds the reglet trim better than nails alone. This helps prevent the movement that can cause cracks in the joint compound applied on top of the trim. The pencil lines from the dry fit show where to put the adhesive.
 |
 |
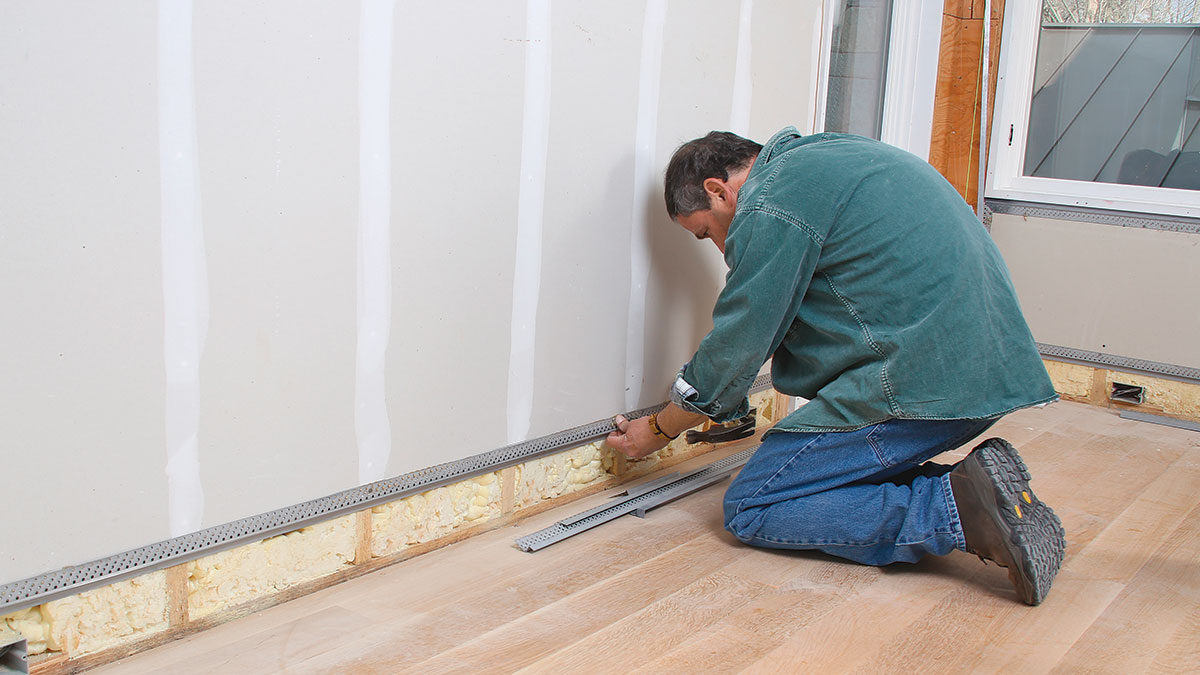
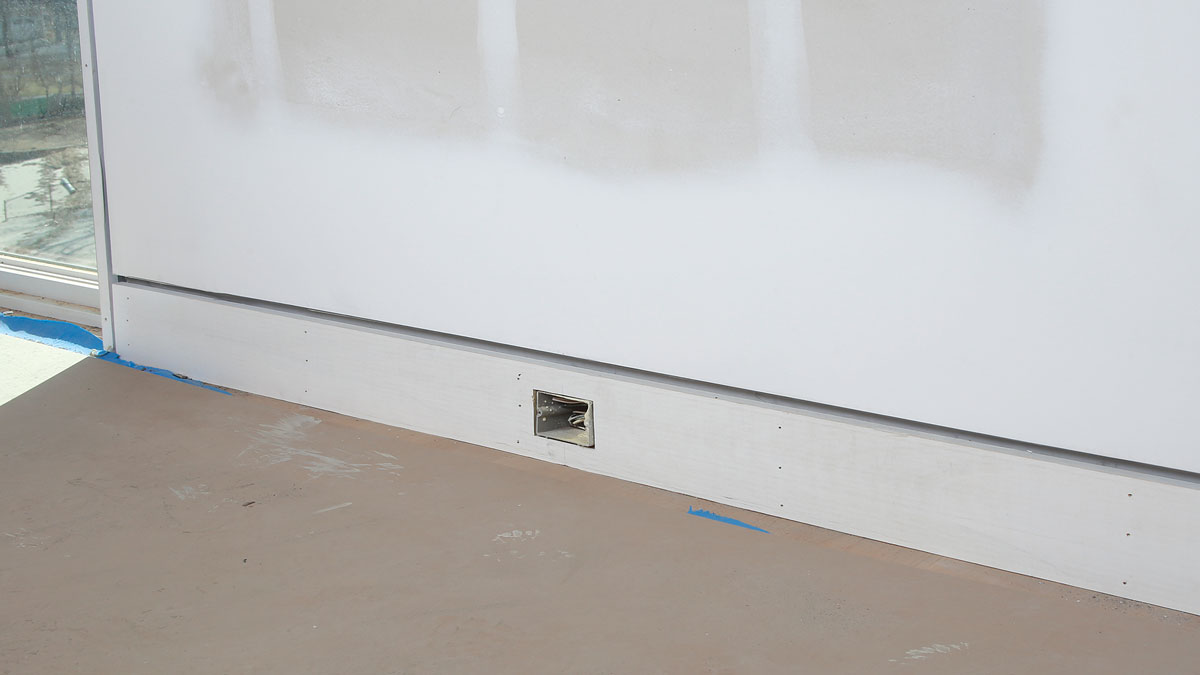
Case, then base. Once the window trim is complete, we install the trim for adjacent baseboard. When all the reglet is in place, we sand and finish the hardwood floors before the baseboard is installed.
 |
 |
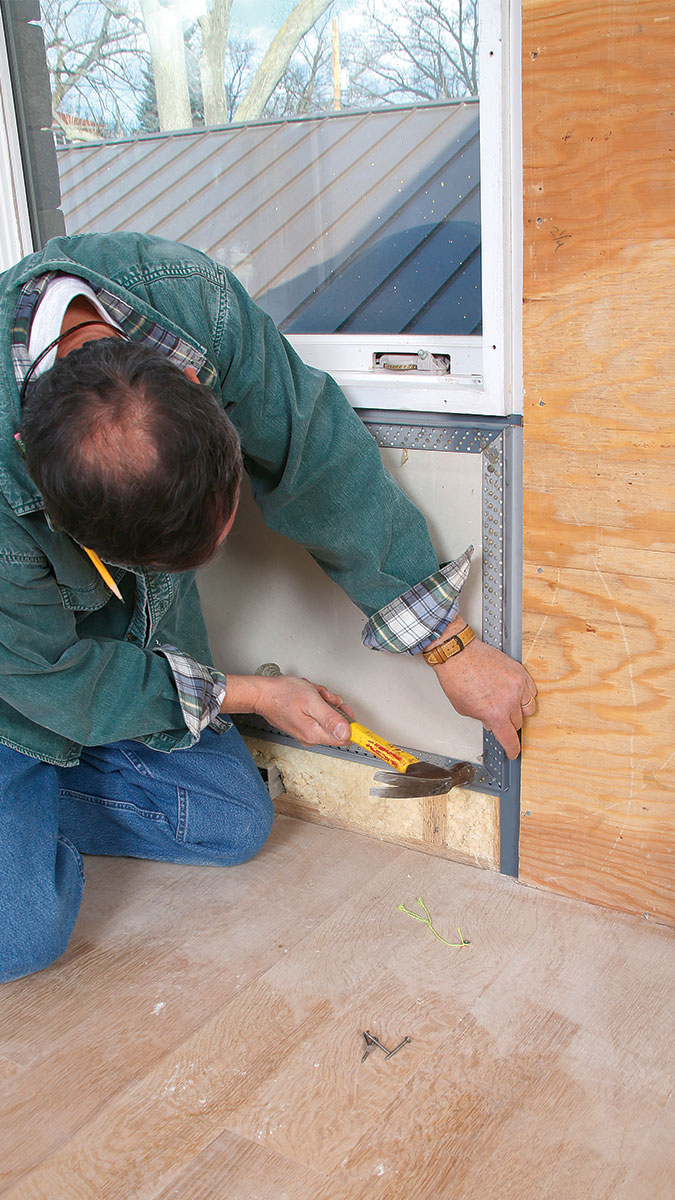
Glue everything. In addition to gluing the nailing flange to the wall, glue the back of the reglet to blocking behind it to prevent flexing and cracked drywall.
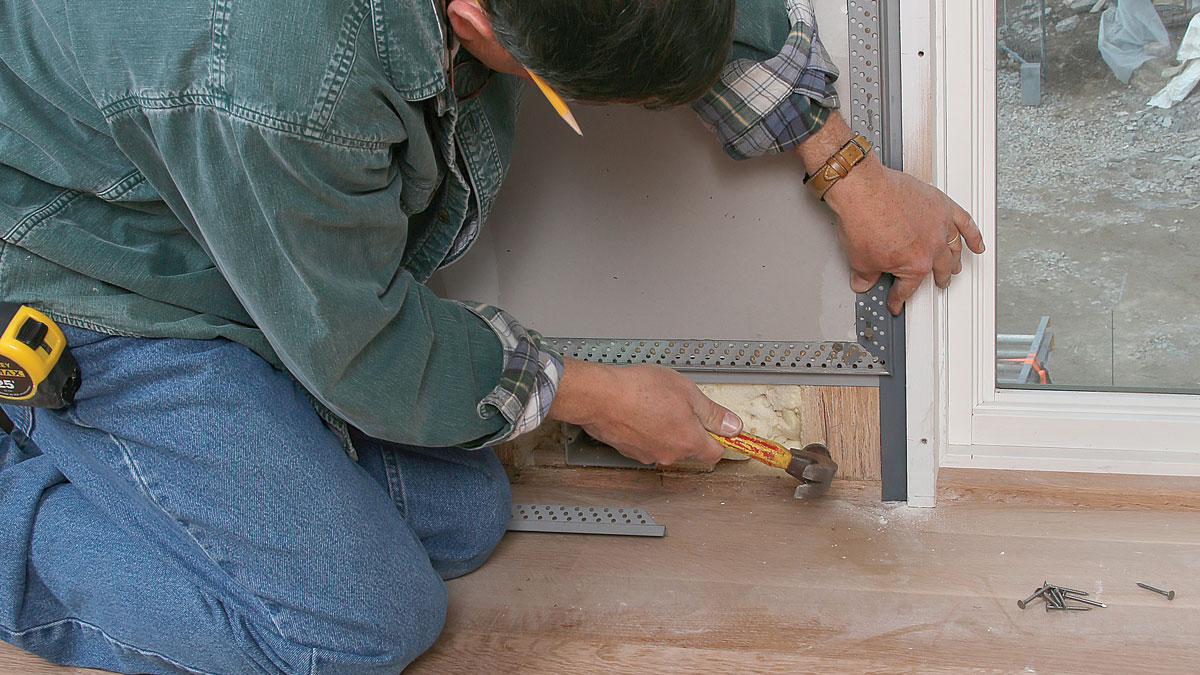
Nail the bottom later. When the window or door trim intersects the base trim, don’t nail the bottom of the door (or window) trim until the base trim is in place. This allows you to make the tightest possible joint and eliminates gaps that can lead to cracks later.
Finish the drywall. Once the reglet is in place, the molding is finished similar to conventional corner bead or J-bead. Tapers should use heavy-duty taping compound or setting-type compounds for the first two coats. All-purpose or topping compound is okay for the final coat.
Joe Milicia is owner of Hobart Builders in Fairfield, Conn. Photos by Patrick McCombe.
More on interior house trim:
Create Sleek Lines with Reglet Trim – This modern design element is tough to pull off, but the clean lines make it so worth it.
Tighten Up Your Trimwork – Though it doesn’t have a cord or battery, a block plane is a powerful finish-carpentry tool.
Ten Tips for Fast Trim – Improve the speed and quality of your next trim job with better layout, assembly, and installation.
Painting Trim the Right Way – A pro shares 8 steps from prep to final coat.

To view the entire article, please click the View PDF button below.

