FHB Logo Facebook LinkedIn Email Pinterest Twitter X Instagram Tiktok YouTube Plus Icon Close Icon Navigation Search Icon Navigation Search Icon Arrow Down Icon Video Guide Icon Article Guide Icon Modal Close Icon Guide Search Icon Skip to content
Subscribe
Log In
  • How-To
  • Design
  • Tools & Materials
  • Restoration
  • Videos
  • Blogs
  • Forum
  • Magazine
  • Members
  • FHB House
  • Podcast
Log In

Fine Homebuilding Project Guides

Tiling

Guide Home
  • Selecting Tile
  • Tools & Techniques
  • Installation Materials
  • Preparation
  • Tiling Floors
  • Tiling Walls & Backsplashes
  • Tiling Showers
  • Grouting, Sealing & Caulking
  • Maintenance & Repair
How-To

Epoxy Grouting

Epoxy grout has a number of advantages over cement grout; here's how to work with it.

By Robin Nicholas, Michael Schweit
  • X
  • facebook
  • linkedin
  • pinterest
  • email
  • add to favorites Log in or Sign up to save your favorite articles

Over the years, epoxy grout has become more user-friendly and is a great alternative to cement grouts. The big plus with epoxy grout is that it is extremely stain resistant (some brands actually claim to be stainproof), provides consistent color, doesn’t shrink (which means less possible hairline cracking), and is dust-free.

There are some differences between installing tile with epoxy grout and with cement grout, but it is an easy transition if you follow the instructions carefully. Epoxy grout systems are made up of two (or three) parts. The essential parts are a resin, which is the main component, and an activator (often with colorant, though that may be packaged separately) that combines with the resin to cure and harden the grout.

Working with Epoxy Grout

Before you begin, it’s important to read the manufacturer’s directions/ specifications because you have less open time with epoxy than with cement grout. Working with epoxy grout is a timed process and if it gets away from you, it may be difficult to fix any issues. For your first installation, plan on spreading an area no larger than you think you can comfortably grout in 20 minutes. It’s always better to be safe than sorry for your first go around.

Have all your tools ready to go before mixing up a batch of epoxy grout. An epoxy grout float (at right) is harder and heavier than a standard float and nonporous to resist gumming up from the epoxy.

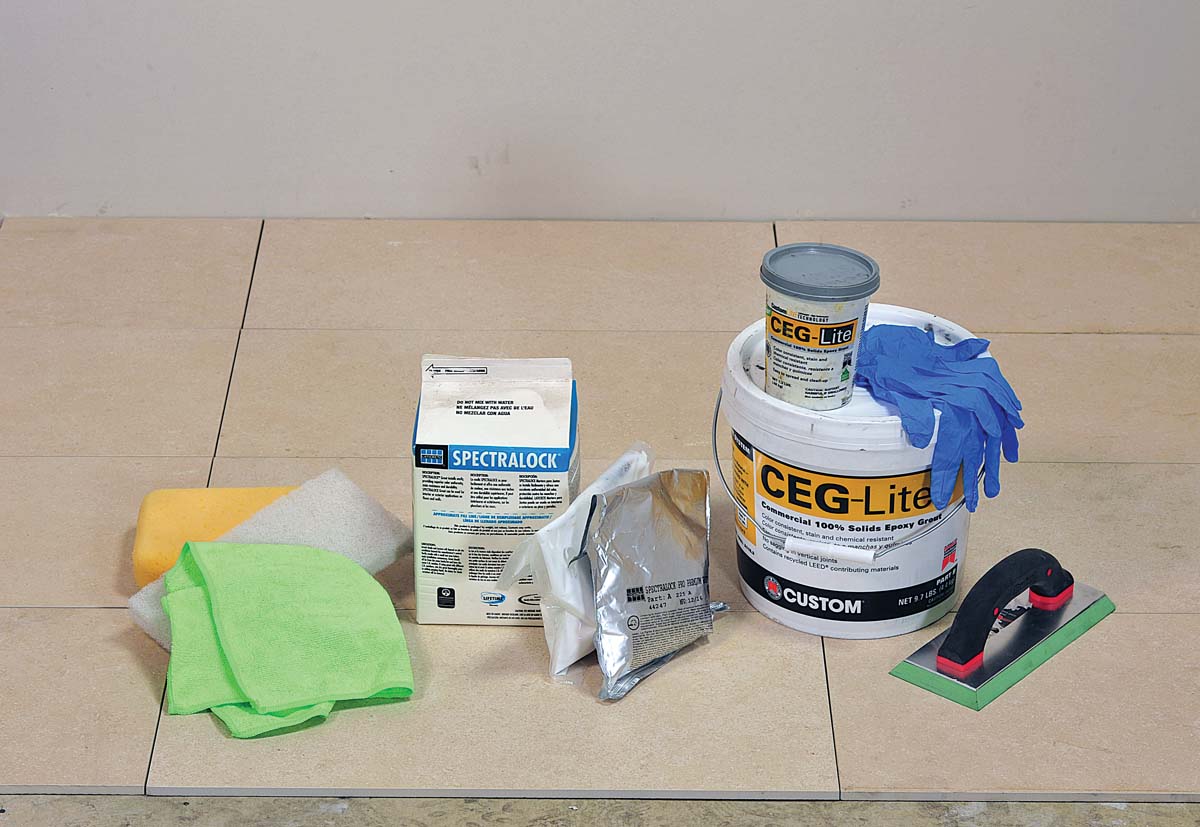
Also before you begin to mix or spread the grout, have all of your tools ready to go: gloves, epoxy float, sponges, white scrub pads, microfiber towels, and buckets filled with water (with cleaning additive provided by the manufacturer or recommended by them). You won’t have time to gather them once you’ve begun the process. You should also wear your least favorite clothes or work clothes. Epoxy grout is not the least bit forgiving, and it’s the gift that keeps on giving if you do get it on your clothing. It adheres beautifully and is tenacious.

Choose a mixing area with ventilation and be sure to mix on something disposable in case of a spill. To begin, thoroughly mix all parts separately before mixing them together 1. Then combine all parts until you have a homogenous mix 2, 3. Dump the mixed epoxy onto a piece of waterproof paper, board, or other open surface that you can easily move around 4.

If you leave epoxy in your mixing bucket, it will set up too quickly. Spread the grout into the joints with your epoxy grout float, but be sure to remove as much as possible from the face of the tiles 5.

Stir each of your epoxy components (the hardener and the resin) until you have a homogenous mix.
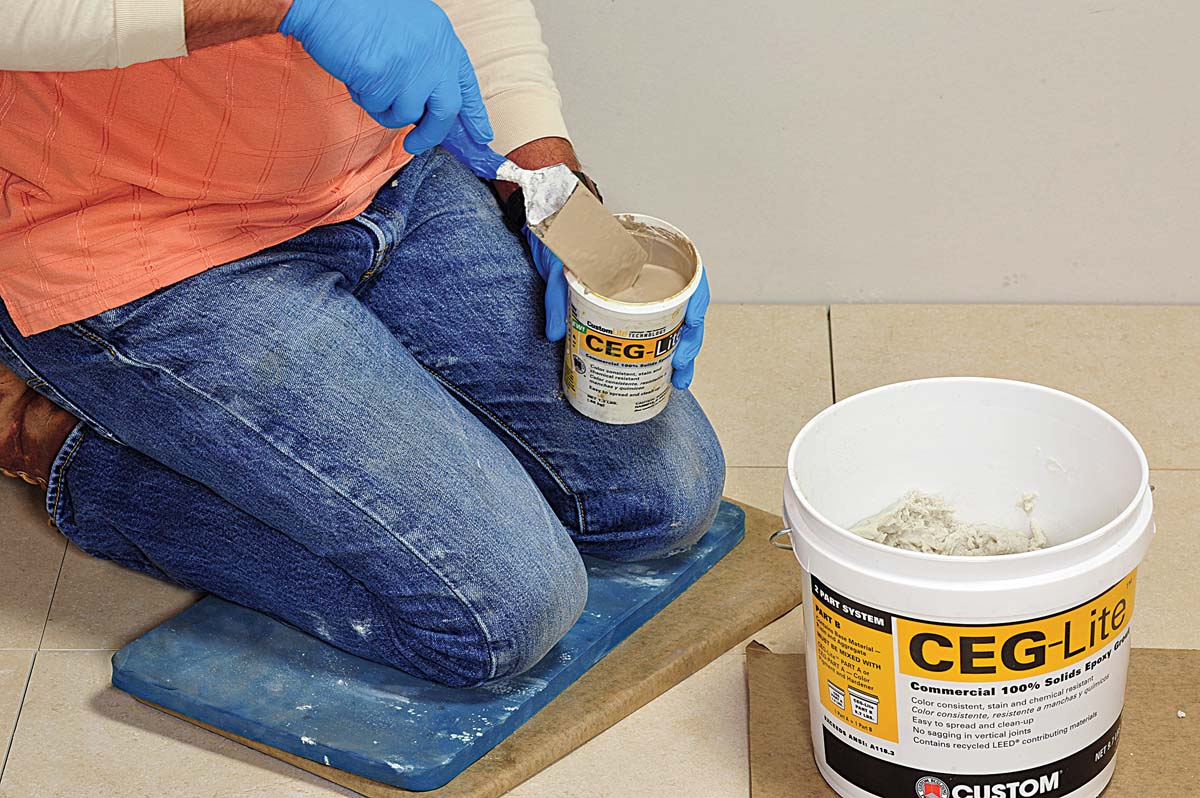
1.  Stir each of your epoxy components (the hardener and the resin) until you have a homogenous mix.
Pour and/or combine components into one container.
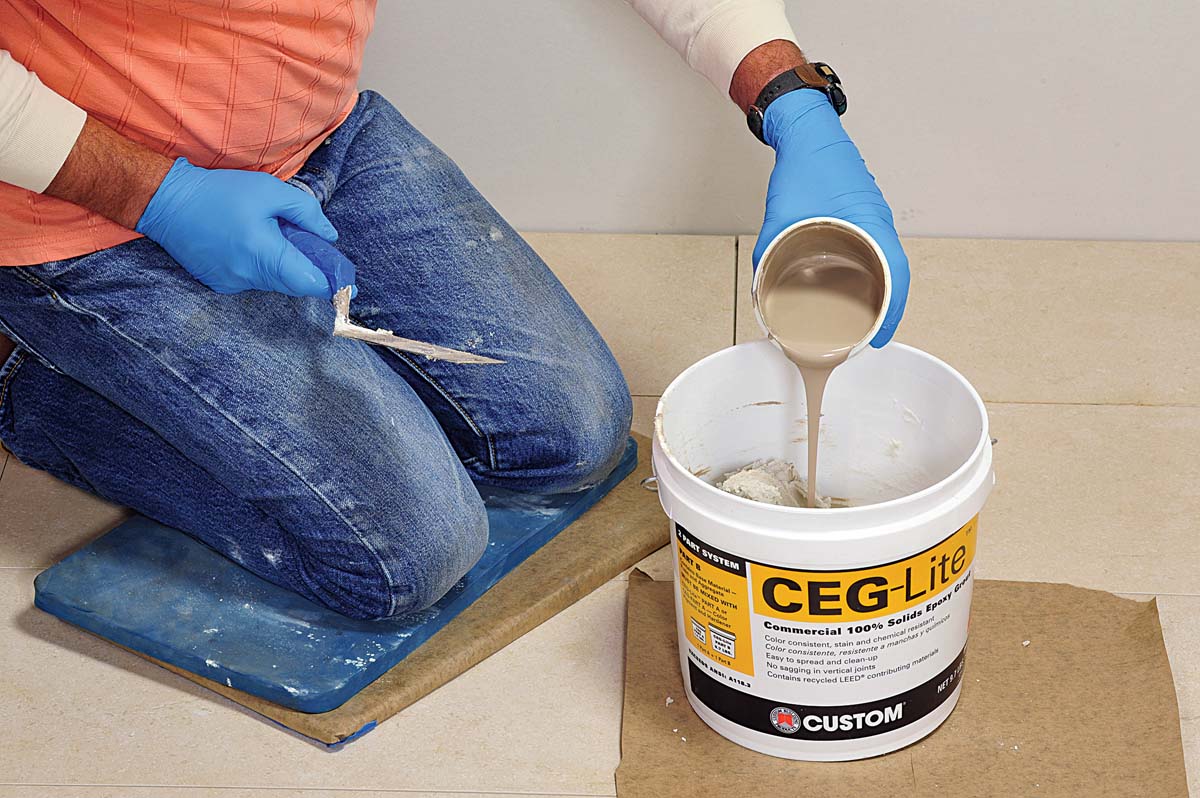
2.  Pour and/or combine components into one container.
Mix grout components together until the color is consistent.
3. Mix grout components together until the color is consistent.
Scoop the mixture onto waterproof paper or a board.
4. Scoop the mixture onto waterproof paper or a board.
Use an epoxy float to fill the grout joints fully but be sure to remove any excess grout from the face of the tile.
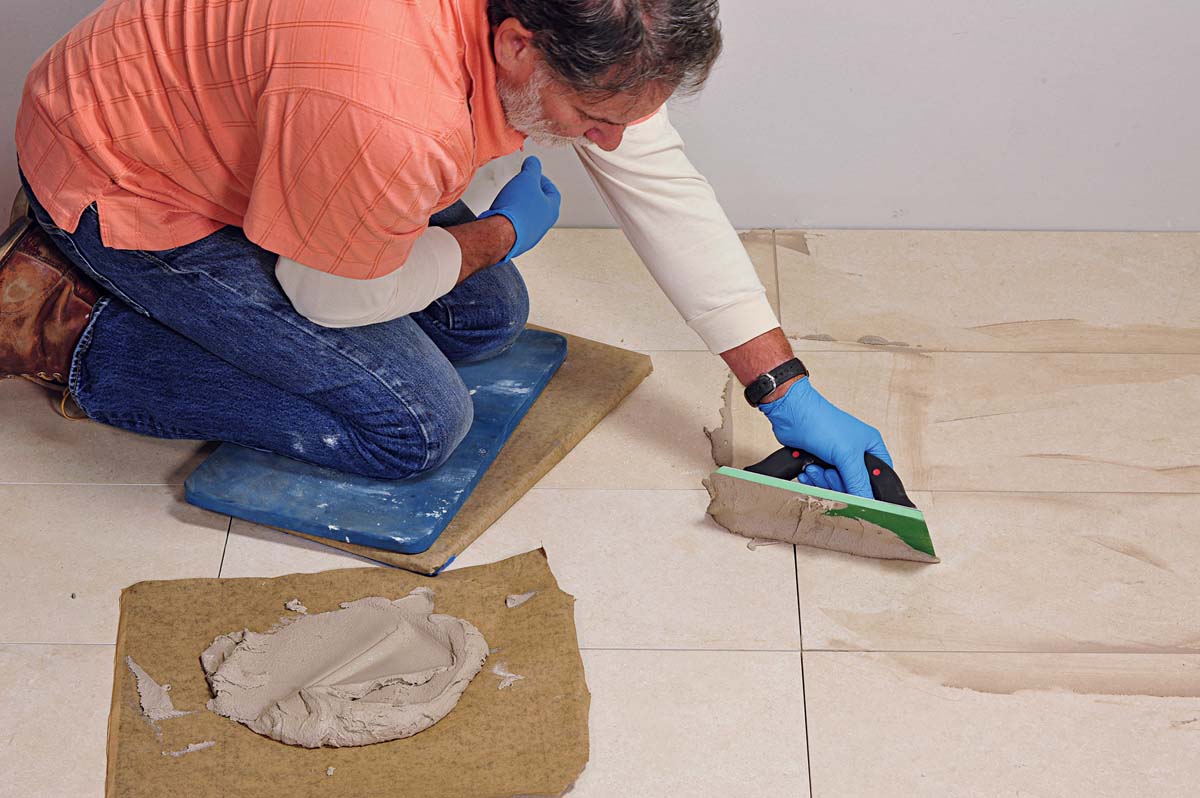
5. Use an epoxy float to fill the grout joints fully but be sure to remove any excess grout from the face of the tile.


After spreading a manageable area of wall or floor, check the time. Depending on the particular grout company, you may start wiping immediately or per their instructions 6. Fill any voids or pin holes at this time 7. Do not exceed the recommended time allotment. Epoxy grout has the opposite need of cement grout: With cement grout, water is the enemy but with epoxy grout, water is a good friend. Don’t wring your sponge out but instead, allow water to aid you when you wipe down the surface. If you don’t use enough water, you will pull grout from the joints instead of shaping them. But you also must take care to keep water out of the ungrouted joints. Your sponge will also not last as long as with cement grouts. The pores will clog with epoxy stickiness and become unusable, so be sure to have additional sponges on hand.

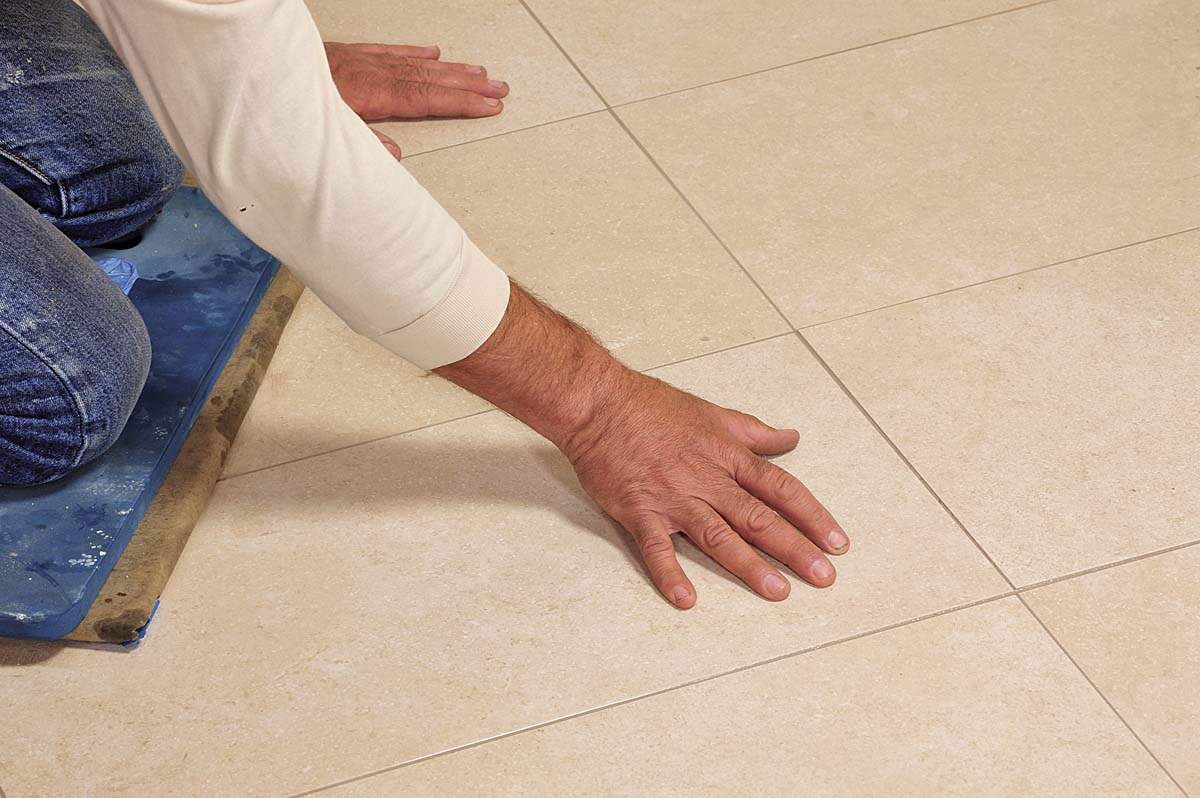
For your second wipe down, wait the prescribed amount of time, then use a white scrubber pad with clean water to agitate the surface of the tiles to loosen any epoxy residue before you use a microfiber cloth 8. If you are wiping a floor, remember to flip your kneepad to a clean side or protect it again or you’ll be pulling and dragging epoxy grout around the floor. To use your microfiber cloth, wring it out thoroughly before each diagonal pass over a tile 9. Keep in mind that any remaining water will contain epoxy residue, so you want to use your cloth to remove as much water as possible. For a larger area (over 50 sq. ft.), you will need to clean out your water bucket periodically. With bare hands, feel the surface of the tile for any epoxy residue and wipe again if necessary 10.

If you did not complete grouting the entire area at one time, proceed as described earlier with a new unit of epoxy grout and continue on from wherever you left off. The following day, inspect the grouted area and if you find a small bit of residue, use a paint scraper to remove it 11. If you find epoxy film on the surface, you can use an epoxy haze remover 12.

Shape the joints with a wet sponge and clean the face of the tile. Use plenty of water.
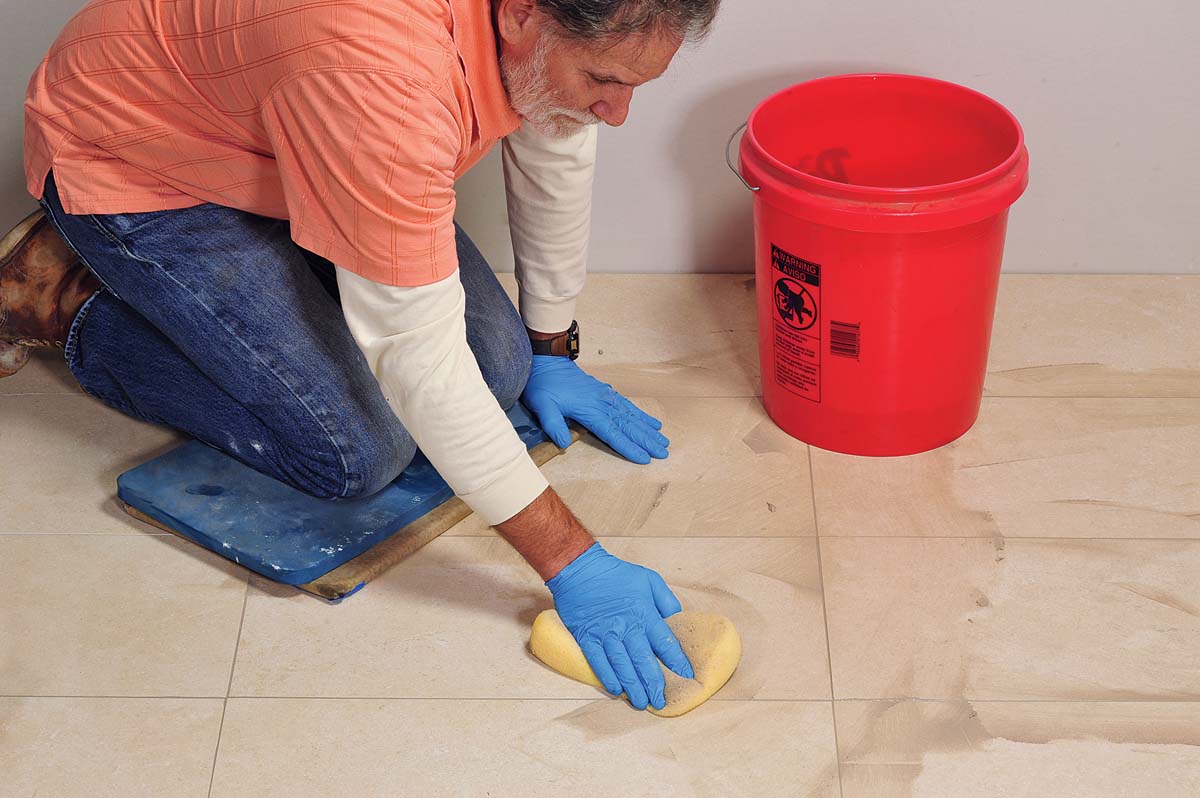
6. Shape the joints with a wet sponge and clean the face of the tile. Use plenty of water.
Touch up any depressions or pin holes in the grout.
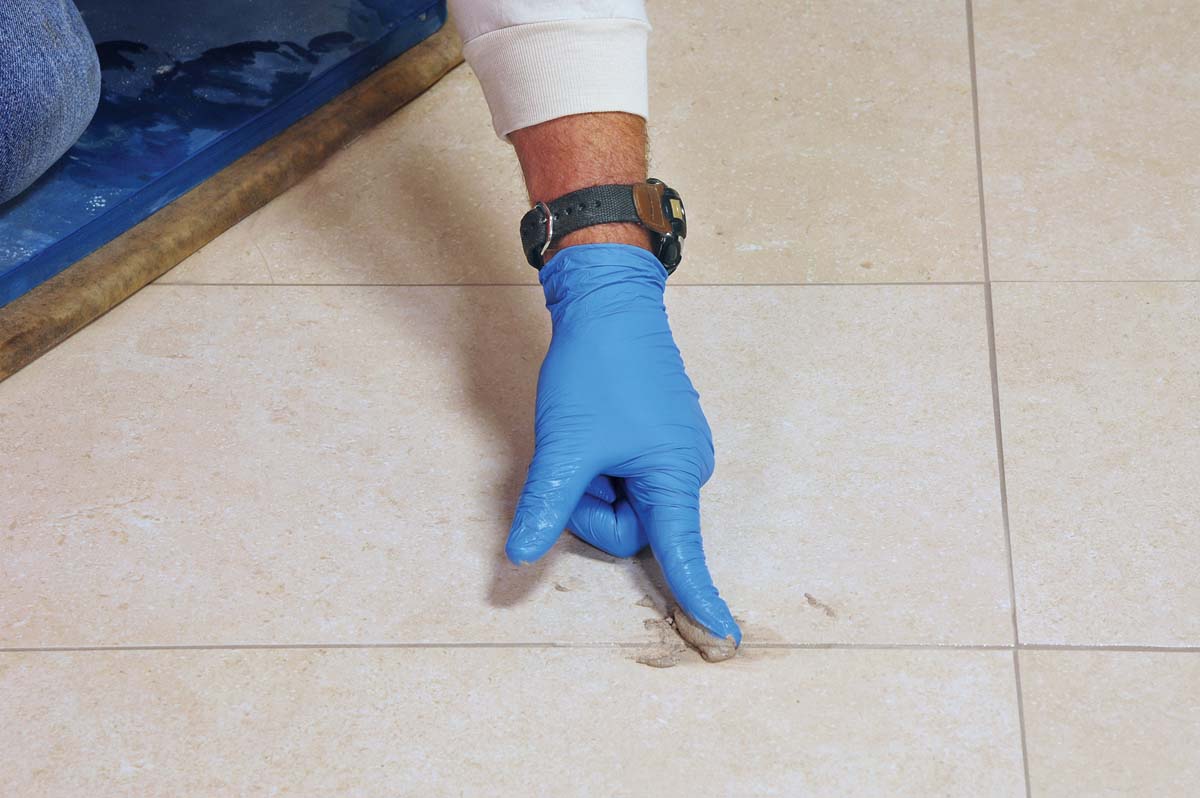
7. Touch up any depressions or pin holes in the grout.


TRADE SECRET: If you are wiping floor grout, you will need to protect your knee pads by wrapping them with waterproof paper. If you do not, the sticky residue on your pad will pull the epoxy out of the grout joints as you go over the grouted areas.


Agitate the surface of the tile with a white scrub pad and it will loosen any residual grout. Use care to prevent gouging your shaped grout joints.
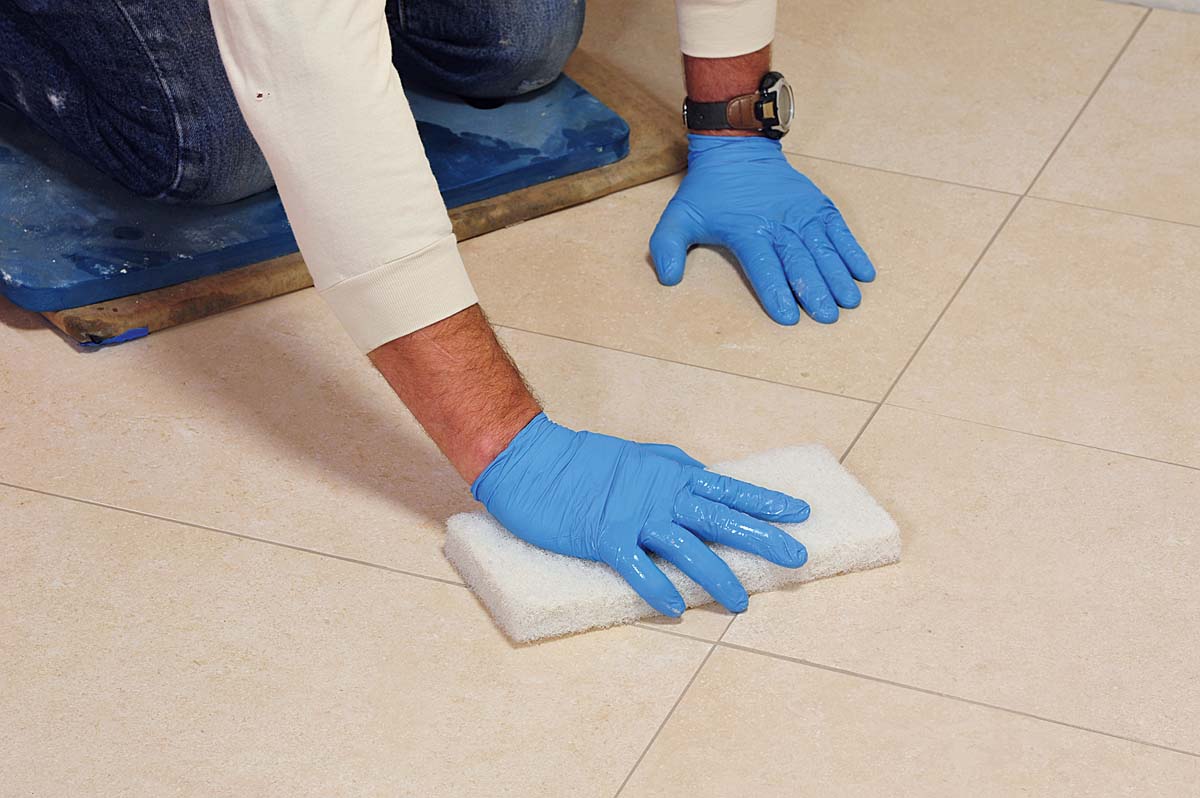
8. Agitate the surface of the tile with a white scrub pad and it will loosen any residual grout. Use care to prevent gouging your shaped grout joints.
Any water on the tile will contain grout residue. Drag a damp microfiber towel diagonally across the tile to remove any excess water.
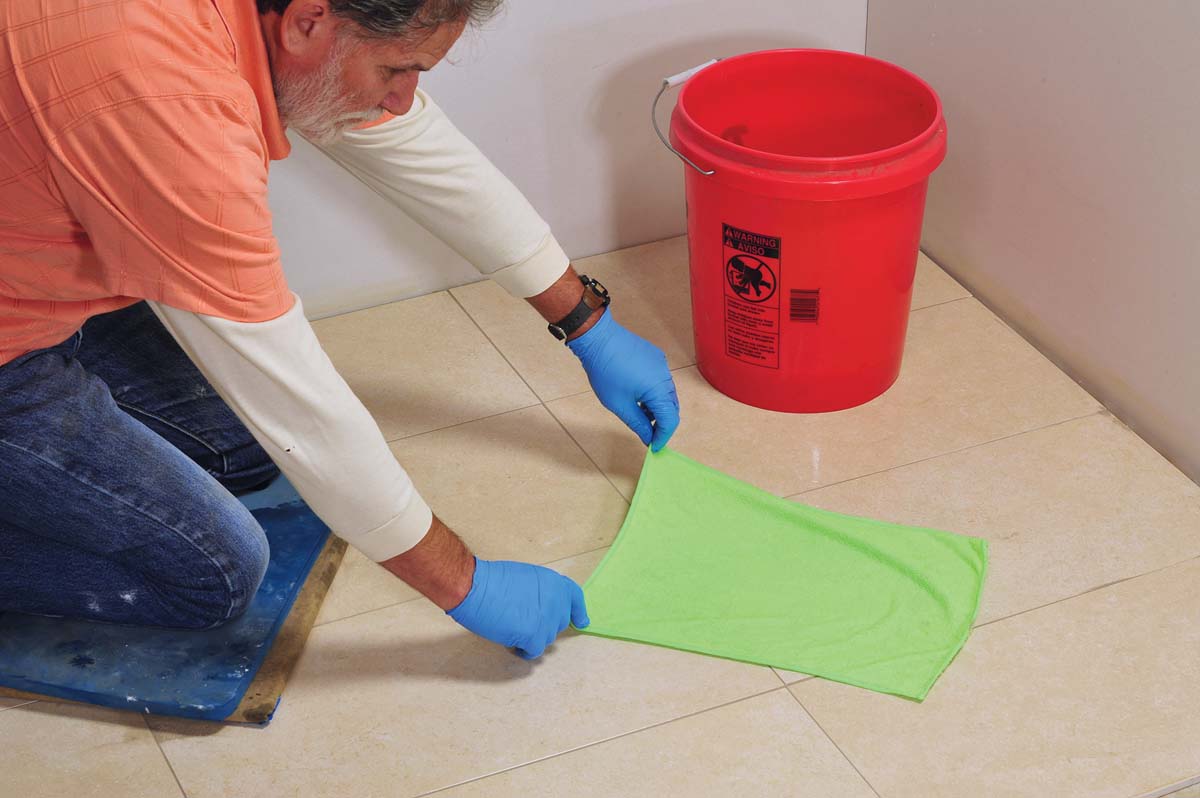
9. Any water on the tile will contain grout residue. Drag a damp microfiber towel diagonally across the tile to remove any excess water.
Feel the face of the tiles with your bare hands to locate any grout residue. If you feel any stickiness or granules, wipe them off.
10. Feel the face of the tiles with your bare hands to locate any grout residue. If you feel any stickiness or granules, wipe them off.
The next day, use a paint scraper to easily remove any grout from the surface of the tile.
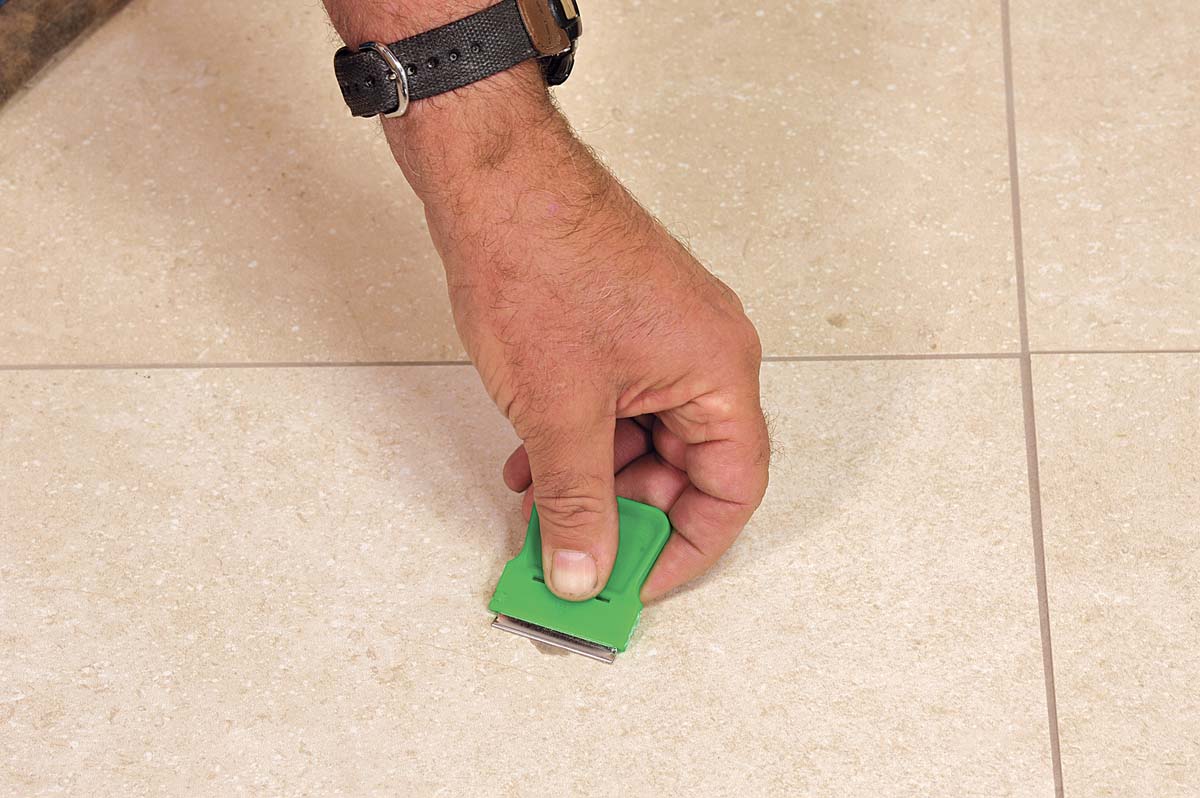
11. The next day, use a paint scraper to easily remove any grout from the surface of the tile.
Additionally, wipe any remaining epoxy film off the surface with epoxy haze remover.
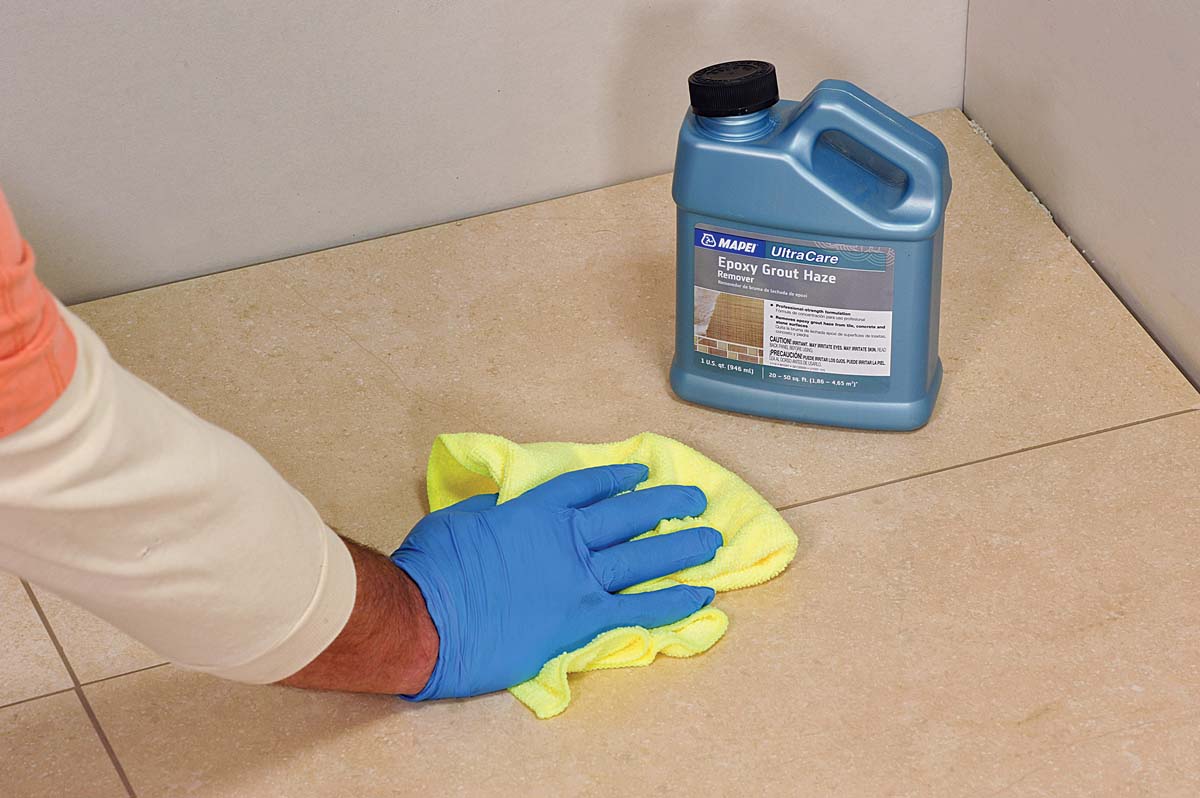
12. Additionally, wipe any remaining epoxy film off the surface with epoxy haze remover.


TRADE SECRET:Unlike working with cement grout, after epoxy grout has cured (hours or days later) you can blend in a new unit of epoxy grout without any color or texture issues.

Tiling Complete, 2nd EditionExcerpted from Tiling Complete, 2nd Edition by Robin Nicholas and Michael Schweit.

Available in the Taunton Store and at Amazon.com.

Fine Homebuilding Recommended Products

Fine Homebuilding receives a commission for items purchased through links on this site, including Amazon Associates and other affiliate advertising programs.

Hitachi Pin Nailer (NP35A)

This compact, no-frills nailer is a good choice for someone starting out in the trades or a builder unsure of how to get the most out of a 23-ga. pinner.
Buy at Amazon

Festool Cordless Track Saw (TSC 55 KeB-F)

The Festool Cordless Track Saw is a powerful, smooth tool with reliable, high-friction strips and a semi-transparent splinter guard.
Buy at Amazon

Reliable Crimp Connectors

These reliable, high-quality connectors from Wirefy work on 10-22-gauge wire have heat-shrink insulation to keep out water and road salt.
Buy at Amazon
Previous: Grouting Tile Next: A Fearless Approach to Epoxy Grout

Guide

Tiling

Chapter

Grouting, Sealing & Caulking

Sign up for eletters today and get the latest how-to from Fine Homebuilding, plus special offers.

Signing you up...

This site is protected by reCAPTCHA and the Google Privacy Policy and Terms of Service apply.
See all newsletters
See all newsletters

Log in or create an account to post a comment.

Sign up Log in

Become a member and get full access to FineHomebuilding.com

Tiling

Tiling

Trusted, comprehensive guidance from the pros for a great-looking tile job in any room of the house

View Project Guide

View All Project Guides »

Become a member and get unlimited site access, including the Tiling Project Guide.

Start Free Trial

Selecting Tile
  • The Basics
  • Tile Options
Tools & Techniques
  • Job-Preparation Tools
  • Cutting Tiles
  • Setting & Grouting Tools
Installation Materials
  • Membranes & Substrates
  • Adhesives & Mortars
  • Grout
  • Sealers & Caulk
  • Spacers, Hardware & Trim
Preparation
  • The Prep Job
  • Repairs & Surface Prep
  • Installing Backerboard
Tiling Floors
  • Layout & Installation
  • Setting Specialty Tiles
Tiling Walls & Backsplashes
  • Preparation
  • Backsplashes
  • Walls
Tiling Showers
  • Tile Shower Basics
  • Waterproofing
  • Shower Pans
  • Shower Drains
  • Shower Niches
  • Video Series: Tile a Shower
  • Video Series: Tile a Barrier-Free Bathroom
Grouting, Sealing & Caulking
  • Grouting
  • Caulking
  • Sealing
Maintenance & Repair
  • Maintenance
  • Tile Repair
  • Grout Repair

Fine Home Building

Newsletter Sign-up

  • Fine Homebuilding

    Home building tips, offers, and expert advice in your inbox.

  • Green Building Advisor

    Building science and energy efficiency advice, plus special offers, in your inbox.

  • Old House Journal

    Repair, renovation, and restoration tips, plus special offers, in your inbox.

Signing you up...

This site is protected by reCAPTCHA and the Google Privacy Policy and Terms of Service apply.
See all newsletters

Follow

  • Fine Homebuilding

    Dig into cutting-edge approaches and decades of proven solutions with total access to our experts and tradespeople.

    Start Free Trial Now
    • Facebook
    • Instagram
    • X
    • LinkedIn
  • GBA Prime

    Get instant access to the latest developments in green building, research, and reports from the field.

    Start Free Trial Now
    • Facebook
    • YouTube
  • Old House Journal

    Learn how to restore, repair, update, and decorate your home.

    Subscribe Now
    • Facebook
    • Instagram
    • X

Membership & Magazine

  • Online Archive
  • Start Free Trial
  • Magazine Subscription
  • Magazine Renewal
  • Gift a Subscription
  • Customer Support
  • Privacy Preferences
  • About
  • Contact
  • Advertise
  • Careers
  • Terms of Use
  • Site Map
  • Do not sell or share my information
  • Privacy Policy
  • Accessibility
  • California Privacy Rights

© 2025 Active Interest Media. All rights reserved.

Fine Homebuilding receives a commission for items purchased through links on this site, including Amazon Associates and other affiliate advertising programs.

  • Home Group
  • Antique Trader
  • Arts & Crafts Homes
  • Bank Note Reporter
  • Cabin Life
  • Cuisine at Home
  • Fine Gardening
  • Fine Woodworking
  • Green Building Advisor
  • Garden Gate
  • Horticulture
  • Keep Craft Alive
  • Log Home Living
  • Military Trader/Vehicles
  • Numismatic News
  • Numismaster
  • Old Cars Weekly
  • Old House Journal
  • Period Homes
  • Popular Woodworking
  • Script
  • ShopNotes
  • Sports Collectors Digest
  • Threads
  • Timber Home Living
  • Traditional Building
  • Woodsmith
  • World Coin News
  • Writer's Digest
Active Interest Media logo
X
X
This is a dialog window which overlays the main content of the page. The modal window is a 'site map' of the most critical areas of the site. Pressing the Escape (ESC) button will close the modal and bring you back to where you were on the page.

Main Menu

  • How-To
  • Design
  • Tools & Materials
  • Video
  • Blogs
  • Forum
  • Project Guides
  • Reader Projects
  • Magazine
  • Members
  • FHB House

Podcasts

  • FHB Podcast
  • ProTalk

Webinars

  • Upcoming and On-Demand

Podcasts

  • FHB Podcast
  • ProTalk

Webinars

  • Upcoming and On-Demand

Popular Topics

  • Kitchens
  • Business
  • Bedrooms
  • Roofs
  • Architecture and Design
  • Green Building
  • Decks
  • Framing
  • Safety
  • Remodeling
  • Bathrooms
  • Windows
  • Tilework
  • Ceilings
  • HVAC

Magazine

  • Current Issue
  • Past Issues
  • Magazine Index
  • Subscribe
  • Online Archive
  • Author Guidelines

All Access

  • Member Home
  • Start Free Trial
  • Gift Membership

Online Learning

  • Courses
  • Project Guides
  • Reader Projects
  • Podcast

More

  • FHB Ambassadors
  • FHB House
  • Customer Support

Account

  • Log In
  • Join

Newsletter

Get home building tips, offers, and expert advice in your inbox

Signing you up...

This site is protected by reCAPTCHA and the Google Privacy Policy and Terms of Service apply.
See all newsletters
See all newsletters

Follow

  • X
  • YouTube
  • instagram
  • facebook
  • pinterest
  • Tiktok

Join All Access

Become a member and get instant access to thousands of videos, how-tos, tool reviews, and design features.

Start Your Free Trial

Subscribe

FHB Magazine

Start your subscription today and save up to 70%

Subscribe

We hope you’ve enjoyed your free articles. To keep reading, become a member today.

Get complete site access to expert advice, how-to videos, Code Check, and more, plus the print magazine.

Start your FREE trial

Already a member? Log in

Privacy Policy Update

We use cookies, pixels, script and other tracking technologies to analyze and improve our service, to improve and personalize content, and for advertising to you. We also share information about your use of our site with third-party social media, advertising and analytics partners. You can view our Privacy Policy here and our Terms of Use here.

Cookies

Analytics

These cookies help us track site metrics to improve our sites and provide a better user experience.

Advertising/Social Media

These cookies are used to serve advertisements aligned with your interests.

Essential

These cookies are required to provide basic functions like page navigation and access to secure areas of the website.

Delete My Data

Delete all cookies and associated data