
Replacing Tile around a Shower Valve
Learn how to repair a tile wall after a plumbing-valve replacement.
After many years, it is not uncommon to find out that your shower or tub valve has a leak, causing you to hire a plumber who will tear apart your lovely tiled wall to replace the valve. While most plumbers will remove the tile to do the valve change, very few will repair the actual tile work. This section will show you how to complete the repair and maintain any waterproofing.
Replacement tiles
If you are fortunate enough to have tile remaining from the original installation, those tiles will be your replacement tiles, which makes your repair easy. If you don’t have the original tiles (or don’t have enough for the repair), you’ll need to find replacement tiles. If you contracted or did the work yourself, contact the store that supplied your tile to see if they have any remaining stock. If you don’t know the origin of the tile, check with a reputable store in your area.
Take a photo of your tile, and/or, if your plumber has removed the tile, take any piece or broken chunk of the tile to the store with you. If the tile is no longer available, you’ll have to use a different size or color of tile to repair the area. If this is the case, you might want to use a decorative tile or create a border to change the size or orientation of the replacement tiles. You could also choose a tile in a contrasting color to look more intentional, rather than have your repair look like a patch (as shown in the repair-over-mud example here).
After the tile is removed and the valve is replaced, you’ll be able to see whether your tile was installed over a mud bed or over backerboard. The following two sections will show you how to repair either situation. We will also deal with methods to maintain your waterproofing.
| TRADE SECRET: Assess your installation to see if there is waterproof paper around the valve repair. If you find that there’s paper, take care to leave it as intact as possible. |
Repair over mud bed
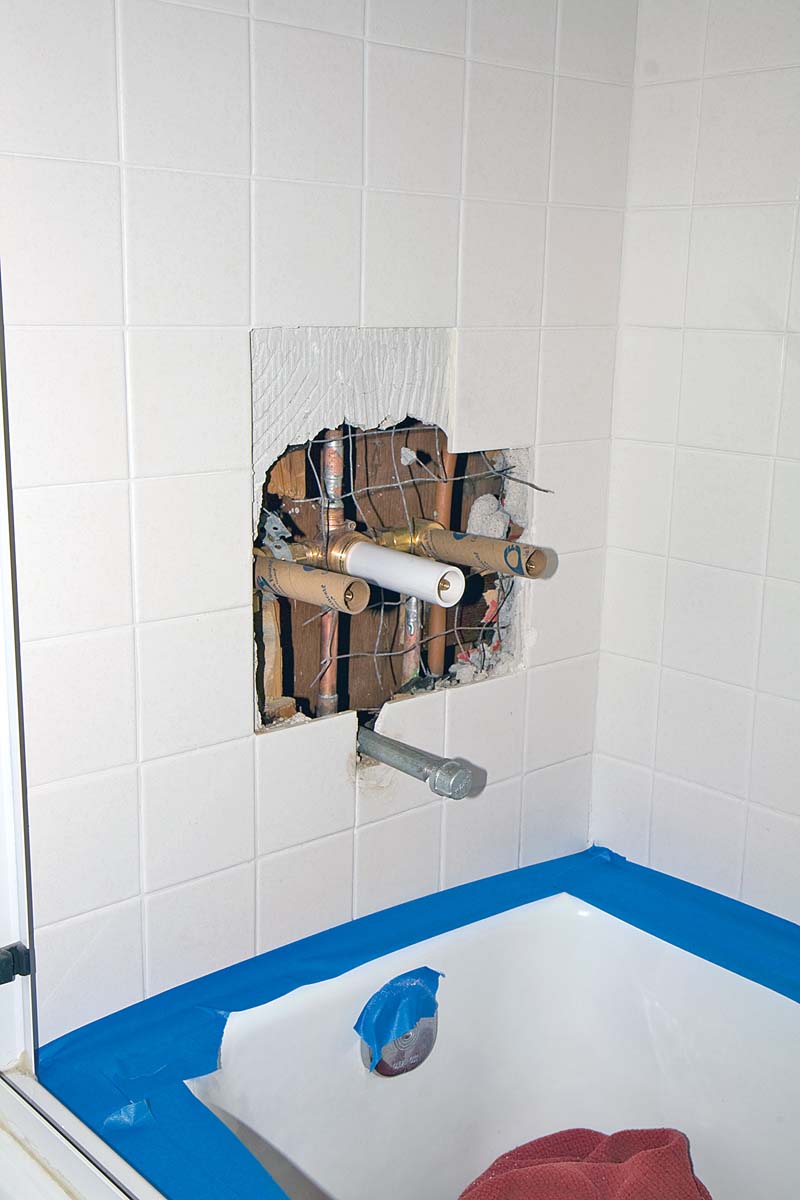
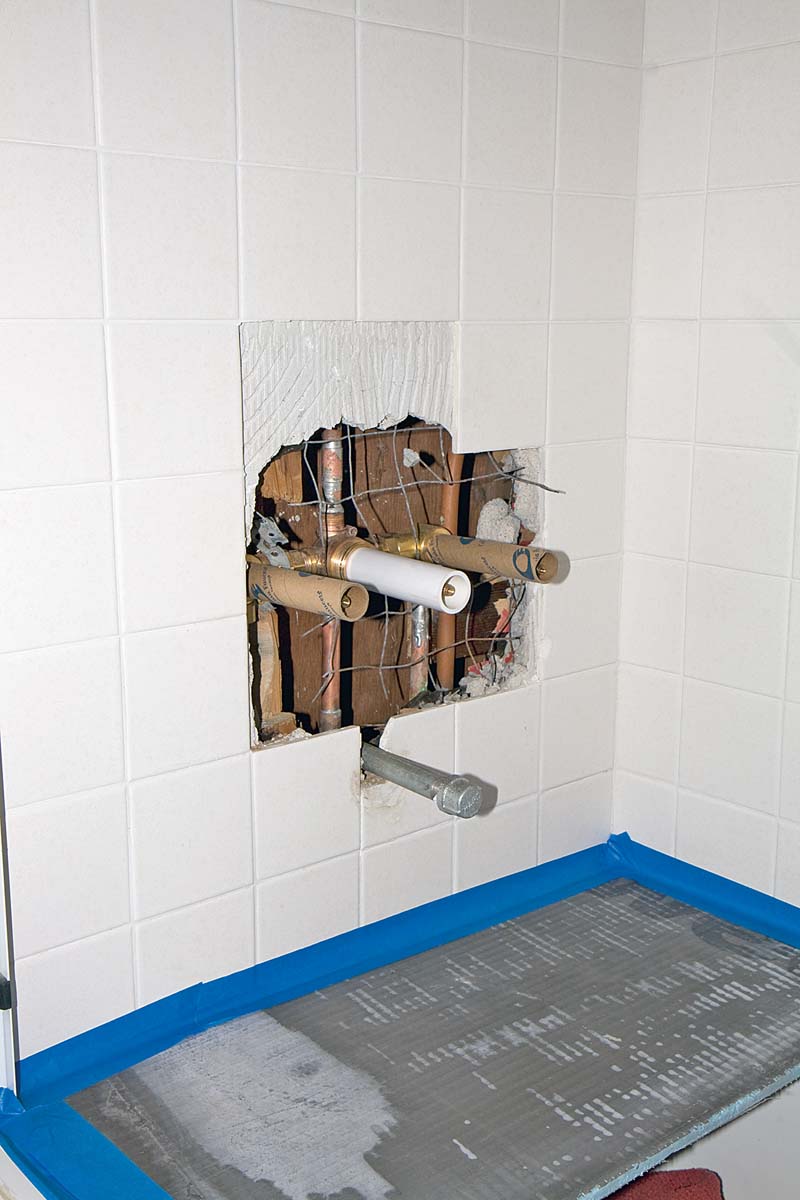
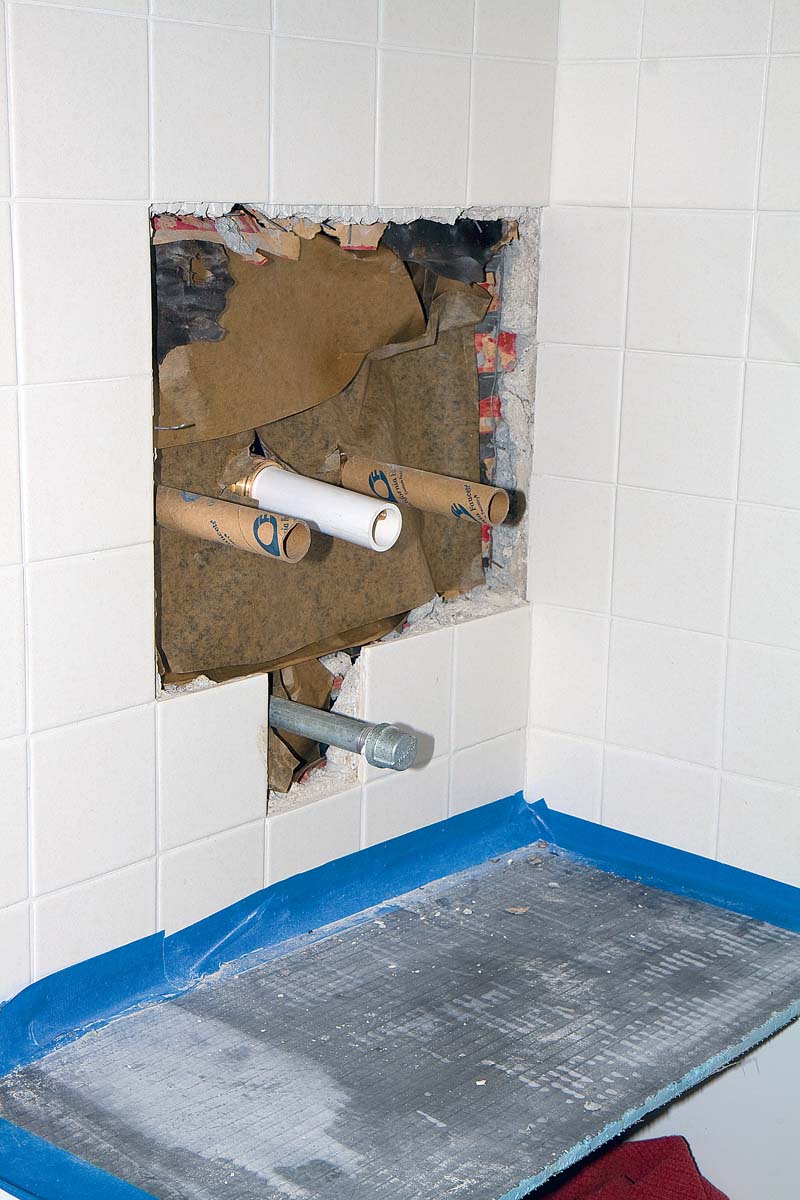
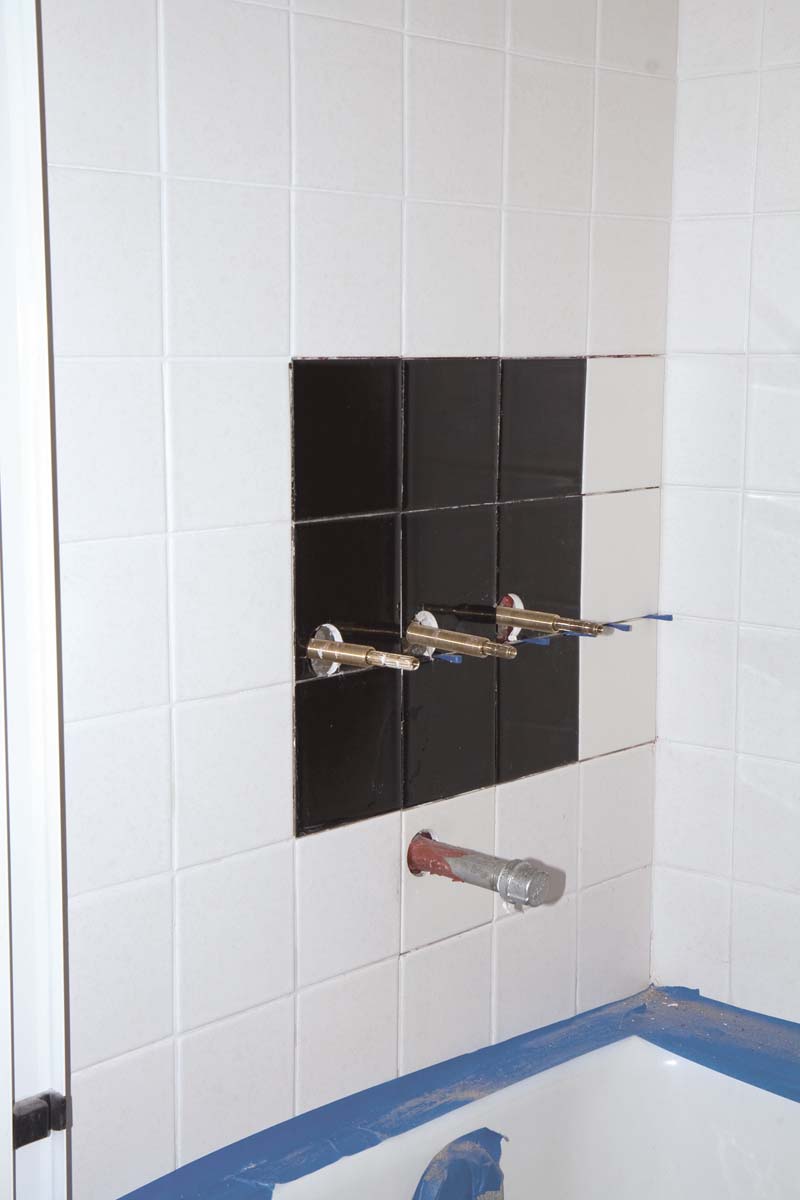
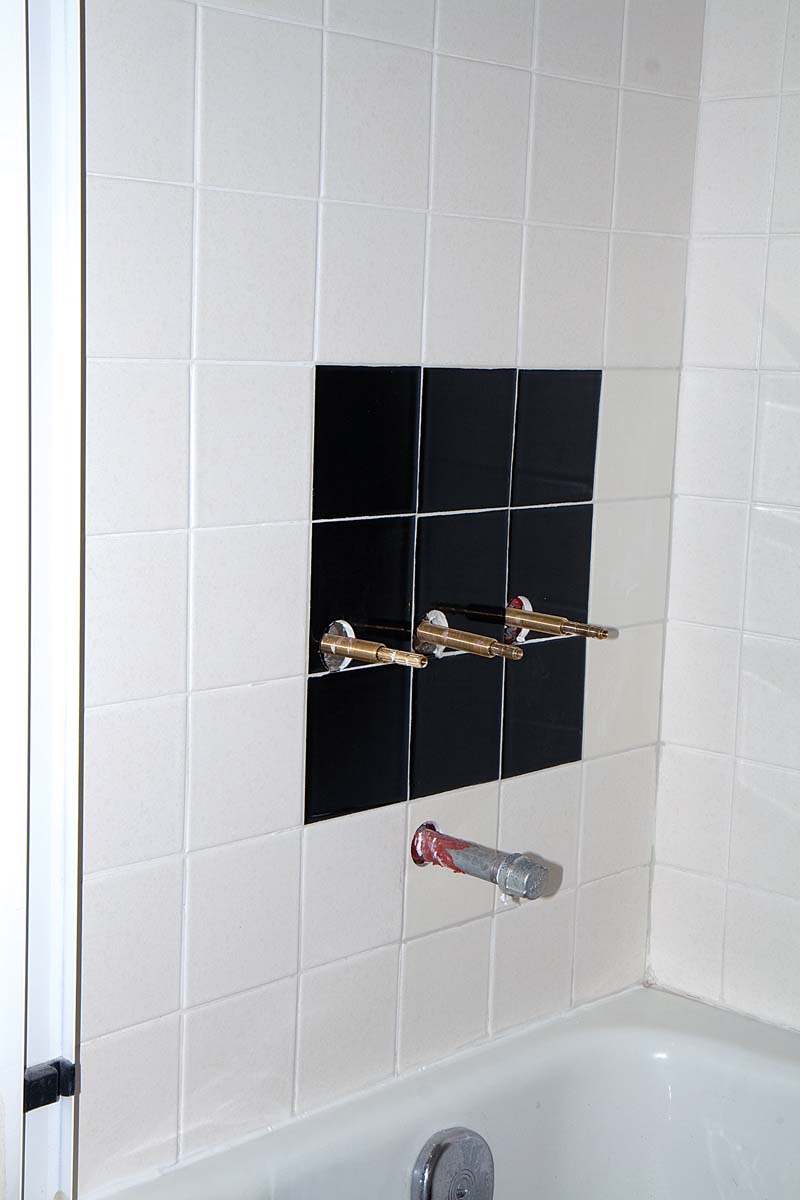
You need to protect the surrounding area before you begin to work 1. Tape off the top of the tub and cover the bottom with a blanket or drop cloth and/or work surface to protect the tub or shower floor from dirt, dust, water, and damage from a dropped tool 2. Protect the new valve stems with tape or cardboard sleeves.
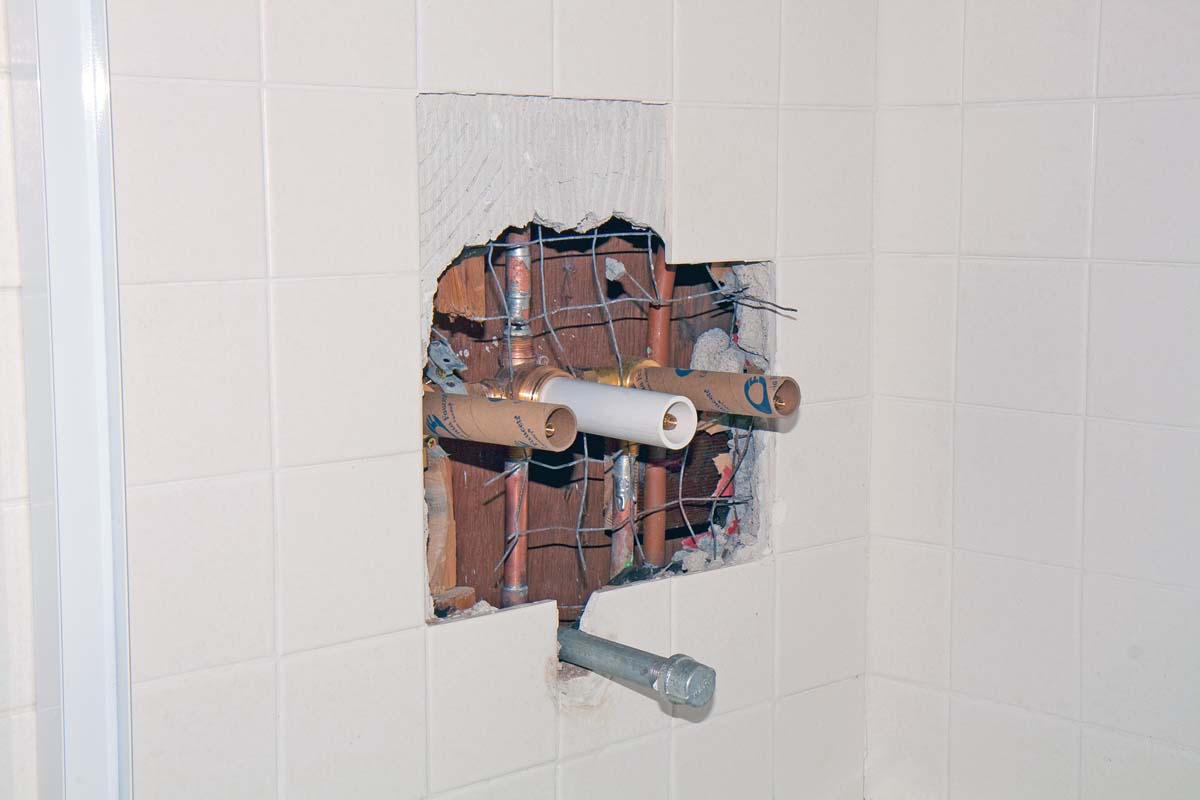
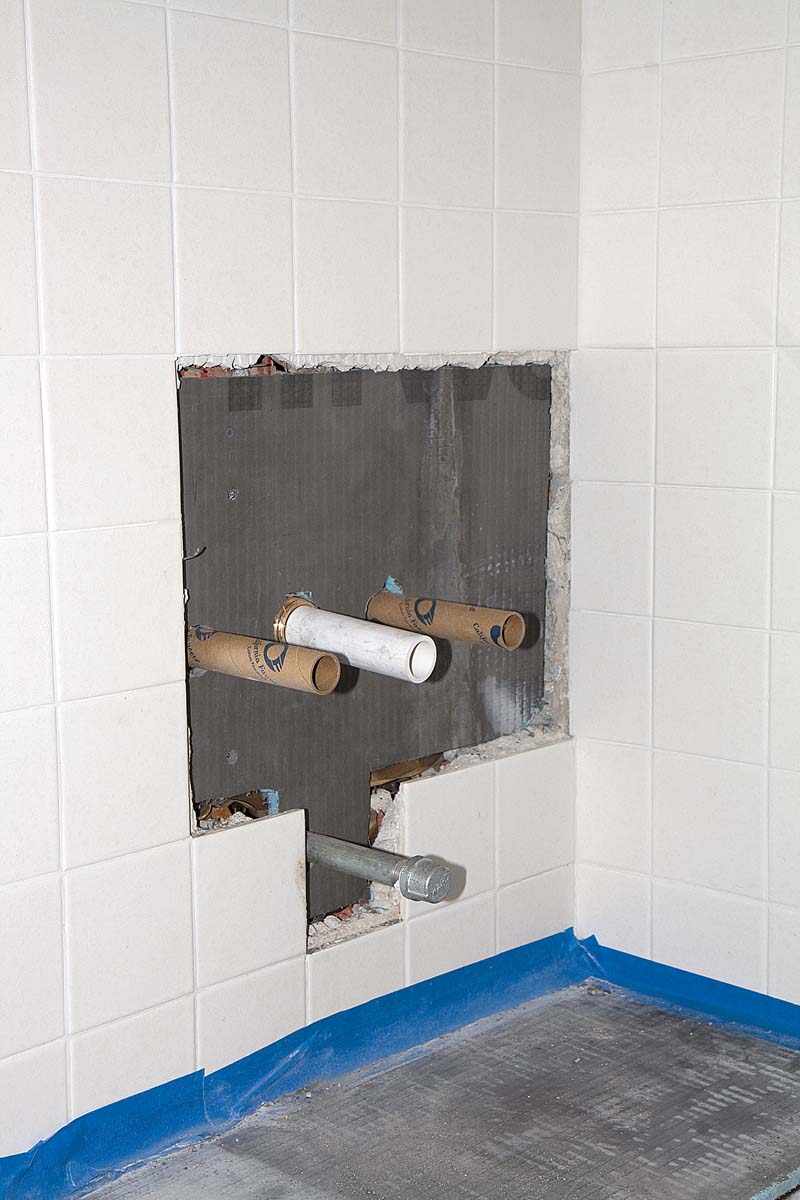
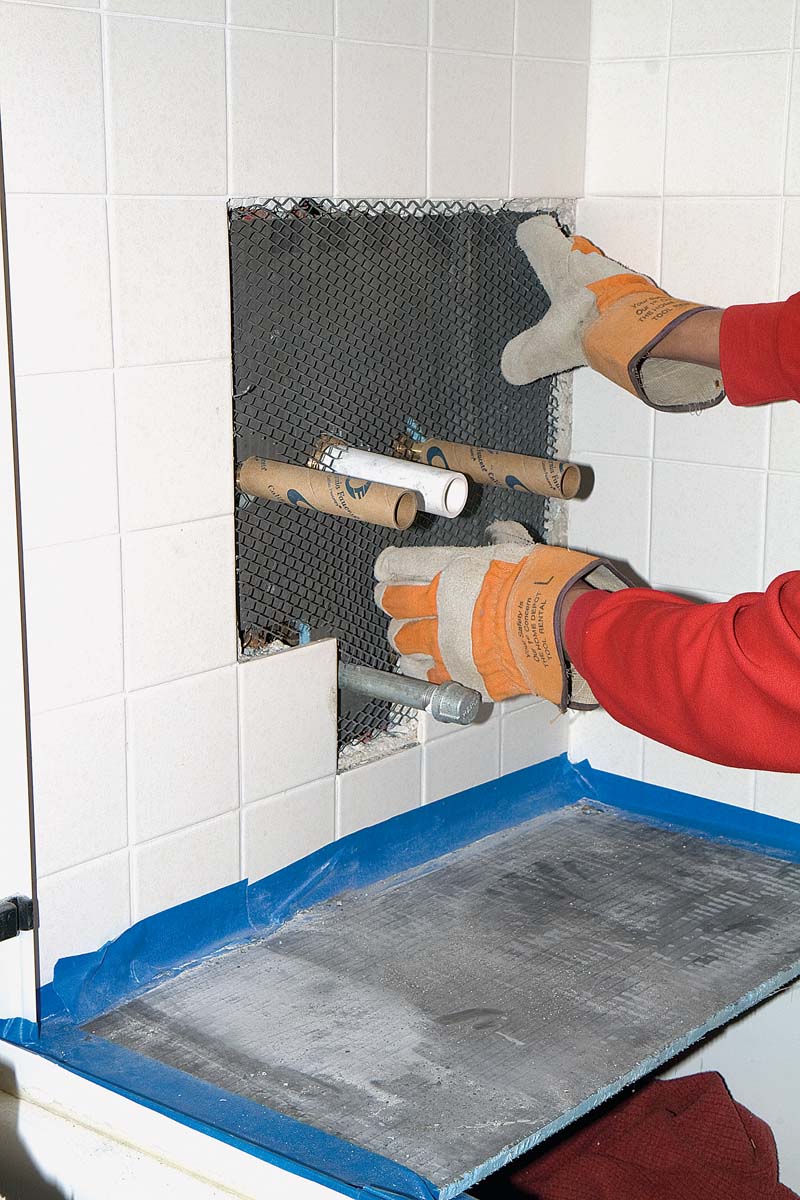
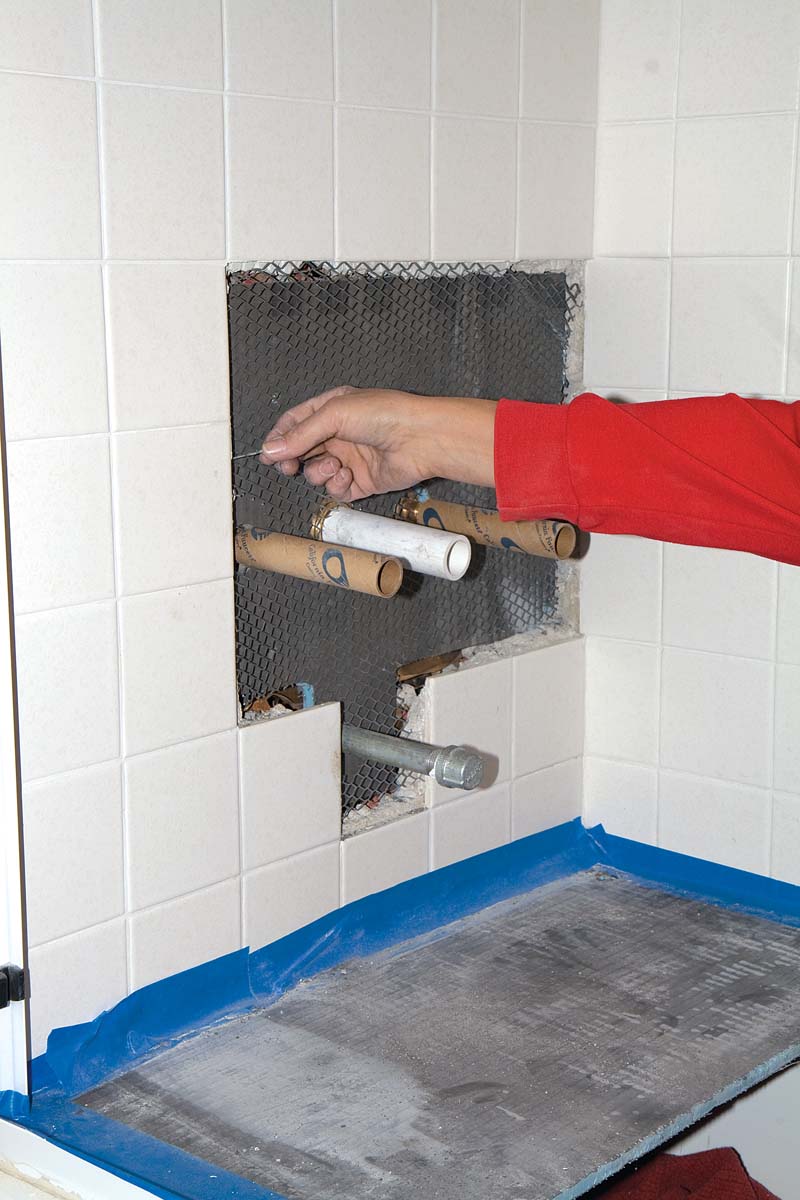
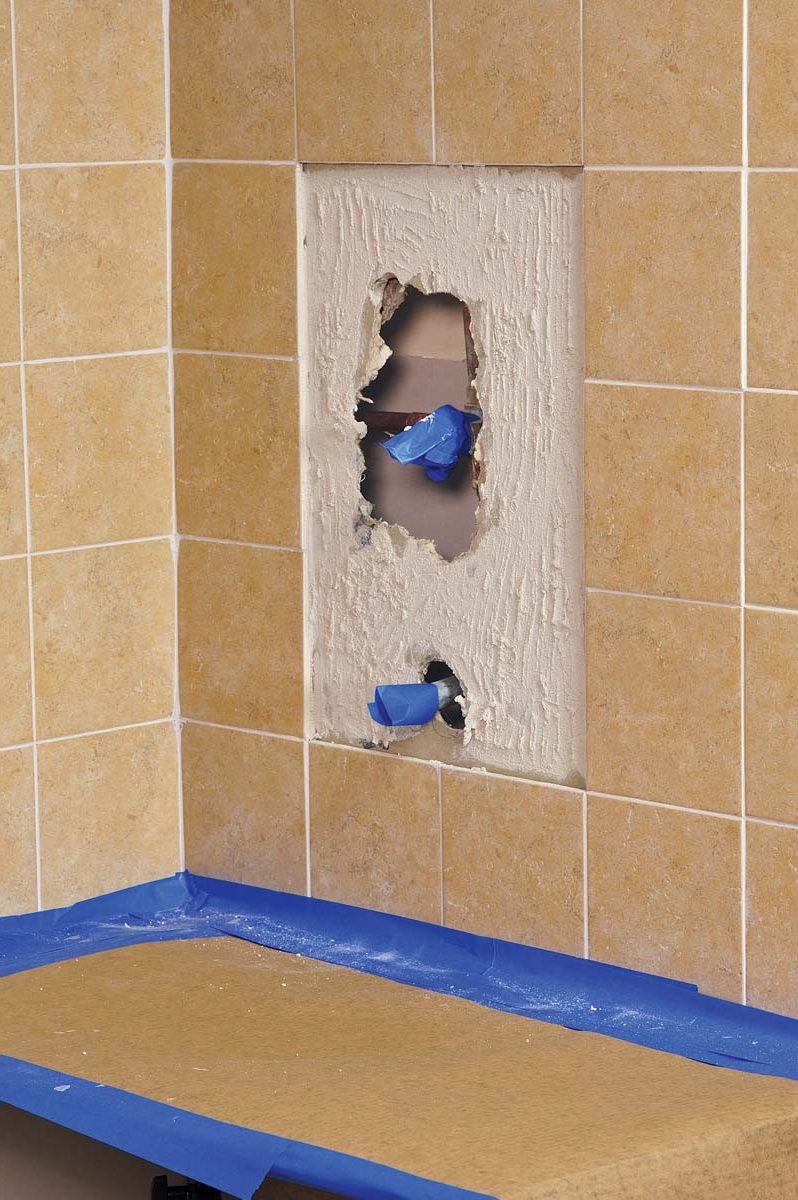
If there are additional chipped tiles to be removed, take care of those tiles first (being careful not to drill into any plumbing pipes) 3, 4, 5. Now, clip away any reinforcing wire, leaving about 1-1/2 in. around the perimeter for overlapping purposes 6. Once the area is clear, tuck waterproof paper under the paper at the top and over any paper at the bottom of the opening 7. Cut and install a piece of backerboard for backing 8. Cut a piece of reinforcing wire or metal lath to size and attach to the backerboard 9. Wrap the cut perimeter wires over the board 10.
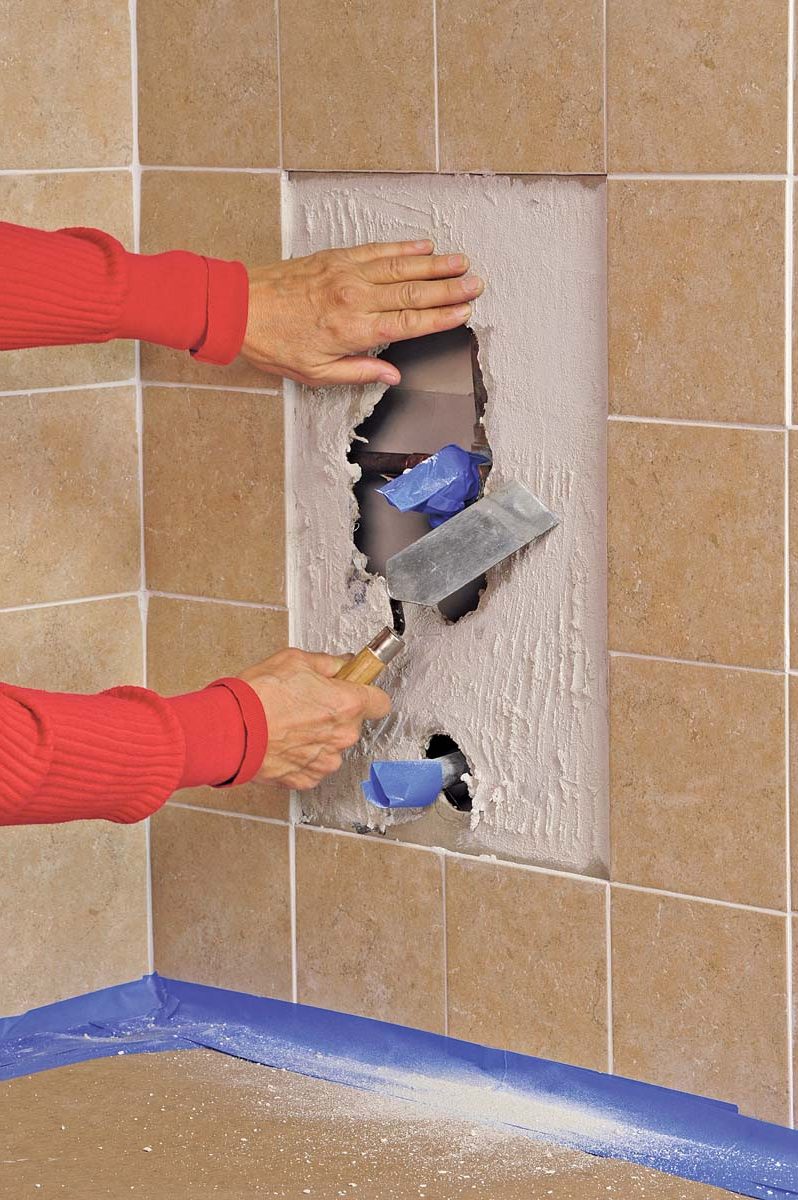
Mix a small amount of brick mortar mix and spread it over the entire area 11. Use a scrap piece of wood or backerboard to smooth the mud slightly below the existing mud bed 12. Hold a tile on the mortar near the existing wall tiles to check that you will have room for your new tile adhered with some thinset behind it. Let cure overnight.
The following day, brush a generous coating of antifracture/waterproofing membrane over the entire area of the repair 13. Allow to dry according to the manufacturer’s instructions.
Set your replacement tiles flush with the existing installation using modified thinset 14, grout, and allow appropriate curing time before you or your plumber set the finish plumbing 15, 16.
 |
1. Always protect the bottom and top of the tub before commencing work. |
 |
2. For the repair, a work surface will be helpful for protection. |
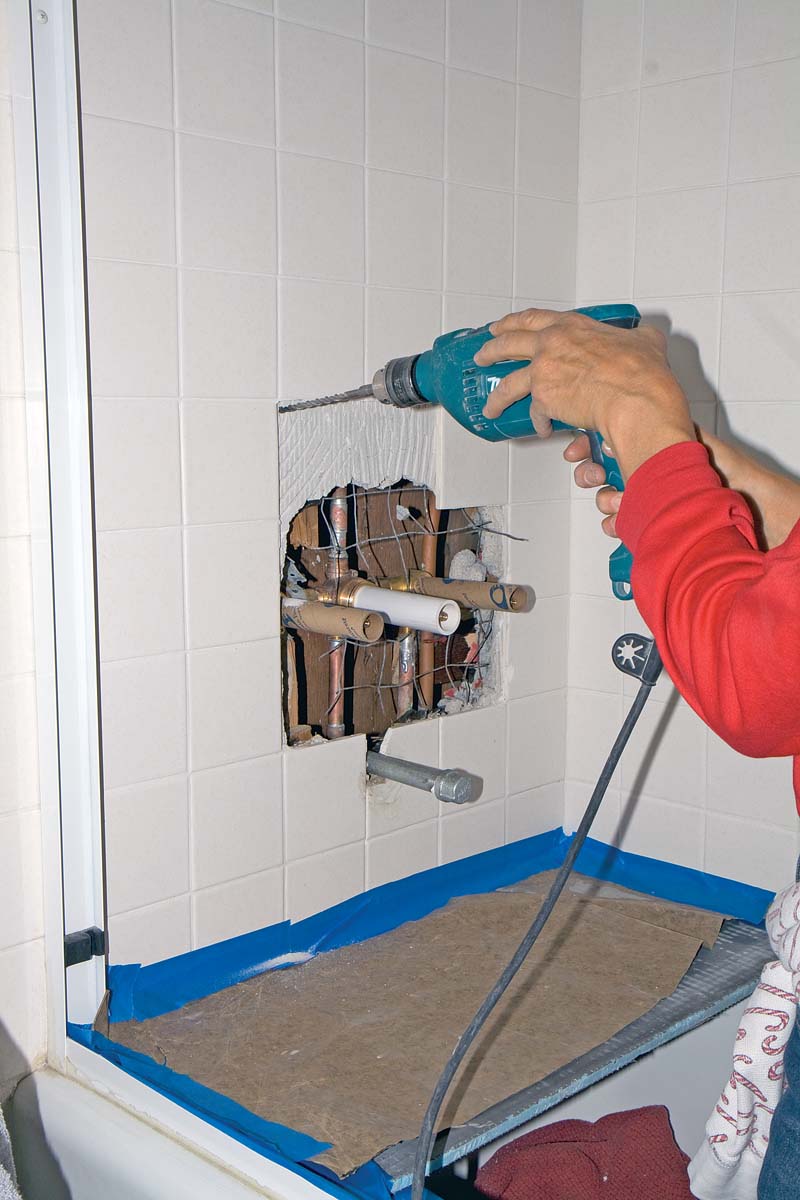 |
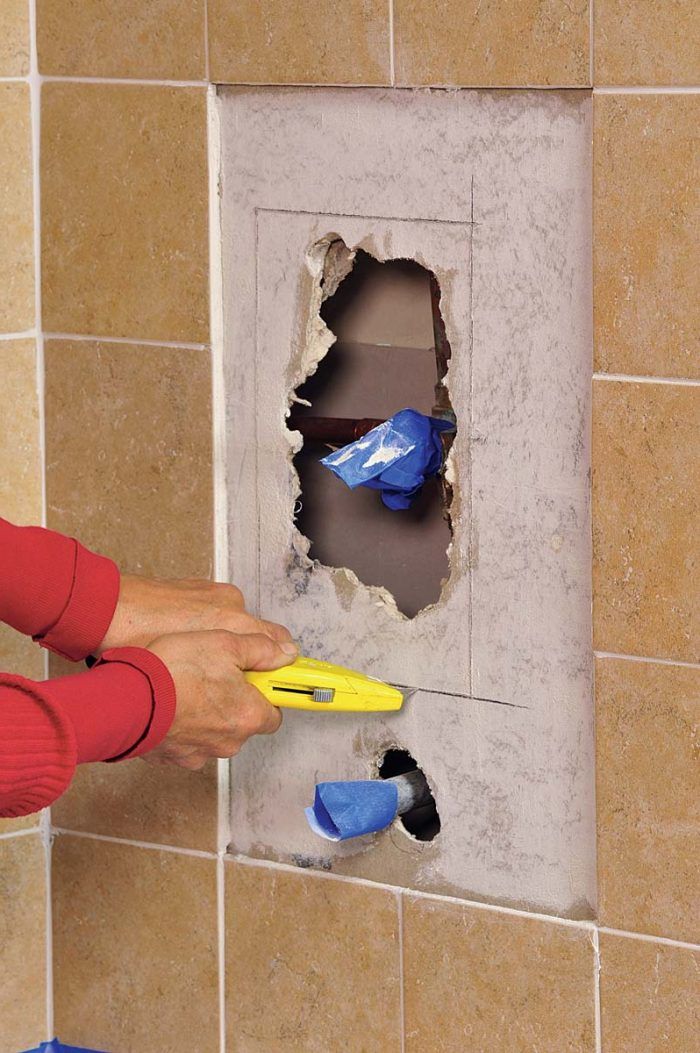
3. Drill through the old thinset and tile to get to the old mortar bed with as little impact on surrounding areas as possible. |
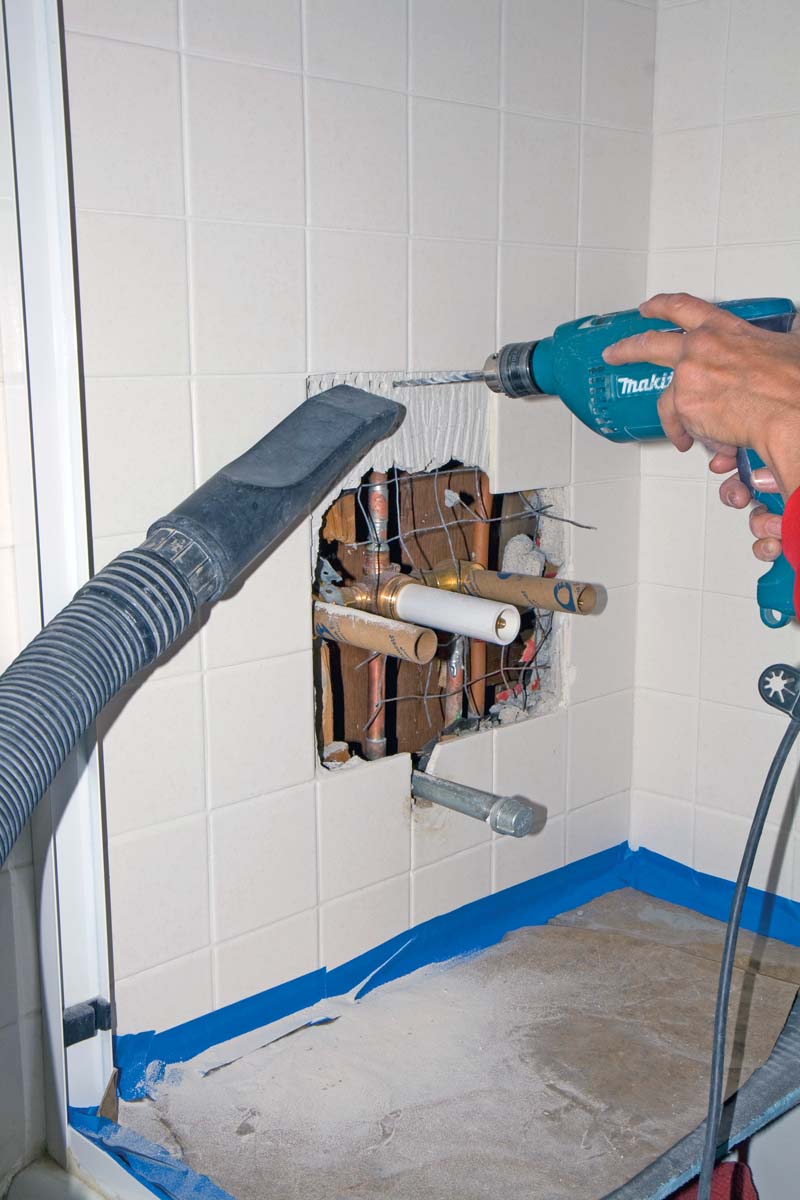 |
4. A vacuum will keep the dust at a minimum, but you may need an extra pair of hands to assist you. |
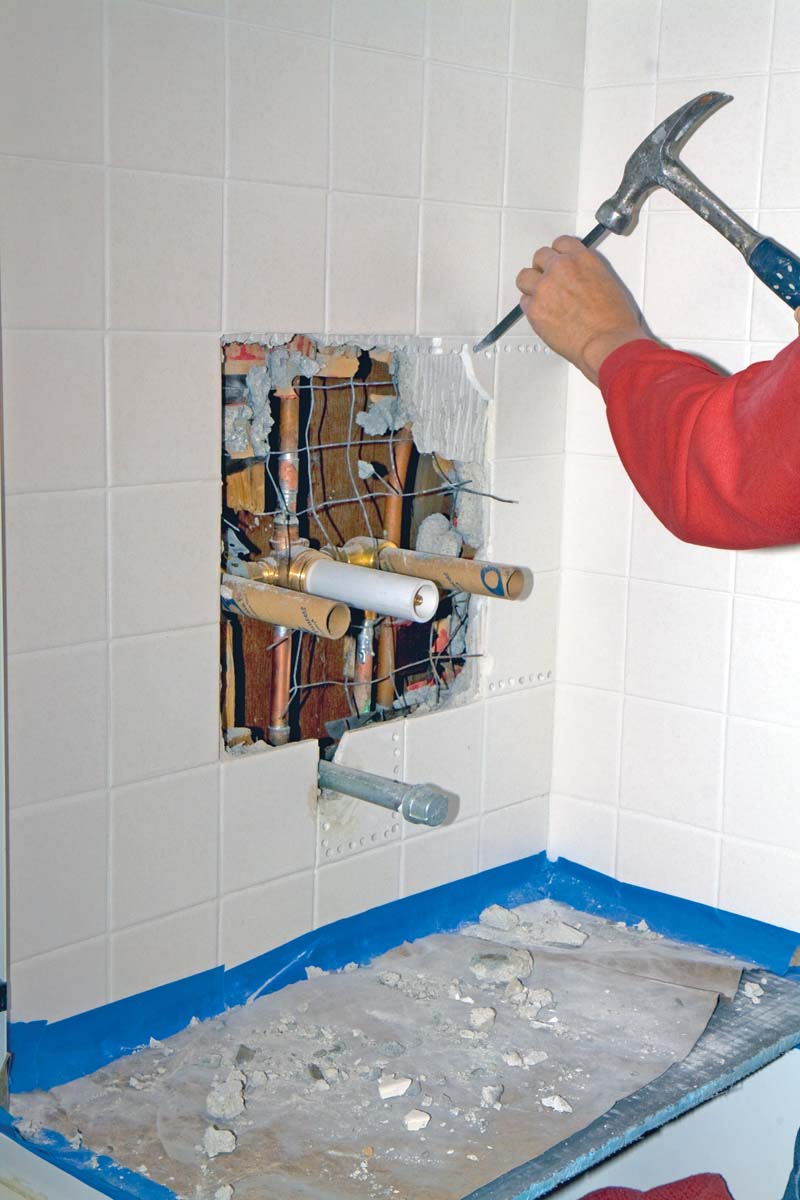 |
5. Use a hammer and chisel with care to remove the remaining tiles and mortar bed for the repair. |
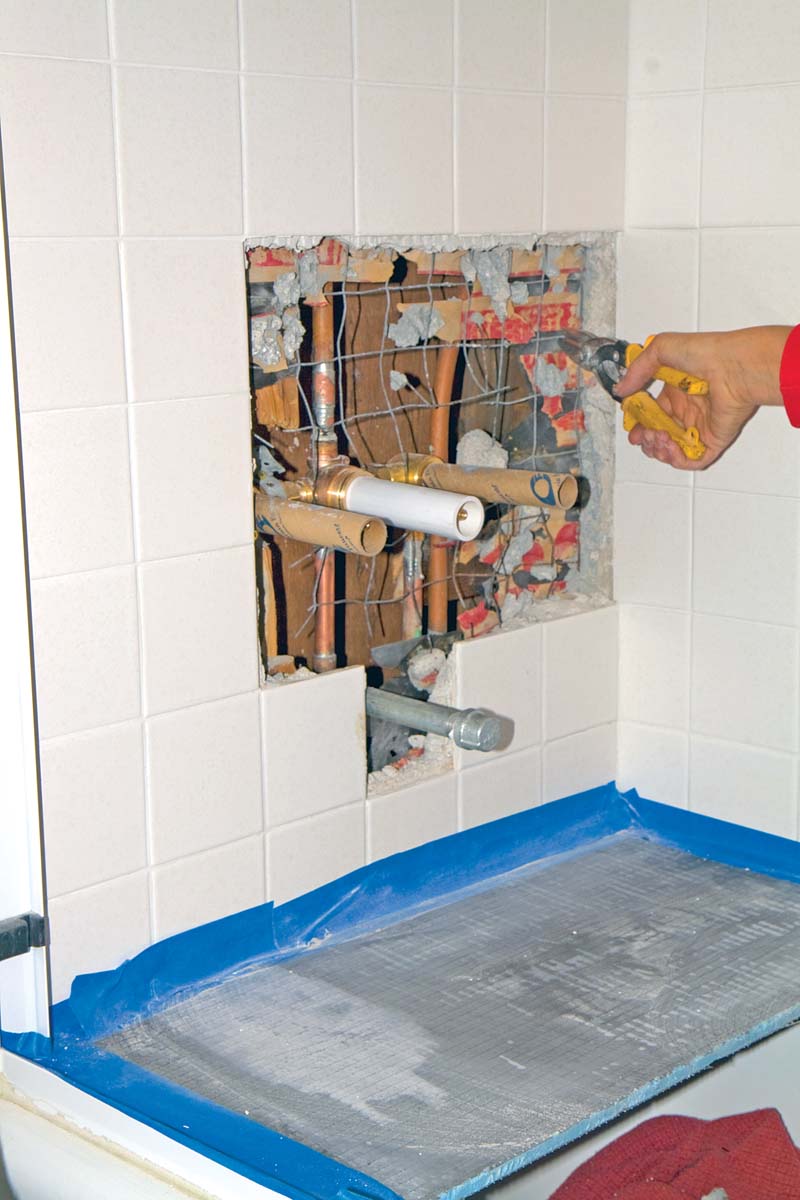 |
6. Cut any wire or lath but leave 1-1/2 in. to lap over your new wire reinforcing for your mortar bed. |
 |
7. Overlap the existing waterproof paper with new waterproof paper, from bottom to top. |
 |
8. Fit and screw your backerboard into place. |
 |
9. Cut and fit reinforcing wire to lay over the backerboard. |
 |
10. Bend the old reinforcing wire over the new lath or wire. |
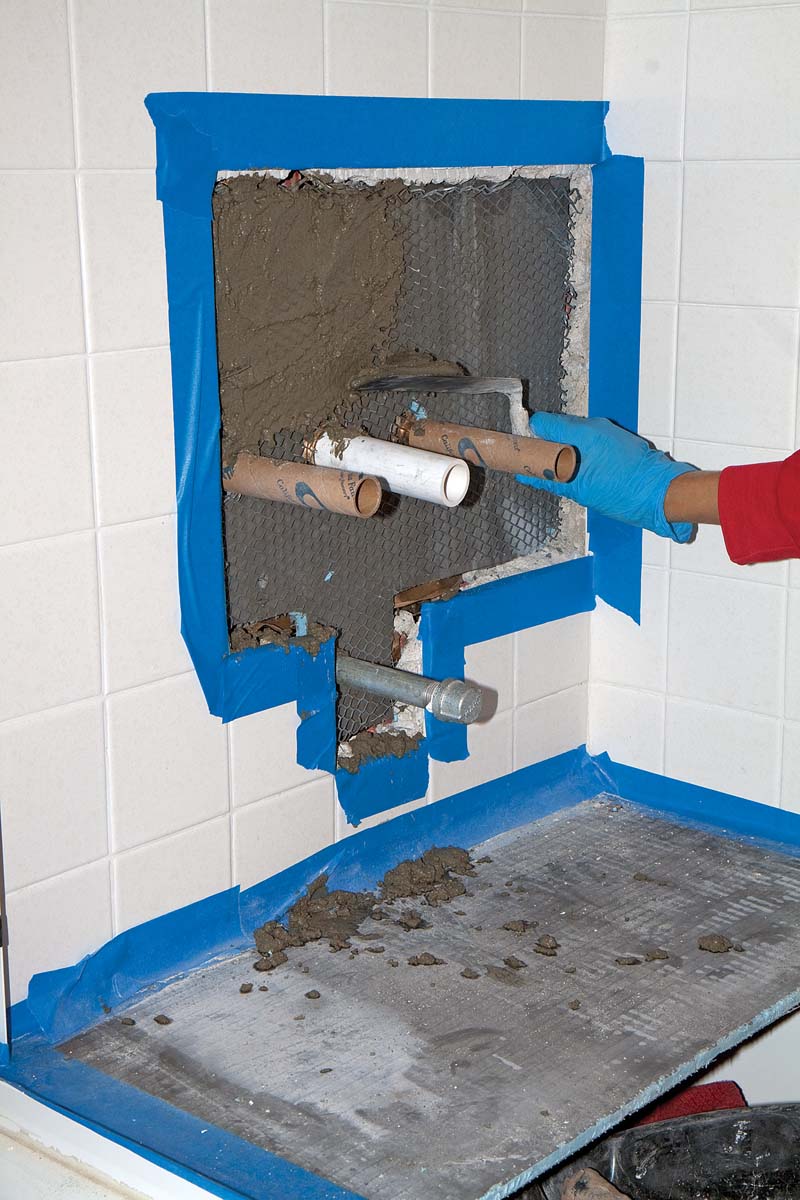 |
11. Apply mortar until the wire is completely covered. |
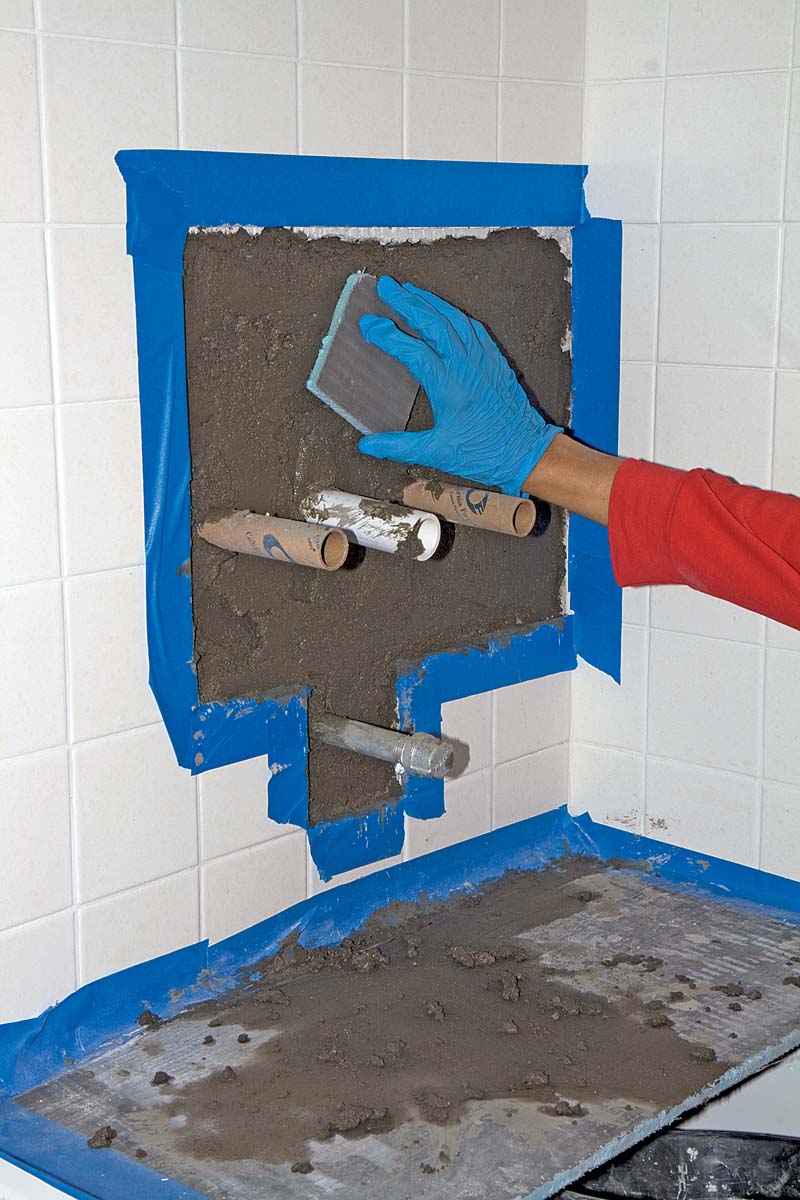 |
12. Use a scrap piece of board or other material to smooth out the mortar. |
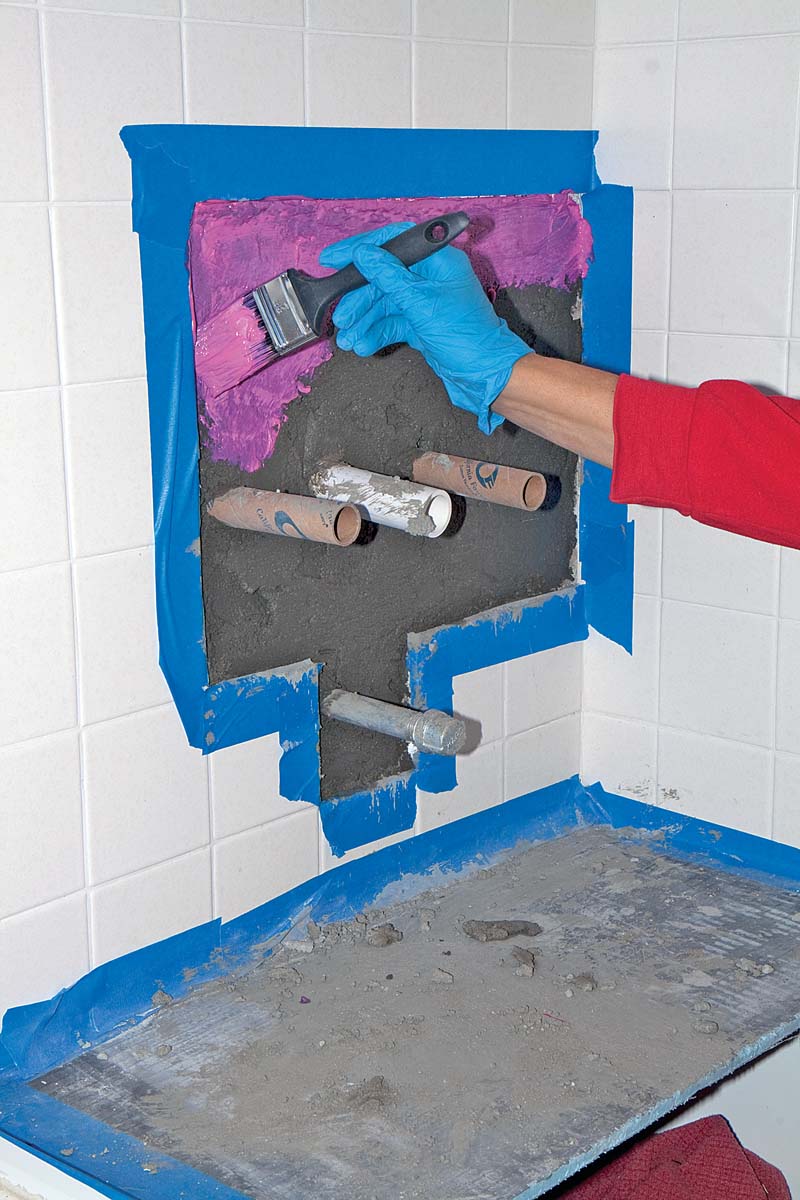 |
13. For further protection, apply a waterproof membrane with a brush. |
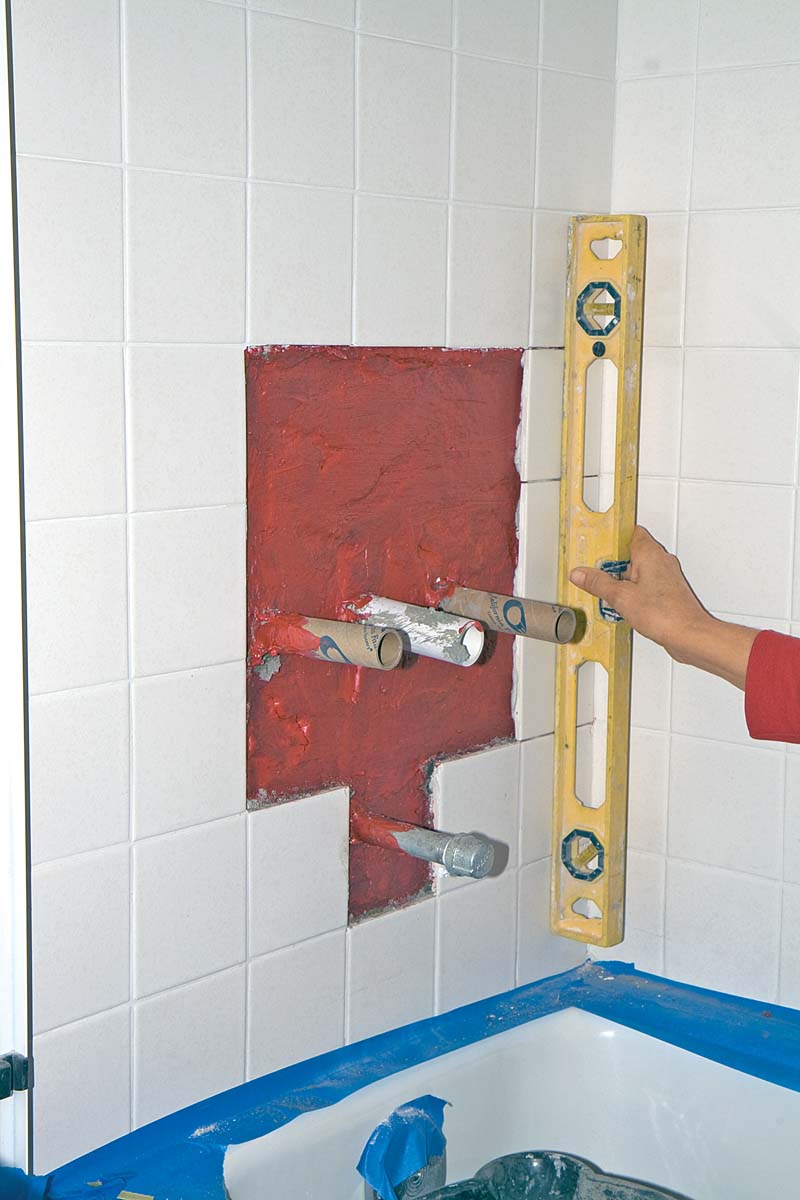 |
14 After the membrane has cured, lay tiles and use a level to ensure that they are even with existing areas. |
 |
15. Drill holes for the valves and then set the replacement tiles. |
 |
16. The repair is grouted and finished. |
Repair over backerboard
If you’re making a repair over tile set on backerboard, protect the area and remove any chipped tiles as you did for the repair over mud 1. Scrape or chip off residual thinset from the existing backerboard 2. With a small level, mark out a rectangle or square on the backerboard just beyond the damaged area 3. Cut to these lines by scoring, then cutting with a utility knife, and remove any additional board with tile nippers 4, 5. Screw in blocking to reinforce and bolster the repair piece 6. Cut the repair piece to size, slightly smaller than the opening you just created, and screw it in place 7, 8.
Caulk generously around the perimeter of the patch, then flatten and allow drying time 9. Add fiberglass mesh at the seams to reinforce the repair and coat with antifracture/waterproofing membrane 10, 11. Set the replacement tiles with modified thinset, checking that they lay as flat as possible to the existing installation. Grout and allow to cure before setting your finish plumbing.
 |
1. Tape and protect the new valve and the surrounding work area. |
 |
2. Scrape the old thinset off the backerboard with the flat edge of your margin trowel. |
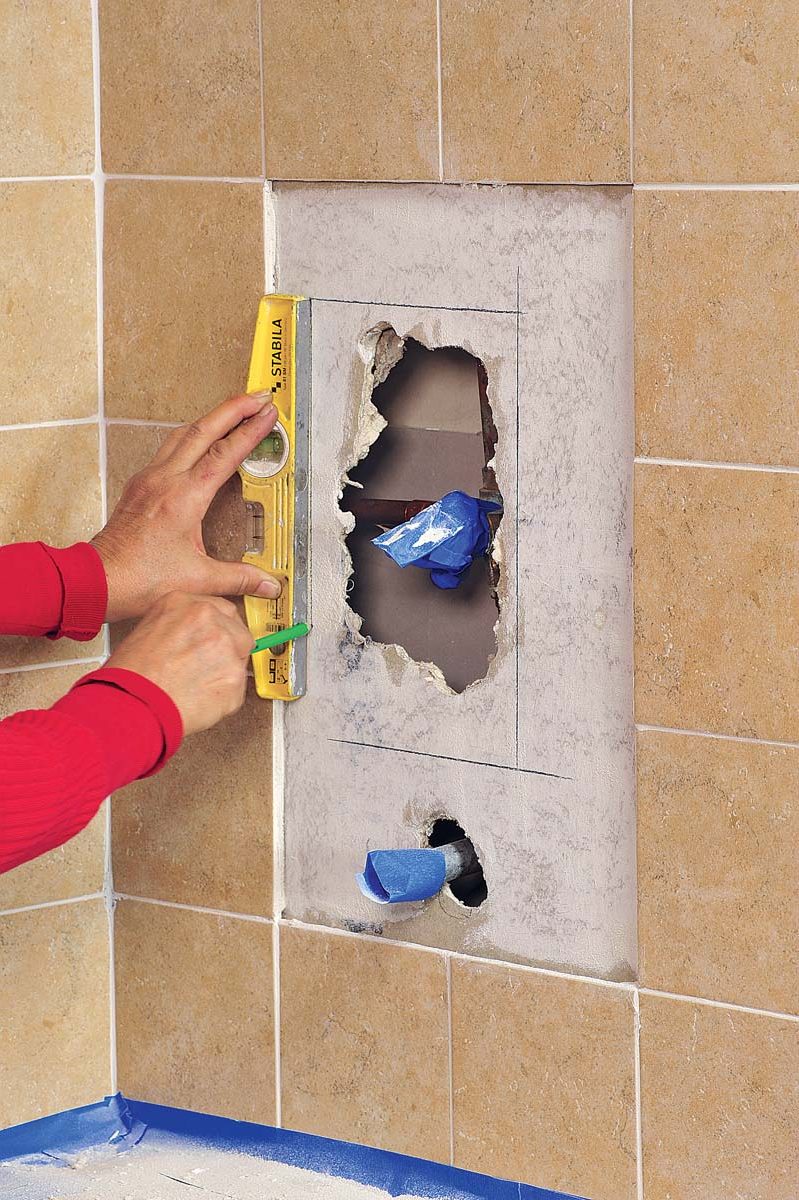 |
3. Mark out plumb and level lines around the damaged area that will be replaced. |
 |
4. Use a utility knife to score along the marked lines. |
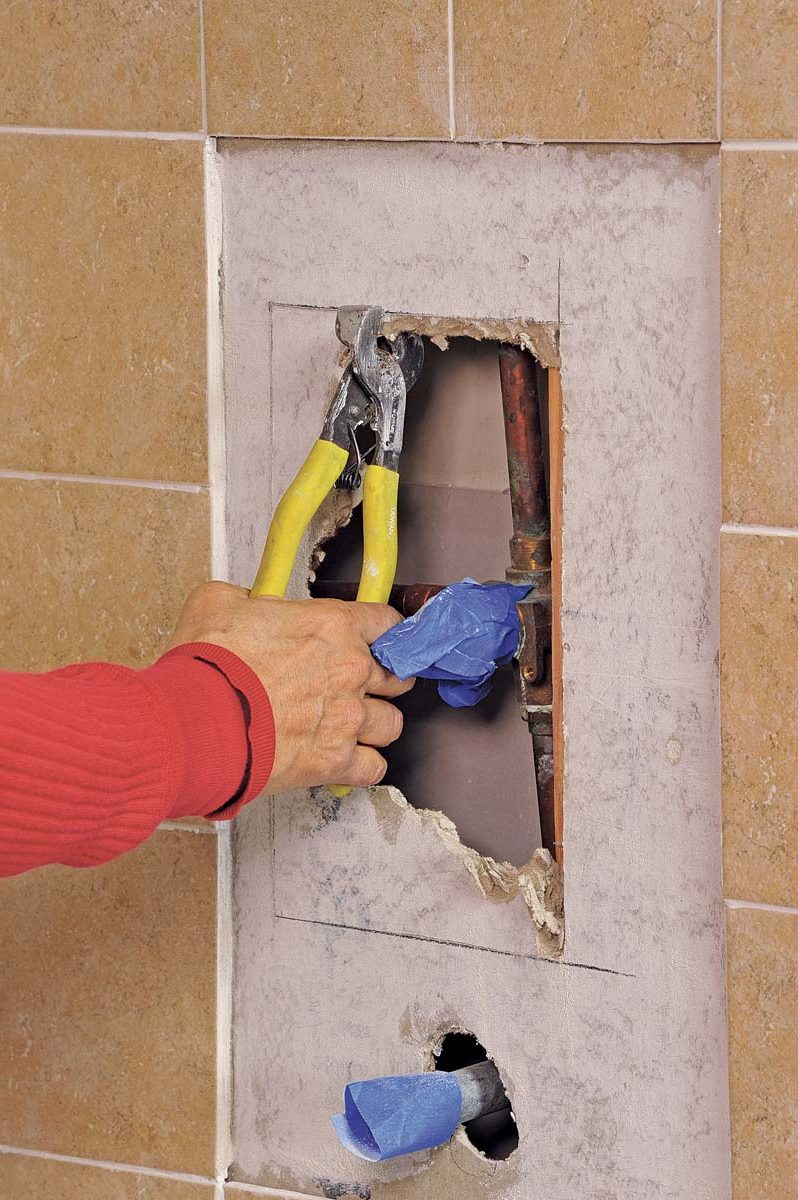 |
5. Tile nippers come in handy in these awkward places to remove the backerboard up to your lines. |
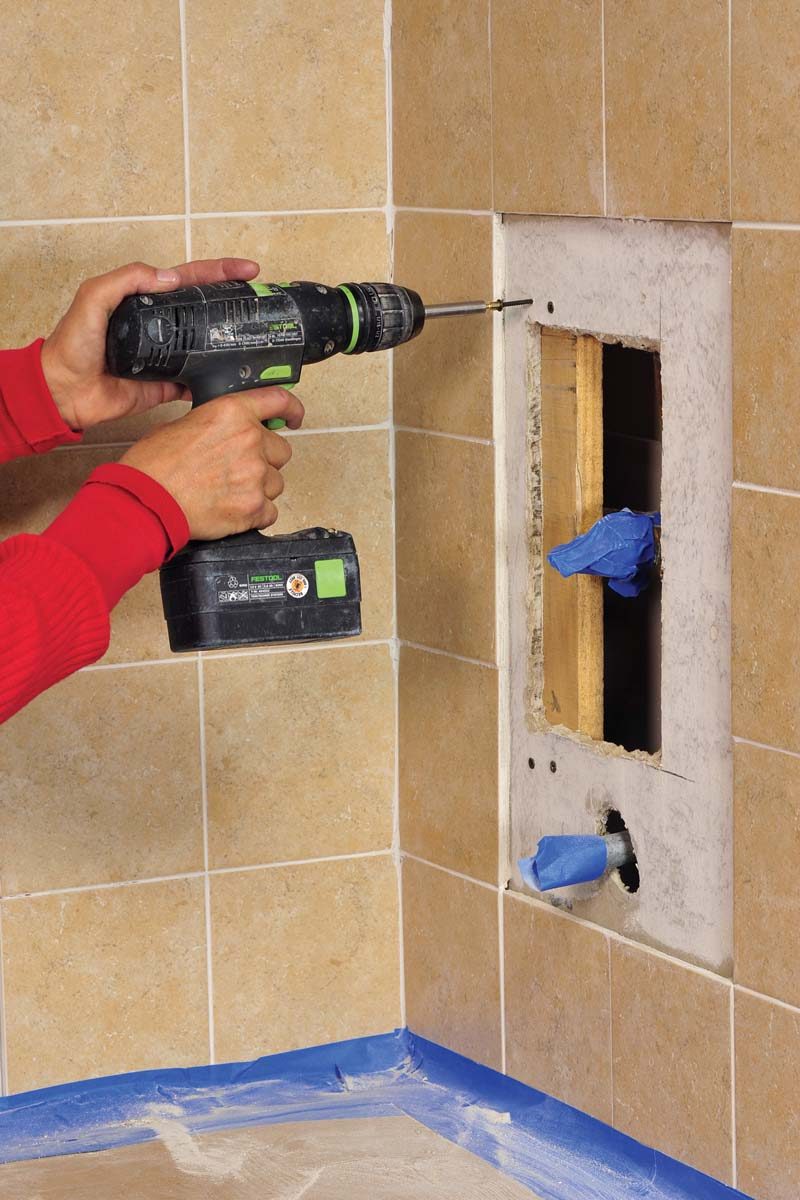 |
6. Drill screws through the existing backerboard to mount a support piece of wood. |
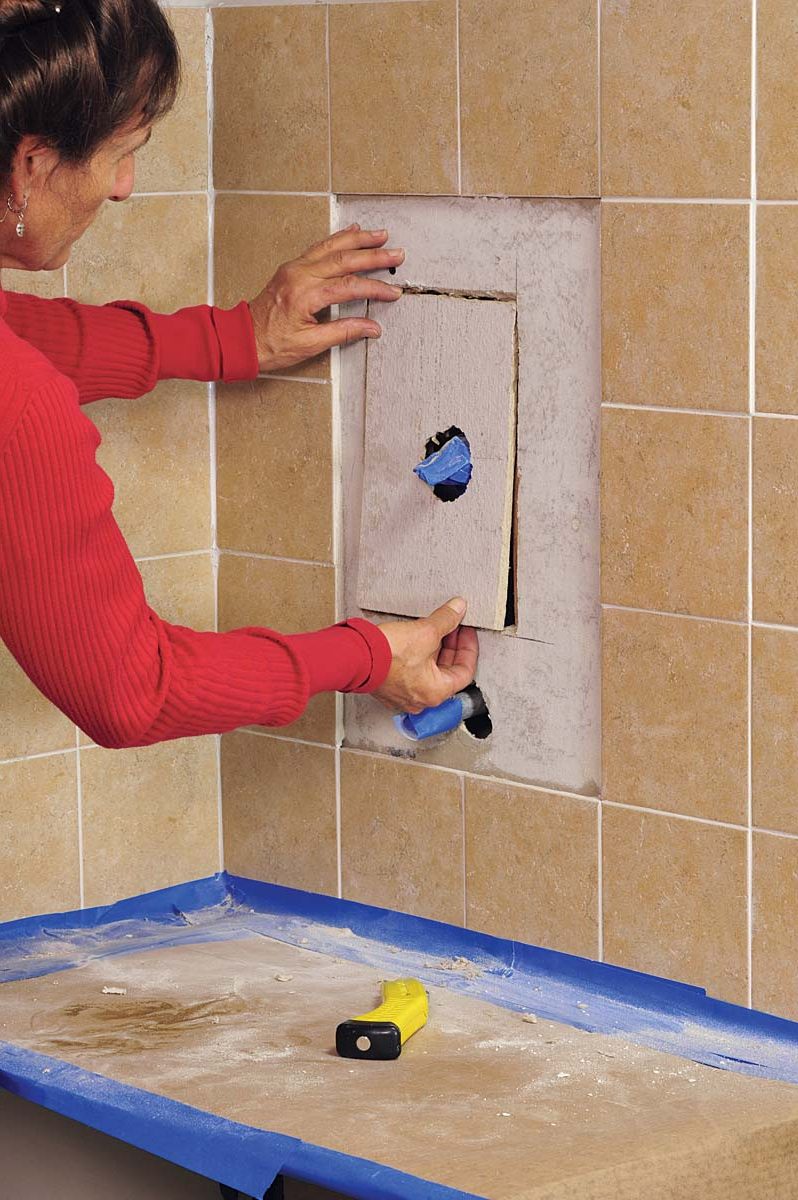 |
7. Cut the replacement piece of backerboard and set it in place. |
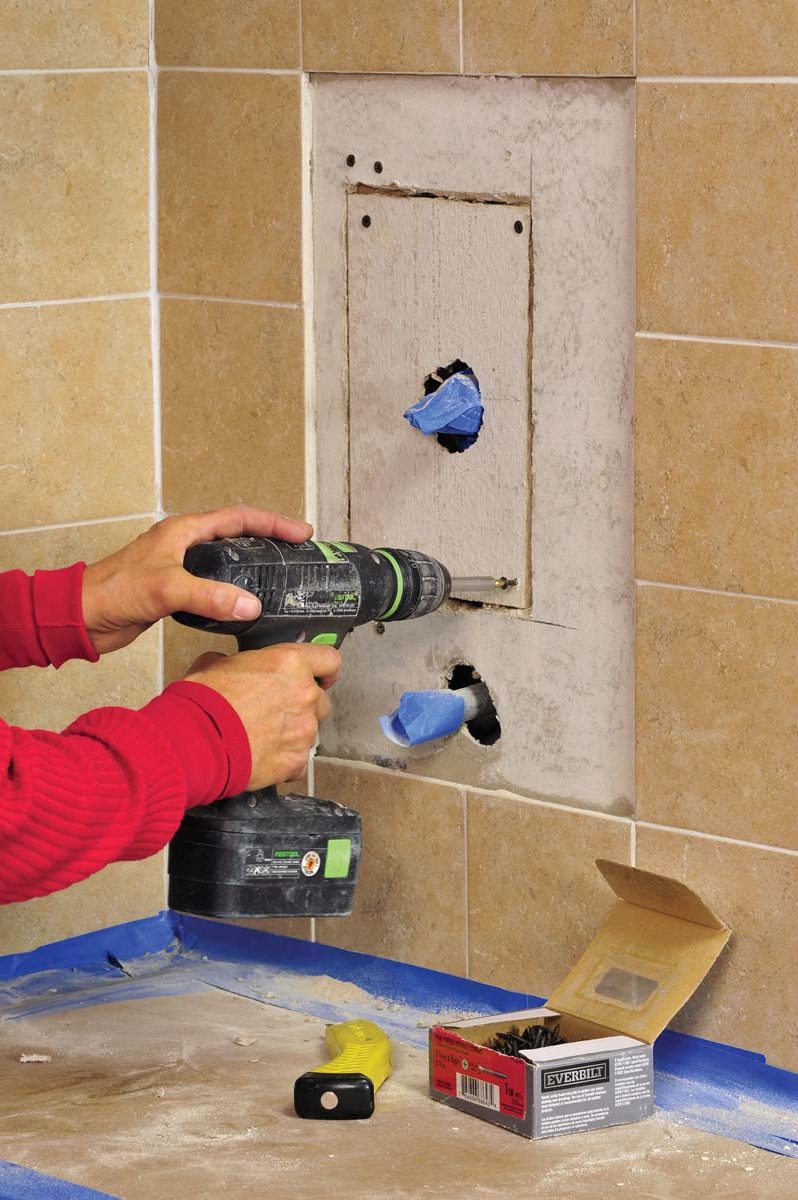 |
8. Screw the board into the support piece (left) and an available stud (right). |
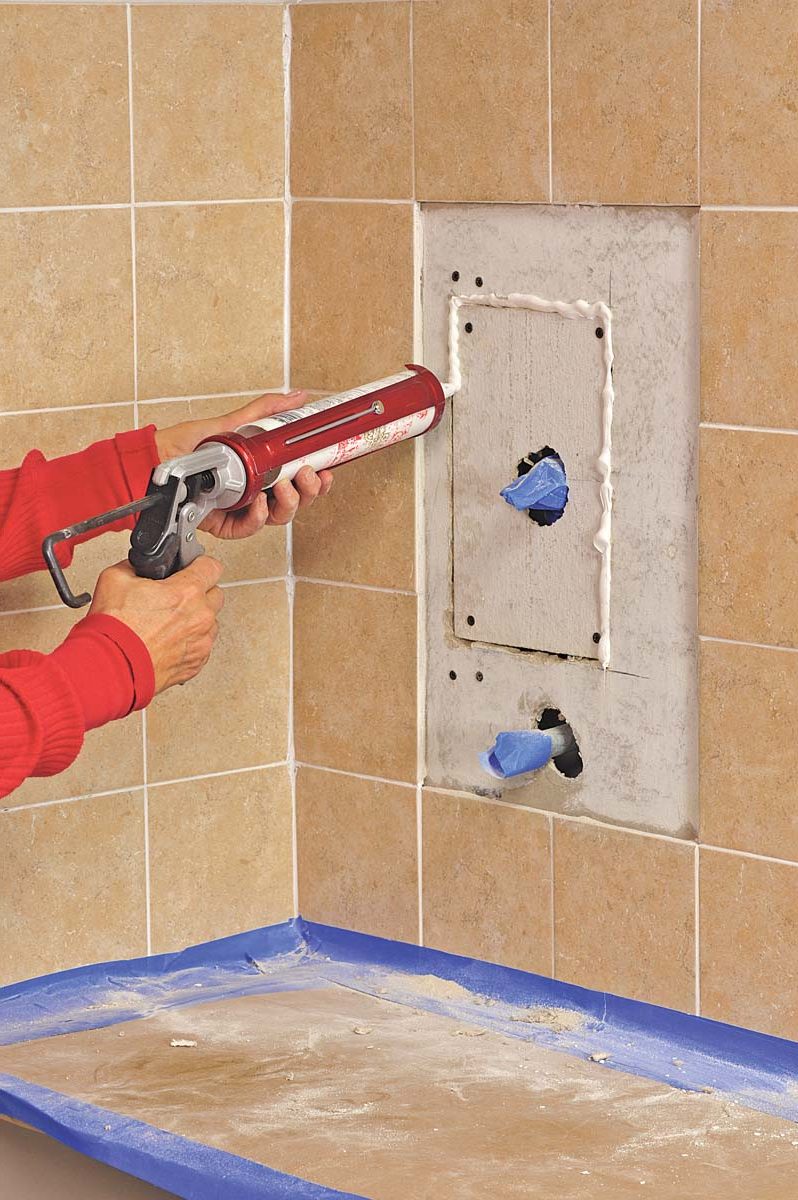 |
9. Force caulk into the gaps, smooth even with the surface, and allow to dry. |
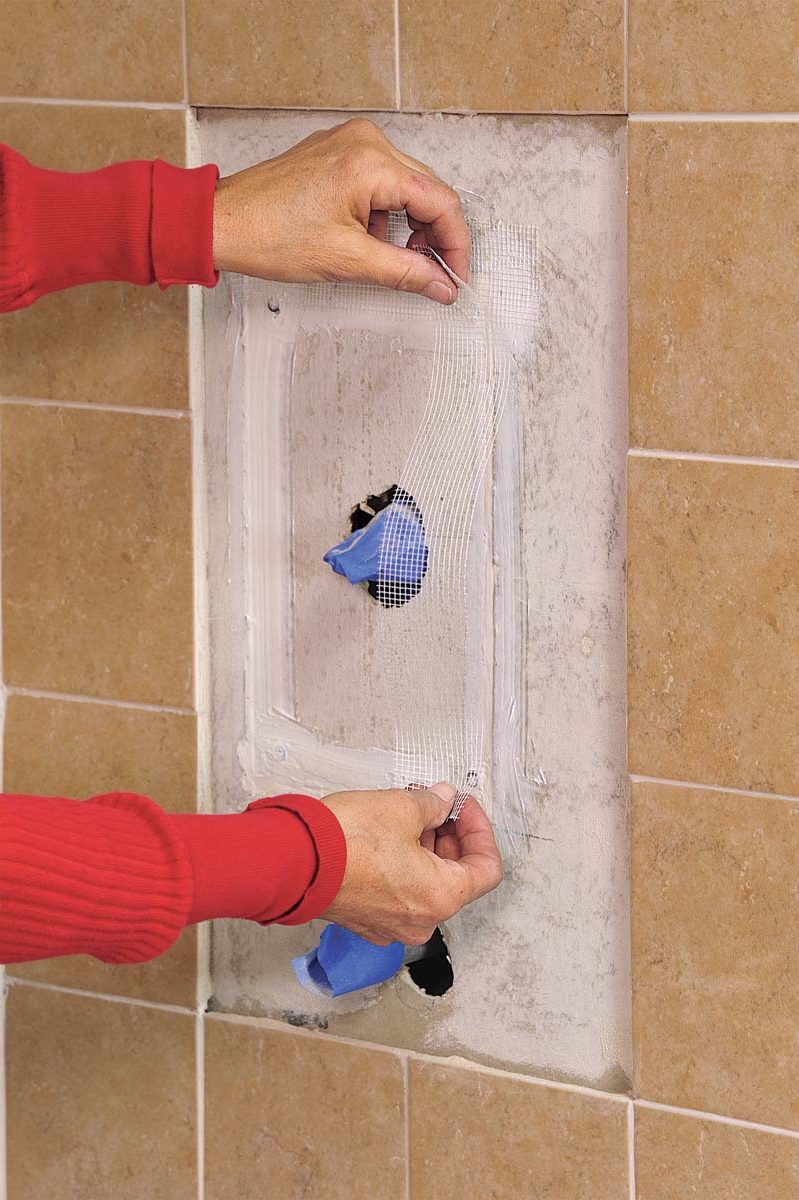 |
10. Place fiberglass mesh over the seams to increase the strength of the repair. |
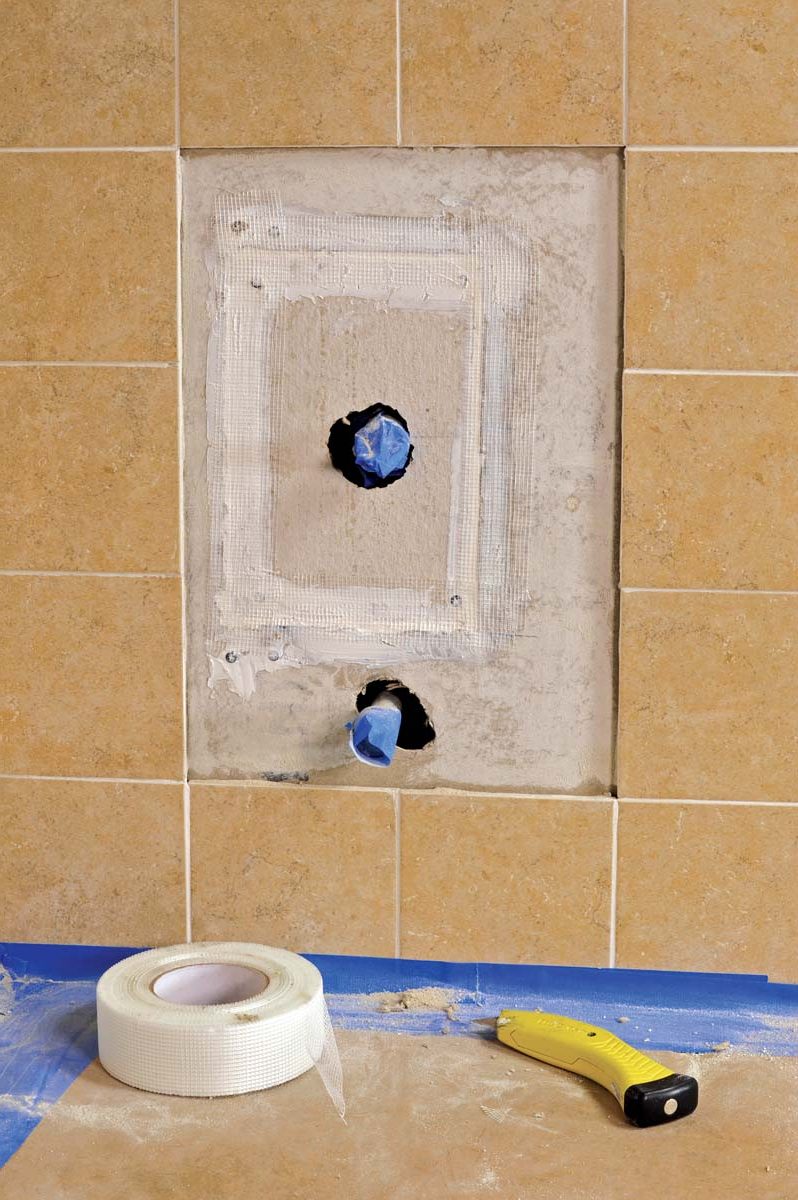 |
11. The repair is now ready for waterproofing, setting tile, and grouting. |
 Excerpted from Tiling Complete, 2nd Edition by Robin Nicholas and Michael Schweit.
Available in the Taunton Store and at Amazon.com.

