
Step-by-Step Ridge Vent Installation Instructions
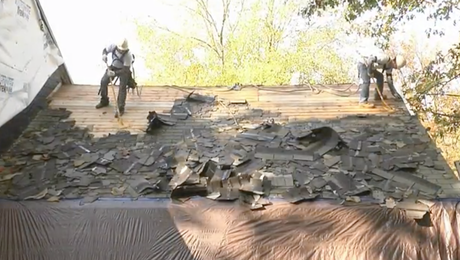
The last phase of this project includes cutting through the sheathing at the ridge, fastening down vent material, and nailing down roof-cap shingles.

Ridge vent installation is used to provide cooling along the entire roof deck. Installation is performed from end-to-end and has a low profile to keep the home aesthetically pleasing. A ridge vent installation project will either involve a metal ridge vent or shingle-over vents.
Video Transcript
Narrator: Before the ridge vent installation begins, the crew installs pieces of peel-and-stick membrane to patch under the existing felt paper on the adjacent wall. Then, they lap the peel-and-stick, existing felt, and new housewrap over the step and kick-out flashings so that any water hitting the wall is directed onto the roof instead of behind the flashing.
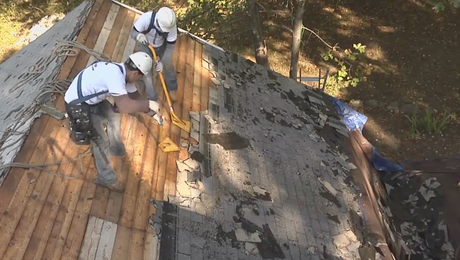
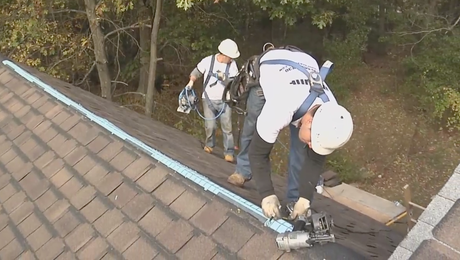
To begin the ridge vent installation, they measure down 3 inches from the top of the ridge and snap a line to cut the opening for the ridge vent. Using a circular saw with a carbide-tip blade, one of the roofers plunges the saw into the ridge at the ends and then follows the chalk line. He stops the cut 6 inches short of the roof edge, as recommended by the ridge-vent manufacturer’s instructions. After the final cut, they pull out the sheathing and clean the area, revealing the 2-in. wide air space on both sides of the ridge.
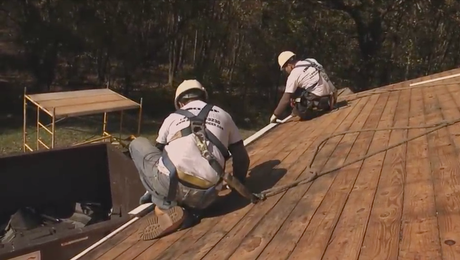
Now they are ready for the ridge vent.The fiberous material allows hot air to escape the attic and prevents water and insects from getting in. They install it by tacking one end, rolling it out, and centering it on the ridge. Then they nail it along the edge every 6 to 10 inches. When ridge vent installation is performed correctly, the vent increases the home’s energy efficiency and extends the life of the roof.
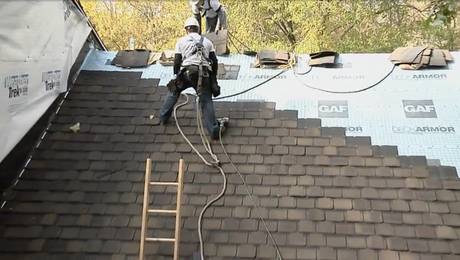
The next step is to cap the ridge. The ridge cap used on this roof comes in 3-ft. shingles which are perforated to be broken into 12-in. squares. Ridge caps should be oriented to face away from prevailing winds. That puts our first cap against the side of the house. They seal the first one with a generous application of roof cement and nail it down. They continue lapping subsequent shingles as they work their way across the ridge. Each cap gets 2 nails per side. These particular caps have an 8-in. exposure, but you should consult your manufacturer’s instructions for your shingle type.
At the end of the ridge, they remove the top layer from the second-to-last cap and nail it in place. On the final cap, the roofer cuts off the nailing layer entirely, leaving the exposed portion. He hand nails it in place using 2-in. roofing nails. Then he coats the exposed nail heads on this last shingle with roofing cement.
With the ridge complete, it’s time to trim the overhanging roof edges. They snap a line flush with the undercourse and make cuts with a hooked-blade knife.
This particular roof has an unusual roof projection that frames an entrance to the backyard. Once that is shingled, this roof is done.
While not all homes require ridge vent installation, you or your roofer may consider adding one during a reroofing project, particularly for an older home with gable vents. Gable vents rarely act as an effective ventilation system on their own, and ridge vent installation will improve energy efficiency. If you’re doing the job yourself, expect to spend less than $150 for material, but ridge vent installation by a roofer will add about $400 to $500 to your roofing project.

View Comments
No comment on the primary content.
However, the number of domains the page goes thru severely impacts the page responsiveness and reader/viewer experience. Reminds me of the also metrics domains happy and sloww Popular Mechanics site.
In addition, the ads to content mix is painful.