
Installing Floor Joists
With mudsills and support beams in place, fill in the joists to complete the floor framing.
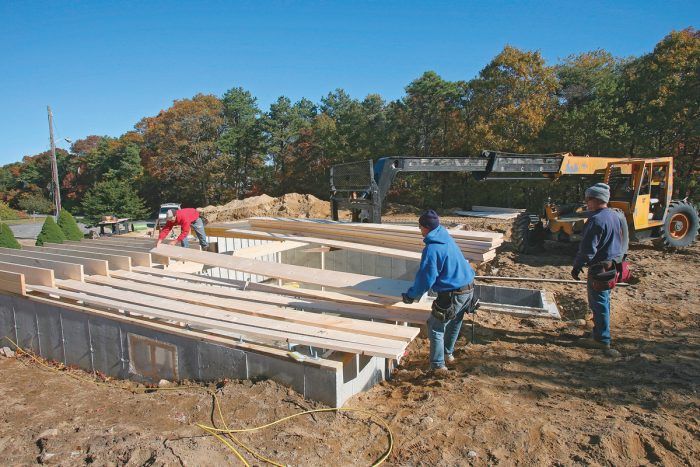
Once you’ve installed the mudsills and support beams, it’s time to frame the first-floor deck. Take another look at the framing plan and note any special materials and details. This house, for example, has a large framed opening to accommodate the stair chase. The floor framing features dimensional lumber, but LVLs were specified to strengthen the framing in certain areas.
Floor joist layout
The most common spacing for floor, wall, and roof framing is 16 in. o.c., and that’s what we used on this project. This means that the centerline of each joist, stud, or rafter is 16 in. from the center of its nearest neighbor, unless some exception is called for on the plans. This dimension may seem arbitrary, but you’ll realize its value as framing progresses: It works out perfectly to support standard 4-ft. by 8-ft. sheathing panels with a minimum of waste. Joist layout is done directly on the mudsills that run along the long dimension of the house.
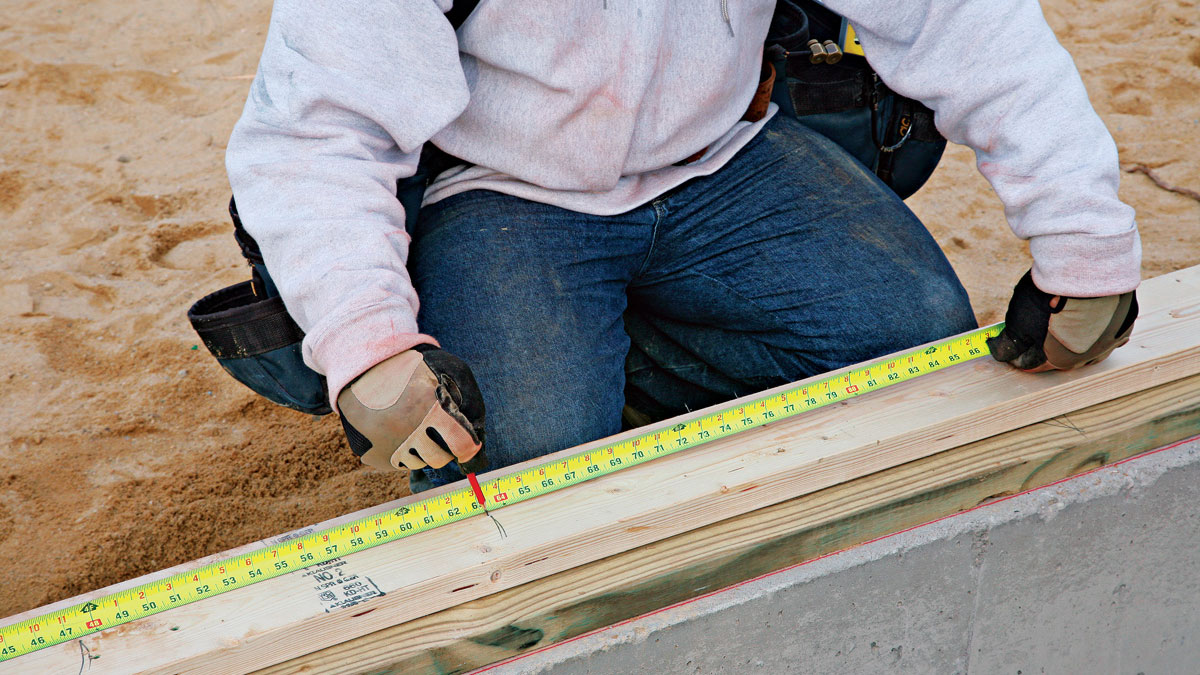
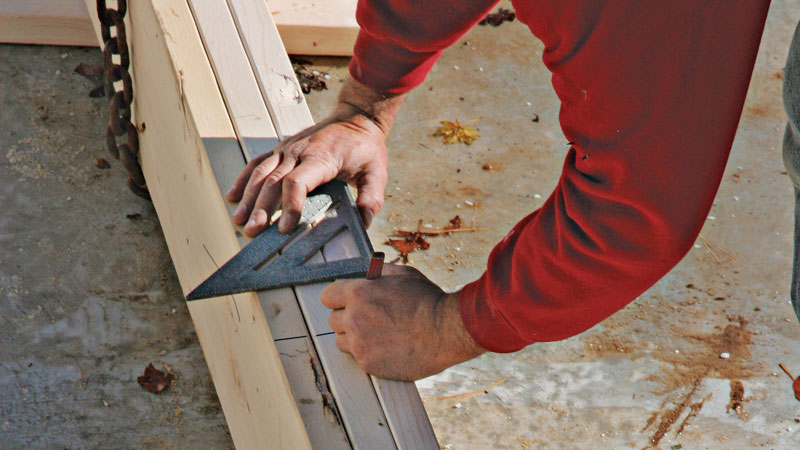
To start the layout, hook the end of your tape on the end of a mudsill. It’s tempting at that point to make a mark every 16 in., but that would put the edge of each joist on the 16-in. mark, not the centerline. This common mistake becomes painfully obvious when the first sheet of sheathing either falls short of a joist or completely covers it. Believe me, all carpenters make this mistake at least once in their career. To avoid it, subtract ¾ in. (half the thickness of the joist stock) from each of the tape’s 16-in. o.c. markers. The layout marks therefore fall at 15¼ in., 31¼ in., and so forth. Mark those points, square a line across the stock, and be sure to put an X on the side of the line where the joist should fall. A corresponding joist layout has to be marked on the support beam, but in this case, we did the layout before the beam was lifted into place so the crew wouldn’t have to use ladders to do it later.
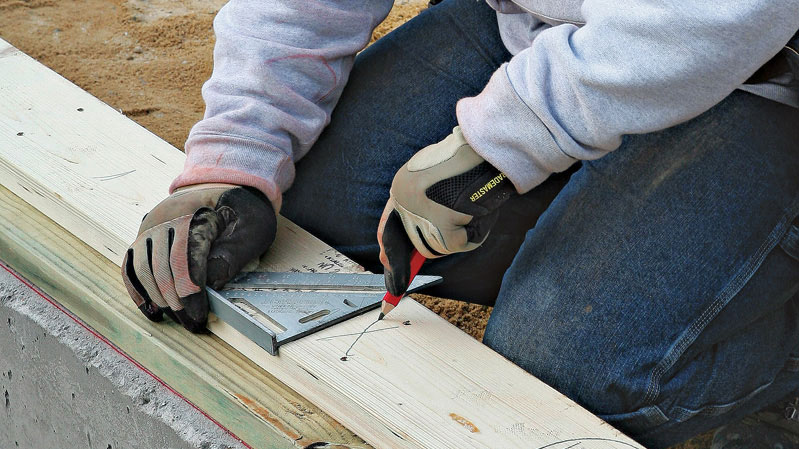
Marking a LayoutGet in the habit of making a small V or arrow at each layout point (photo below left). That’s because a single line is tougher to read and less precise. Then, at each layout point square a line across the lumber and mark an X on the side where the framing will sit (photo below right). This strategy eliminates another common mistake: nailing lumber to the wrong side of the layout line.
|
The joists overlap at the support beam, so instead of marking an X on the side where the joist sits, mark an F (front joist) on one side of the line and a B (back joist) on the other side.
Once the joist layout is marked on the mudsills, go back and lay out any special framing, such as framing around the stairwell. On this house, the inside edge of the stair chase is located 12 ft. from the right end of the house, and the chase is 9 ft. wide (a measurement derived from the first-floor plan). The first step is to pull a measurement from the right end of the house to the inside edge of the chase, or 12 ft. Because there would already be a joist at that location, we opted to put the LVLs right next to the joist, which moved the LVLs in a bit (¾ in.) but not enough to affect future framing. From there we measured the overall width of the chase (9 ft.) to locate the LVLs for the other side.
The last step in joist layout is to snap a chalkline to indicate where the ends of the joists will fall. This line also locates the inside face of the rim joist.
 |
 |
Measuring Joist SpacingAn alternative way to lay out the joist positions is to mark the edge of the first joist for the proper on-center alignment. Partially drive a nail at that mark and hook your tape on the nail’s head. Then mark the rest of the layout at the 16-in. increments shown on the tape. I’d use this method only for the 16-in.-o.c. layout, however. Measurements for any variations in the framing should always be taken from the edge of the mudsill to ensure accuracy. |
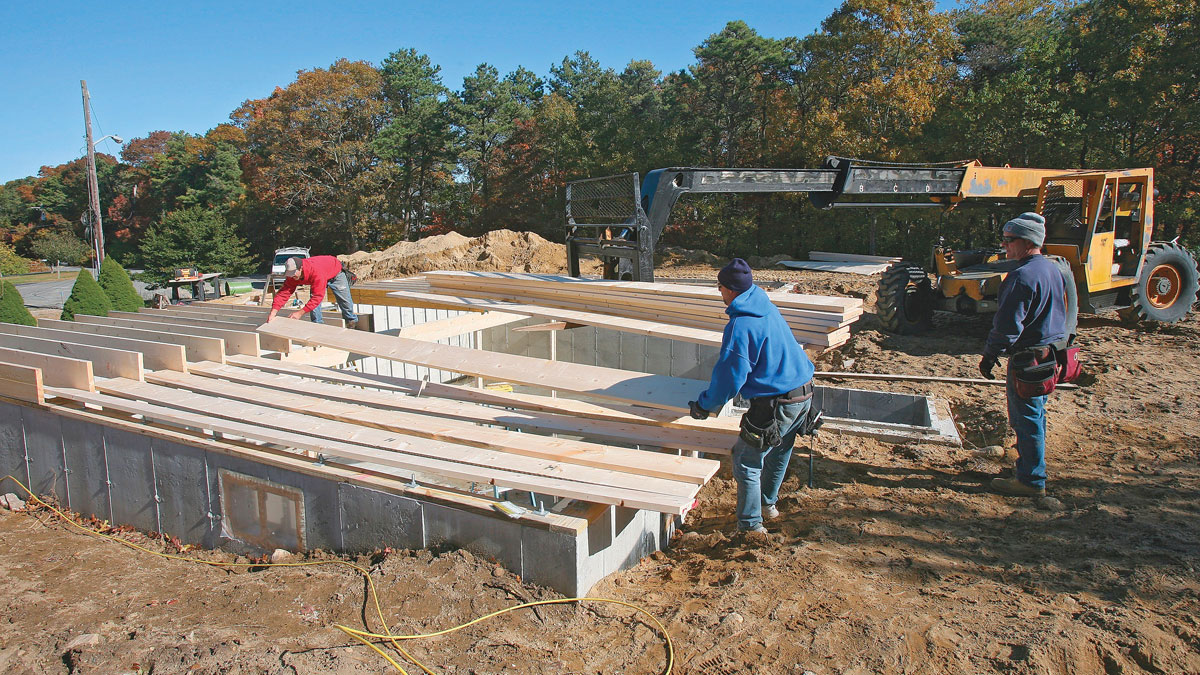
Installing the joists
On this house, the joists were installed in two stages. Joists on the front half of the house were installed first, followed by those on the back half of the house.
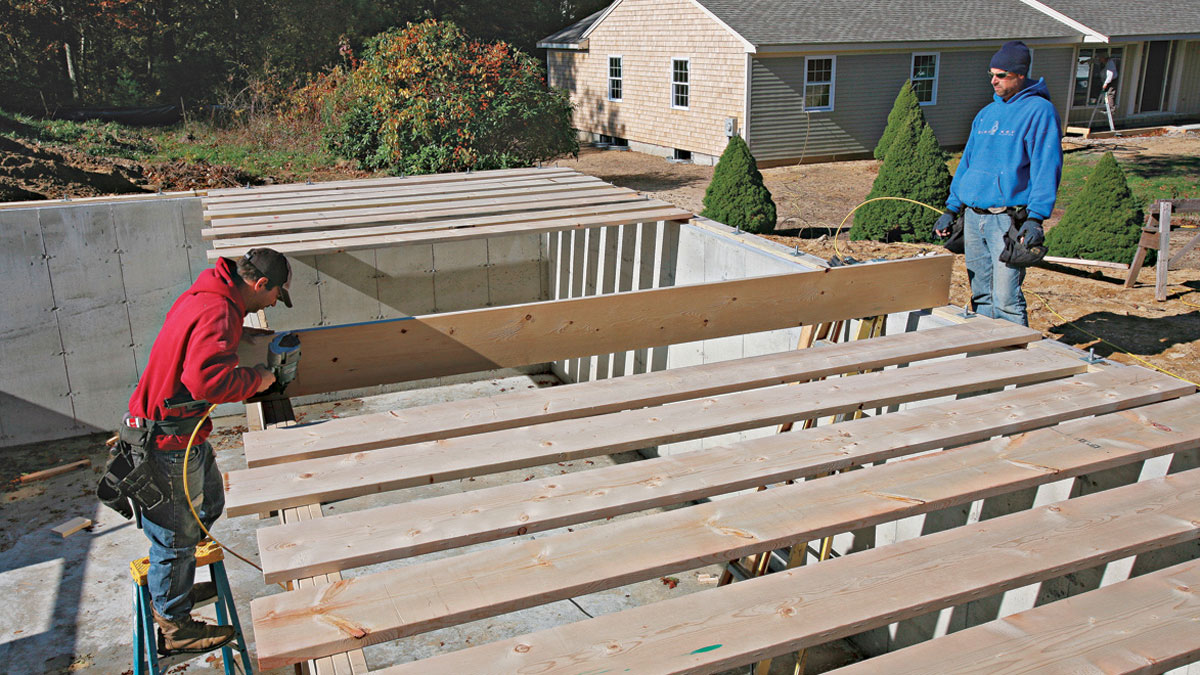
The location of the support beam meant that 12-ft. joists would be sufficient at the front of the house. As each joist was pulled from the pile, it was checked to make sure the sill end was square. Then each joist was laid flat over the support beam and the mudsill in a process called loading. Loading joists takes a bit of practice but it’s simply a matter of sliding one joist over another that’s already in place. This makes loading the joists a safe one-man job. As joists were loaded, a crew member crowned each one and drew an arrow to indicate which edge should face up. To avoid errors later, the crown arrows were oriented so they all faced in the same direction as the joists lay flat.
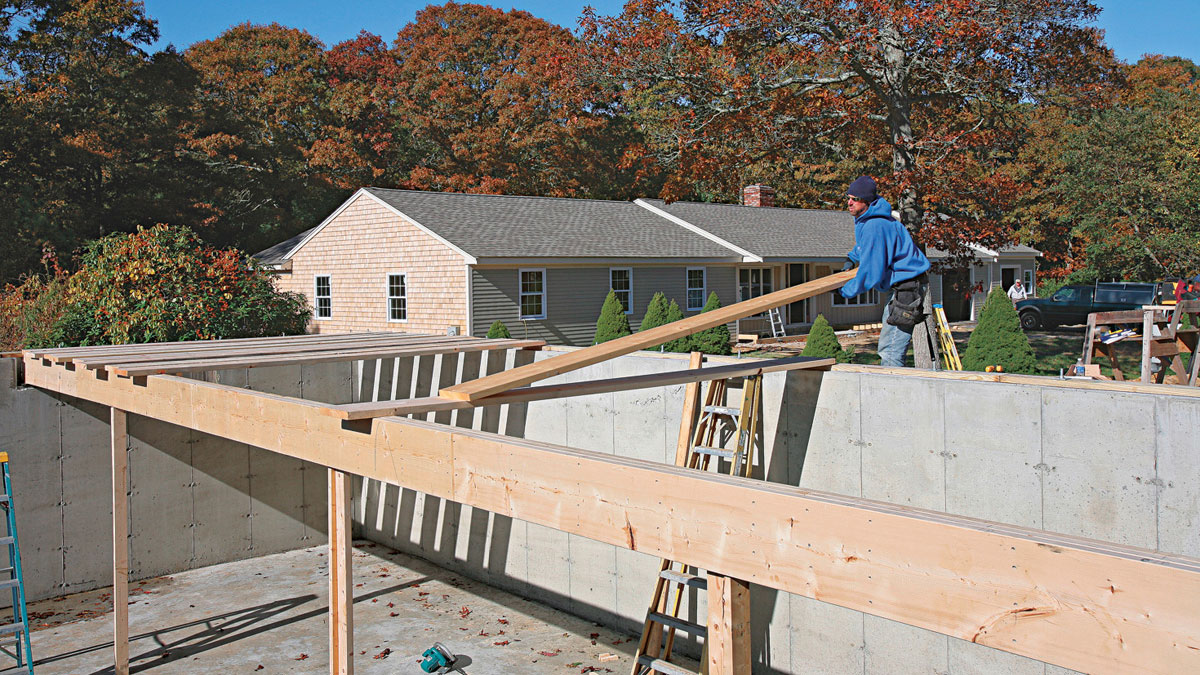
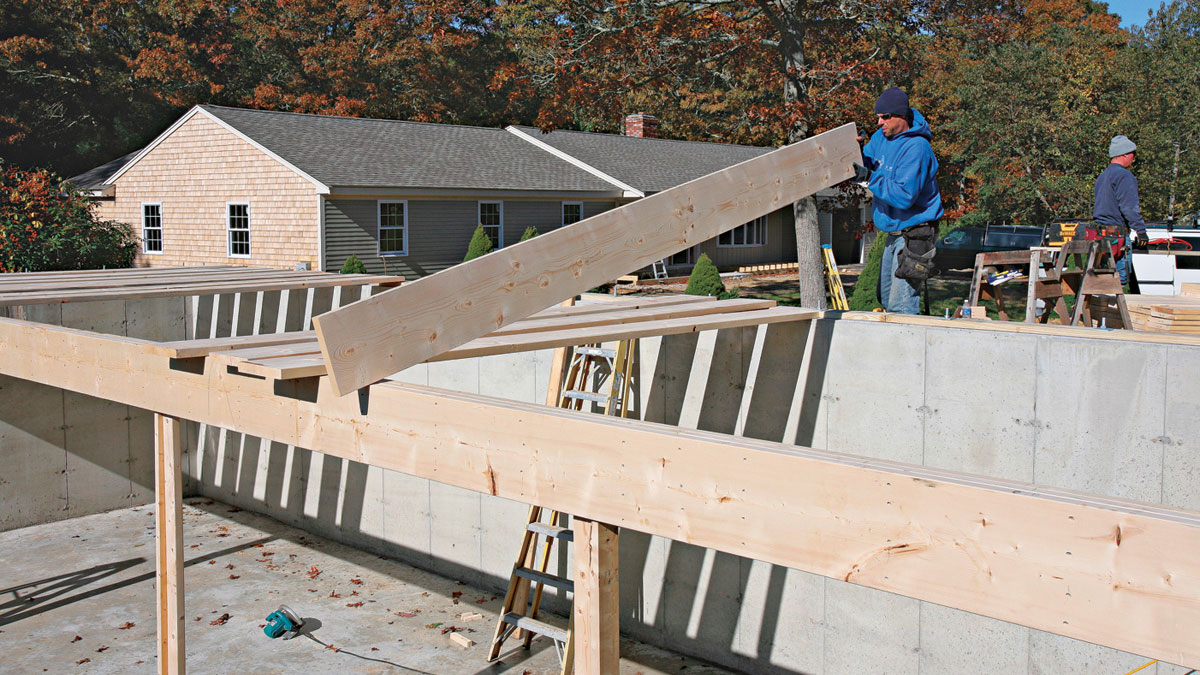
The first joists installed are meant to keep the support beam straight. If you merely set joists from one end of the house and work toward the other end, you can just about guarantee that the beam will get pushed out of position. So in this case we chose a joist on each side of the stair layout as the first joists. At the right end of the house, we measured from the rim joist layout line to the edge of the support beam, and rolled the first joist up on edge. Then we transferred this measurement to the bottom edge of the joist and made a layout mark. The crew member at the mudsill toenailed the joist to the mudsill, aligning it with the rim joist chalkline. A second crew member tapped the beam until it aligned with the layout mark on the joist and then nailed the joist to the beam. We repeated that procedure until four joists held the beam straight over its entire length. After that, it was safe to roll and nail the remaining joists, starting with the rim joist at one end. When all the joists on the front of the house were secure, we set the LVLs for the stair chase. LVLs come a full 10 in. wide, so each one had to be ripped down to 9¼ in. to match the actual width of a 2×10. After sliding the LVLs into place on their layout marks, they were nailed into place.
Once the joists at the front of the house were in place, we tackled the back joists. To load the back, joists were piled on the forklift so that the crew could lay them out easily. These joists had to be just over 14 ft. long to overlap the beam, which meant that 16-ft. lumber was specified on the materials list. But rather than waste the extra couple of feet by letting it overlap the front joists, we cut the excess off each joist and stacked it to use for blocking later.
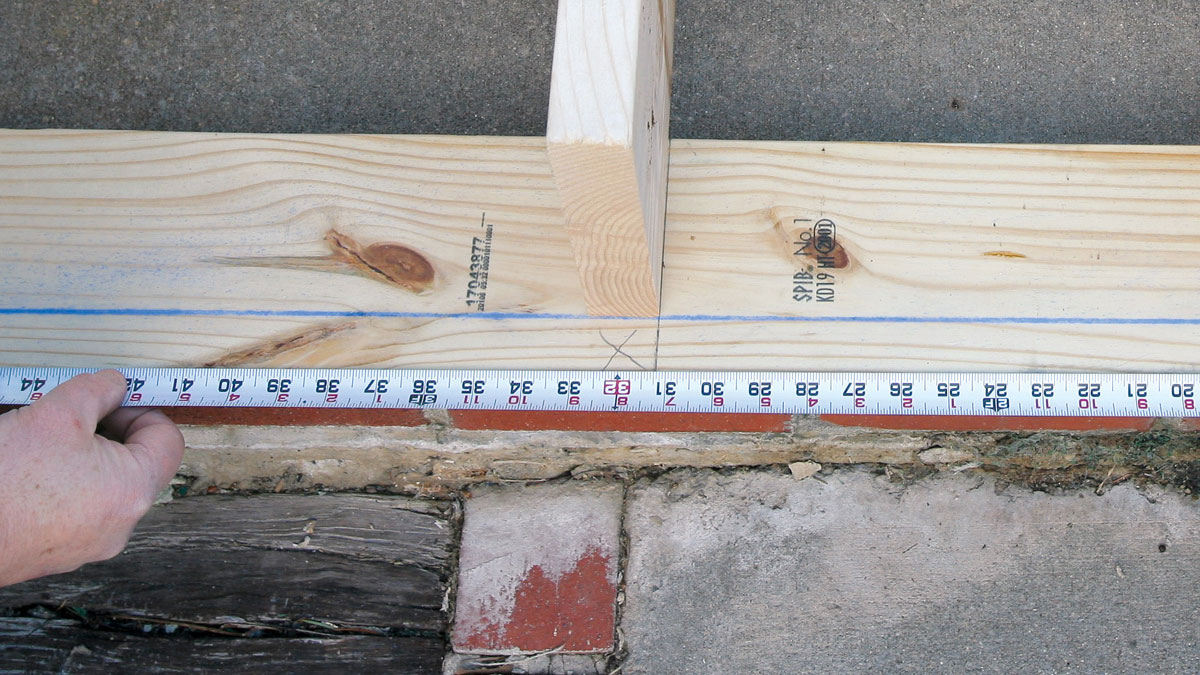
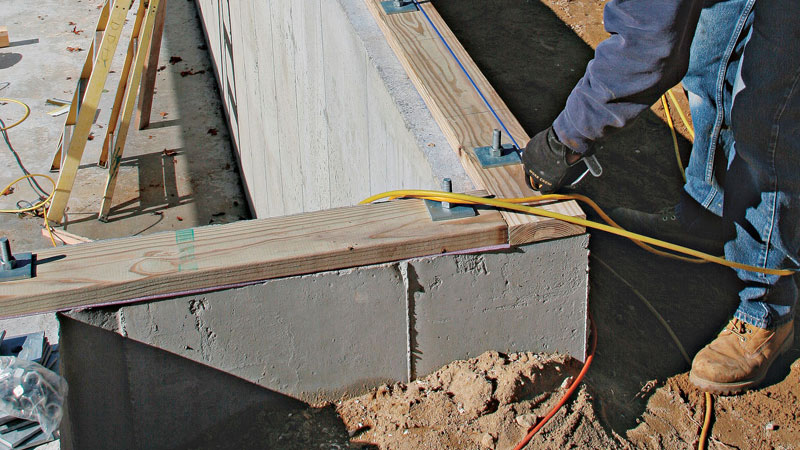
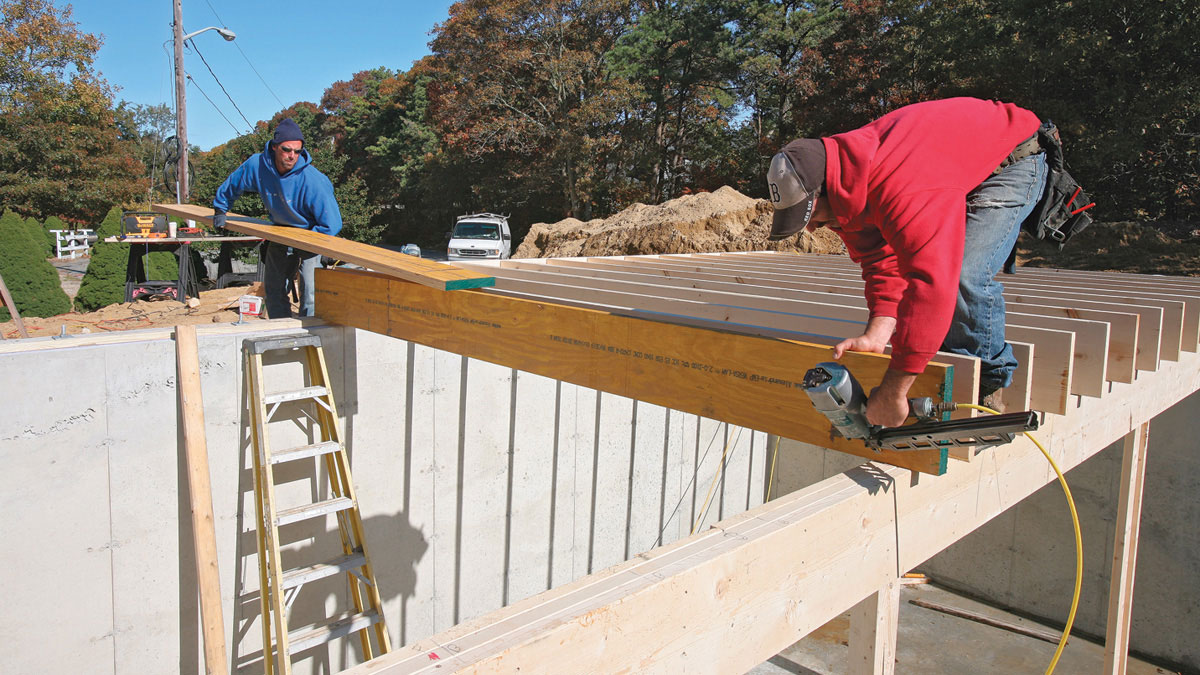
Layout and installation of the back joists were straightforward, except over the bulkhead opening in the foundation. Here the rim joist had to be doubled to create a header that would span this opening, so the joists that landed over the bulkhead were moved inward 1½ in. to accommodate an extra thickness of rim joist stock. This extra length of rim joist was cut to fit between the joists closest to the sides of the bulkhead and was nailed to those joists (see the photo below). When the rim joist was later installed, it formed the second half of the header.
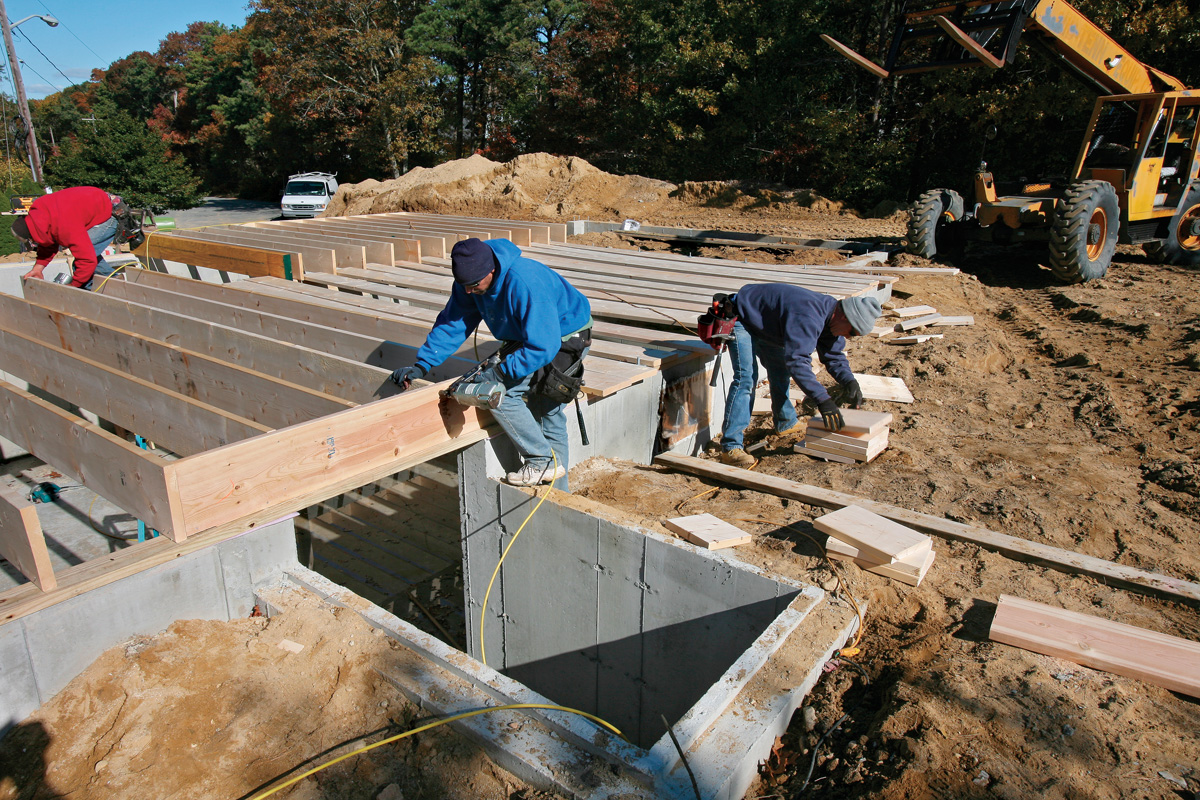
The bulkhead required a header to span the opening, so an extra layer of rim joist stock was nailed to the shortened joists. The main rim joist itself will form the second half of the header when the two pieces are nailed together.
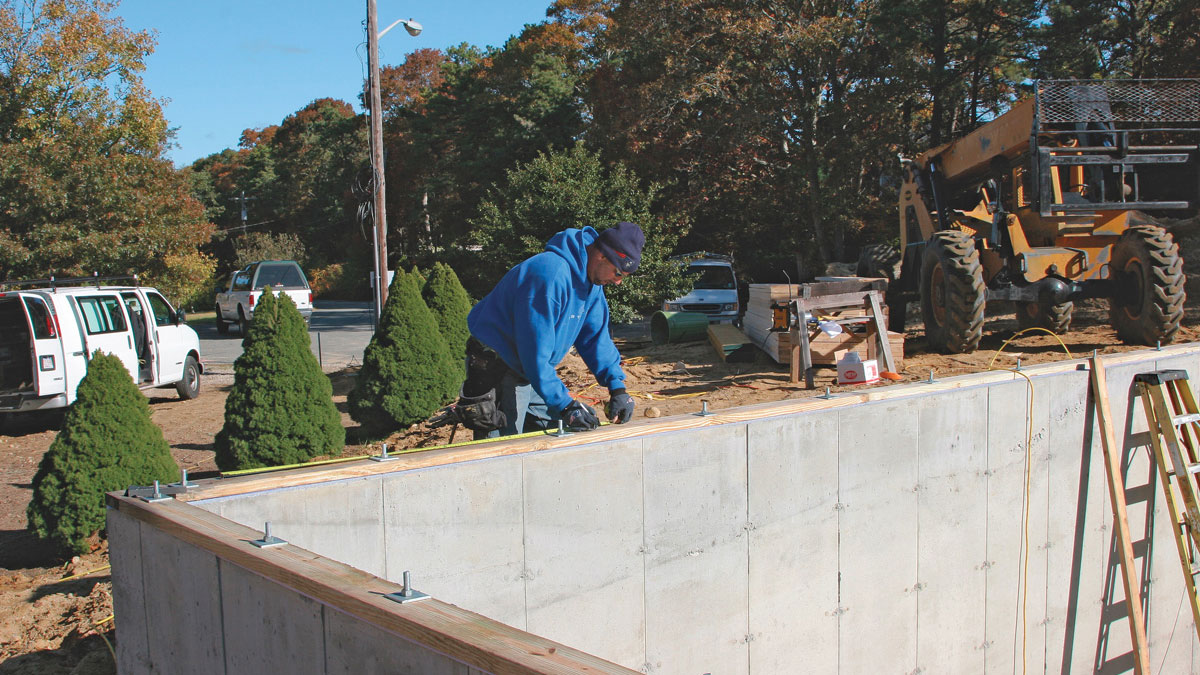
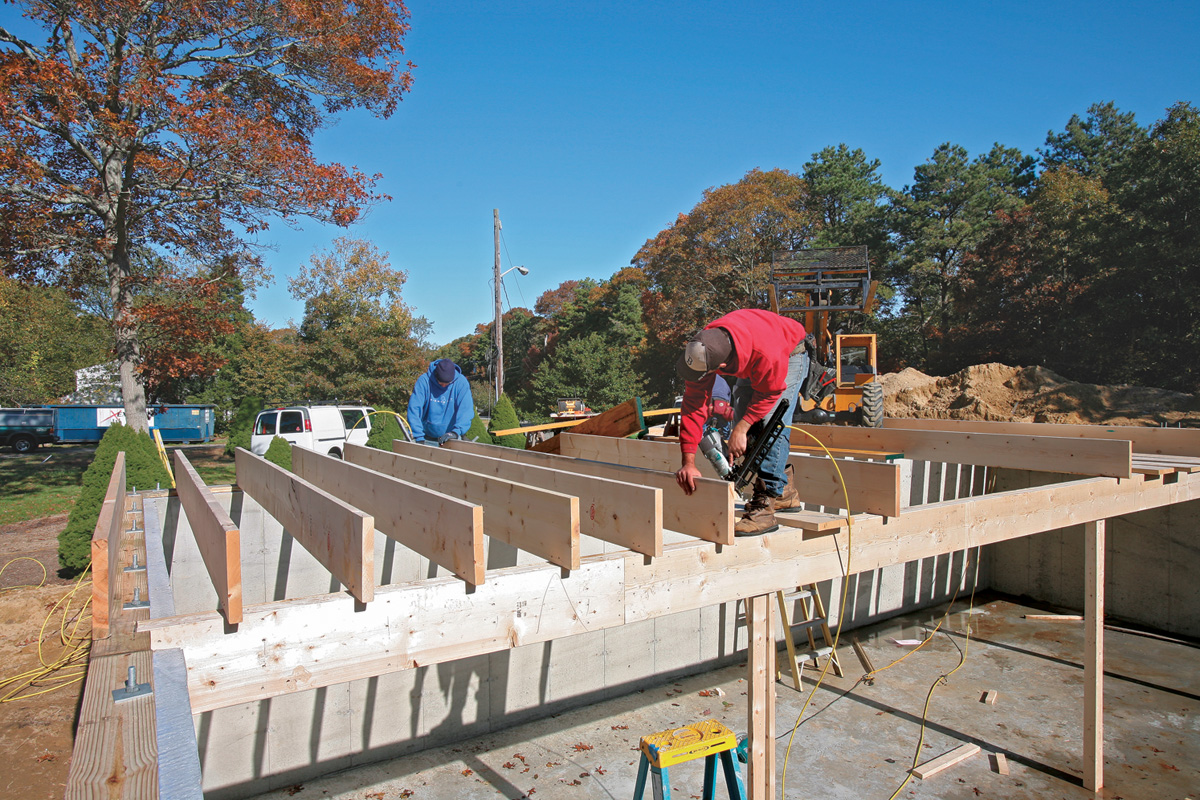
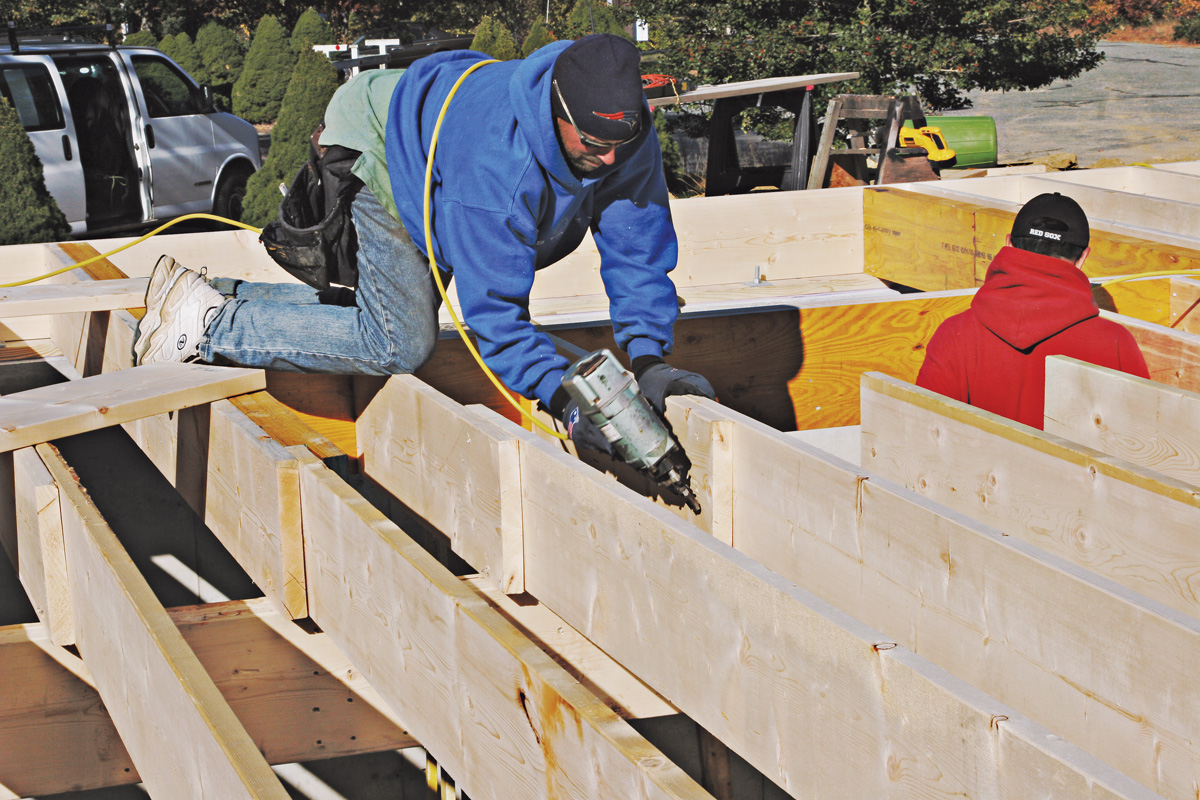
Installing rim joists The rim joists that run parallel to the floor joists are installed with the joists. The perpendicular rim joists—the ones that cap the ends of the joists—can either be installed as the floor joists go in or be added after the joists are in place. Their role is to hold the ends of the floor joists plumb and square to the mudsills.
Start by nailing the ends of the parallel rim joists into the perpendicular rims at the corners. Next, toenail the rims into the mudsills to draw them tight against the bottom corners of the joists. Now hook your tape on the end of the rim and line up the center of the first regular joist with the layout mark on the tape. Drive a nail through the rim and into the top of that joist to keep it in position. Hook your tape on the edge of the first joist and line the next joist on the layout mark. Secure it with a nail at the top. Keep the tape hooked on that first joist and continue down the row, nailing the tops of all the joists on the layout. Check as you go to make sure the joists are square to the top edge of the rim joist and not slightly twisted. When the top of each joist is secured with a nail, go back and drive the rest of the nails through the rims into the joists.
Installing headers The last major piece of floor framing to be installed on this job was the LVL header that fit between the doubled LVLs at each side of the stair chase. After the location of the header was laid out, we nailed temporary blocks to the bottom of the LVLs to support the header. Once the header was nailed into place, we removed the blocks and slipped metal joist hangers into place. Short stub joists completed the framing from the header to the support beam. Joist hangers were added later to connect the stubs to the LVL header.
Fine Homebuilding Recommended Products
Fine Homebuilding receives a commission for items purchased through links on this site, including Amazon Associates and other affiliate advertising programs.

Short Blade Chisel

QuikDrive PRO300s

11" Nail Puller

