
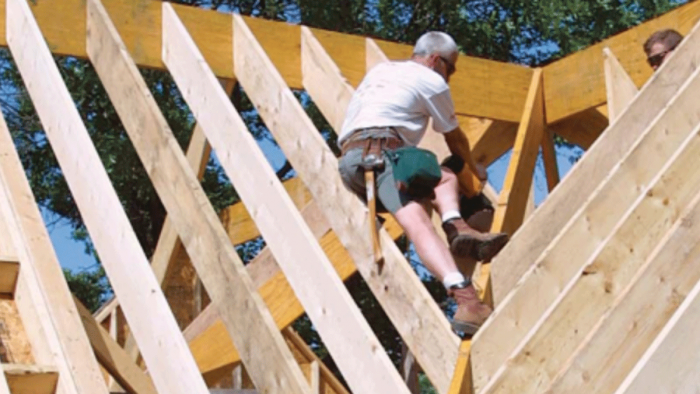
Framing a Roof Valley
Do the math on a calculator so that you can concentrate on what's important: getting the rafters right.
Synopsis: If you begin with accurate, as-built measurements and use a construction calculator to do the math, you can cut all of the rafters for most roofs on the ground in just one shot. Here, contributing editor Rick Arnold takes readers through the process step by step.
Framing a complex roof is one of the trickiest parts of home building. But it doesn’t have to be. If you begin with accurate, as-built measurements and use a construction calculator to do the math, you can cut all of the rafters for most roofs on the ground in just one shot.
This roof valley is a perfect example. To understand the concept and how all the pieces are laid out and cut, I picture the roof two dimensionally, in plan view. Then I use a construction calculator to find the correct length of each rafter.
To get started, I need to know only two things. The first is the pitch of the roof. On this project, the roof is a 12 pitch, or 12-in-12. The second thing that I need to know is the total run of the common rafters.
As a house is framed, measurements can vary slightly from the design, so I disregard the plans when finding the run of the common rafters, and instead take my own measurements. I measure the width of the building first, including the sheathing. The run of the common rafters is equal to half of this measurement, less half the thickness of the ridge board. Once I have the run of the common rafters, I use the calculator to find the lengths of all the rafters.

The valley rafter has a different pitch
The run of the valley rafter is longer than the run of the common rafters, so it takes 17 in. of run for the valley rafter to rise the same distance that the common rafters rise in 12 in. Therefore, the pitch of the valley rafter is 12-in-17.
The first cut that I make on both the common rafters and the valley rafter is the plumb cut, where the rafter will meet the ridge board. On the common rafters, the plumb cut is marked with a framing square for a 12-in-12 pitch (45°) and cut square (i.e., no bevel). The valley rafter is marked for a 12-in-17 pitch and then cut with a double bevel to fit into the ridge intersection. Because most framing lumber is not perfectly straight, I check each piece and mark the crown before I start cutting the lumber into rafters. Keeping all of the crowns pointing up prevents waves from marring the finished roof.
 For more photos and details on framing a roof valley, click the View PDF button below.
From Fine Homebuilding #161
Fine Homebuilding Recommended Products
Fine Homebuilding receives a commission for items purchased through links on this site, including Amazon Associates and other affiliate advertising programs.

Short Blade Chisel
Flashing Boot

Roof Jacks

View Comments
I’ve got a question! and yes the the top edge of the valley Jacks are heading down in a plane to the centre line of the Valley and let’s say we are using a 2” square edge Valley Rafter. My question is do you think it feasible to keep the Valley Jack rafters flush with the corner top edge of the Valley Rafter. For example in a case where the HAP is kept the same where it intersects with the outside edge of the plate. In turn then the under side corners of the valley boards are bevelled to the reverse angle of the backing bevel. ? as opposed to having the Valley Jacks slightly higher than the top edge of the Valley Rafter or using an inverted vee bevelled Valley Rafter ?