FHB Logo Facebook LinkedIn Email Pinterest Twitter X Instagram Tiktok YouTube Plus Icon Close Icon Navigation Search Icon Navigation Search Icon Arrow Down Icon Video Guide Icon Article Guide Icon Modal Close Icon Guide Search Icon Skip to content
Subscribe
Log In
  • How-To
  • Design
  • Tools & Materials
  • Restoration
  • Videos
  • Blogs
  • Forum
  • Magazine
  • Members
  • FHB House
  • Podcast
Log In

Fine Homebuilding Project Guides

Tiling

Guide Home
  • Selecting Tile
  • Tools & Techniques
  • Installation Materials
  • Preparation
  • Tiling Floors
  • Tiling Walls & Backsplashes
  • Tiling Showers
  • Grouting, Sealing & Caulking
  • Maintenance & Repair
How-To

Marking Cuts for Tile

Learn how to make clear and accurate marks on tiles for straight, diagonal, and more complex cuts.

By Robin Nicholas, Michael Schweit
  • X
  • facebook
  • linkedin
  • pinterest
  • email
  • add to favorites Log in or Sign up to save your favorite articles

Marking Straight Cuts

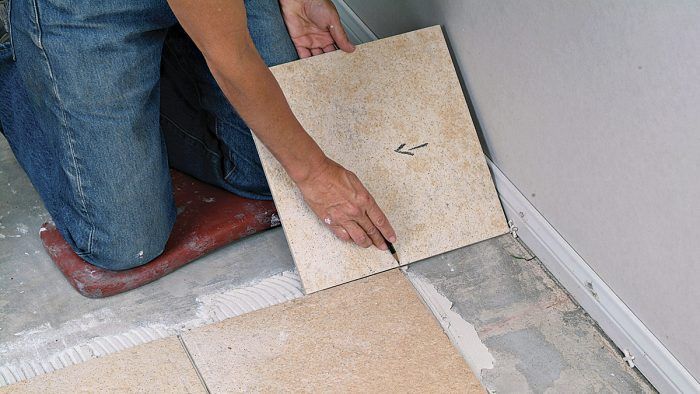
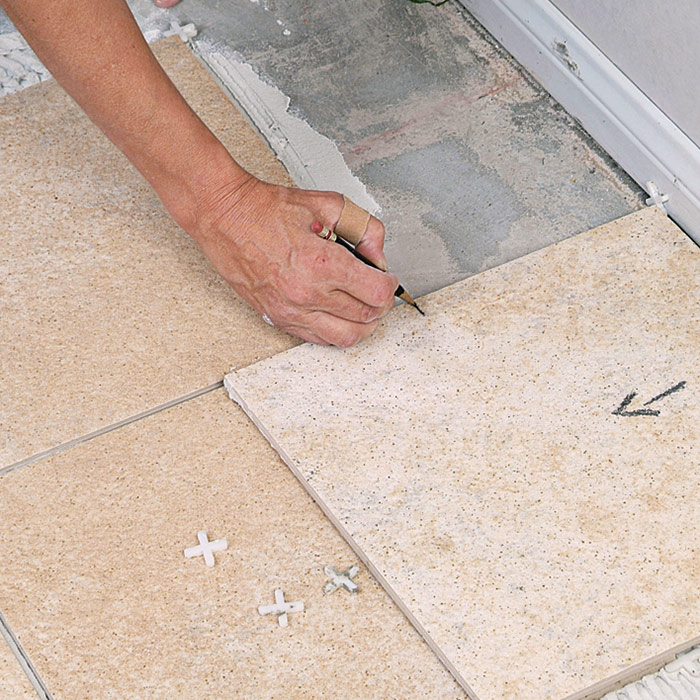
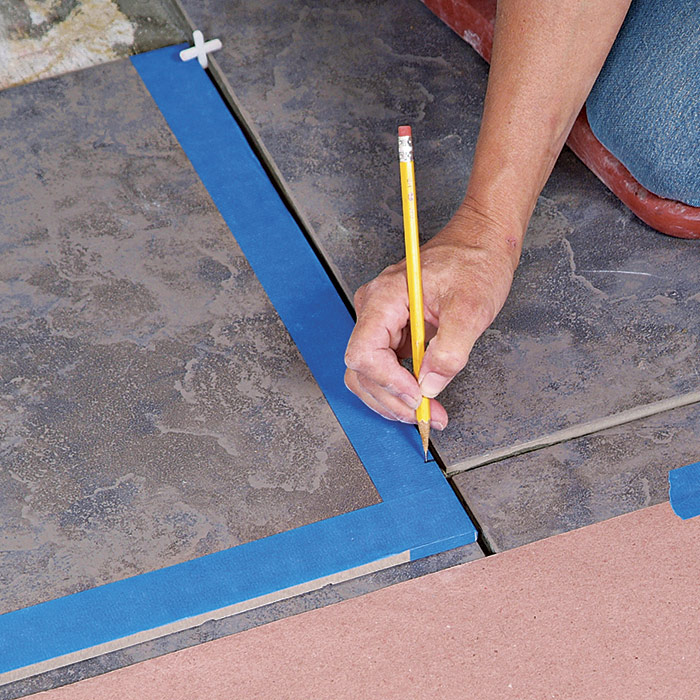
We mark the cuts for tiles that go against walls at the edge of a counter or floor by transferring the distance directly from the counter or floor to the tile. This ensures that the cut piece will fit, even if the wall isn’t parallel to the tile. You may find the method a bit confusing at first because the tile’s orientation is reversed during the marking process. To help you keep track of the tile’s orientation during marking and cutting, start by drawing an arrow on the “good” portion of the tile so that it points toward the “waste” portion that will be cut off 1.

Use a wax pencil to mark your cut lines
Use a wax pencil to mark your cut lines on glazed tiles when accuracy is not an issue.

draw arrow
1) Drawing an arrow on the tile will help you remember its orientation.

Place a spacer against the wall
2) Place a spacer against the wall to allow for the grout joint.

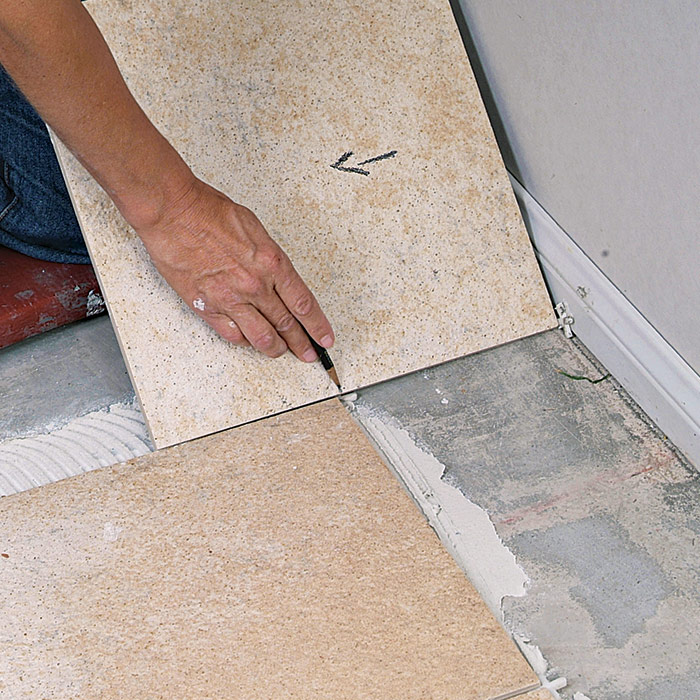
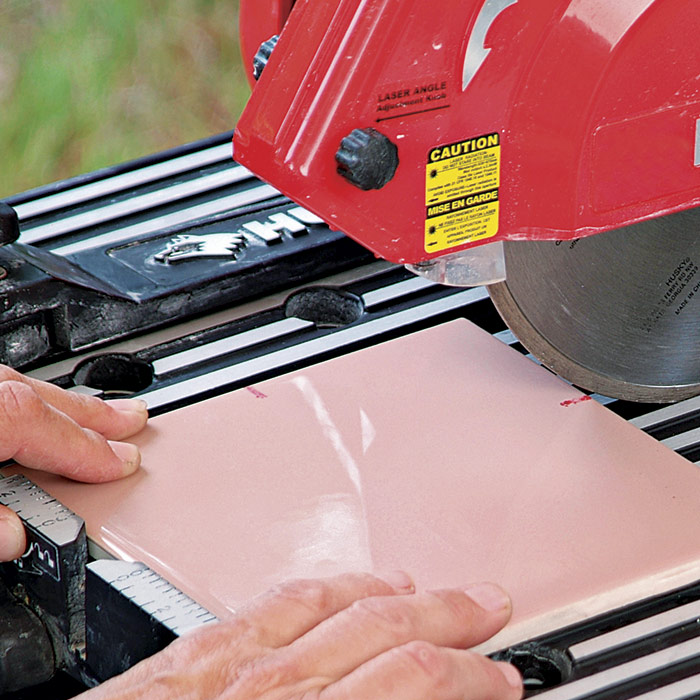
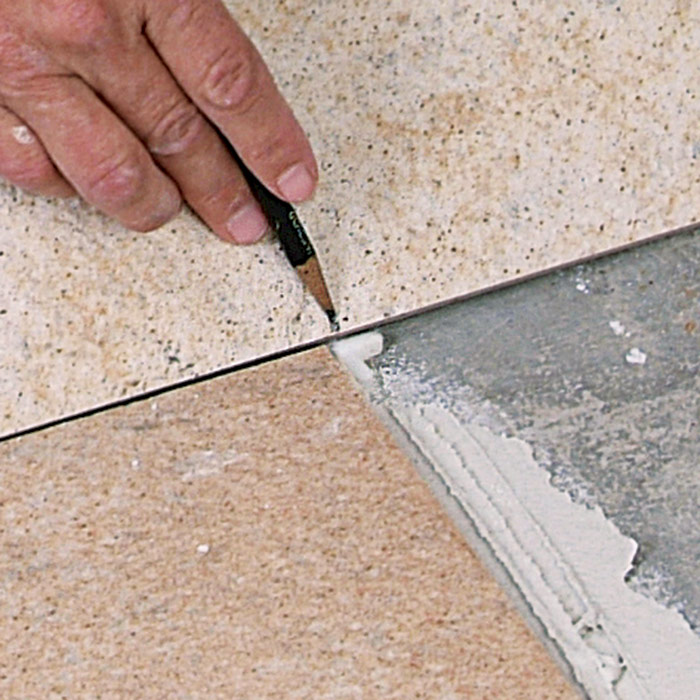
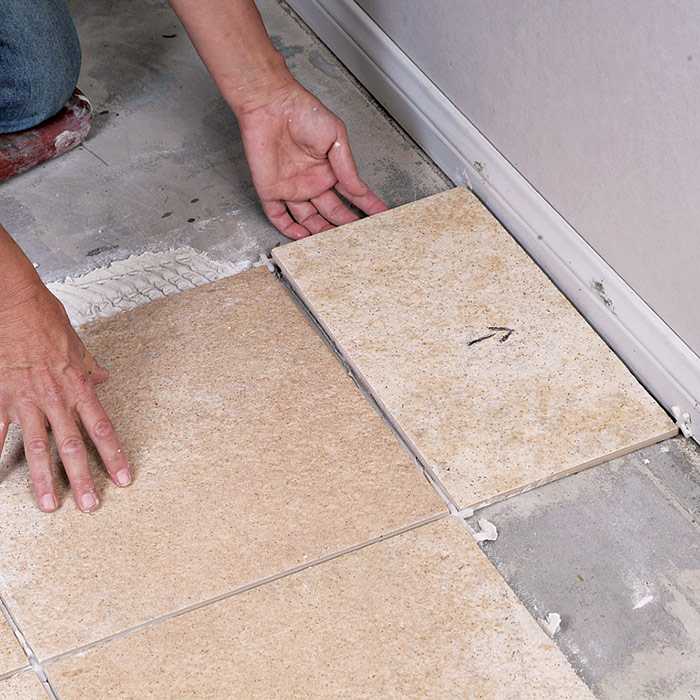
Now mark one edge of the tile to be cut (the workpiece) by setting it between the wall and the last full field tile, with the arrow pointing away from wall 2. Here it points away from the wall but after cutting, you will flip the tile and it will point to the wall. Be sure to use a spacer between the workpiece and the wall, so you’ll have space for a caulk joint. To account for the caulk joint, mark the workpiece at the edge of the field tile’s spacer 3. Now slide the workpiece over to other side of the field tile and mark the other edge at the spacer as before 4. Connect the two marks with a pencil and you’re ready to cut the tile. Remember, when the tile is set in place, the cut edge will go toward the wall (the direction in which the arrow should point) 5. Be sure to use a rubbing stone to smooth the edges.

pencil mark
3) Make a pencil mark on the side of the spacer where the cut tile will be set.

mark the other side
4) Move the tile to the opposite end of the space and mark the other side of the cut.

Dry-fit the tile
5) Dry-fit the tile before you apply thinset, and it should be perfect.


Marking Diagonal Cuts

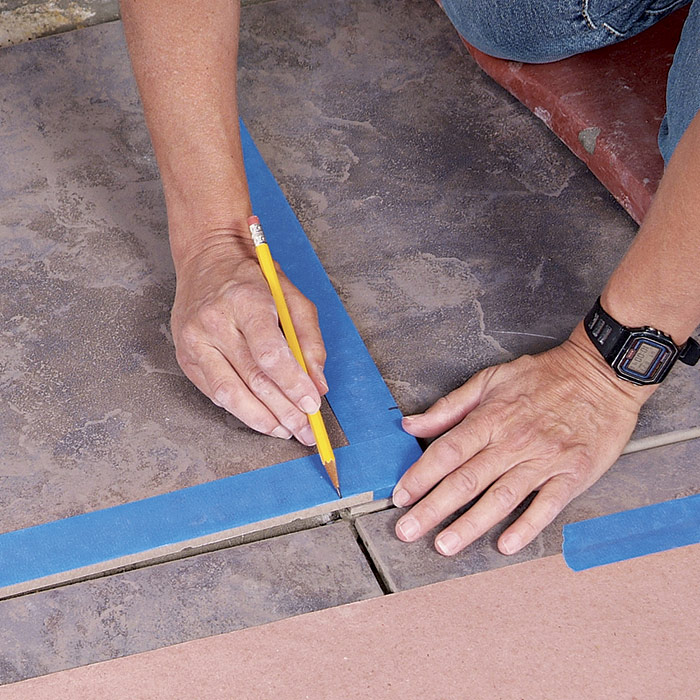
When square tiles are set diagonally, instead of parallel to the wall surfaces, you’ll have to trim the tiles around the edges of your installation. The process is roughly the same as marking straight cuts (see the facing page), except that the adjacent sides of the workpiece are marked, instead of the opposite sides.

Tape adjacent edges
1) Tape adjacent edges of the tile before you make marks for diagonal cuts.

Place a spacer
2) Place a spacer against the wall to allow for grout and align the tile edge parallel with the set tile next to it.

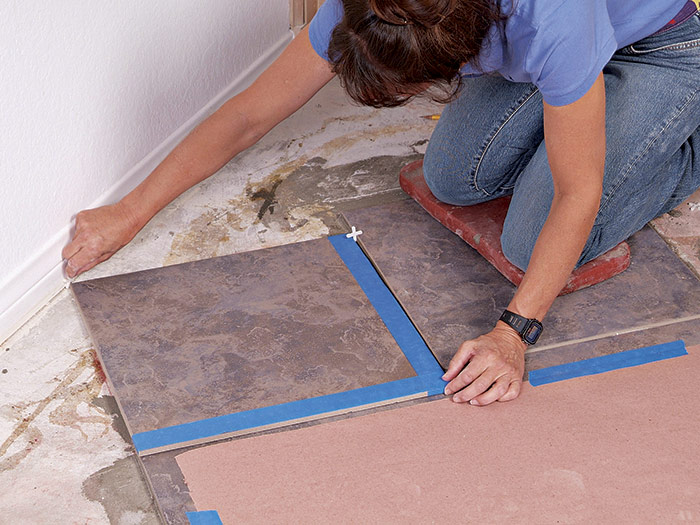
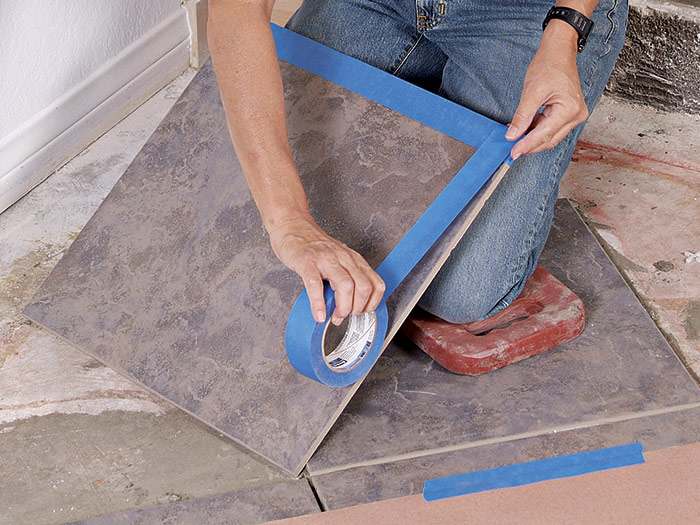
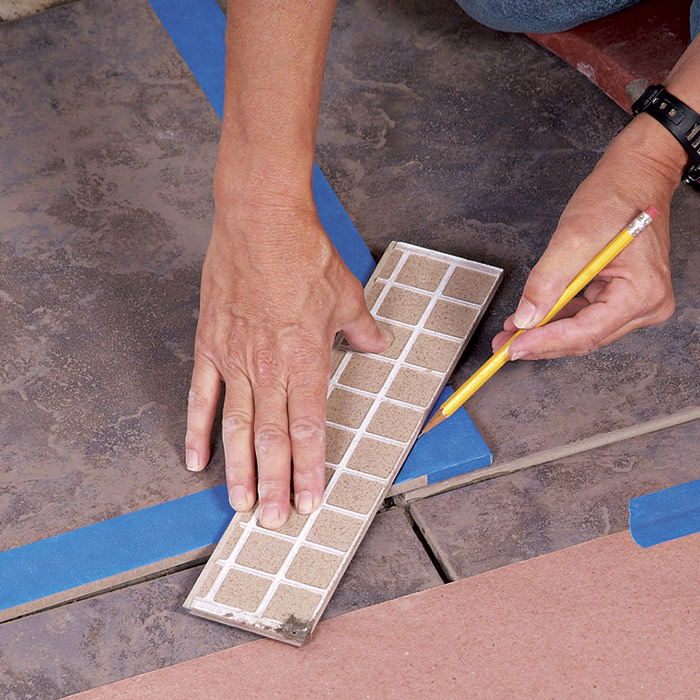
If the tile you’re working with is hard to mark with a pencil, apply masking tape along the edges 1. Set one spacer against the wall (to create room for a caulk joint) and another against the field tile that’s already been set, to help you keep the workpiece parallel to the set tiles 2. Make a mark on the wall-facing side of the set tile’s grout line 3. Now move the tile and both spacers to the opposite set tile and mark the other side of the cut 4. Draw a line to connect the two marks 5. Cut along the line, and you’ll have a perfectly cut tile, ready to set.

Mark the tile
3) Mark the tile to be cut at the spacer at the intersection of the tiles.

Move the tile
4) Move the tile (same orientation) to the adjacent grout joint and mark it.

connect your pencil marks
5) Use a scrap of tile or small level to connect your pencil marks.


Making Complex Cuts

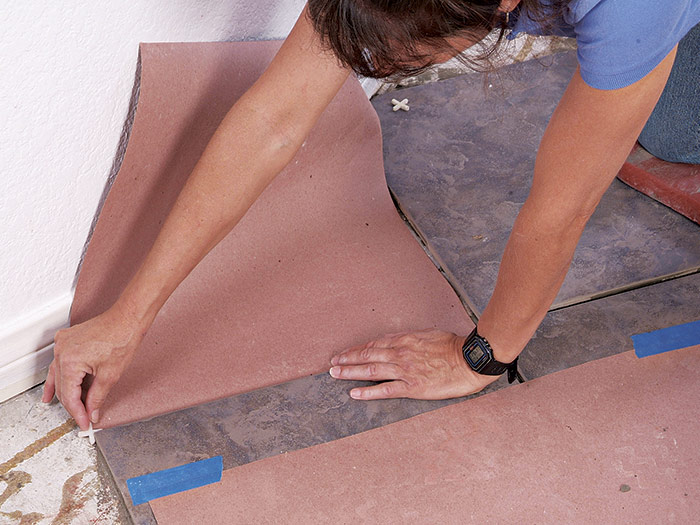
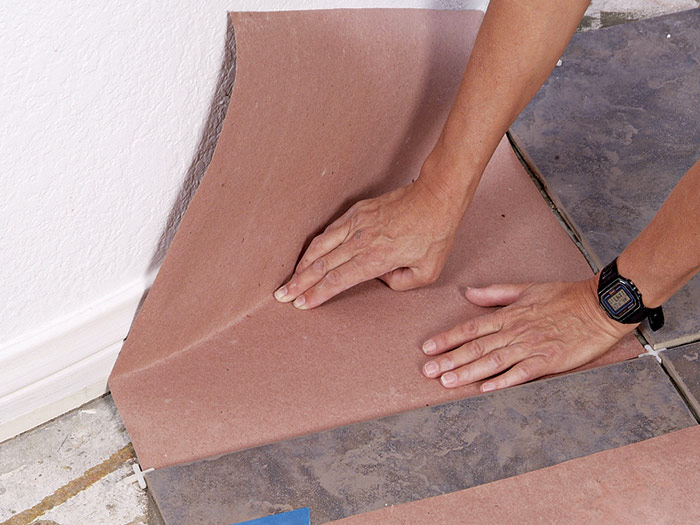
An easy and time-saving method for marking a complex shape—concave curve or irregular edge—on a tile to be cut requires the use of a paper pattern. For example, to mark a cut on a tile that butts up to a curved wall, start by cutting a piece of rosin or brown paper the size of your tile. For such a cut, a paper template will save you lots of hair pulling. Place the paper where the tile will
go when set, positioning it carefully with tile spacers 1. Now press the paper down to create a curved crease where the paper meets the wall 2.

Start the template
1) Start the template by laying a tile on a large piece of paper, and position with tile spacers.

create a crease
2) After placing the paper template against the spacers, use your fingers to create a crease along the curved edge.

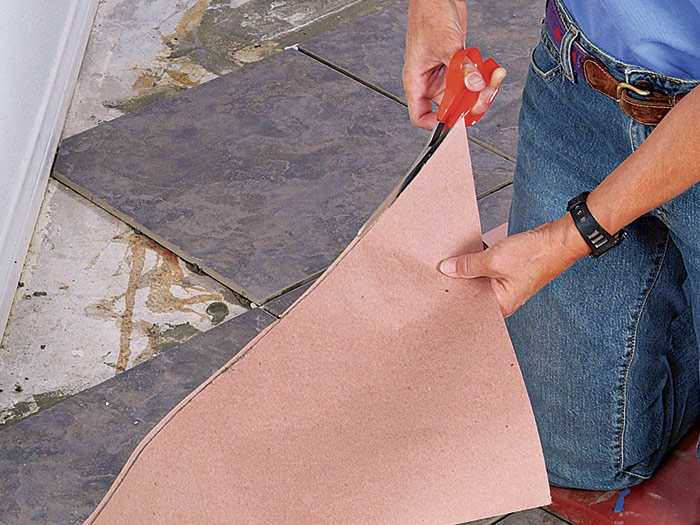
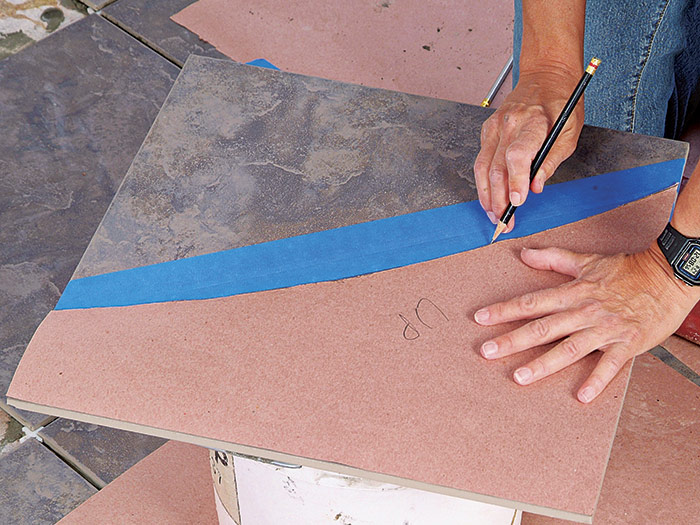
Cut the paper along the creased line with scissors, then put the paper back in place 3. Use a pencil to draw a line parallel to the curved wall, holding the pencil flat to the baseboard molding 4. This will create a space for grout or caulking between the tile and the wall. Cut the paper along this line, then transfer the curve to the surface of the tile 5.

cut the template along the crease
3) Use a pair of scissors to cut the template along the crease.

allow for grout or caulk joint
4) Lay the template back in place. Hold a pencil flat against the molding to allow for grout or caulk joint.

transfer the curve
5) Place the template on the tile and transfer the curve.

Tiling Complete, 2nd EditionExcerpted from Tiling Complete, 2nd Edition by Robin Nicholas and Michael Schweit.

Available in the Taunton Store and at Amazon.com.

Previous: Tile-Cutting Tools Next: Cutting with Tile Nippers

Guide

Tiling

Chapter

Tools & Techniques

Sign up for eletters today and get the latest how-to from Fine Homebuilding, plus special offers.

Signing you up...

This site is protected by reCAPTCHA and the Google Privacy Policy and Terms of Service apply.
See all newsletters
See all newsletters

Log in or create an account to post a comment.

Sign up Log in

Become a member and get full access to FineHomebuilding.com

Tiling

Tiling

Trusted, comprehensive guidance from the pros for a great-looking tile job in any room of the house

View Project Guide

View All Project Guides »

Become a member and get unlimited site access, including the Tiling Project Guide.

Start Free Trial

Selecting Tile
  • The Basics
  • Tile Options
Tools & Techniques
  • Job-Preparation Tools
  • Cutting Tiles
  • Setting & Grouting Tools
Installation Materials
  • Membranes & Substrates
  • Adhesives & Mortars
  • Grout
  • Sealers & Caulk
  • Spacers, Hardware & Trim
Preparation
  • The Prep Job
  • Repairs & Surface Prep
  • Installing Backerboard
Tiling Floors
  • Layout & Installation
  • Setting Specialty Tiles
Tiling Walls & Backsplashes
  • Preparation
  • Backsplashes
  • Walls
Tiling Showers
  • Tile Shower Basics
  • Waterproofing
  • Shower Pans
  • Shower Drains
  • Shower Niches
  • Video Series: Tile a Shower
  • Video Series: Tile a Barrier-Free Bathroom
Grouting, Sealing & Caulking
  • Grouting
  • Caulking
  • Sealing
Maintenance & Repair
  • Maintenance
  • Tile Repair
  • Grout Repair

Fine Home Building

Newsletter Sign-up

  • Fine Homebuilding

    Home building tips, offers, and expert advice in your inbox.

  • Green Building Advisor

    Building science and energy efficiency advice, plus special offers, in your inbox.

  • Old House Journal

    Repair, renovation, and restoration tips, plus special offers, in your inbox.

Signing you up...

This site is protected by reCAPTCHA and the Google Privacy Policy and Terms of Service apply.
See all newsletters

Follow

  • Fine Homebuilding

    Dig into cutting-edge approaches and decades of proven solutions with total access to our experts and tradespeople.

    Start Free Trial Now
    • Facebook
    • Instagram
    • X
    • LinkedIn
  • GBA Prime

    Get instant access to the latest developments in green building, research, and reports from the field.

    Start Free Trial Now
    • Facebook
    • YouTube
  • Old House Journal

    Learn how to restore, repair, update, and decorate your home.

    Subscribe Now
    • Facebook
    • Instagram
    • X

Membership & Magazine

  • Online Archive
  • Start Free Trial
  • Magazine Subscription
  • Magazine Renewal
  • Gift a Subscription
  • Customer Support
  • Privacy Preferences
  • About
  • Contact
  • Advertise
  • Careers
  • Terms of Use
  • Site Map
  • Do not sell or share my information
  • Privacy Policy
  • Accessibility
  • California Privacy Rights

© 2025 Active Interest Media. All rights reserved.

Fine Homebuilding receives a commission for items purchased through links on this site, including Amazon Associates and other affiliate advertising programs.

  • Home Group
  • Antique Trader
  • Arts & Crafts Homes
  • Bank Note Reporter
  • Cabin Life
  • Cuisine at Home
  • Fine Gardening
  • Fine Woodworking
  • Green Building Advisor
  • Garden Gate
  • Horticulture
  • Keep Craft Alive
  • Log Home Living
  • Military Trader/Vehicles
  • Numismatic News
  • Numismaster
  • Old Cars Weekly
  • Old House Journal
  • Period Homes
  • Popular Woodworking
  • Script
  • ShopNotes
  • Sports Collectors Digest
  • Threads
  • Timber Home Living
  • Traditional Building
  • Woodsmith
  • World Coin News
  • Writer's Digest
Active Interest Media logo
X
X
This is a dialog window which overlays the main content of the page. The modal window is a 'site map' of the most critical areas of the site. Pressing the Escape (ESC) button will close the modal and bring you back to where you were on the page.

Main Menu

  • How-To
  • Design
  • Tools & Materials
  • Video
  • Blogs
  • Forum
  • Project Guides
  • Reader Projects
  • Magazine
  • Members
  • FHB House

Podcasts

  • FHB Podcast
  • ProTalk

Webinars

  • Upcoming and On-Demand

Podcasts

  • FHB Podcast
  • ProTalk

Webinars

  • Upcoming and On-Demand

Popular Topics

  • Kitchens
  • Business
  • Bedrooms
  • Roofs
  • Architecture and Design
  • Green Building
  • Decks
  • Framing
  • Safety
  • Remodeling
  • Bathrooms
  • Windows
  • Tilework
  • Ceilings
  • HVAC

Magazine

  • Current Issue
  • Past Issues
  • Magazine Index
  • Subscribe
  • Online Archive
  • Author Guidelines

All Access

  • Member Home
  • Start Free Trial
  • Gift Membership

Online Learning

  • Courses
  • Project Guides
  • Reader Projects
  • Podcast

More

  • FHB Ambassadors
  • FHB House
  • Customer Support

Account

  • Log In
  • Join

Newsletter

Get home building tips, offers, and expert advice in your inbox

Signing you up...

This site is protected by reCAPTCHA and the Google Privacy Policy and Terms of Service apply.
See all newsletters
See all newsletters

Follow

  • X
  • YouTube
  • instagram
  • facebook
  • pinterest
  • Tiktok

Join All Access

Become a member and get instant access to thousands of videos, how-tos, tool reviews, and design features.

Start Your Free Trial

Subscribe

FHB Magazine

Start your subscription today and save up to 70%

Subscribe

This is your last free article.

Don't miss another expert tip or technique from building pros. Start your free trial today.

Start your FREE trial

Already a member? Log in

We hope you’ve enjoyed your free articles. To keep reading, become a member today.

Get complete site access to expert advice, how-to videos, Code Check, and more, plus the print magazine.

Start your FREE trial

Already a member? Log in

Privacy Policy Update

We use cookies, pixels, script and other tracking technologies to analyze and improve our service, to improve and personalize content, and for advertising to you. We also share information about your use of our site with third-party social media, advertising and analytics partners. You can view our Privacy Policy here and our Terms of Use here.

Cookies

Analytics

These cookies help us track site metrics to improve our sites and provide a better user experience.

Advertising/Social Media

These cookies are used to serve advertisements aligned with your interests.

Essential

These cookies are required to provide basic functions like page navigation and access to secure areas of the website.

Delete My Data

Delete all cookies and associated data