FHB Logo Facebook LinkedIn Email Pinterest Twitter X Instagram Tiktok YouTube Plus Icon Close Icon Navigation Search Icon Navigation Search Icon Arrow Down Icon Video Guide Icon Article Guide Icon Modal Close Icon Guide Search Icon Skip to content
Subscribe
Log In
  • How-To
  • Design
  • Tools & Materials
  • Restoration
  • Videos
  • Blogs
  • Forum
  • Magazine
  • Members
  • FHB House
  • Podcast
Log In

Fine Homebuilding Project Guides

Wiring

Guide Home
  • Working with Electricity
  • Tools and Materials
  • Receptacles and Switches
  • Lights and Fans
  • Rough-In
  • Outdoor Wiring
  • Panels and Subpanels
How-To

Installing a Sconce Light

Follow these guidelines to remove an existing wall sconce and wire a new one.

By Mike Litchfield, Michael McAlister
  • X
  • facebook
  • linkedin
  • pinterest
  • email
  • add to favorites Log in or Sign up to save your favorite articles

When removing an existing sconce, save all the old screws and incidental hardware—you never know what you might need when you attach the new one. Turn off power to the outlet, then use a noncontact tester to make sure the power is off. Next use a probe tester to verify that the power is off.


Safety Alert: It’s always best to turn off the circuit breaker or remove the fuse rather than relying on a light switch to disconnect power.


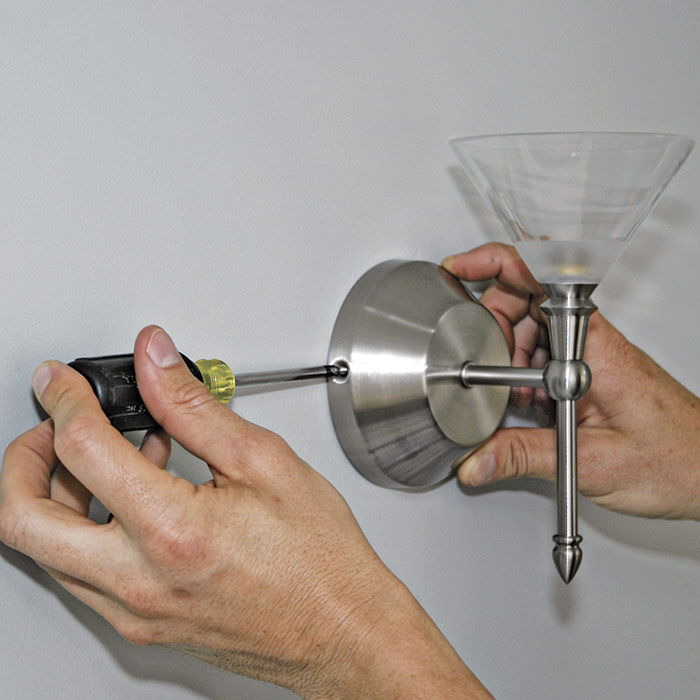
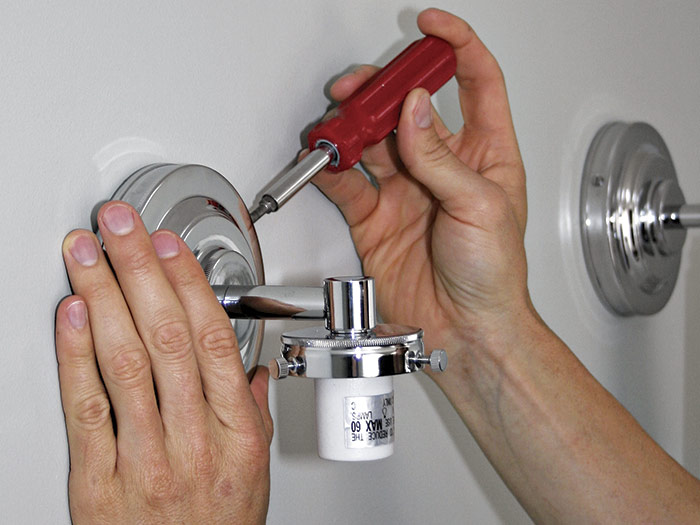
Remove the fixture’s mounting screws; in this case, they’re on the side of the fixture base 1. As you do so, always support the shade so it doesn’t fall out and break 2. Or you can remove the glass shade by unscrewing the small setscrews that hold it to the fixture.

1 Test to make sure the power is off. Then remove the fixture’s mounting screws.
1 ) Test to make sure the power is off. Then remove the fixture’s mounting screws.

2  As you pull the sconce away from the wall, support the glass shade if it’s still attached.
2) As you pull the sconce away from the wall, support the glass shade if it’s still attached.

3 Many low-voltage fixtures need a transformer—typically hidden under the fixture base—to operate.
3) Many low-voltage fixtures need a transformer—typically hidden under the fixture base—to operate.

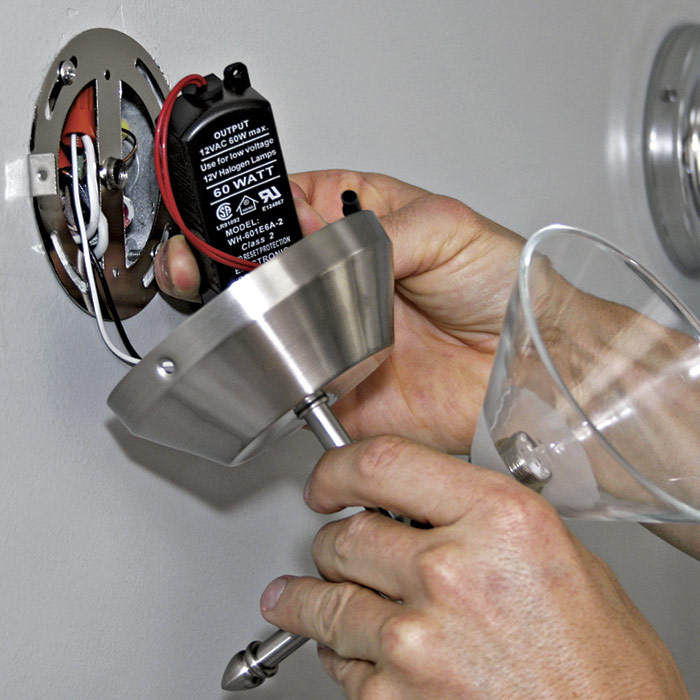
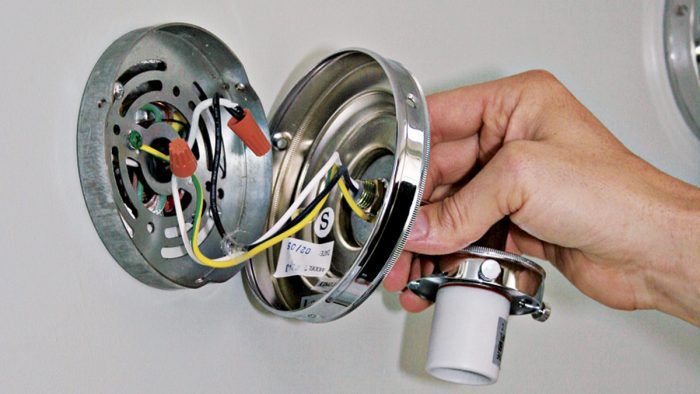
Some low-voltage sconces, such as the one shown here, require a transformer, which fits under the fixture base 3. Pull the fixture away from the wall to reveal its spliced wires. Remove the wire nuts splicing the supply wires to the fixture wires 4 and gently pull the wires apart. Then disconnect the ground wire that is attached to a green ground screw on the fixture or spliced to the fixture ground wire.

4  Pull the fixture away from the wall. Disconnect all splices between house wires and fixture wires and any wire attached to a ground screw.
4) Pull the fixture away from the wall. Disconnect all splices between house wires and fixture wires and any wire attached to a ground screw.

5  Remove any mounting bracket screwed to the outlet box.
5) Remove any mounting bracket screwed to the outlet box.

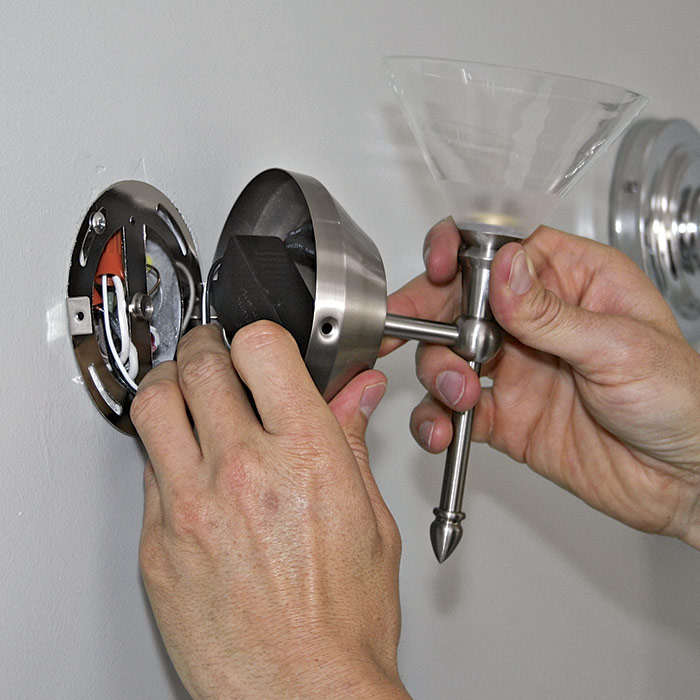
After disconnecting the wire splices, remove the mounting bracket because it won’t be needed to mount the new fixture 5. (Most likely, its holes won’t line up with the new fixture’s mounting screws.) Save this bracket in case you want to reinstall the old sconce elsewhere.

Connecting a New Sconce

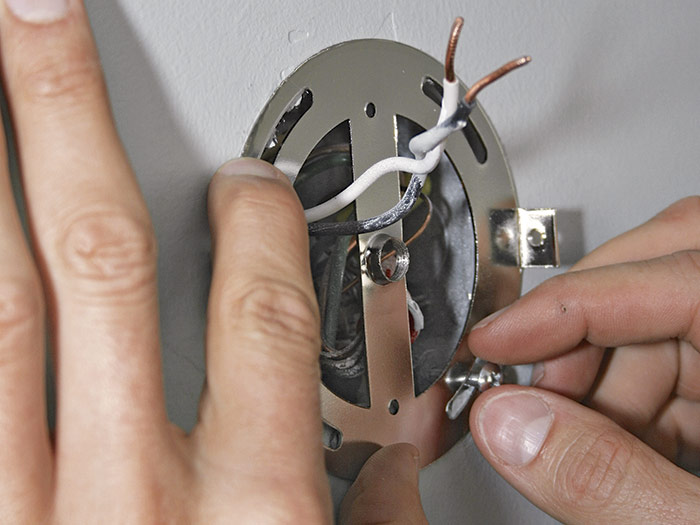
Once the old sconce has been removed, you’re ready to connect the new one. Feed the incoming supply wires through the center of the new sconce’s mounting bracket 1 and then screw that bracket to the outlet box in the wall.

1 Feed existing supply wires through the new mounting bracket and screw it to the outlet box.
1) Feed existing supply wires through the new mounting bracket and screw it to the outlet box.

2  Attach the fixture ground wire to the ground screw on the bracket.
2) Attach the fixture ground wire to the ground screw on the bracket.

3 Use wire connectors to splice the supply neutral to the fixture neutral, and the supply hot wire to the fixture hot wire.
3) Use wire connectors to splice the supply neutral to the fixture neutral, and the supply hot wire to the fixture hot wire.


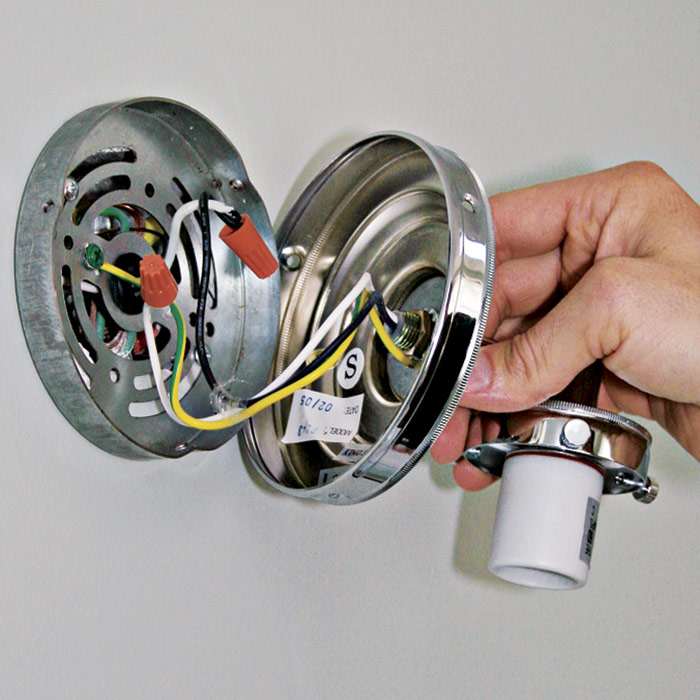
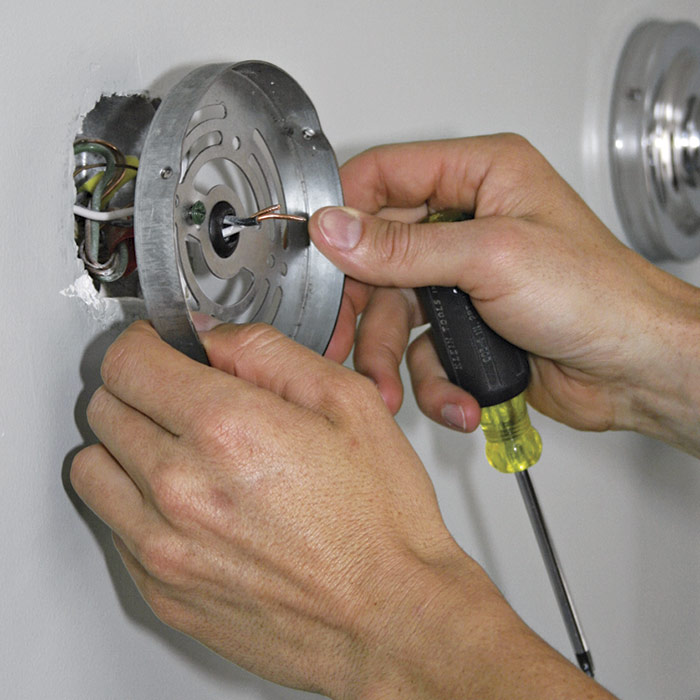
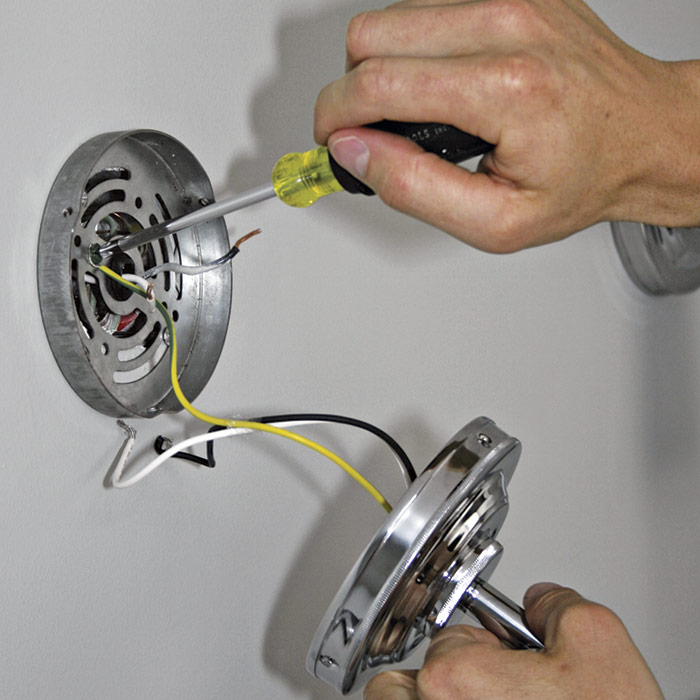
Screw the ground lead from the fixture (here, a yellow and green striped wire) to the ground screw on the mounting bracket 2. Next splice the neutral supply wire to the fixture neutral, then splice the hot supply wire to the fixture hot wire 3. Making sure that all wires are within the mounting bracket, screw the fixture base to the bracket 4.

4  Gently push spliced wires under the fixture base and screw it to the mounting bracket.
4) Gently push spliced wires under the fixture base and screw it to the mounting bracket.

5  Turn the small setscrews to attach the glass shade to the fixture. Be careful not to overtighten.
5) Turn the small setscrews to attach the glass shade to the fixture. Be careful not to overtighten.

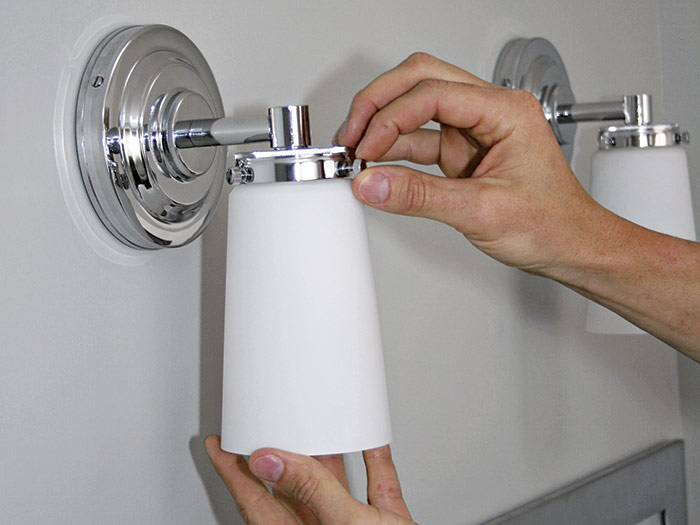
Attach the shade by tightening the small setscrews on the side of the shade holder 5. Don’t overtighten the set screws or the shade could crack when the bulb heats it up and it expands. Once in place, you should be able to rotate the shade slightly.


Wiring Complete, 3rd Edition

Excerpted from Wiring Complete, 3rd Edition (The Taunton Press, 2017) by Michael Litchfield and Michael McAlister

Available in the Taunton Store and at Amazon.com.

Previous: Mounting Light Fixtures Next: Installing Recessed Lighting

Guide

Wiring

Chapter

Lights and Fans

Sign up for eletters today and get the latest how-to from Fine Homebuilding, plus special offers.

Signing you up...

This site is protected by reCAPTCHA and the Google Privacy Policy and Terms of Service apply.
See all newsletters
See all newsletters

Log in or create an account to post a comment.

Sign up Log in

Become a member and get full access to FineHomebuilding.com

Wiring

Wiring

Trusted, code-compliant guidance from the pros for working safely on any wiring project

View Project Guide

View All Project Guides »

Become a member and get unlimited site access, including the Wiring Project Guide.

Start Free Trial

Working with Electricity
  • Basics
  • Safety
  • Troubleshooting and Upgrades
Tools and Materials
  • Electrical Tools
  • Electrical Boxes
  • Cables and Wires
Receptacles and Switches
  • Materials
  • Wiring Receptacles
  • Wiring Switches
Lights and Fans
  • Lighting Design
  • Installing Lights
  • Fans
Rough-In
  • Planning
  • Installing Electrical Boxes
  • Running Cable
  • Retrofit Work
  • Making Connections in Boxes
  • Electrical Conduit
Outdoor Wiring
  • Basics
  • Outlets
  • Installing Lighting
Panels and Subpanels
  • Understanding Panels
  • Circuits
  • Installing a Subpanel

Fine Home Building

Newsletter Sign-up

  • Fine Homebuilding

    Home building tips, offers, and expert advice in your inbox.

  • Green Building Advisor

    Building science and energy efficiency advice, plus special offers, in your inbox.

  • Old House Journal

    Repair, renovation, and restoration tips, plus special offers, in your inbox.

Signing you up...

This site is protected by reCAPTCHA and the Google Privacy Policy and Terms of Service apply.
See all newsletters

Follow

  • Fine Homebuilding

    Dig into cutting-edge approaches and decades of proven solutions with total access to our experts and tradespeople.

    Start Free Trial Now
    • Facebook
    • Instagram
    • X
    • LinkedIn
  • GBA Prime

    Get instant access to the latest developments in green building, research, and reports from the field.

    Start Free Trial Now
    • Facebook
    • YouTube
  • Old House Journal

    Learn how to restore, repair, update, and decorate your home.

    Subscribe Now
    • Facebook
    • Instagram
    • X

Membership & Magazine

  • Online Archive
  • Start Free Trial
  • Magazine Subscription
  • Magazine Renewal
  • Gift a Subscription
  • Customer Support
  • Privacy Preferences
  • About
  • Contact
  • Advertise
  • Careers
  • Terms of Use
  • Site Map
  • Do not sell or share my information
  • Privacy Policy
  • Accessibility
  • California Privacy Rights

© 2025 Active Interest Media. All rights reserved.

Fine Homebuilding receives a commission for items purchased through links on this site, including Amazon Associates and other affiliate advertising programs.

  • Home Group
  • Antique Trader
  • Arts & Crafts Homes
  • Bank Note Reporter
  • Cabin Life
  • Cuisine at Home
  • Fine Gardening
  • Fine Woodworking
  • Green Building Advisor
  • Garden Gate
  • Horticulture
  • Keep Craft Alive
  • Log Home Living
  • Military Trader/Vehicles
  • Numismatic News
  • Numismaster
  • Old Cars Weekly
  • Old House Journal
  • Period Homes
  • Popular Woodworking
  • Script
  • ShopNotes
  • Sports Collectors Digest
  • Threads
  • Timber Home Living
  • Traditional Building
  • Woodsmith
  • World Coin News
  • Writer's Digest
Active Interest Media logo
X
X
This is a dialog window which overlays the main content of the page. The modal window is a 'site map' of the most critical areas of the site. Pressing the Escape (ESC) button will close the modal and bring you back to where you were on the page.

Main Menu

  • How-To
  • Design
  • Tools & Materials
  • Video
  • Blogs
  • Forum
  • Project Guides
  • Reader Projects
  • Magazine
  • Members
  • FHB House

Podcasts

  • FHB Podcast
  • ProTalk

Webinars

  • Upcoming and On-Demand

Podcasts

  • FHB Podcast
  • ProTalk

Webinars

  • Upcoming and On-Demand

Popular Topics

  • Kitchens
  • Business
  • Bedrooms
  • Roofs
  • Architecture and Design
  • Green Building
  • Decks
  • Framing
  • Safety
  • Remodeling
  • Bathrooms
  • Windows
  • Tilework
  • Ceilings
  • HVAC

Magazine

  • Current Issue
  • Past Issues
  • Magazine Index
  • Subscribe
  • Online Archive
  • Author Guidelines

All Access

  • Member Home
  • Start Free Trial
  • Gift Membership

Online Learning

  • Courses
  • Project Guides
  • Reader Projects
  • Podcast

More

  • FHB Ambassadors
  • FHB House
  • Customer Support

Account

  • Log In
  • Join

Newsletter

Get home building tips, offers, and expert advice in your inbox

Signing you up...

This site is protected by reCAPTCHA and the Google Privacy Policy and Terms of Service apply.
See all newsletters
See all newsletters

Follow

  • X
  • YouTube
  • instagram
  • facebook
  • pinterest
  • Tiktok

Join All Access

Become a member and get instant access to thousands of videos, how-tos, tool reviews, and design features.

Start Your Free Trial

Subscribe

FHB Magazine

Start your subscription today and save up to 70%

Subscribe

You have 1 free article remaining.

Get complete site access, including thousands of videos, how-to tips, tool reviews, and design features.

Start your FREE trial

Already a member? Log in

We hope you’ve enjoyed your free articles. To keep reading, become a member today.

Get complete site access to expert advice, how-to videos, Code Check, and more, plus the print magazine.

Start your FREE trial

Already a member? Log in

Privacy Policy Update

We use cookies, pixels, script and other tracking technologies to analyze and improve our service, to improve and personalize content, and for advertising to you. We also share information about your use of our site with third-party social media, advertising and analytics partners. You can view our Privacy Policy here and our Terms of Use here.

Cookies

Analytics

These cookies help us track site metrics to improve our sites and provide a better user experience.

Advertising/Social Media

These cookies are used to serve advertisements aligned with your interests.

Essential

These cookies are required to provide basic functions like page navigation and access to secure areas of the website.

Delete My Data

Delete all cookies and associated data