FHB Logo Facebook LinkedIn Email Pinterest Twitter Instagram Plus Icon Close Icon Navigation Search Icon Navigation Search Icon Arrow Down Icon Video Guide Icon Article Guide Icon Modal Close Icon Guide Search Icon Skip to content
Subscribe

In every issue you'll find...

  • Expert insights on techniques and principles
  • Unbiased tool reviews
  • Step-by-step details to master the job
  • Field-tested advice and know-how
Subscribe Now!
Subscribe
  • How-To
  • Design
  • Tools & Materials
  • Videos
  • Blogs
  • Forum
  • Magazine
  • Members
  • FHB House
  • Podcast
  • Join
  • Log In
Subscribe

Fine Homebuilding Project Guides

Wiring

Guide Home
Chapter
  • Working with Electricity
  • Tools and Materials
  • Receptacles and Switches
  • Lights and Fans
  • Rough-In
  • Outdoor Wiring
  • Panels and Subpanels
How-To

Installing New Work Boxes

Follow these guidelines to attach boxes directly to exposed framing members.

By Mike Litchfield, Michael McAlister

Once you’ve used your plans to locate receptacle, switch, and light-fixture boxes on walls and ceilings, installing them is pretty straightforward. Electrical codes dictate box capacity and composition.

In residences, 18-cu.-in. single-gang PVC plastic boxes are by far the most commonly used. This size is large enough for a single outlet or a single switch and two cables. Otherwise, use a 22.5-cu.-in. single-gang box or a four-square box with a plaster ring.

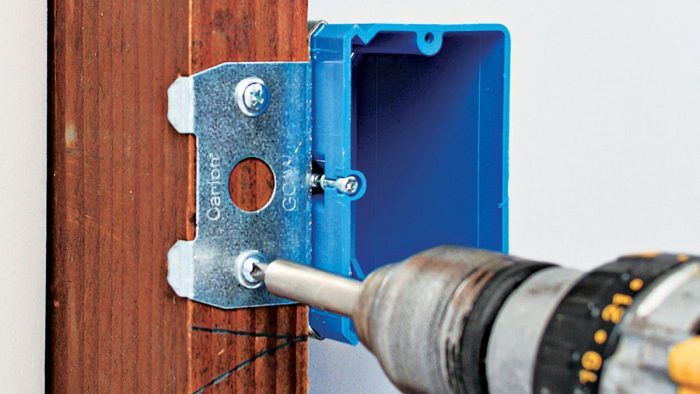
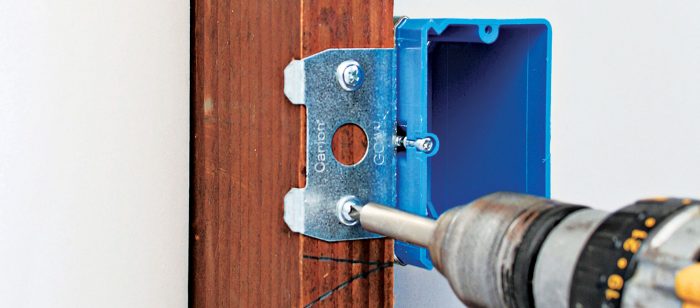
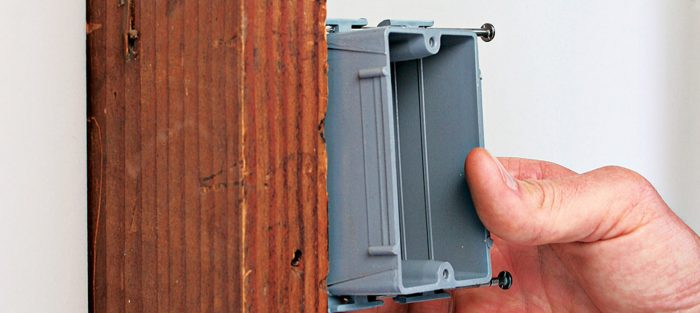
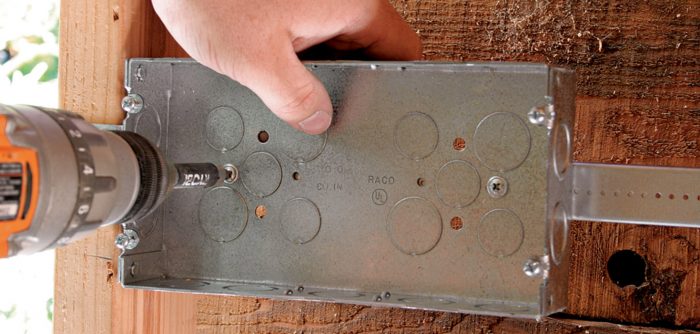
Set each box to the correct height, then set its depth so that the box edge will be flush to the finish surface. If you use adjustable boxes, simply screw them to a stud  1. To raise or lower the box depth, turn the adjusting screw. Side-nailing boxes typically have scales (gradated depth gauges) on the side  2. If not, use a scrap of finish material (such as 1⁄2-in. drywall) as a depth gauge. Metal boxes frequently have brackets that mount the box flush to a stud edge  3. after the box is wired, add a mud ring (plaster ring) to bring the box flush to the finish surface.

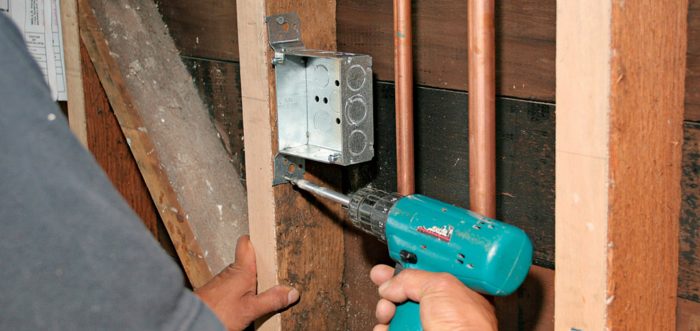
Multiple-gang boxes mount to studs in the same way. But if plans locate the box away from studs or a multigang box is particularly wide, nail blocking between the studs or install an adjustable box bracket and screw the box to it  4. (The bracket is also called a screw gun bracket, because a screw gun is typically used to mount it and to attach boxes to it.)

Using a screw gun to attach an adjustable box to a stud.
1.  To install an adjustable box, press its bracket flush against the stud edge and screw the bracket to the edge or side of the stud.
Attaching a non adjustable nail-on box to a stud.
2.  Nail-on boxes cannot be adjusted, so use the depth gauge on the side to ensure that box edges will be flush to finish surfaces.
Man using a screw gun to attach a box with integral brackets to a stud.
3.  Boxes with integral brackets have small points at top and bottom that sink into the stud. A mud ring brings the box flush to the wall.
Man using a screw gun to attach a multigang box to a stud.
4.  To provide solid support for multigang boxes, first install an adjustable box bracket that spans the studs.

About knockouts

Once you’ve mounted boxes, remove the appropriate number of box knockouts and install cable clamps. Single-gang, new-construction plastic boxes don’t need clamps: Simply strike a screwdriver handle with the heel of your hand to drive out the knockout. To remove a metal-box knockout, jab it with the nose of needle-nose pliers to loosen it, then use the pliers’ jaws to twist it free.


Wiring Complete, 3rd Edition

Excerpted from Wiring Complete, 3rd Edition (The Taunton Press, 2017) by Michael Litchfield and Michael McAlister

Available in the Taunton Store and at Amazon.com.


Sign up for eletters today and get the latest how-to from Fine Homebuilding, plus special offers.

Signing you up...

This site is protected by reCAPTCHA and the Google Privacy Policy and Terms of Service apply.
See all newsletters
See all newsletters
Previous: How to Wire a Bathroom: Make a Code-Compliant Plan Next: How to Install an Electrical Outlet Box

Guide

Wiring

Chapter

Rough-In

Log in or create an account to post a comment.

Sign up Log in

Become a member and get full access to FineHomebuilding.com

Wiring

Wiring

Trusted, code-compliant guidance from the pros for working safely on any wiring project

View Project Guide

View All Project Guides »

Become a member and get unlimited site access, including the Wiring Project Guide.

Start Free Trial

Working with Electricity
  • Basics
  • Safety
  • Troubleshooting and Upgrades
Tools and Materials
  • Electrical Tools
  • Electrical Boxes
  • Cables and Wires
Receptacles and Switches
  • Materials
  • Wiring Receptacles
  • Wiring Switches
Lights and Fans
  • Lighting Design
  • Installing Lights
  • Fans
Rough-In
  • Planning
  • Installing Electrical Boxes
  • Running Cable
  • Retrofit Work
  • Making Connections in Boxes
  • Electrical Conduit
Outdoor Wiring
  • Basics
  • Outlets
  • Installing Lighting
Panels and Subpanels
  • Understanding Panels
  • Circuits
  • Installing a Subpanel

Fine Homebuilding

Follow

  • twitter
  • facebook
  • instagram
  • pinterest

Newsletter

Get home building tips, offers, and expert advice in your inbox

Signing you up...

This site is protected by reCAPTCHA and the Google Privacy Policy and Terms of Service apply.
See all newsletters
See all newsletters

Membership & Magazine

  • Online Archive
  • Start Free Trial
  • Magazine Subscription
  • Magazine Renewal
  • Gift a Subscription
  • Customer Support
  • Privacy Preferences

Taunton Network

  • Green Building Advisor
  • Fine Woodworking
  • Fine Gardening
  • Threads
  • About
  • Contact
  • Advertise
  • Careers
  • Copyright
  • Terms of Use
  • Site Map
  • Do not sell or share my information
  • Privacy Policy
  • Accessibility
  • California Privacy Rights

© 2023 The Taunton Press, Inc. All rights reserved.

X
X
This is a dialog window which overlays the main content of the page. The modal window is a 'site map' of the most critical areas of the site. Pressing the Escape (ESC) button will close the modal and bring you back to where you were on the page.

Main Menu

  • How-To
  • Design
  • Tools & Materials
  • Video
  • Blogs
  • Forum
  • Reader Projects
  • Magazine
  • Members
  • FHB House

Podcasts

  • FHB Podcast
  • ProTalk

Webinars

  • Upcoming and On-Demand

Account

  • Log In
  • Join

Podcasts

  • FHB Podcast
  • ProTalk

Webinars

  • Upcoming and On-Demand

Popular Topics

  • Kitchens
  • Business
  • Bedrooms
  • Roofs
  • Architecture and Design
  • Green Building
  • Decks
  • Framing
  • Safety
  • Remodeling
  • Bathrooms
  • Windows
  • Tilework
  • Ceilings
  • HVAC

Magazine

  • Current Issue
  • Past Issues
  • Magazine Index
  • Subscribe
  • Online Archive
  • Author Guidelines

All Access

  • Member Home
  • Start Free Trial
  • Gift Membership

Shop the Store

  • Books
  • DVDs
  • Taunton Workshops

More

  • FHB Ambassadors
  • Reader Projects
  • Podcast
  • Customer Support

Account

  • Log In
  • Join

Newsletter

Get home building tips, offers, and expert advice in your inbox

Signing you up...

This site is protected by reCAPTCHA and the Google Privacy Policy and Terms of Service apply.
See all newsletters
See all newsletters

Follow

  • twitter
  • facebook
  • instagram
  • pinterest

Join All Access

Become a member and get instant access to thousands of videos, how-tos, tool reviews, and design features.

Start Your Free Trial

Subscribe

FHB Magazine

Start your subscription today and save up to 70%

Subscribe

We hope you’ve enjoyed your free articles. To keep reading, become a member today.

Get complete site access to expert advice, how-to videos, Code Check, and more, plus the print magazine.

Start your FREE trial

Already a member? Log in