FHB Logo Facebook LinkedIn Email Pinterest Twitter Instagram Plus Icon Close Icon Navigation Search Icon Navigation Search Icon Arrow Down Icon Video Guide Icon Article Guide Icon Modal Close Icon Guide Search Icon Skip to content
Subscribe

In every issue you'll find...

  • Expert insights on techniques and principles
  • Unbiased tool reviews
  • Step-by-step details to master the job
  • Field-tested advice and know-how
Subscribe Now!
Subscribe
  • How-To
  • Design
  • Tools & Materials
  • Videos
  • Blogs
  • Forum
  • Magazine
  • Members
  • FHB House
  • Podcast
  • Join
  • Log In
Subscribe

Fine Homebuilding Project Guides

Wiring

Guide Home
Chapter
  • Working with Electricity
  • Tools and Materials
  • Receptacles and Switches
  • Lights and Fans
  • Rough-In
  • Outdoor Wiring
  • Panels and Subpanels
How-To

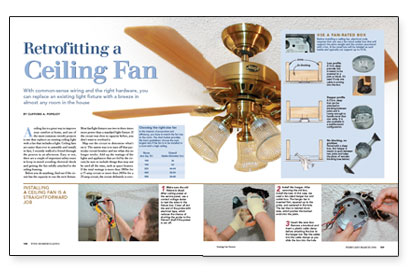
Retrofitting a Ceiling Fan

With common-sense wiring and the right hardware, you can replace an existing light fixture with a breeze in almost any room in the house.

By Clifford A. Popejoy Issue 177

Synopsis: A ceiling fan improves a room’s climate and its overall appearance, and the units are fairly easy to install — all good reasons why retrofits are so popular. Written by an electrical contractor, this article discusses the important aspects of a ceiling-fan retrofit: namely, using fan-rated outlet boxes and checking the existing wiring, as well as other installation tips.


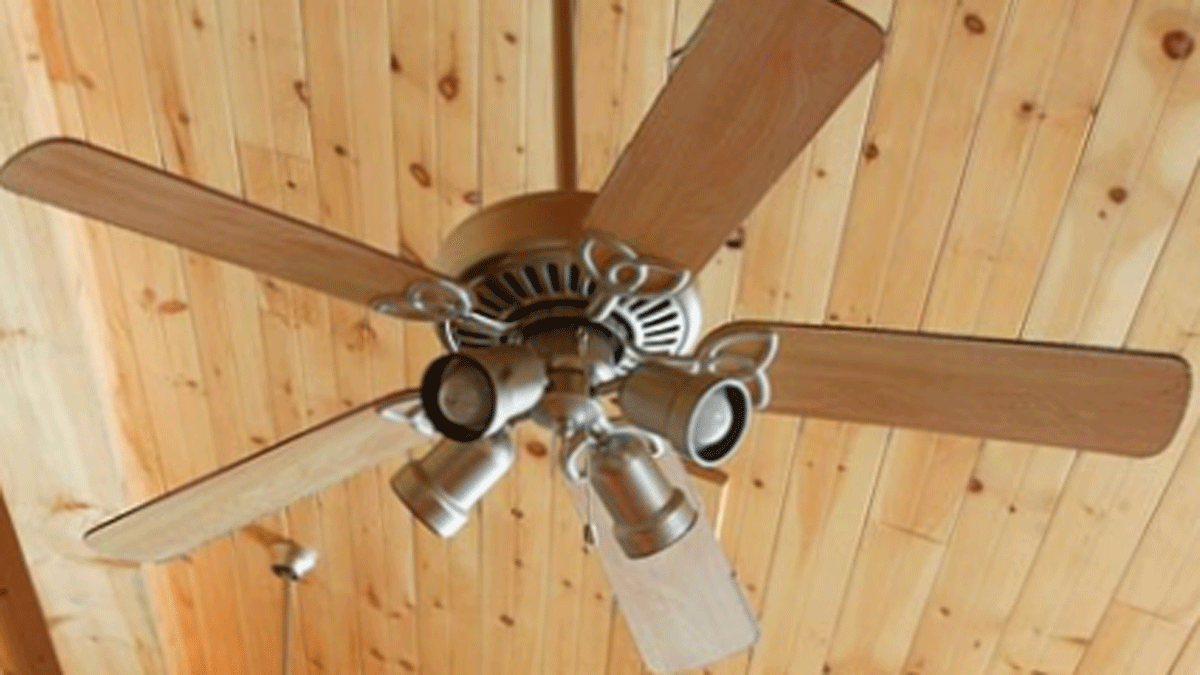
A ceiling fan is a great way to improve your comfort at home, and one of the most common retrofit projects is one that replaces an existing ceiling light with a fan that includes a light. Ceiling fans are easier than ever to assemble and install; in fact, I recently walked a friend through the process in an afternoon. Easy or not, there are a couple of important safety issues to keep in mind: avoiding electrical shock and getting the fan solidly attached to the ceiling framing.

Before you do anything, find out if the circuit has the capacity to run the new fixture. Most fan/light fixtures use two to three times more power than a standard light fixture. If the circuit was close to capacity before, you don’t want to overload it.

Map out the circuit to determine what’s on it. The easiest way is to turn off that particular circuit breaker and see what else no longer works. Add up the wattage of the lights and appliances that are fed by the circuit; be sure to include things that may not be used all the time, such as space heaters. If the total wattage is more than 1800w for a 15-amp circuit or more than 2400w for a 20-amp circuit, the circuit definitely is over loaded. Although not required by code, it’s advisable to keep the load below 80% of those figures.new ceiling fan against wood ceiling

Remove the old box, and check the existing wires

Just shutting off the existing light at the wall switch doesn’t guarantee that power is off in the ceiling box. The ceiling light’s circuit should be turned off at the service panel. Use a voltage tester to confirm that the fixture and all the wires in the box are de-energized, and make sure they’ll stay that way while you’re working on them.

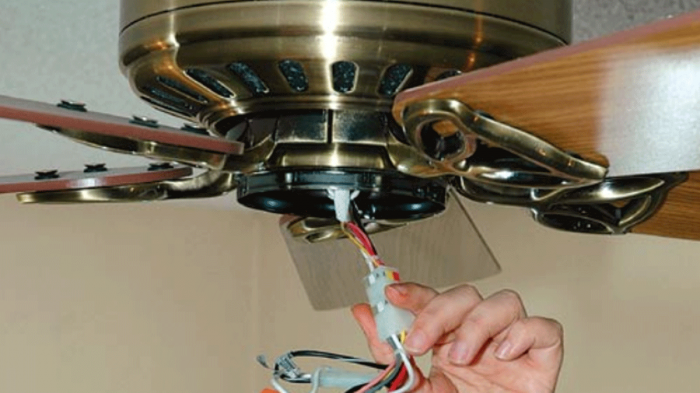
Now take a close look at the cables coming into the box; take notes on how they’re connected. Sometimes it’s helpful to label the wires with masking tape and a felt-tip pen. If the old ceiling box is a ½-in.-deep pancake style box, removing it is usually just a matter of pulling some nails or a couple of screws. For a side-nailed box, I’ve found that the best removal tool to use is a hacksaw blade in a holder, or a reciprocating saw outfitted with a thin, short blade to cut the nails. Be careful that you don’t chew up the wiring as you cut.

After removing the box, check the wires. If the insulation on the wires is old and deteriorated, use electrical tape or heat-shrink tubing (available in most electronics-supply stores) to insulate them. If the insulation is too cracked and you have access from above, cut back the old wires, install a splice (or junction) box, and run new cables to the fan-box location. If the wiring is armored (BX) cable, make sure the metal jacket is in good condition; if it’s rusty or corroded, install a junction box and run new cable.

magazine spread of this article From Fine Homebuilding #177

For more photos, illustrations, and details, click the View PDF button below:


Sign up for eletters today and get the latest how-to from Fine Homebuilding, plus special offers.

Signing you up...

This site is protected by reCAPTCHA and the Google Privacy Policy and Terms of Service apply.
See all newsletters
See all newsletters
View PDF
Previous: Installing Low-Voltage Monorail Track Lighting Next: Installing a Ceiling Fan

Guide

Wiring

Chapter

Lights and Fans

Log in or create an account to post a comment.

Sign up Log in

Become a member and get full access to FineHomebuilding.com

Wiring

Wiring

Trusted, code-compliant guidance from the pros for working safely on any wiring project

View Project Guide

View All Project Guides »

Become a member and get unlimited site access, including the Wiring Project Guide.

Start Free Trial

Working with Electricity
  • Basics
  • Safety
  • Troubleshooting and Upgrades
Tools and Materials
  • Electrical Tools
  • Electrical Boxes
  • Cables and Wires
Receptacles and Switches
  • Materials
  • Wiring Receptacles
  • Wiring Switches
Lights and Fans
  • Lighting Design
  • Installing Lights
  • Fans
Rough-In
  • Planning
  • Installing Electrical Boxes
  • Running Cable
  • Retrofit Work
  • Making Connections in Boxes
  • Electrical Conduit
Outdoor Wiring
  • Basics
  • Outlets
  • Installing Lighting
Panels and Subpanels
  • Understanding Panels
  • Circuits
  • Installing a Subpanel

Fine Homebuilding

Follow

  • twitter
  • facebook
  • instagram
  • pinterest

Newsletter

Get home building tips, offers, and expert advice in your inbox

Signing you up...

This site is protected by reCAPTCHA and the Google Privacy Policy and Terms of Service apply.
See all newsletters
See all newsletters

Membership & Magazine

  • Online Archive
  • Start Free Trial
  • Magazine Subscription
  • Magazine Renewal
  • Gift a Subscription
  • Customer Support
  • Privacy Preferences

Taunton Network

  • Green Building Advisor
  • Fine Woodworking
  • Fine Gardening
  • Threads
  • About
  • Contact
  • Advertise
  • Careers
  • Copyright
  • Terms of Use
  • Site Map
  • Do not sell or share my information
  • Privacy Policy
  • Accessibility
  • California Privacy Rights

© 2023 The Taunton Press, Inc. All rights reserved.

X
X
This is a dialog window which overlays the main content of the page. The modal window is a 'site map' of the most critical areas of the site. Pressing the Escape (ESC) button will close the modal and bring you back to where you were on the page.

Main Menu

  • How-To
  • Design
  • Tools & Materials
  • Video
  • Blogs
  • Forum
  • Reader Projects
  • Magazine
  • Members
  • FHB House

Podcasts

  • FHB Podcast
  • ProTalk

Webinars

  • Upcoming and On-Demand

Account

  • Log In
  • Join

Podcasts

  • FHB Podcast
  • ProTalk

Webinars

  • Upcoming and On-Demand

Popular Topics

  • Kitchens
  • Business
  • Bedrooms
  • Roofs
  • Architecture and Design
  • Green Building
  • Decks
  • Framing
  • Safety
  • Remodeling
  • Bathrooms
  • Windows
  • Tilework
  • Ceilings
  • HVAC

Magazine

  • Current Issue
  • Past Issues
  • Magazine Index
  • Subscribe
  • Online Archive
  • Author Guidelines

All Access

  • Member Home
  • Start Free Trial
  • Gift Membership

Shop the Store

  • Books
  • DVDs
  • Taunton Workshops

More

  • FHB Ambassadors
  • Reader Projects
  • Podcast
  • Customer Support

Account

  • Log In
  • Join

Newsletter

Get home building tips, offers, and expert advice in your inbox

Signing you up...

This site is protected by reCAPTCHA and the Google Privacy Policy and Terms of Service apply.
See all newsletters
See all newsletters

Follow

  • twitter
  • facebook
  • instagram
  • pinterest

Join All Access

Become a member and get instant access to thousands of videos, how-tos, tool reviews, and design features.

Start Your Free Trial

Subscribe

FHB Magazine

Start your subscription today and save up to 70%

Subscribe

We hope you’ve enjoyed your free articles. To keep reading, become a member today.

Get complete site access to expert advice, how-to videos, Code Check, and more, plus the print magazine.

Start your FREE trial

Already a member? Log in