
Installing Low-Voltage Path Lights
Illuminate your way outside with these easy-to-install lo-vo lights.

Low-voltage (lo-vo) lights make nighttime paths and walkways safer, are easy to install, and pose almost no shock threat. However, turn power off to the circuit you’ll be working on to be doubly sure. Always follow the installation instructions that come with your low-voltage kit. Kits usually include light assemblies, lo-vo cable, posts, ground stakes, and timer-transformer power pack whose transformer reduces house current from 120v to 12v.
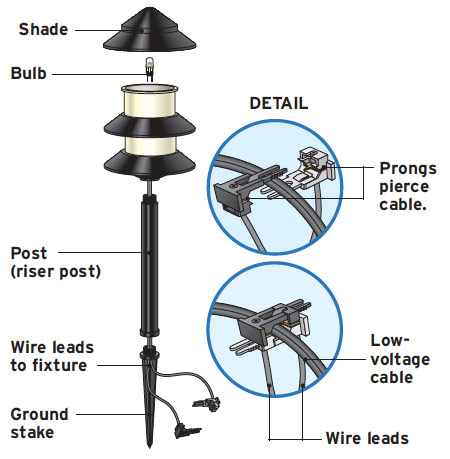
Low-Voltage Light Parts
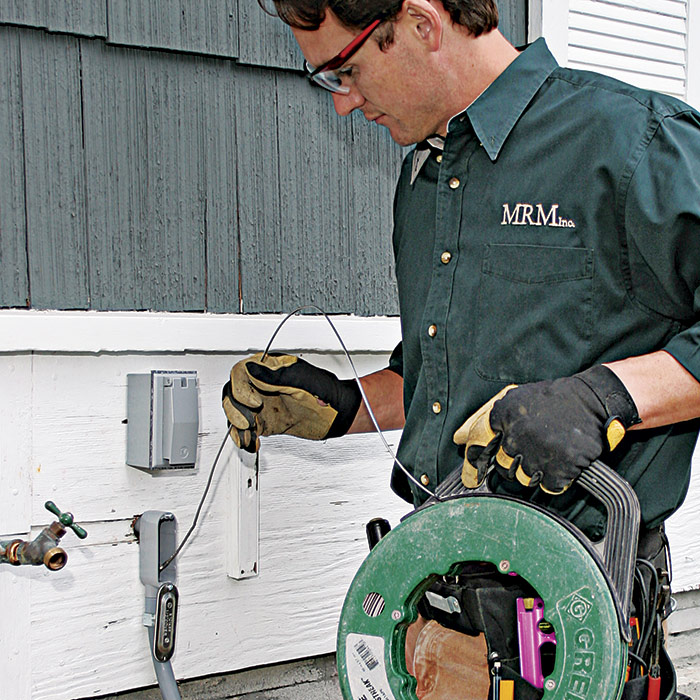
In the installation shown here, the power pack was mounted inside the garage, so PVC conduit was installed to protect the lo-vo cable as it traveled up the exterior wall into the garage. If you install the power pack outside, you probably won’t need conduit. If you do install conduit, start by inserting a fish tape down the conduit 1. Separate the two wires in the lo-vo cable, snip one, loop and tape the remaining wire to the fish tape, and pull the lo-vo cable through the conduit.
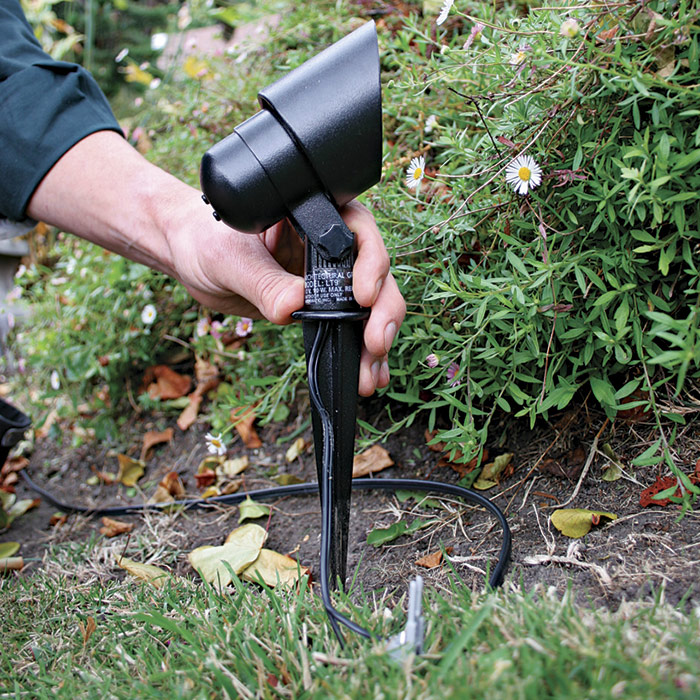
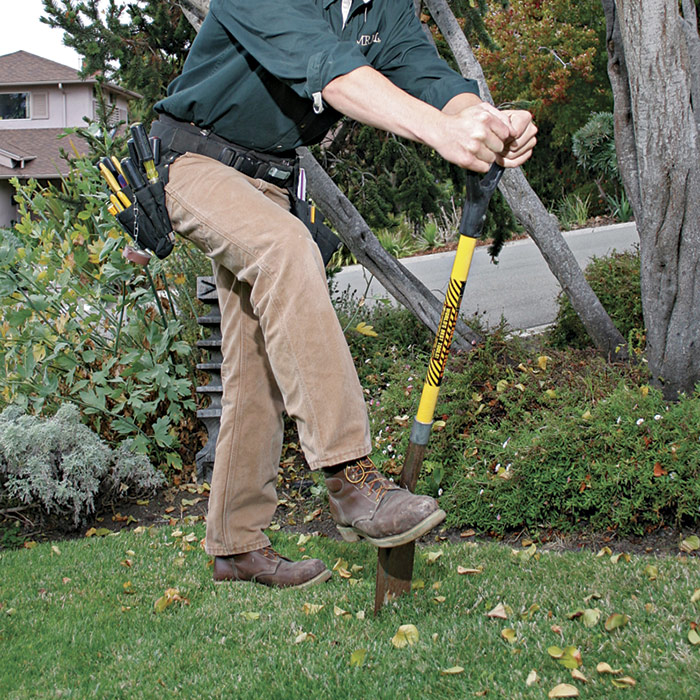
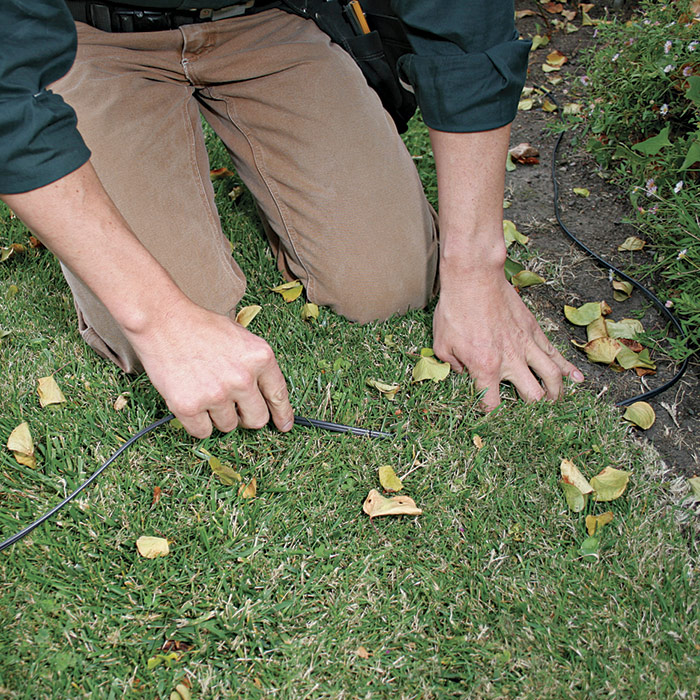
Place the lights where they’ll best illuminate a walkway or highlight a landscape feature, then run the lo-vo cable to them 2. Run cable along the ground and cover it with a few inches of mulch, or use a square-nosed shovel to create a shallow slot for the cable. Stomp on the shovel so it goes down 4 in., then rock the shovel from side to side to create a V-shaped slot 3. Press the cable into the slot 4; then stamp your feet to close the soil over the cable.
 |
 |
 |
 |
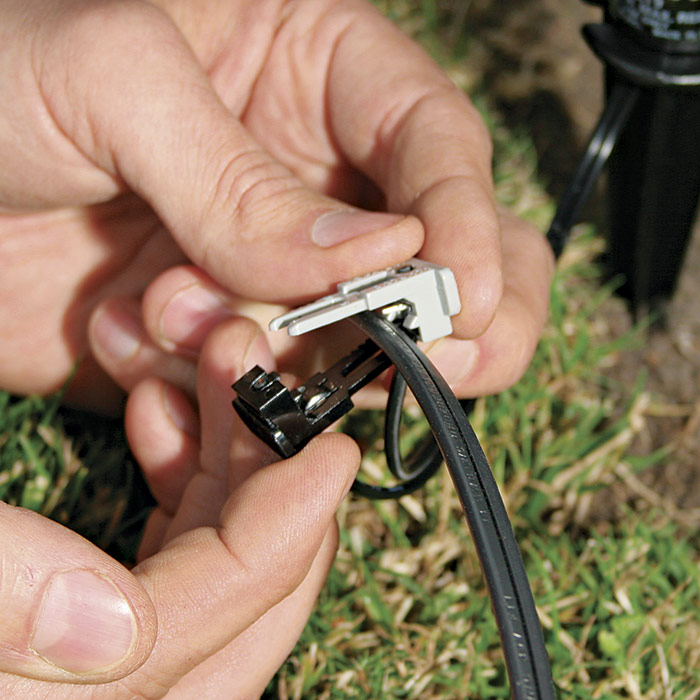
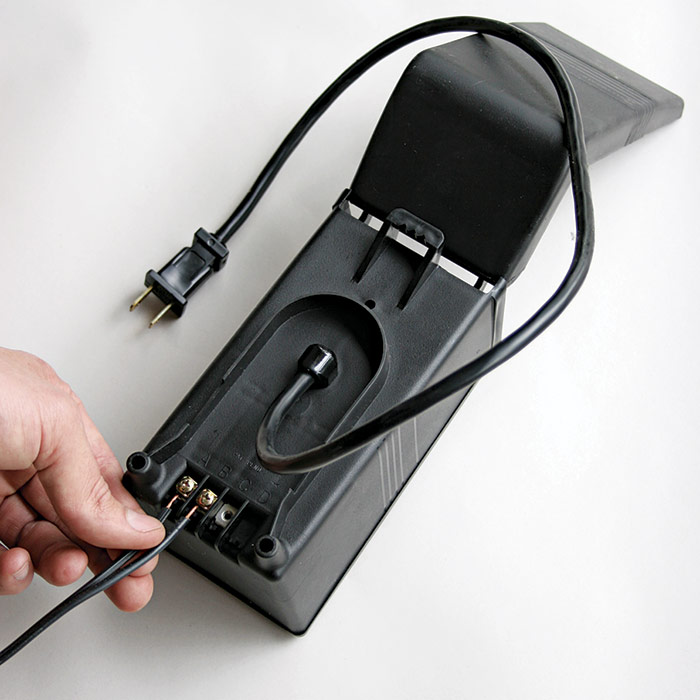
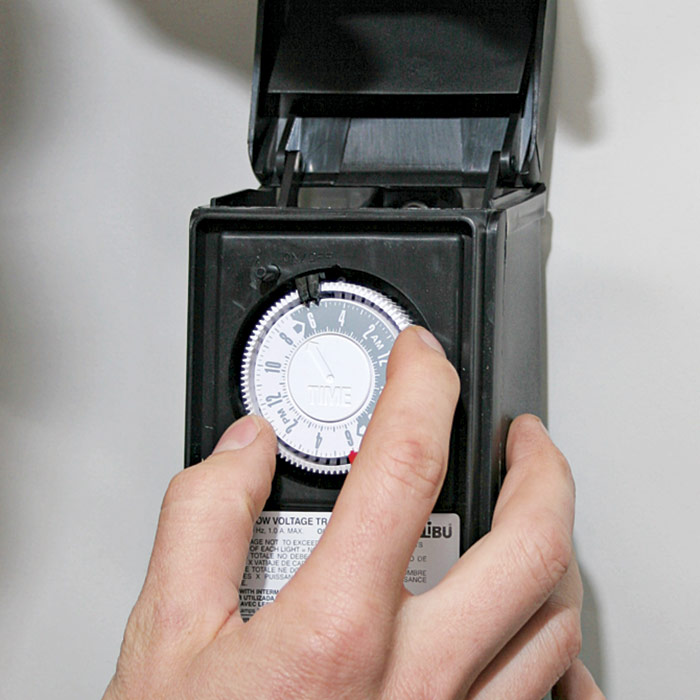
Each light fixture has two wire leads that terminate in sharp-pointed cable connectors. When snapped together, the connectors pierce the insulation of the lo-vo wires and supply each light with 12v current 5. To power the system, attach lo-vo cable wires to the terminals on the power pack 6. Mount the power pack securely to the wall and plug it into the outlet. Power packs are equipped with timers so that the lights come on and turn off whenever you like—whether you’re home or away 7.
 |
 |
 |
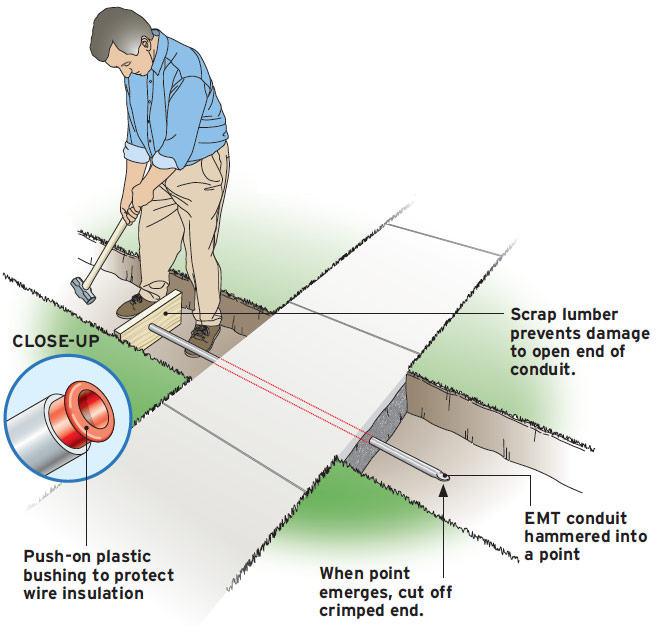
Running Lo-Vo Cable Under a Sidewalk
The easiest way to run lo-vo cable under a sidewalk is to cut a piece of EMT pipe about 1 ft. longer than the sidewalk is wide. Hammer one end of the EMT shut so it creates a point, then use a hand sledge to drive the EMT under the sidewalk. To prevent closing the end of the pipe you hammer on, position a scrap of 234 against the pipe end as you hit it. When the pointed end emerges from the other side of the walk, use a hacksaw to cut it off. Then feed the lo-vo cable through the EMT pipe.

Excerpted from Wiring Complete, 3rd Edition (The Taunton Press, 2017) by Michael Litchfield and Michael McAlister
Available in the Taunton Store and at Amazon.com.

