FHB Logo Facebook LinkedIn Email Pinterest Twitter Instagram Plus Icon Close Icon Navigation Search Icon Navigation Search Icon Arrow Down Icon Video Guide Icon Article Guide Icon Modal Close Icon Guide Search Icon Skip to content
Subscribe
Log In
  • How-To
  • Design
  • Tools & Materials
  • Videos
  • Blogs
  • Forum
  • Magazine
  • Members
  • FHB House
  • Podcast
Log In

Fine Homebuilding Project Guides

Wiring

Guide Home
  • Working with Electricity
  • Tools and Materials
  • Receptacles and Switches
  • Lights and Fans
  • Rough-In
  • Outdoor Wiring
  • Panels and Subpanels
Building Skills

Wire-Stripping Tips for Roughing in an Electrical Box

Learn some time-saving tricks for handling plastic-sheathed cable.

By Official Fine Homebuilding Post

3 Tips for working with plastic-sheathed cable

With Brian Walo

1. Quickly and safely expose the copper conductors

Here’s one reliable way to get the insulation off of nonmetallic sheathed wires without cutting yourself or damaging the wire. First, grab the cable so that about 1-1/2 inches is sticking out past your hand. Stick the point of your utility knife into the center of the protruding piece of cable and push it away from your hand, splitting the sheathing down the middle. Then, grasp the exposed wires in one hand and pull the sheathing away with the other – it should just tear down the middle. If using this method, be sure that when you rough in your wires there’s enough wire extending out of the box so that the last couple inches will get cut off. This way it doesn’t matter if you nick the copper conductor with your utility knife.

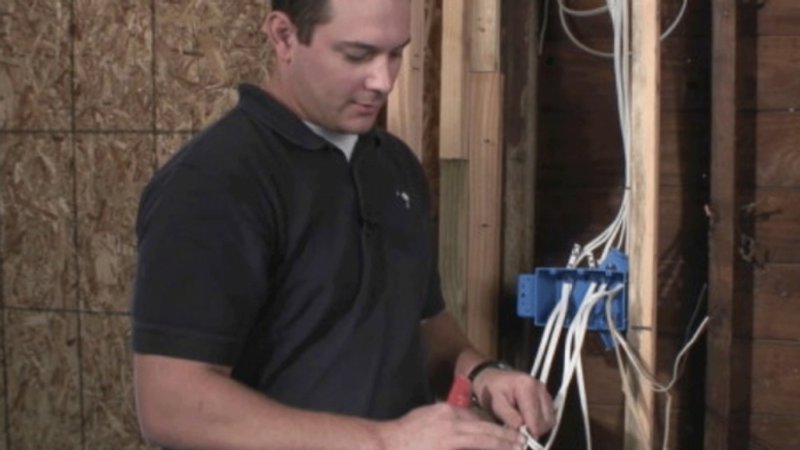
2. Keep track of your wires

When you rough in the wires, all the cables should be labeled with a permanent marker so you know what they will connect to. You can keep those labels and reuse them to permanently mark the purpose of each wire in the electrical box. Before you strip the sheathing, cut off the section of sheathed cable that has the label, slide the labeled sheathing off of the conductors, and temporarily tuck it into the hole where each cable enters the electrical box. When it’s time to wire the switches, receptacles, and other devices, just slip those labels over the conductors before you connect them.

3. Cut off the loose sheathing

Once you have the labels in place and the sheathing pulled back, it’s time to remove the excess sheathing. Brian suggests using diagonal cutters (also called dikes or side cutters) for this last step. Grasp the loose sheathing in one hand and snip the loose sheathing with the jaw of the cutters, about 1/2-in. from where the wire comes into the electrical box. This way you will keep the 1/4-in. minimum of sheathing protecting the wires where they contact the potentially sharp edges of the box.

More on Electrical 

Running New Wires through Old Walls – With an assortment of tools, a few tricks, and a little luck, you can make electrical cable go where you didn’t think it could.

Ten Common Wiring Problems – A master electrician details some frequently found mistakes that could cost you your house or your life.

The Indispensable Digital Multimeter – In this article, electrician Brian Walo explains what to look for in a digital multimeter: style (some meters include a split fork, a hook, or a clamp), leads, display, the maximum number of amps the tool can read, whether the DMM has an auto-ranging or manual-ranging feature or both.

Video Series: Install a Subpanel – Whether you’re building an addition or renovating an existing space, a new subpanel may be the easiest way to add electrical circuits to a house. In this video series, a licensed electrician shows you everything you will need to do the job right.

Sign up for eletters today and get the latest how-to from Fine Homebuilding, plus special offers.

Signing you up...

This site is protected by reCAPTCHA and the Google Privacy Policy and Terms of Service apply.
See all newsletters
See all newsletters
Previous: How to Splice Wires Next: How to Wire a Switch Box

Guide

Wiring

Chapter

Rough-In

View Comments

  1. Tonawanda | Feb 02, 2018 02:44pm | #1

    Fantastic! Thanks the taking the time and making the effort to share your expertise.
    Tonawanda

Log in or create an account to post a comment.

Sign up Log in

Become a member and get full access to FineHomebuilding.com

Wiring

Wiring

Trusted, code-compliant guidance from the pros for working safely on any wiring project

View Project Guide

View All Project Guides »

Become a member and get unlimited site access, including the Wiring Project Guide.

Start Free Trial

Working with Electricity
  • Basics
  • Safety
  • Troubleshooting and Upgrades
Tools and Materials
  • Electrical Tools
  • Electrical Boxes
  • Cables and Wires
Receptacles and Switches
  • Materials
  • Wiring Receptacles
  • Wiring Switches
Lights and Fans
  • Lighting Design
  • Installing Lights
  • Fans
Rough-In
  • Planning
  • Installing Electrical Boxes
  • Running Cable
  • Retrofit Work
  • Making Connections in Boxes
  • Electrical Conduit
Outdoor Wiring
  • Basics
  • Outlets
  • Installing Lighting
Panels and Subpanels
  • Understanding Panels
  • Circuits
  • Installing a Subpanel

Fine Homebuilding

Follow

  • twitter
  • facebook
  • instagram
  • pinterest

Newsletter

Get home building tips, offers, and expert advice in your inbox

Signing you up...

This site is protected by reCAPTCHA and the Google Privacy Policy and Terms of Service apply.
See all newsletters
See all newsletters

Membership & Magazine

  • Online Archive
  • Start Free Trial
  • Magazine Subscription
  • Magazine Renewal
  • Gift a Subscription
  • Customer Support
  • Privacy Preferences

Taunton Network

  • Green Building Advisor
  • Fine Woodworking
  • Fine Gardening
  • Threads
  • About
  • Contact
  • Advertise
  • Careers
  • Copyright
  • Terms of Use
  • Site Map
  • Do not sell or share my information
  • Privacy Policy
  • Accessibility
  • California Privacy Rights

© 2023 The Taunton Press, Inc. All rights reserved.

X
X
This is a dialog window which overlays the main content of the page. The modal window is a 'site map' of the most critical areas of the site. Pressing the Escape (ESC) button will close the modal and bring you back to where you were on the page.

Main Menu

  • How-To
  • Design
  • Tools & Materials
  • Video
  • Blogs
  • Forum
  • Reader Projects
  • Magazine
  • Members
  • FHB House

Podcasts

  • FHB Podcast
  • ProTalk

Webinars

  • Upcoming and On-Demand

Podcasts

  • FHB Podcast
  • ProTalk

Webinars

  • Upcoming and On-Demand

Popular Topics

  • Kitchens
  • Business
  • Bedrooms
  • Roofs
  • Architecture and Design
  • Green Building
  • Decks
  • Framing
  • Safety
  • Remodeling
  • Bathrooms
  • Windows
  • Tilework
  • Ceilings
  • HVAC

Magazine

  • Current Issue
  • Past Issues
  • Magazine Index
  • Subscribe
  • Online Archive
  • Author Guidelines

All Access

  • Member Home
  • Start Free Trial
  • Gift Membership

Shop the Store

  • Books
  • DVDs
  • Taunton Workshops

More

  • FHB Ambassadors
  • Reader Projects
  • Podcast
  • FHB House
  • Customer Support

Account

  • Log In
  • Join

Newsletter

Get home building tips, offers, and expert advice in your inbox

Signing you up...

This site is protected by reCAPTCHA and the Google Privacy Policy and Terms of Service apply.
See all newsletters
See all newsletters

Follow

  • twitter
  • facebook
  • instagram
  • pinterest

Join All Access

Become a member and get instant access to thousands of videos, how-tos, tool reviews, and design features.

Start Your Free Trial

Subscribe

FHB Magazine

Start your subscription today and save up to 70%

Subscribe

We hope you’ve enjoyed your free articles. To keep reading, become a member today.

Get complete site access to expert advice, how-to videos, Code Check, and more, plus the print magazine.

Start your FREE trial

Already a member? Log in