
Framing the Bell Curve
Framing the bell-shaped roof of a small, square historic building posed some interesting challenges.
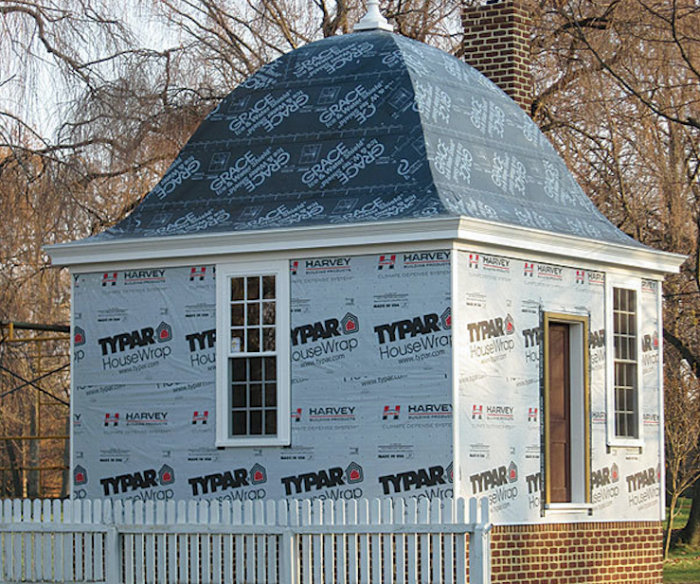
Our client wanted to replicate a small building from 18th-century Williamsburg, Va. While only 16 ft. sq., it posed some enticing challenges, such as its bell-shaped roof. To begin, the existing plans from the Historic American Building Survey (see “Trick of the Trade,” below) provided only a footprint and some elevations. Lucky for us, the drawings were scaled 1/4 in. to the foot.
We had the drawing enlarged to 2 ft. by 3 ft. at a local copy center. Then we imposed a grid of lines spaced 1/16 in. apart on the front elevation, which translated to 88 lines spaced 13/16 in. apart in full scale. Next, we began to draw the roof shape at that scale. On rosin paper stapled to the shop floor, we snapped a baseline and a perpendicular centerline, then snapped 90 lines 13/16 in. apart. To keep errors to a minimum, we used a story pole that transferred the marks and corresponding numbers to the floor.
We decided to calculate the rafter lengths from the underside and to ignore the shaped side of the rafters. The undersides gave us straight areas to measure and a means to check that everything was in plane. While we could calculate the length of the hips from the underside, we couldn’t derive the elongated shape on top of the rafters. Scribing the hip in place seemed to be the most foolproof solution.
To begin the frame, which was made from 2-in.-thick LVL stock, we placed three commons in their locations mounted to the center block. In place of the fourth common, we built a temporary ridge supported by a post to which we could position two additional commons, one on each side, for scribing the hip. With the hip cut to length, we used pocket screws to locate it in place temporarily.
Next, we cut both sets of jacks for the first hip and installed them with pocket screws. Using the two commons and the longer jacks as guides, we could scribe the shape of the roof to the hip with a 10-ft.-long straightedge tipped with a pencil. (It turns out that it’s easier to scribe down than up.) Once the scribed hip stock was back on the ground, we used 1×1 PVC to smooth the line.
When we had completed half the roof, we removed the temporary ridge and post, then used the existing structure to determine the shape of the remaining hips. While one hip probably could have been used as a pattern for the rest, we weren’t comfortable with the idea of wasting an entire board if it didn’t work out, so we scribed all four hips. The process didn’t really add that much more time, and it yielded great results. After the framing was complete, we sheathed the roof with two layers of 3/8-in. bending plywood that in turn was covered with self-adhesive membrane.
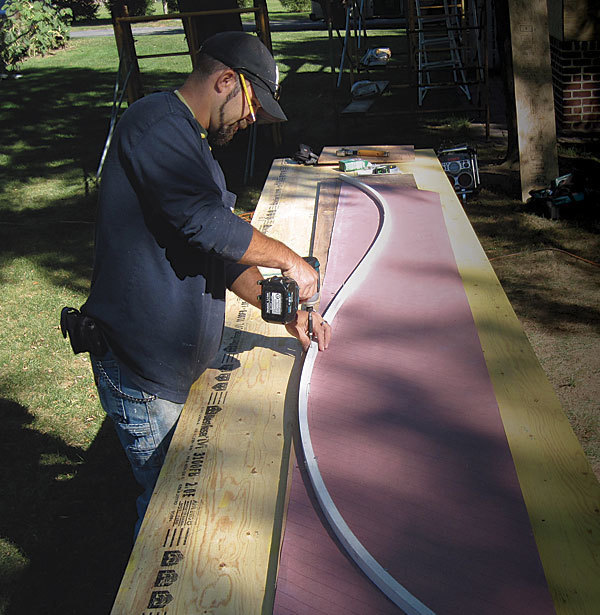
Plotting a rafter with paper and PVC. Once the grid points were plotted, we drew the outline of the rafter shape on rosin paper. Here, a piece of PVC trim stock was ripped to about 1 in. by 1 in. and bent to the plotted points to smooth out the shape. After the shape was cut out from the paper, it was transferred onto 1/2-in. plywood as a full-scale mock-up that was then installed and given a visual check.
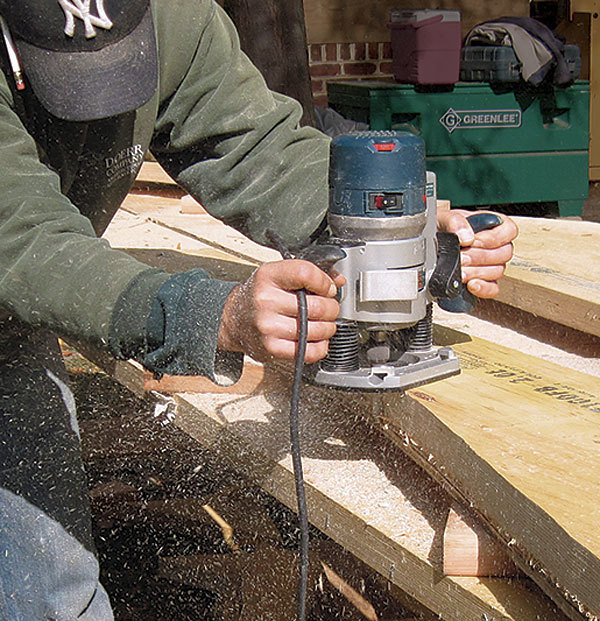
Start with a template and end with a router. Once the shape was approved, five common rafters were cut out with a jigsaw, then cleaned up to the lines with a 2-in. pattern bit on a router registered on the plywood template.
Shaping the Hips
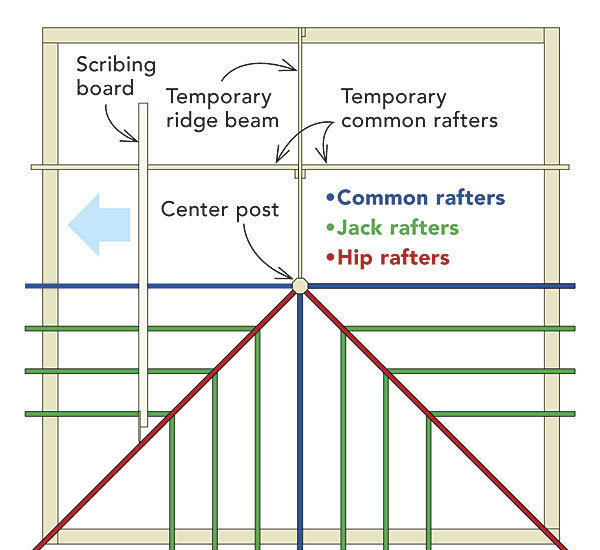
First, the three common rafters, two rough-cut hips, and longer jacks were installed. For a more accurate scribe, a temporary ridge was first screwed to the back side of the center post and supported by a temporary post at the other end. An additional common rafter was installed temporarily on each side of the ridge to give more bearing surface for the scribing board.
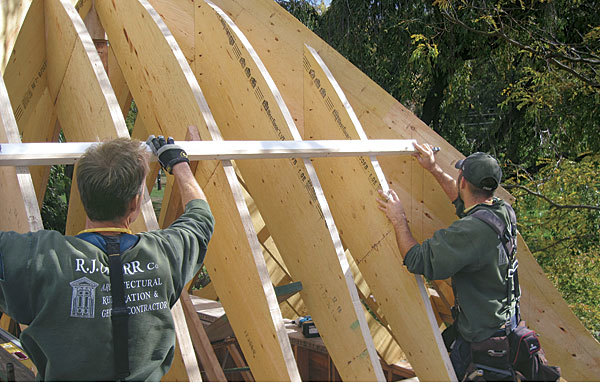
Scribe, don’t measure. A 10-ft. board tipped with a carpenter’s pencil became the major scribing tool. Registered roughly level across the commons and jacks, it drew an accurate layout line on each side of the hip.
Trick of the Trade
HABS
If you are interested in architectural history in the United States, there’s no better place to start your research than the Historic American Building Survey (HABS), whose online collection is part of the enormous and rewarding Web site of the Library of Congress (www.loc.gov/pictures/collection/hh). It includes a collection of more than 500,000 high-resolution photographs, drawings, and histories of nearly 40,000 historic structures and sites in all 50 states—everything from pueblos to Frank Lloyd Wright houses to the Golden Gate Bridge. Best of all, most items in the collection are in the public domain, and downloads are encouraged.
Photos: Chad Ekdahl; Drawing: Rodney Diaz
Fine Homebuilding Recommended Products
Fine Homebuilding receives a commission for items purchased through links on this site, including Amazon Associates and other affiliate advertising programs.

Ladder Stand Off
Fall Protection
Flashing Boot Repair

