
How To Cut Stair Stringers
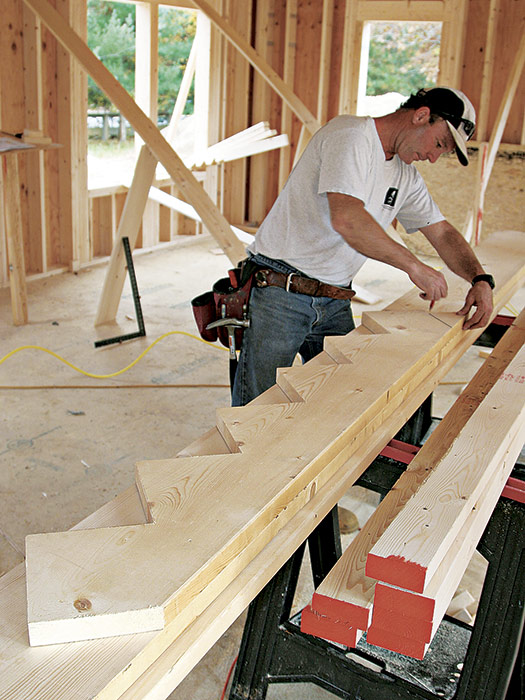
First make a test stringer on 2x12 stock, then use it as a template for the rest of the stringers.
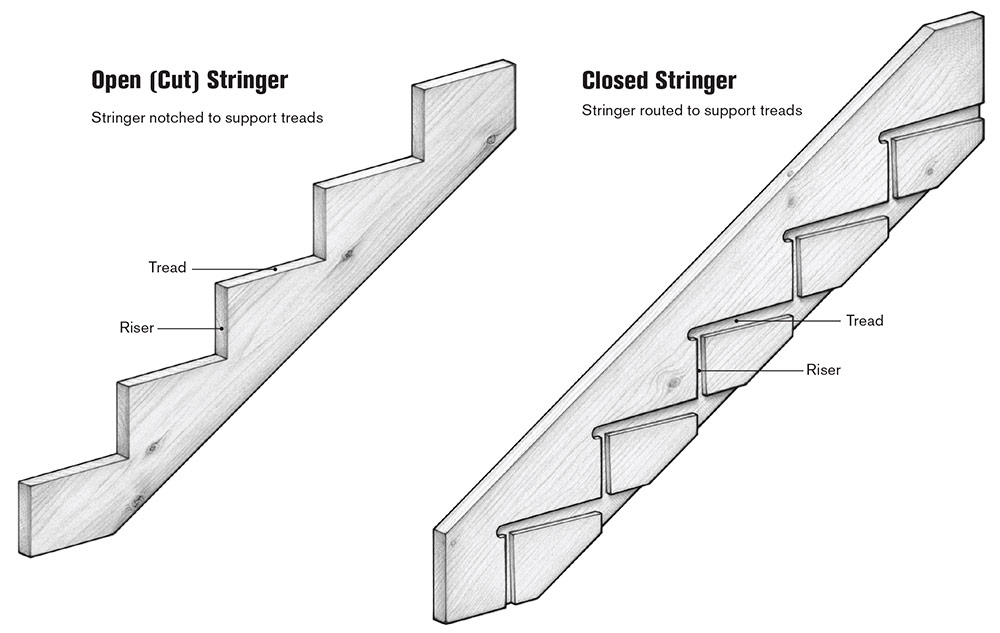
Armed with the unit rise and unit run dimensions, you can make the stair stringers. Stringers can be open or closed, as shown in the drawing below. With closed stringers, the treads and risers fit into slots cut into the inside face of the stringer stock. Closed stringers are usually made from finish-grade lumber and are meant to be left exposed.
Open stringers, sometimes called cut stringers, have triangular-shaped notches cut out of their top edge so that the stringer resembles a dragon’s tail (a common nickname for open stringers). Open stringers, such as those on this project, are made from framing-grade lumber and are not usually left exposed. The side and underside of these stringers will be covered with drywall. Much later on, the temporary treads will be replaced by finished treads and risers.
Make a test stringer
The first step is to make a test stringer, which will confirm that your calculations are correct. If the stringer is accurate, it will become a template for cutting the rest of the stringers. Choose the straightest, best-quality 2×12 stock to use for stringers. A quick diagonal measurement from the top of the stairs to the platform location marked earlier tells you approximately what length stock to cut the stringer from, but start out with a little extra length just in case. As with floor framing, crown the stringer stock and make sure that any bow faces the direction of the tread and riser cutouts.
Stringer Stock
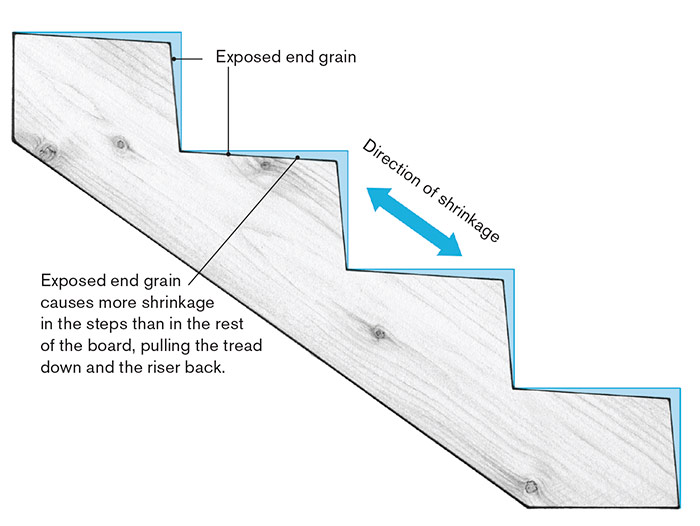
Stair stringers are typically made from 2×12 lumber. That’s because a significant part of the board’s width has to be removed for each tread and riser and a 2×12 has enough lumber left after those cutouts. But the problem with dimensional lumber is that it shrinks over time. Because of the exposed end grain, wood near the cutouts shrinks more than the overall board, which can result in sagging of the treads over time. Some builders use LVL stock for stringers because it is less likely to shrink. But pay attention: LVL stock isn’t always perfectly straight, so check for a crown as you would check a 2×12.
You’ll need a pair of stair gauges for layout. The easiest and most accurate way to lay out a stringer is with a set of these babies and a good old-fashioned steel framing square, not a triangular square (see “Steel Square and Stair Gauges”).
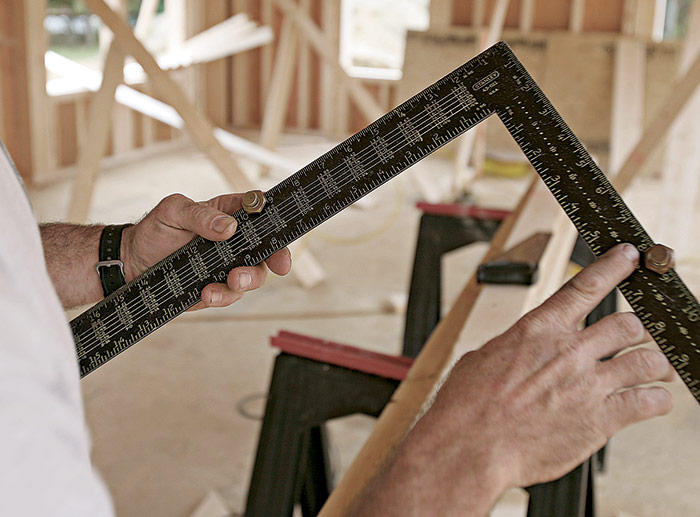 Steel Square and Stair Gauges When my friend Rob Turnquist first showed me how to make a set of stairs, I was amazed when he dug down into the sawdust at the bottom of his tool belt and pulled out two small hexagon-shaped devices called stair gauges. Each has a slot designed to fit over the edge of a framing square. He slipped the gauges onto the square at the proper rise and run dimensions and tightened the knurled bolts to keep them in place. Stair gauges usually sell for less than $10. |
Set the stringer stock on a pair of sawhorses or a work table with the crown facing toward you. Now tighten a stair gauge at 8⅛ in. on one side of the square to represent the unit rise, and tighten the other gauge at 9 in. on the other leg of the square to represent the unit run. Keep the corner of the framing square flat on the stringer stock, then slide the framing square onto the crowned edge of the board until both gauges touch the edge of the stringer.
Start by laying out the top of the stringer. There are often flaws at the very end of the board that can interfere with the gauges, so place the riser gauge in a bit from the end of the board. Stringers can be confusing, especially to a novice, so make sure you always keep the rise and run on the framing square oriented in the same direction as the progression of your layout. If you stop to check the layout or to count rises or to work from the backside of the stringer, just make sure the square’s orientation hasn’t changed before resuming the layout.
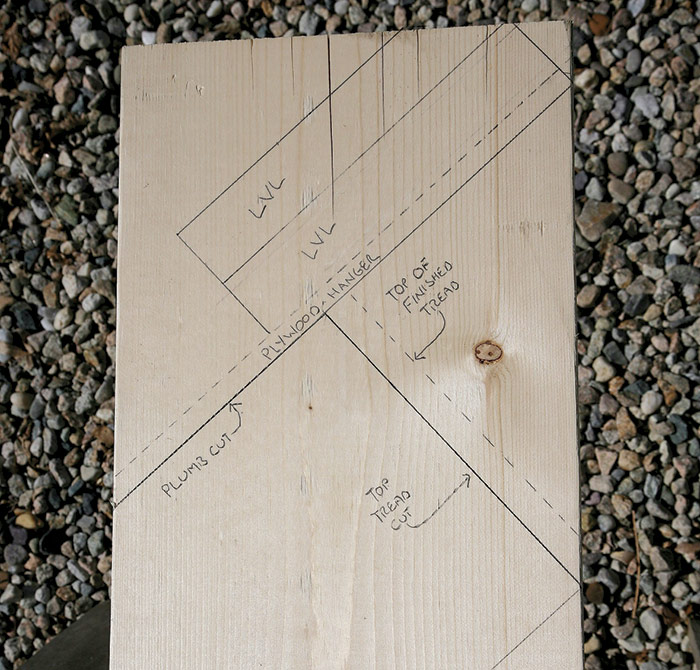
Hold the square in place and mark along its outer edge to indicate the top tread and the associated riser. Remember that there’s no riser at the top of the stringer: The top tread is actually the top of the stringer. Believe me, it’s easy to get confused at this juncture. Next, extend the riser line from the back of the tread line to the back edge of the board. This line is the plumb cut where the top of the stringer attaches to the plywood hanger or cleat. By the way, the simplest way to extend riser or tread lines is to place a second framing square or a straightedge against the square with stair gauges.
After establishing the lines for the first tread at the top of the stringer, slide the framing square down, so that the edge of the riser gauge lines up with the tread line. Now trace the next tread and riser. Continue stepping your way down the board until you have the proper number of risers traced out (six, in this case).

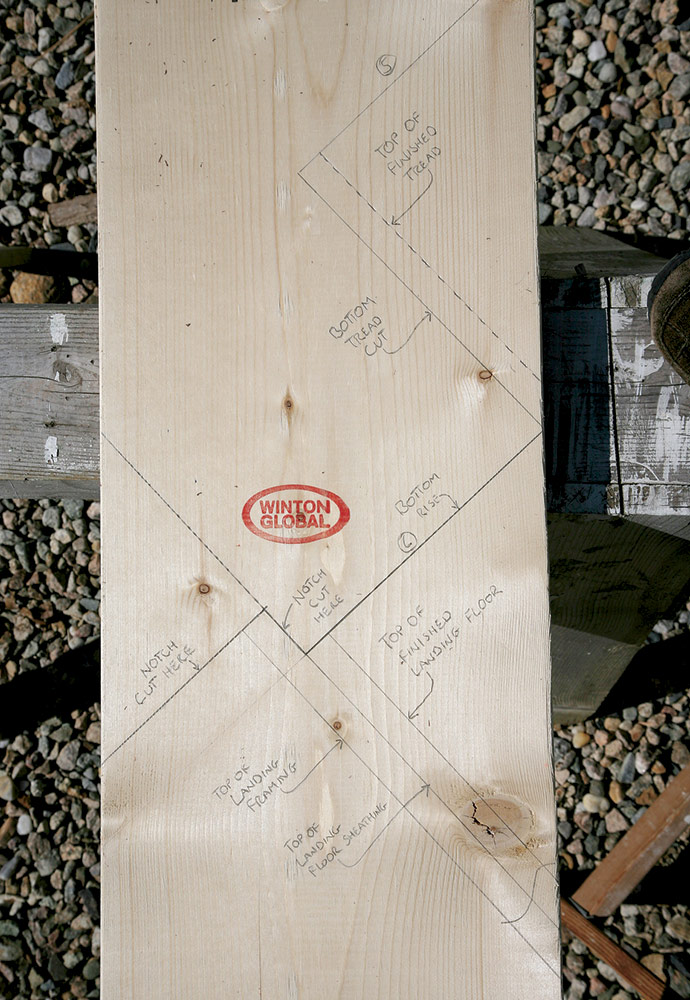
As you work down the board, look out for any lumps or voids along the edge that might interfere with the stair gauges, thereby changing the precise alignment of the framing square. (If one of these spots is unavoidable, carefully sight down the milled face of the stair gauge and align it with the edge of the board.) Hold the square down firmly and mark the rise and run on the stringer. At the bottom, extend the tread line below the bottom rise to the back edge of the stock. To make sure the stringers are the right length, I always number the risers and double-check my numbers before cutting them.
 |
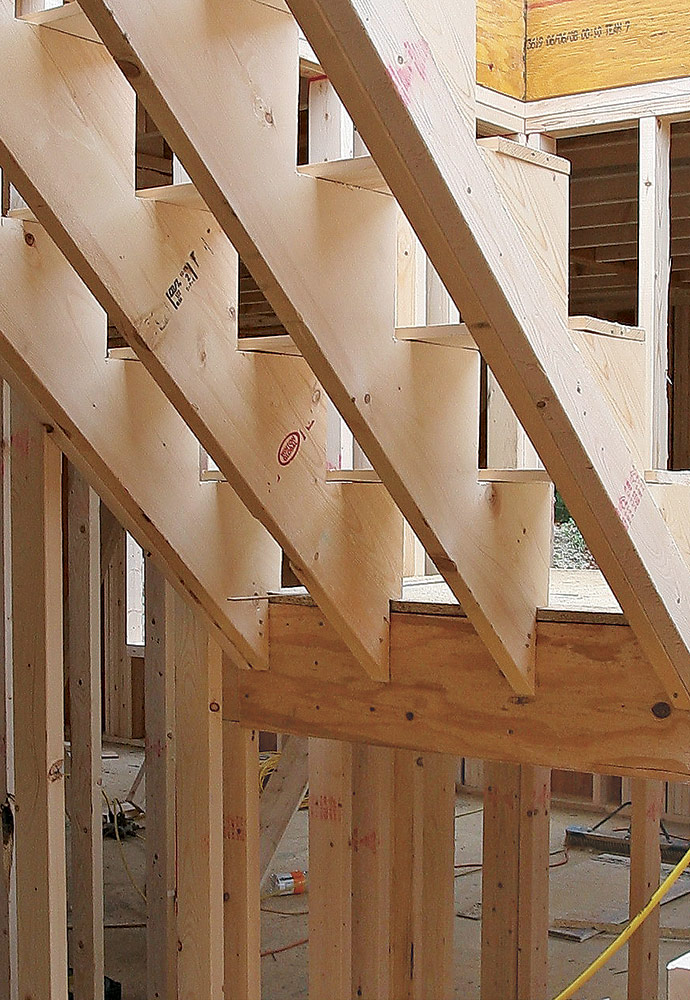 |
The 9-in. run of the treads meant that the bottom riser on the stringers for the upper flight would have only 1½ in. of support on the landing, not nearly enough. So at the bottom of those stringers, we made a notch to wrap around the framing of the landing. (On the lower flight, the bottom of the stringers landed fully on the first-floor deck.)
Differences in flooring and tread thickness
One stair-building factor that confounds carpenters and messes up stairs is dealing with the finished floor thickness and the thickness of the finished treads. This house was pretty easy because the finished floors would be ¾-in.-thick hardwood and the treads would also be ¾-in. stock. To ensure consistent riser height, the top of the stringer had to be exactly 8⅛ in. below the second-floor sheathing, or the height of one riser.
But if the treads had been, say, 1¼ in. thick, then we’d have to drop the stringer an extra ½ in., or the difference in thickness between the finished floor (¾ in.) and the tread (1¼ in.). To drop a stringer ½ in., cut that amount off the bottom.
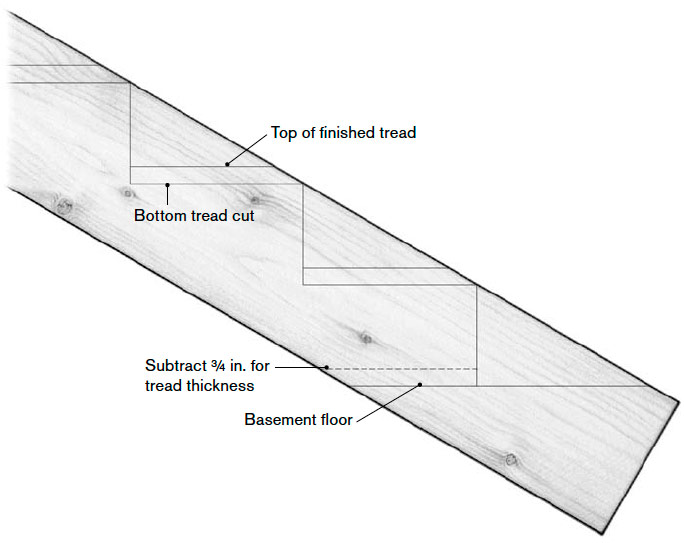
In the basement, the bottom flight landed on the concrete floor with no other flooring. In that case, we took ¾ in. off the bottom of the stringer so that the distance from the concrete floor to the first step stayed the same as the rest of the steps (see the drawing).
Basement Stairs Detail
So what would you do if the landing were to have a finished floor that was thicker than the treads? Right, you’d drop the height of the landing by the difference in the thicknesses. But in this house, the finished landing floors were the same thickness as the treads, so we set the landing height at exactly seven times the rise, or 56⅞ in. below the second-floor deck. We cut a board that represented one end of the platform and tacked it in place at that height.
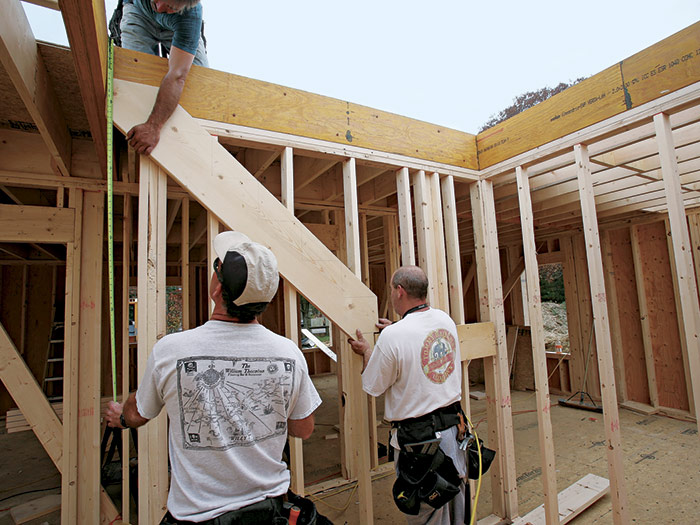
Fit the test stringer
Once all adjustments are made for any variations in floor or tread thickness, cut just the top and bottom of the first stringer. This stringer is for testing your layout and landing height. The test stringer for the upper flight had just the plumb cut and tread cut at the top and the notch at the bottom.
Now for the moment of truth. Set the test stringer in place. Have someone hold the top at the right height while you check the fit at the top and bottom. In this case, the bottom of the stringer had to be held ¾ in. above the board representing the platform framing to account for floor sheathing on the landing.
You’re probably wondering about now why we didn’t just build the platform first and then cut stringers to fit. Well, go right ahead and build the platform and then try the test stringer. But when it’s not quite right and the platform needs to be taken out with a reciprocating saw to be lowered ¼ in., I’ll remind you that it’s a lot easier to tweak the height of the platform when it’s represented by a single board nailed to the framing. That’s what the pros do to save themselves time and trouble in the long run.
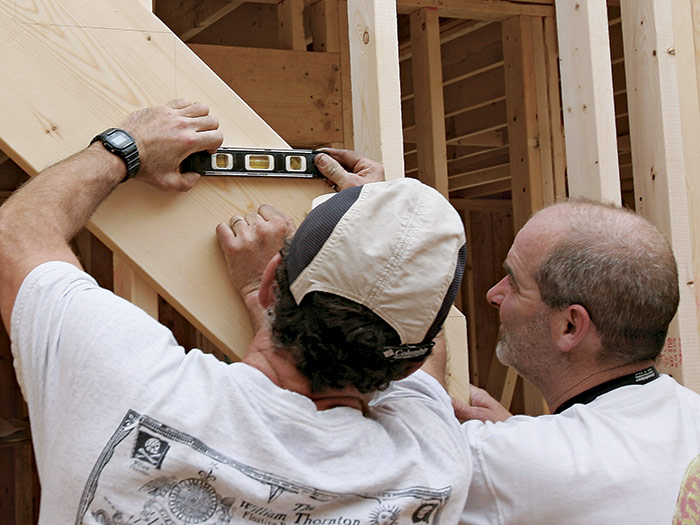
If your measurements and calculations were right, the plumb cut at the top of the stringer and the notch at the bottom will seat properly, flat against the mating surfaces. Set a torpedo level along one of the tread lines to confirm that the steps made from this stringer will be level.
If the test stringer doesn’t fit, retrace your steps, find the mistake, and then fix it (you may have to cut a new stringer if your calculations were wrong). Take time now to make sure the stringer fits exactly. Correcting the problem later is guaranteed to be a pain.
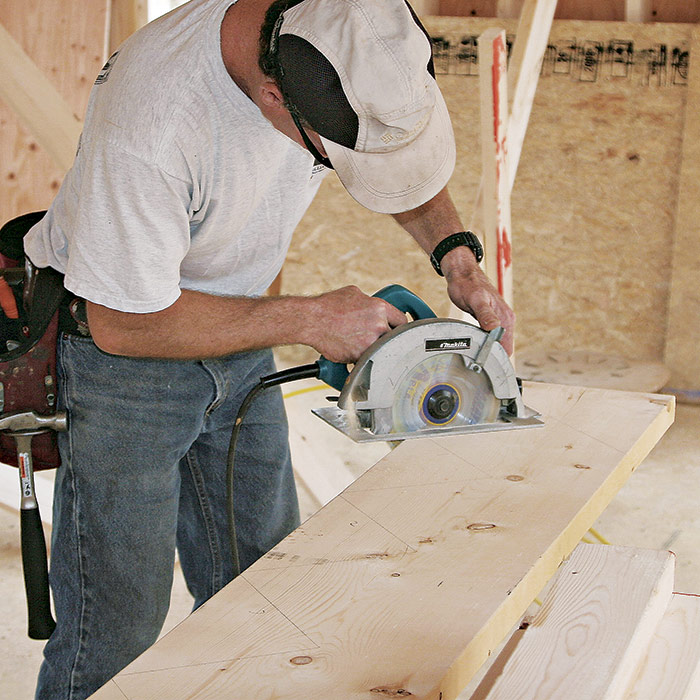
Use the test stringer as a pattern
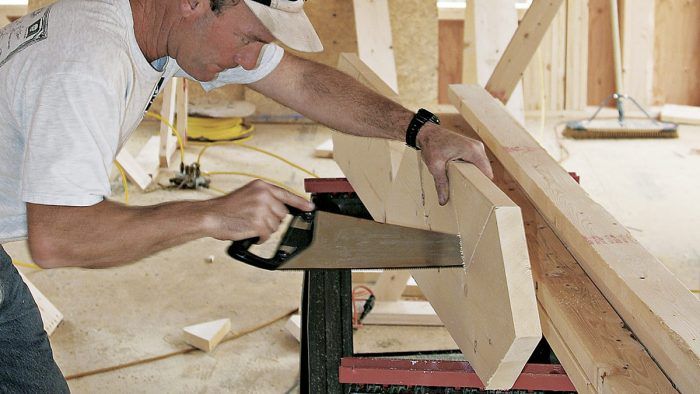
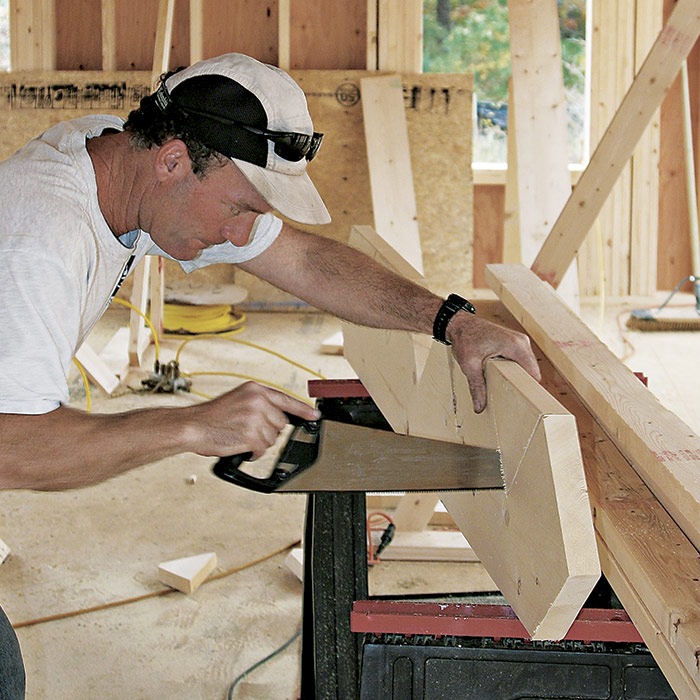
After the test stringer has passed its exam, the rest of the treads and risers can be cut out. Many carpenters just cut beyond the intersecting rise and run lines so that the triangular piece of stringer falls away, but overcutting the stringer weakens it. Instead, cut just to the lines and finish the job with a handsaw. The amount of extra work this takes is minimal compared to the benefit it brings.
When all the cutouts are made on the first stringer, you can use it as a pattern for the other stringers in the same flight. Simply align the bottom edge of the pattern on the stringer stock and trace every detail.
How Many Stringers?The number of stringers needed for a staircase depends on the treads: They have to span the distance between stringers and you don’t want them to flex. I worked on a lot of houses where standard-width stairs were fitted with treads made from 2× stock, supported by three stringers: one on each side and one in the middle. (Though I noticed that longer stair runs got a little springy sometimes.) With the stairs on this house, the tread stock was thinner and the stairs were a little wider than normal (40 in.). So we built the stairs using four stringers. The extra one made these stairs really solid. |
Fine Homebuilding Recommended Products
Fine Homebuilding receives a commission for items purchased through links on this site, including Amazon Associates and other affiliate advertising programs.

Magoog Tall Stair Gauges
Stabila Classic Level Set

Speed Square
