
Efficient Methods for Installing Wall Sheathing
Most framers prefer to sheathe walls before raising them, and cut rough openings in place, to make the job faster and easier.
There are a lot of advantages to sheathing a wall while it’s still flat on the deck. Gravity will be your friend, and you’ll find it easier to align the sheathing to the framing. The technique also prevents the wall from racking as it goes up, which can weaken the joints. But the application of sheathing is one of those techniques that can vary a lot according to the materials being used, the design of the house, local codes, and the preferences of the framer. For example, wood sheathing can be applied vertically or horizontally (the long dimension can go perpendicular or parallel to the studs). In this project, we installed sheathing vertically, but the basic installation technique would be the same if it were running horizontally.
We ran sheathing vertically to create the vertical plywood panels that were required by local code. A vertical plywood panel is plywood sheathing that is strategically placed, nailed, and sometimes even glued to the framing according to detailed instructions provided by an engineer. It is typically placed with the long dimension running vertically so that it will tie horizontal and vertical framing members together. These panels increase the ability of the house to resist high winds and earthquakes and are often located at the corners of a house and around window and door openings. If the engineer requires these panels, you’ll find detailed drawings on the plans showing exactly where to put them and how to install them (see the drawing below).
Vertical Plywood Panel Locations

Horizontal SheathingWhen vertical plywood panels aren’t necessary, the sheathing can be applied in horizontal runs. With a horizontal pattern, the sheathing is usually left short of the top plate, and the rim joists are installed after the walls are standing. Because horizontal sheathing doesn’t cover the entire length of a stud at once, it’s easier to tweak the studs and keep them on layout. To install sheathing horizontally, determine how much the sheathing will have to overhang the mudsill, then snap a chalkline across the wall studs 4 ft. from that point. Align the sheathing to the chalkline, with the end seams staggered from course to course so the seams don’t line up, and nail the sheathing to the studs. If local codes require it, install blocking to support horizontal seams. |
Vertical plywood panels
Panels that reinforce a house against lateral forces such as high wind can take many different forms. On this house; however, the engineer called for continuous vertical plywood sheathing running from the mudsill to at least half way up the second-floor rim joist, the goal being to solidly connect the two floor systems. This requirement meant we had to use 4-ft. by 10-ft. sheets of plywood to sheathe these areas.
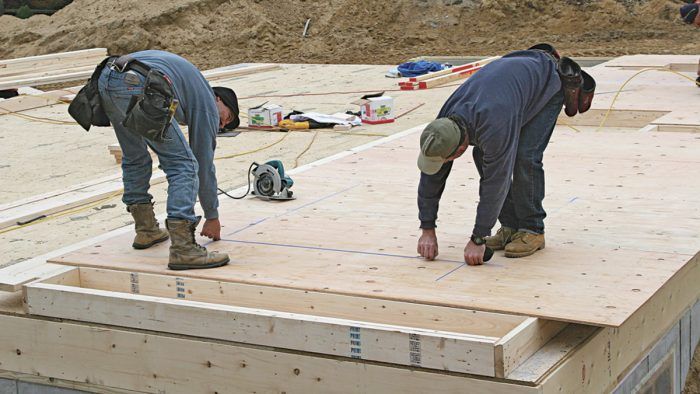
Install the sheathing Any type of wall sheathing should extend past the first-floor rim joists to the bottom edge of the mudsills. Nailing the sheathing to the mudsills provides a structural connection between the walls and the foundation. Measure the amount of overhang from the top of the deck to the bottom of the mudsill (13-3/4 in. in this case). Then position a tape measure with this distance extending past the bottom plate, and measure up to the 10-ft. mark. After marking both ends of the wall in this way, snap a chalkline on the rim joist above the wall to serve as a guide for placing the top edge of the sheathing.
After checking the plans to determine where vertical plywood panels were required (see “Vertical Plywood Panel Locations”), we marked those positions on the chalkline. We aligned full-width plywood sheets to the guide line, and tacked them in place at strategic locations. It’s faster to nail off the sheathing completely when all the sheets are in place.


Cut openings in place
As you install sheathing, let the sheets extend over door and window openings; it’s easier to cut away the plywood later than to cut it to fit beforehand. But be sure to locate the openings before they’re completely covered. Tack the sheathing to hold it in place, then measure and snap lines to indicate the location of the openings. Plunge-cut (discussed in the next section) the openings with a circular saw. When the sheathing is in place and the openings have been cut out, go back and nail all the sheathing according to the nailing schedule on the plans.


Before raising the back wall, we framed and sheathed the front wall in much the same way, with one noted exception. A section of the front wall extended past an open stairway and would not have the benefit of floor joists above to stabilize it. That section of the wall also had to support the gable wall of the dormer above, and a rim joist running on top of that section would have been unsupported and weak. To strengthen the wall and to create better support for the gable wall of the dormer, the crew used longer studs that raised the top plate of that section in line with the second-floor deck sheathing.
Drywall SquareA drywall square is a tool associated primarily with other trades, but framers can use it to improve the speed and accuracy of sheathing installation. It’s quite handy for projecting straight lines from the factory edge of the sheathing, which provide guide lines for nailing or cutting. |
Raising an Unsheathed WallWhenever possible, sheathe a wall before raising it. If you can’t, nail temporary 2× braces diagonally across the framing from one corner of the wall to the other. Those braces will keep the wall square as it’s being raised. If the wall is small or if it fits between two other plumb walls, bracing may not be required. |

Plunge cutting Occasionally, you’ll need to make cuts with a circular saw that don’t begin at the edge of a board or sheet. That technique is called plunge cutting. One example of this procedure is cutting a framed window opening that has been sheathed over.
To make a plunge cut, set the blade at the proper depth for the stock you’re cutting and make sure that the area below the cut is clear. Position yourself beside the saw, never behind it. Next, retract the saw guard to expose the blade. Rest the front edge of the saw table on the stock and align the blade with the cut line. With the blade slightly above the work, squeeze the trigger. Slowly and carefully lower the blade into the stock while keeping downward and forward pressure on the front of the saw table. When the saw table is flat against the stock, continue the cut to the end of the line. Then reverse the saw direction and cut to the opposite end of the line; never pull the saw backward.

Fine Homebuilding Recommended Products
Fine Homebuilding receives a commission for items purchased through links on this site, including Amazon Associates and other affiliate advertising programs.

Protective Eyewear
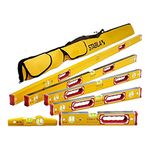
Stabila Classic Level Set
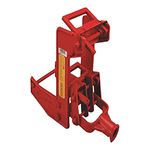
Portable Wall Jack
