
Tying in an Addition to an Existing Home
Use these tips and tricks to match new floor heights to old and get everything square.
Synopsis: Building an addition can be tricky, especially when trying to match the height of the new floor to that of the existing structure. Builder John Whritner details his method of using a story pole and a builder’s level to determine the cripple-wall heights and get everything square and level. A detailed drawing and a series of photographs show the step-by-step process of laying out and building the cripple walls, adjusting as needed, and then tying it all together.
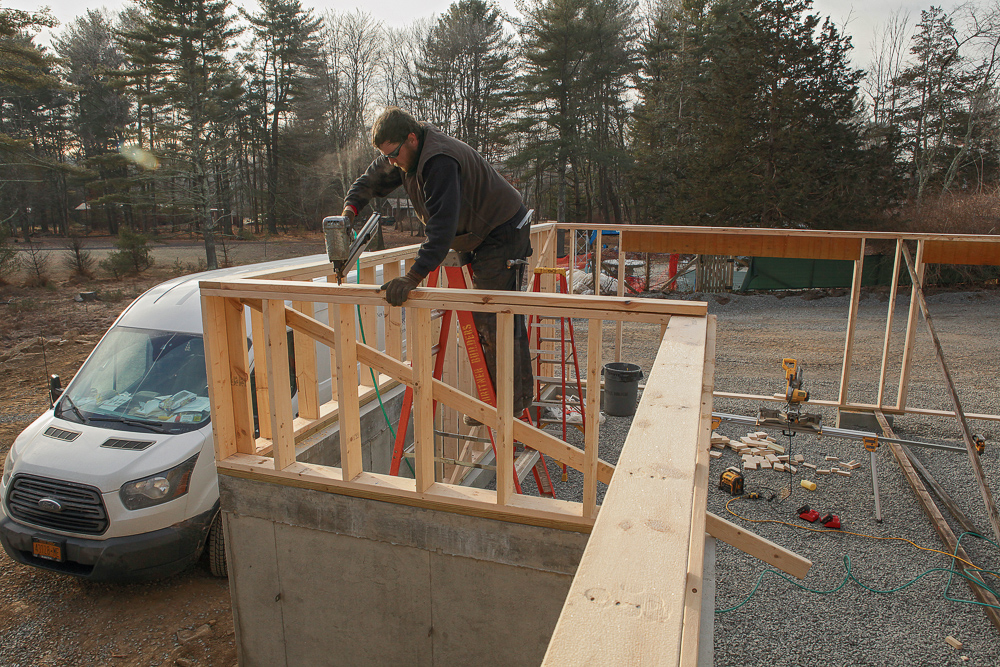
For a lot of reasons, building an addition can be trickier than building a new house. On this project, we needed to match the height of the new floor to that of the main floor of the existing structure, and the new foundation jogged and stepped, resulting in two different cripple-wall heights. Any difference in elevation from new floor to old would telegraph, so everything had to be spot on.
Stepped foundations are a bit harder to check for square. Even if they’re good at the bottom, the walls may be out a bit at the top. Setting up stringlines or lasers to check takes time, and in the end only tells you what you have to deal with—they don’t square it up for you.
Unless something is really out of square at the bottom, I don’t bother squaring up the mudsills on the front end; I build the cripple walls so they can be adjusted after they’re up. I also avoid math as much as possible, and rely on a story pole, a builder’s level, and a tape measure to simplify finding the stud heights for the cripple walls. The setup for this is easy and nearly foolproof.

Story pole + builder’s level
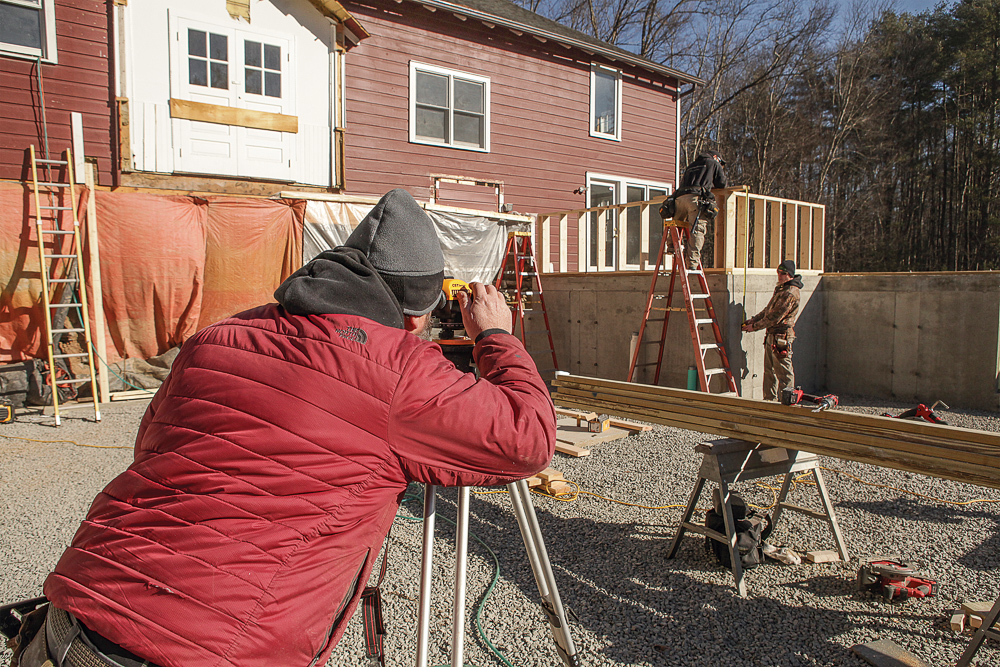
Site-made story poles help keep things consistent, whether it’s the height of door and window trim, siding, or framing. In this case, a story pole helps me figure out the cripple-wall heights.
Since the old siding will be stripped, I cut an inspection hole through the side of the house to expose the existing floor and mark its elevation on a scrap of 2x that will stay screwed to the side of the house for reference. For a story pole, I pick a straight 2×4 that runs from the ground to above the finish-floor height. I attach it next to the more permanent block and transfer the floor height to it. Then, I measure down and mark the thickness of the new flooring and subfloor, and the depth of the new 14-in. I-joists, and drive a screw to mark where the new joists will land on the cripple walls to pull a tape from later. Then I turn to the builder’s level.
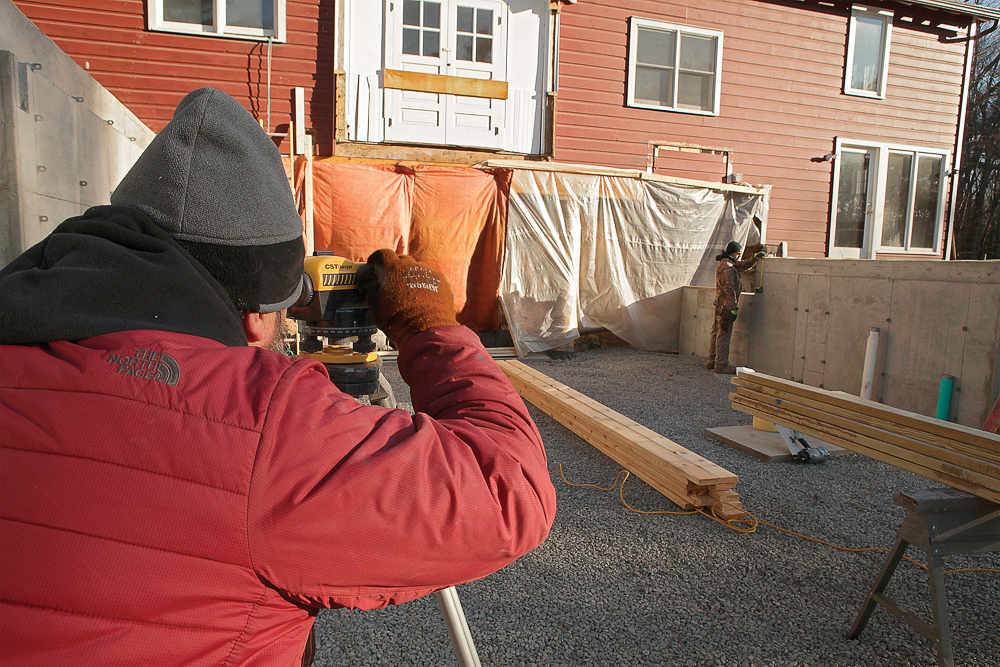
A builder’s level is similar to a transit, except that it can swing 360° in a horizontal plane. It’s like a laser level in that respect, except it doesn’t project a line. When you look through the level’s scope, the horizontal crosshair maintains the same elevation while it’s swung in any direction. It needs to be set on a solid tripod on a stable surface and leveled to work, and the leveling bubble shouldn’t move from the center as you rotate the scope 360°.
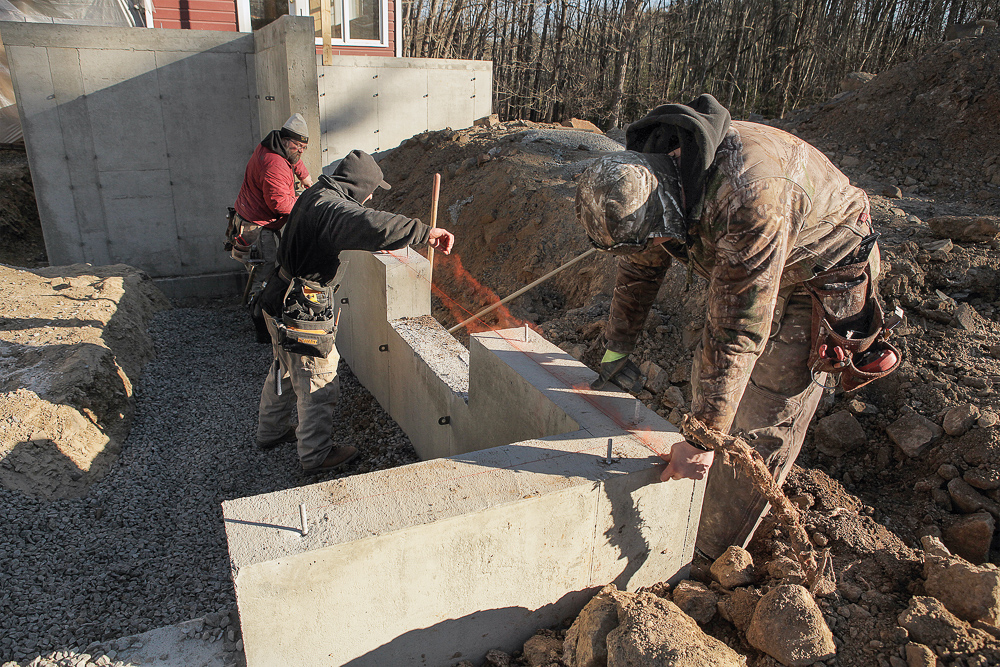
Before figuring out the cripple-wall heights, we determine if the stem walls are level. A crew member hooks a tape measure to the top of the stem wall and pulls straight down; whatever measurement is in the crosshairs of the level’s scope is the vertical distance from the plane of the level to the top of the wall. Using this method, we pull at least three measurements on each wall section, one near each end and another in the middle. The longest measurement represents the highest point of the stem wall. (If the stem wall is below the level’s line of sight, pull the tape from the stem wall straight up; in this case,
the shortest measurement is the high point).
Here, the stem walls were level. If they hadn’t been, we would have either shimmed between the mudsill and bottom plate to level the walls, or, if the discrepancy were really bad, cut the studs to different heights.
Next, we need to figure out the heights of our cripple walls. To do this, we do the same thing we did to determine if they are level, hooking a tape on the top of the stem wall and pulling down (or if the stem wall is below the level’s line of sight, we simply reverse the direction of the tape). Whatever measurement I see in the scope’s crosshairs is the measurement I want to see when I swing the scope to the story pole. Let’s say the measurement from the top of the stem wall is 24 in. I then swing the scope to the story pole, and a crew member extends his tape up until I see 24 in. in the crosshairs. Then he holds that position and marks the story pole at the hook end of the tape, which represents the top of the stem wall.
Once the stem wall’s height is marked on the story pole, hook onto the screw and measure down to that mark. Whatever that measurement is will become the height of the cripple walls. I deduct 4-1⁄2 in. for the bottom plate and double top plates, and another 1-5⁄8 in. for the mudsill. Whatever’s left is the stud height.
Build to adjust
When foundation walls top out at different heights, it can be labor intensive to determine if everything’s square. Rather than taking hours to figure this out by setting up stringlines and trying to use a plumb bob on a blustery day, I plan to make it so everything can be adjusted if necessary once the cripple walls are in. If we get the cripple walls up and plumbed and discover something’s out of square, we can adjust them in place.
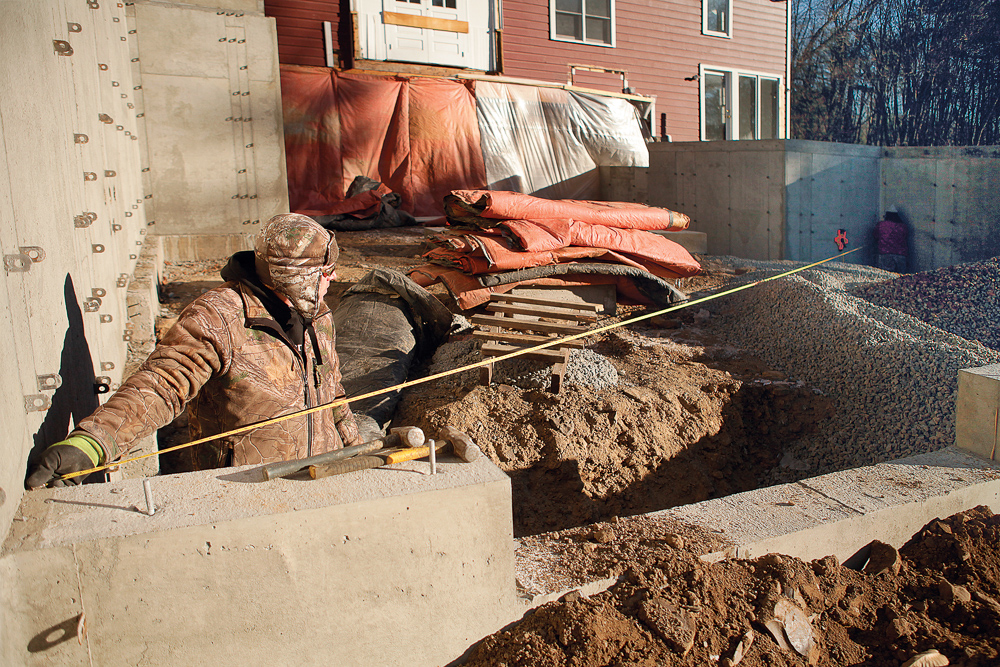
But first, I need to make sure everything’s close. There’s only so much adjusting you can do with an out-of-square foundation. We measure the distance between the ends of parallel walls to see if there are any obvious problems. To get a rough idea of the foundation’s squareness, we check them for plumb with a long level, then pull diagonals using the highest point on the shortest walls as horizontal baselines. As long as they’re pretty plumb and the diagonals are within 3⁄4 in. or so, we should be safe. If everything’s close, we may be able to make all of our adjustments on the tallest wall once we’ve built up to it, but that’s not a guarantee.
Layout for the mudsills starts with lines snapped 5-5⁄8 in. in from the outside edge of the foundation’s lower-height walls. We cut the PT mudsills for the lower walls, and locate and drill 3⁄4-in. holes for the 1⁄2-in. anchor bolts so they can be adjusted to the lines—or off the lines later if necessary. Initially, we install the mudsills right to the snapped lines, and tighten them down.
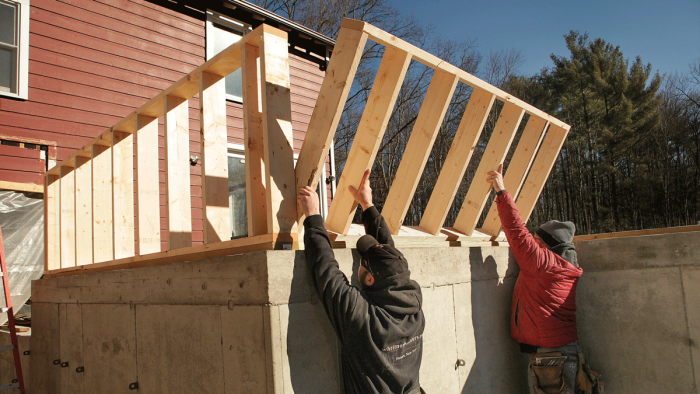
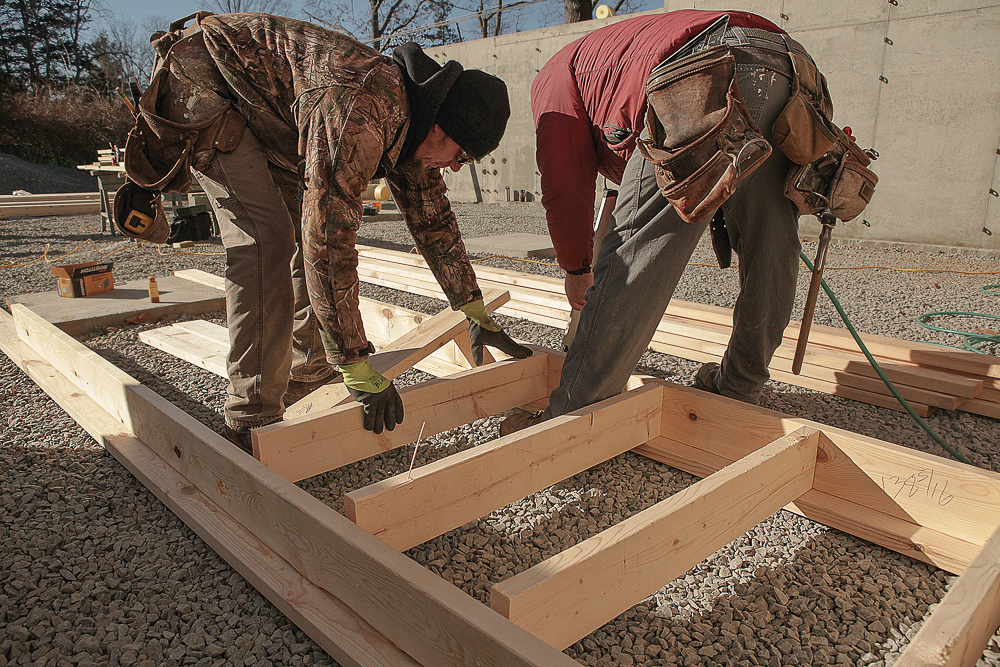
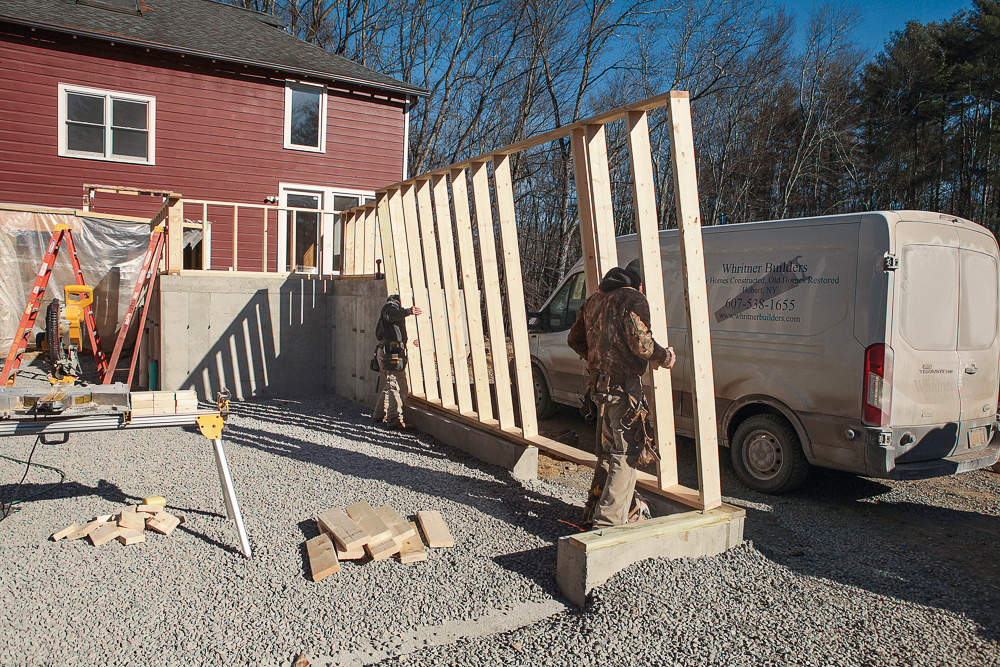
Next, we cut the top and bottom plates for the cripple walls. Before laying out the plates, we transfer all of the anchor-bolt locations to the bottom plate and drill them out with a 1-1⁄4-in. bit. Using the stud heights we determined from our story pole, we cut the studs on a miter saw, and assemble the cripple walls on a table or on parallel pieces of 2x laid on the ground and spaced to support the top and bottom plates.
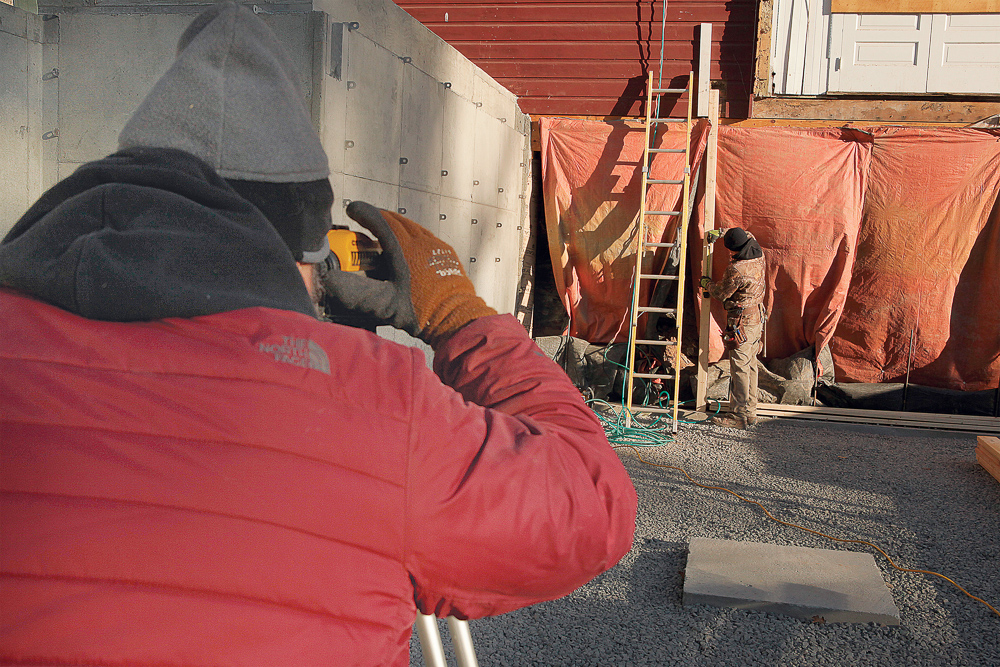
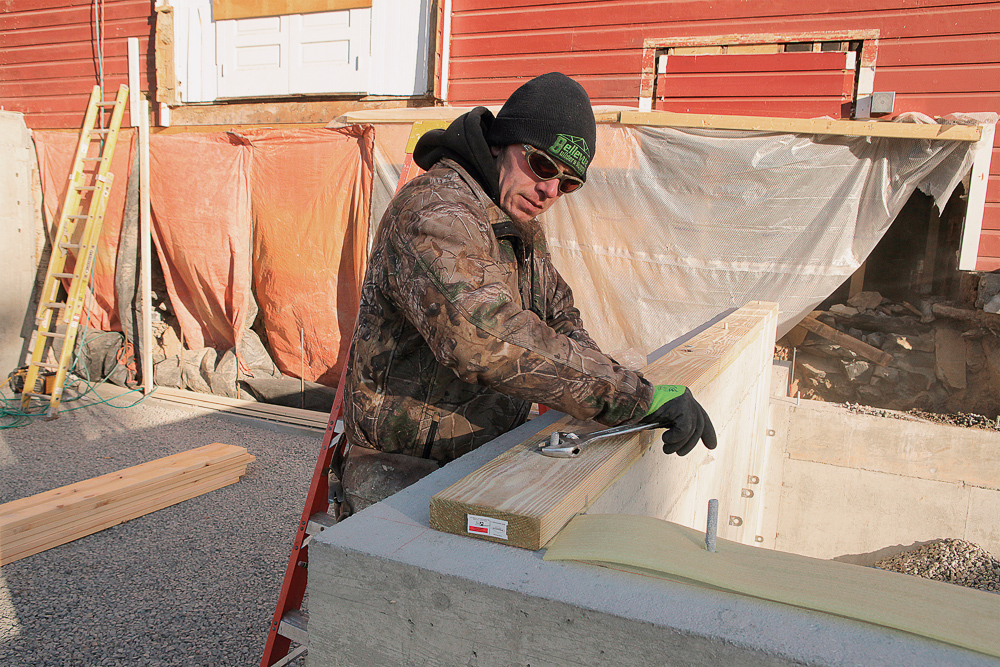
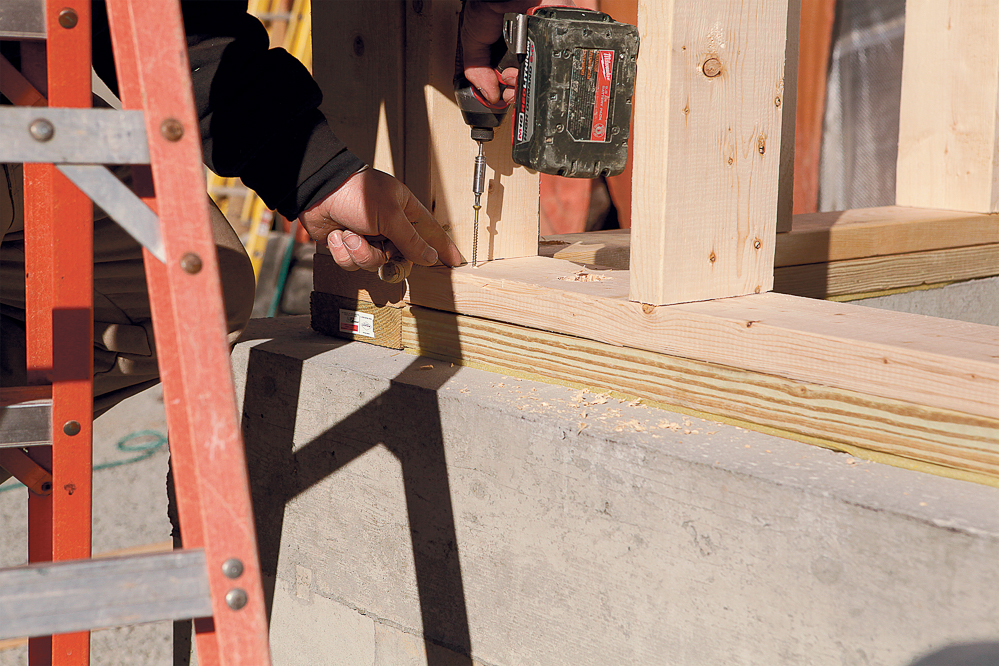
We initially tack the cripple walls in place with 3-in. construction screws; we won’t nail them off until we’re sure everything’s square. If we get the cripple walls up and plumbed and discover something’s off, we can fine-tune the cripple walls on the mudsill, or we can loosen the mudsill and move the sill and cripple walls together. Once the first cripple wall is in, we double-check its height against the story pole by tacking a piece of 2x stock onto the top plate to represent the double top plate, and pulling a measurement down. The number in the crosshairs of the builder’s level should exactly match the number pulled down from the screw representing the bottom of the joist on the story pole.
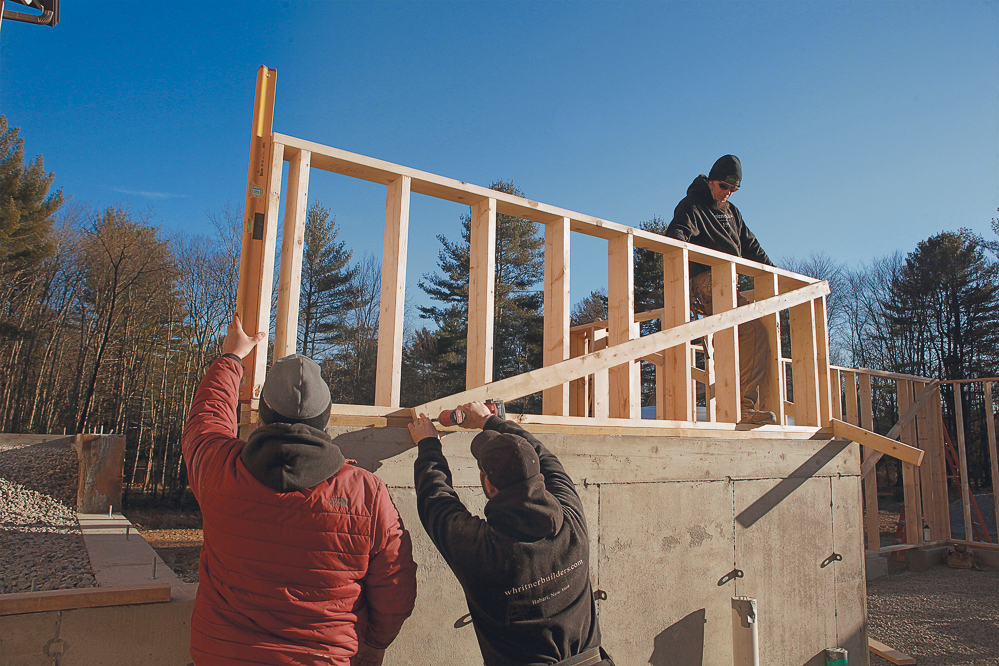
Once all of the cripple walls are up and similarly checked for height with the builder’s level, we plumb and brace them and straighten them out. Without a floor to attach the braces to in what will become the garage, we cut pieces of 2x, jam them between post footings and the mudsill, and nail them to the mudsill. Then we attach another 2x to a stud, push the wall in or out as necessary, and nail the diagonal to the wedged horizontal.
Once all that work is done, we can check our diagonals on a level plane. On this job we were out 3⁄8 in., and were able to adjust the mudsill on the highest foundation wall, which didn’t have a cripple wall, to compensate. But if we’d needed to adjust any of the cripple walls, it would have been relatively easy to back out the screws tacking them to the mudsills, make our adjustments, and reattach them, or loosen the nuts on the j-bolts if needed.
Lay out and build the cripple walls
It’s much easier to check for square when everything is on the same horizontal plane. As long as the foundation is close to square at the bottom and the concrete stem walls are close to plumb, we don’t get too fussy, knowing that we can adjust and square up the cripple walls after they’re in place.
Tie it all together
The same procedure used on the taller stem walls is used to find the stud height needed on the shorter stem walls, except the tape gets turned around. Here, we measure up from the short stem walls, note the measurement, and transfer it to the story pole. The main difference is that the hook of the tape here is down; you still need to match the measurement when transferring it to the story pole, and mark the hook end of the tape.

Photos by Matthew Millham. Drawings by Christopher Mills.
Related stories:
- Master Carpenter: Fast and Accurate Wall Framing
- A Better Way to Build Tall Walls
- Framing Big Gable Walls Safely and Efficiently
From Fine Homebuilding #283
To view the entire article, please click the View PDF button below.
Fine Homebuilding Recommended Products
Fine Homebuilding receives a commission for items purchased through links on this site, including Amazon Associates and other affiliate advertising programs.
Stabila Classic Level Set
Portable Wall Jack

Speed Square

