Begin by measuring the roof accurately, making a sketch to scale on graph paper as you go. Note valleys, ridges, chimneys, skylights, plumbing vents, and other elements that require flashing, waterproof membranes, or special attention. From that sketch, a building supplier can develop a final materials list for shingles, nails, underlayment, flashing, vents, and so on.
| PRO TIP: When reroofing an old house, make sure rafters can support the weight of new shingles. Some thick “luxury shingles” weigh 480 lb. per square versus 250 lb. per square for 30-year architectural shingles or 200 lb. for standard three-tab singles. |
Asphalt shingles come three to five bundles to the square (100 sq. ft.), depending on shingle dimensions. To calculate the number of squares you’ll need to shingle the field, add up the square footage of roof surface and divide by 100. In addition, you’ll need materials to reinforce shingles along eaves and rake edges—either by installing a double layer of shingles along the roof perimeter or by applying a heavy starter strip before shingling.
If you’re installing laminated shingles, use three-tab shingles as an underlayer along the eaves and rakes. For this purpose, three-tab shingles are far cheaper than laminated shingles and will lie flatter. If you’re installing woven valleys, you’ll interweave roughly one bundle of shingles per 16 lin. ft. of valley. Finally, add two extra bundles for waste, ridge and hip caps, and future repairs.
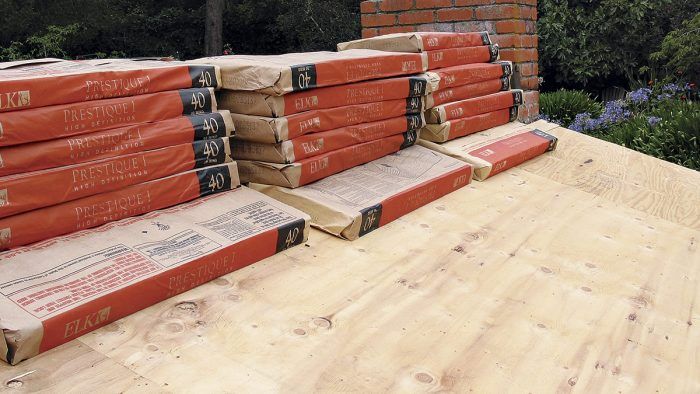
Shingle colors often vary from one production lot to another. To avoid having a new roof with a patched-together look, specify that all bundles come from the same lot when you order. When your order arrives, check the lot numbers on the bundles and open a few bundles from different lots. If lot numbers don’t match and the color variation is noticeable, call the supplier. If the color varies only slightly, you might mix lots every other shingle during installation. Finally, have shingles delivered directly to the roof. Many suppliers will place bundles on the roof by means of truck booms or conveyor belts.
Roofing nail quantities vary according to method: hand nailing, power nailing, or some combination of the two. Typically, use four nails per shingle, or about 2 lb. of nails per square if you’re hand nailing. However, high-wind areas require six nails per shingle, or 3 lb. per square. Roofing nails come in 5-lb. and 50-lb. quantities. Boxes of pneumatic nails typically contain 120 nails per coil and 60 coils per box. At four nails per shingle, you’ll need about 3 1⁄3 coils (400 nails) to attach a square of shingles.
Use corrosion-resistant roofing nails at least 1 1⁄4 in. long for new roofs; use 1 1⁄2-in. nails if you’re roofing over a previous layer. Ideally, nails should sink three-quarters into sheathing or stop just short of penetrating all the way through for 1⁄2-in.- to 5⁄8-in.-thick sheathing. If the roof has an exposed roof overhang (you can see the underside of the sheathing), use 3⁄4-in. nails (along the overhang) for a new roof and 1-in. nails for roofovers.
When ordering, don’t forget tabbed roofing nails for underlayment and metal-compatible nails for attaching flashing or valley clips.
Fine Homebuilding Recommended Products
Fine Homebuilding receives a commission for items purchased through links on this site, including Amazon Associates and other affiliate advertising programs.

Ladder Stand Off

Shingle Ripper

Roofing Gun

