
Using a sheet-metal brake
Slate-roofing contractor John Mahan demonstrates how he uses a portable brake to cut metal for drip-edge flashing.
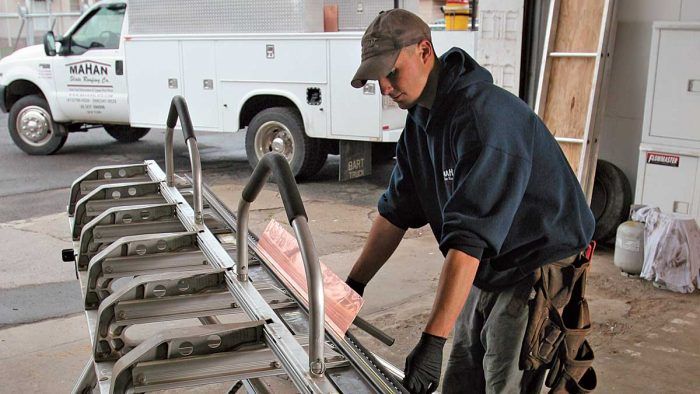
As a slate-roofing contractor, I bend most of my own drip-edge flashing. For small jobs or for bending metal on site, I use a portable sheet-metal brake just like those available at tool-rental centers for around $70 a day. Sometimes called a siding brake or an aluminum brake, this tool can be used for cutting and bending flashing for windows and doors, and for cladding for exterior soffits and fascias. It also can be used for any number of small projects that require bent light-gauge sheet metal or vinyl. When renting a brake, make sure a slitter is included for cutting sheets to width.
Bending a drip edge is a good project to demonstrate how to use a brake. A drip edge requires several different kinds of bends, from a slight kickout to a full fold.
I prefer 16-oz. or 20-oz. sheet-copper flashing rather than aluminum or painted galvanized steel. Copper is expensive, but it lasts longer and looks better than any other flashing choice.
When you’re using a brake, it’s a good idea to use a piece of scrap for a mock-up to ensure that all the bends can be made in sequence. For drip-edge flashing, I cut a 6-in.-wide piece. I fold the hem and kickout first, then work my way back. I wear gloves to protect my fingers and also to prevent fingerprints that would tarnish the copper. While the measurements here create a standard drip edge, a brake allows me to customize the profile if I need to.
Brake bending terms
Leading edge
The sharp front edge of the clamp is where the metal is bent.
Clamp
Upper handles control the clamp, which locks in place to hold the sheet metal firmly between two long jaws.
Bending plate
Parallel to the clamp jaws, the hinged bending plate is pulled up by a pair of lower handles to create the bend.
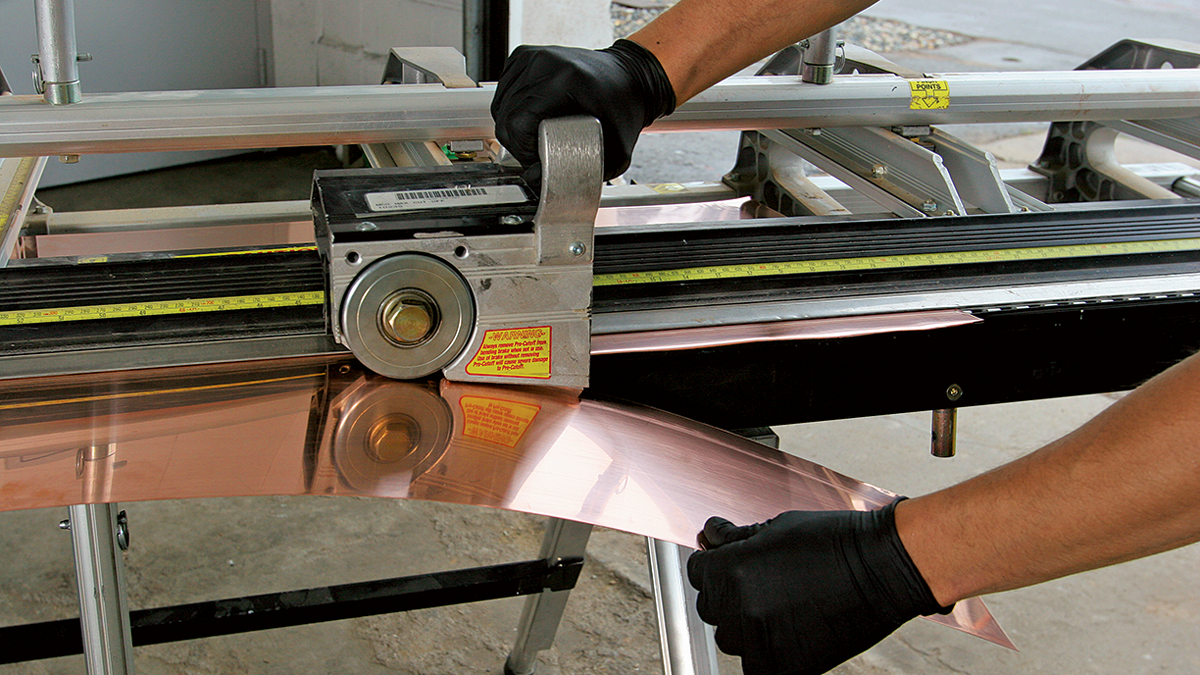
A brake-mounted slitter cuts copper to width
Step 1: Mount the slitter on top of the brake. A slitter is mounted only after a sheet is locked in place. It’s removed before any bending is done. A pair of sharpedged opposing rollers do the actual cutting. To determine the offset distance between the leading edge of the clamp and the cut, clamp a scrap piece in the brake, and nick the edge. The offset here is 11⁄2 in. Add the offset to the desired width of 6 in., and measure back from the clamp’s leading edge. Lock the sheet in place, and push the slitter along the rails with a single fluid motion to make the cut.
 |
 |
Leave no trace

If you aren’t wearing gloves when you handle copper flashing, the oil on your fingers can tarnish the surface and make the pristine flashing look like a crime scene. Although these marks go away with time, the first impression of a less-than-perfect job might not. To keep himself and his customers feeling good about his work, John Mahan wears special MBT-free gloves. (MBT, or mercaptobenzothiazole, is a chemical that can cause an allergic reaction in some people.) The gloves (www.deltagloves.com) are thin with textured fingertips for a better grip. Yet they are tear- and puncture-resistant—durable enough for a professional roofer.

The hem seam is the first fold
Step 2: Start the hem seam with a full fold. Insert the 6-in.-wide sheet 1⁄2 in. into the brake. Lock the sheet in place by pulling the top handle forward. Then lift the bending plate as far as it can travel.
![]()
 |
 |
Step 3: Compress the hem seam, then create the kickout. The top of the clamp’s leading edge can be used to complete full folds. Release the piece, then place the folded edge on the brake’s hinge. Engage the bending plate fully. To create the kickout, flip the piece; then lock the hem seam in the brake, and lift the bending-plate handle 30°.


Two folds complete the profile
 Step 4: Insert the piece with the kickout up. Leave 11⁄2 in. between the clamp’s leading edge and the kickout. The angle of this middle fold matches the roof’s pitch. It doesn’t have to be exact, so use the mock-up to get the angle correct through trial and error.


Step 5: Bend the last fold in two steps. First, place the piece in the brake with the middle fold down. Leave 1 in. between the clamp’s leading edge and the middle fold. Lock the piece in place, and lift the bending plate’s handle as far as it can travel. Second, flip the piece so that the fold is against the bending hinge. Compress the fold to finish the drip edge.


Photos by John Ross; Drawings by: Dan Thornton
Fine Homebuilding Recommended Products
Fine Homebuilding receives a commission for items purchased through links on this site, including Amazon Associates and other affiliate advertising programs.
Fall Protection
Flashing Boot Repair
Shingle Ripper

View Comments
I'm still thinking of doing this on my own or purchasing one at JJ Metal Supply. It's been a while since I am exposed to this field because I halted due to an accident before.
If you were looking to buy a new or used brake which brand would you recommend?