FHB Logo Facebook LinkedIn Email Pinterest Twitter Instagram Plus Icon Close Icon Navigation Search Icon Navigation Search Icon Arrow Down Icon Video Guide Icon Article Guide Icon Modal Close Icon Guide Search Icon Skip to content
Subscribe
Log In
  • How-To
  • Design
  • Tools & Materials
  • Videos
  • Blogs
  • Forum
  • Magazine
  • Members
  • FHB House
  • Podcast
Log In

Fine Homebuilding Project Guides

Tiling

Guide Home
Chapter
  • Selecting Tile
  • Tools & Techniques
  • Installation Materials
  • Preparation
  • Tiling Floors
  • Tiling Walls & Backsplashes
  • Tiling Showers
  • Grouting, Sealing & Caulking
  • Maintenance & Repair
How-To

Applying Self-Leveling Compound

Follow these steps to flatten and level an uneven subfloor in preparation for tiling.

By Robin Nicholas, Michael Schweit

Self-leveling compound is a thin concrete mixture that’s designed to be poured over a bumpy concrete slab (or an uneven wood subfloor) to flatten and level it in preparation for tiling. Each bag covers 50 sq. ft. up to 1/8 in. deep.

To establish how deep you’ll need to pour the compound to level your floor, drill 1/4-in. holes into the floor, spaced a few feet apart in each direction 1. Put a screw anchor in each hole, and drive in a screw that is slightly longer than the difference between the high and low spots in the floor 2. Use your level to find the high point on the floor and raise the highest screw until its head is about 1/8 in. above the concrete 3. Adjust all adjacent screws until they’re level with the high-point screw 4. Work your way around the floor, adjusting each screw until they are all level with each other. You’ll need to pour enough compound to just cover the heads of these screws.

To determine the amount of self-leveling compound required, first drill holes for screws. 
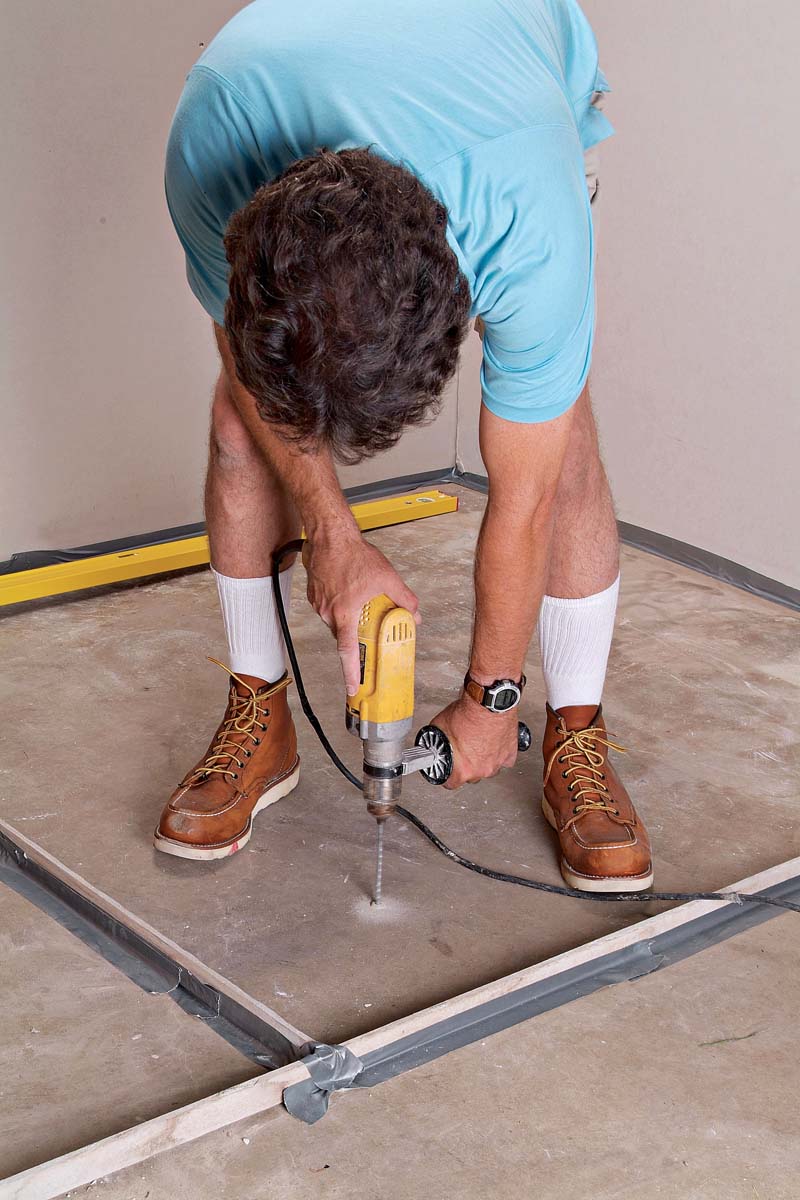
1. To determine the amount of self-leveling compound required, first drill holes for screws.
Tap plastic anchors into the holes. 
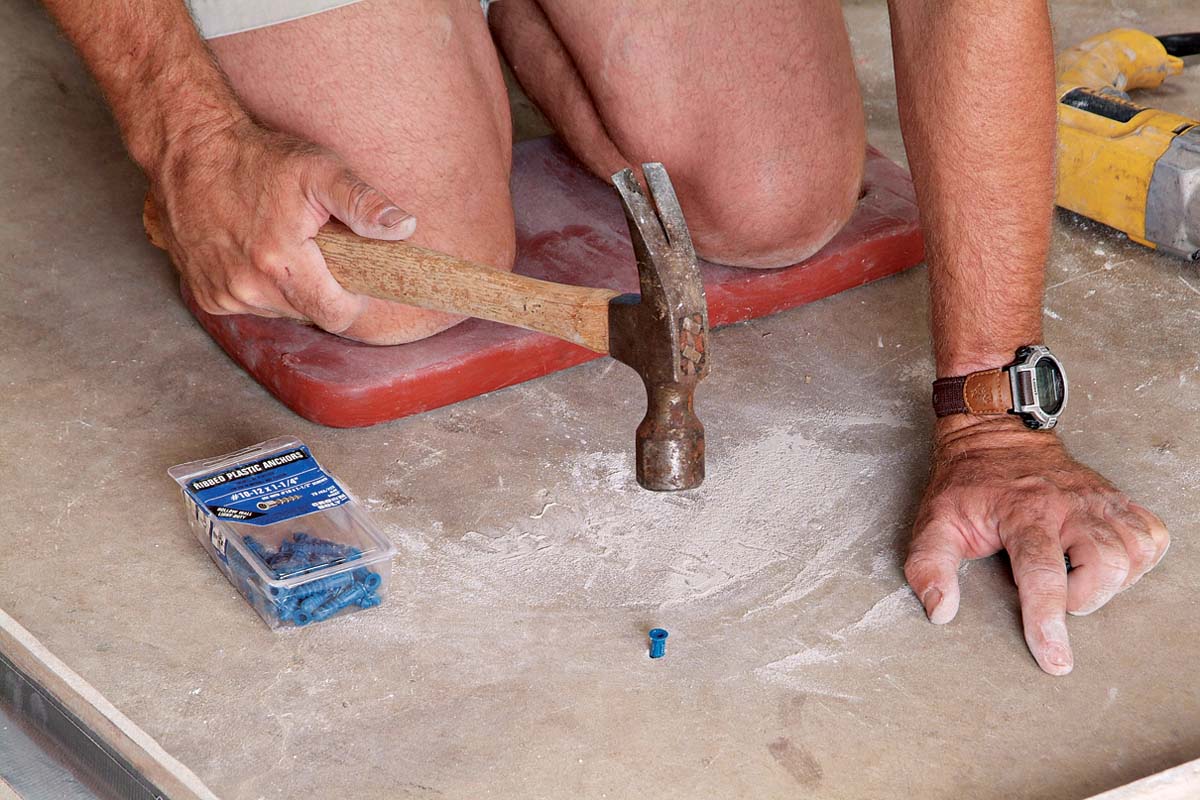
2. Tap plastic anchors into the holes.
Set the screw head nearest the floor’s high point about 1/8 in. above the floor. 
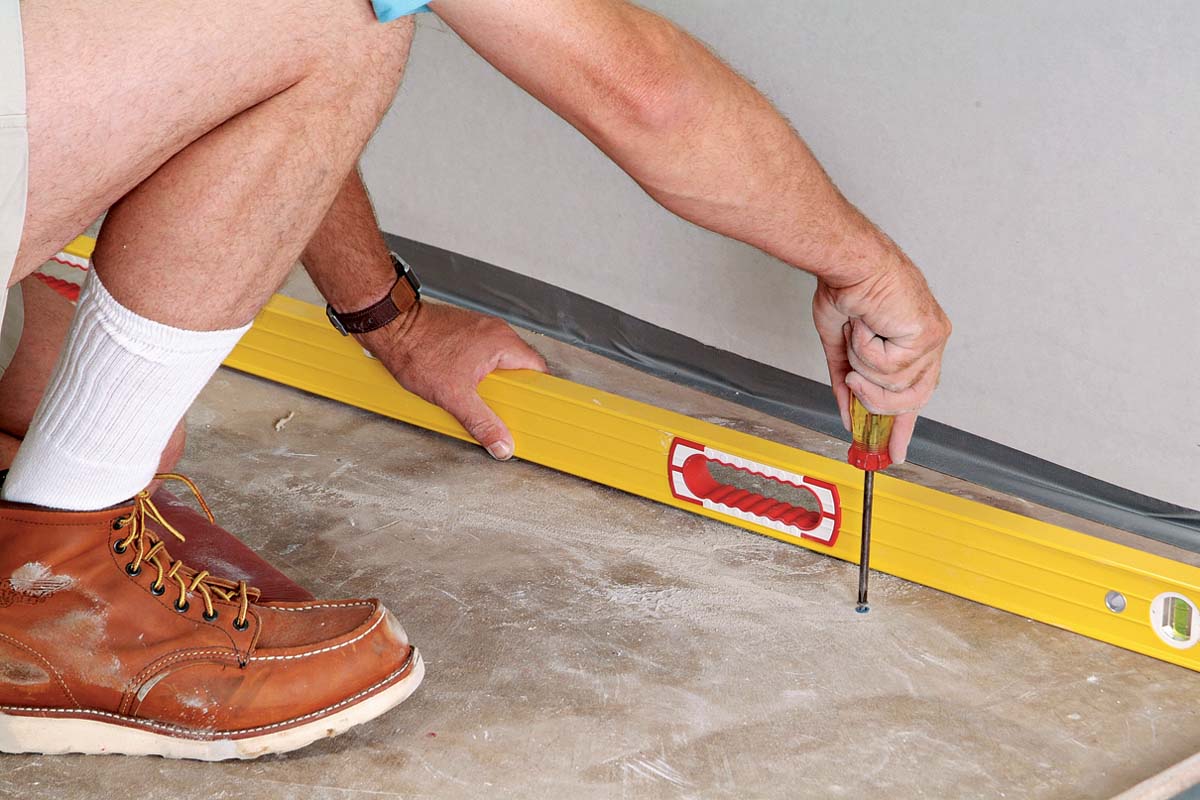
3. Set the screw head nearest the floor’s high point about 1/8 in. above the floor.
Adjust the screws so that all the heads are level with each other across the floor. 
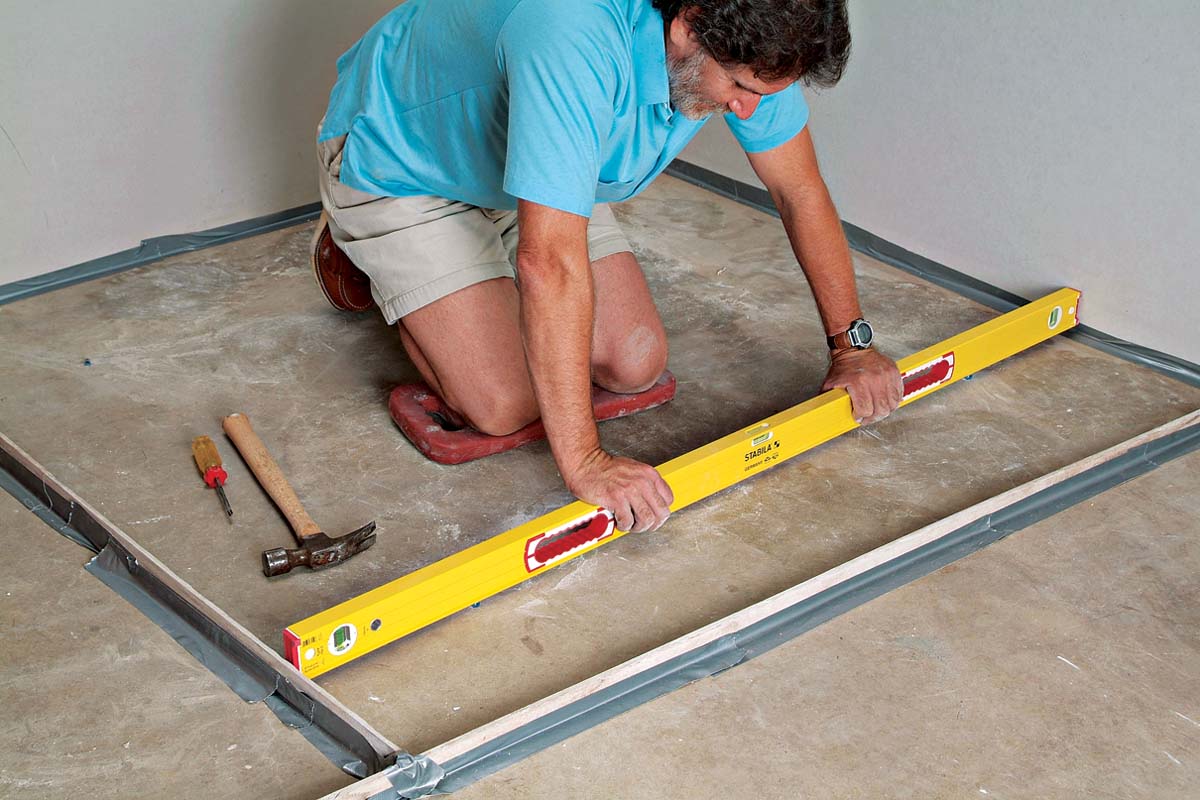
4. Adjust the screws so that all the heads are level with each other across the floor.


What can go wrong: Some two-story homes have lightweight concrete floors upstairs. These floors contain gypsum, which can swell and pull moisture out of tile-setting materials, causing them to set too quickly. You can’t use self-leveling compounds over lightweight concrete, and setting tile directly on it can cause cracking. To tile these floors, consult a tile professional.


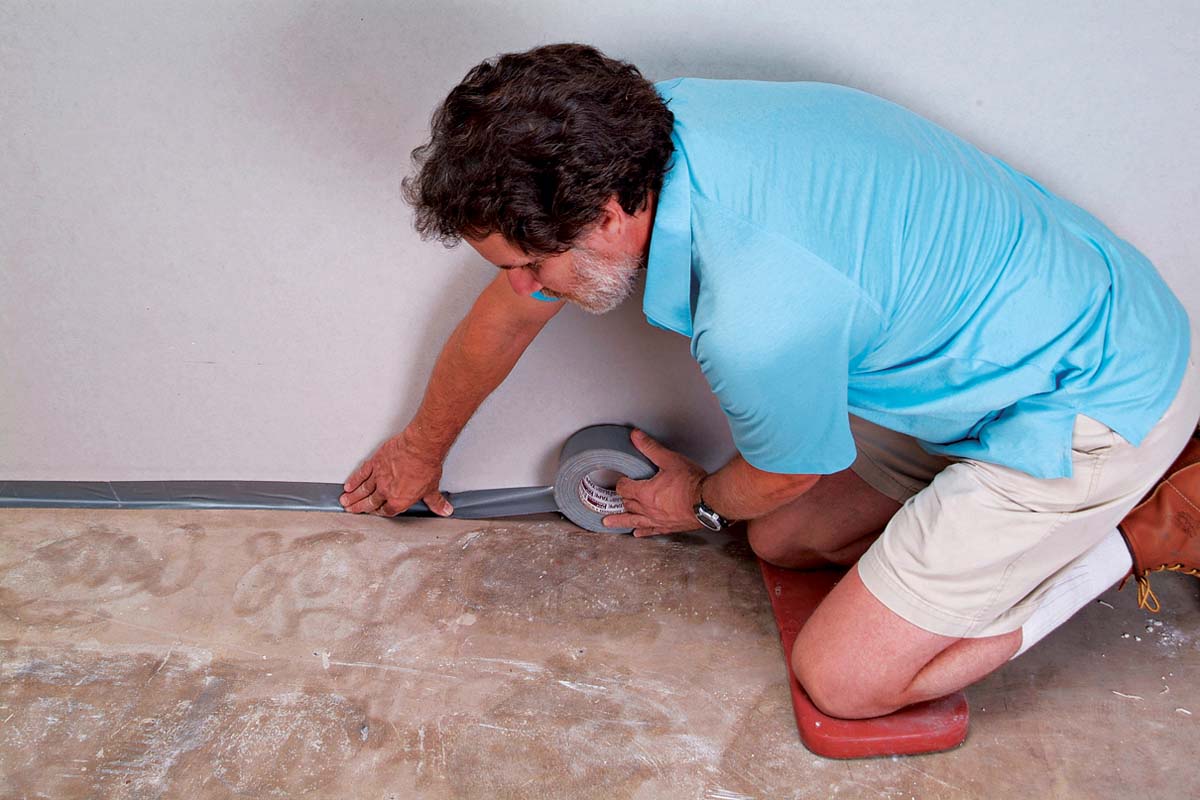
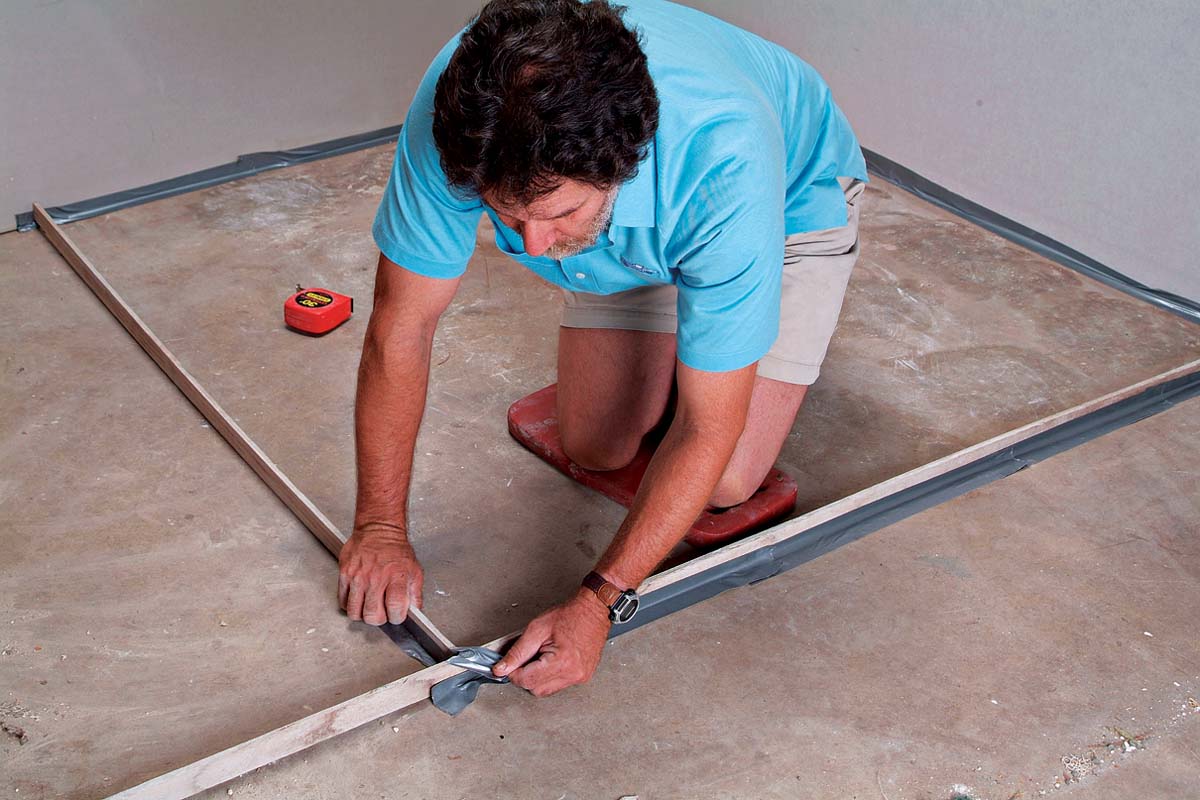
To ensure a good bond between the self-leveling compound and the concrete, clean the floor thoroughly with a sponge and water. After the floor dries, use duct tape in joints between the walls and the floor 5 as well as around any toilet flanges, pipes, or other lines that pass through the concrete. Use duct tape to hold a scrap piece of wood across any doorway. The compound is very runny when it’s poured, so press the tape in place firmly. We recommend that you don’t pour more than 25 sq. ft. of self-leveler at a time. Larger areas are best treated in several pours. To create a form for the pour area, tape lath wood strips to the floor 6.

Seal off the wall edges, holes, and openings with duct tape.5. Seal off the wall edges, holes, and openings with duct tape. Tape wood strips together to use as dividers to separate areas.6. Tape wood strips together to use as dividers to separate areas.


Next, use a 1/4-in.-nap paint roller to apply a coat of latex concrete primer to the pour area 7 and let it dry for about an hour. Set up three 5-gal. pails and measure the required amount of water (specified on the compound’s bag) into each one 8. Depending on the size of the area and depth of the pour, mix two or three pails worth of material 9 (it’s better to mix more than to come up short). If the pour requires more than three bags of material, mix and pour two bags, and let it firm up for about an hour. Then mix and pour the remainder. Pour any excess material into other areas you need to level (if any), to get a head start on your next pour.

Apply primer to the floor with a roller and allow it to dry. 
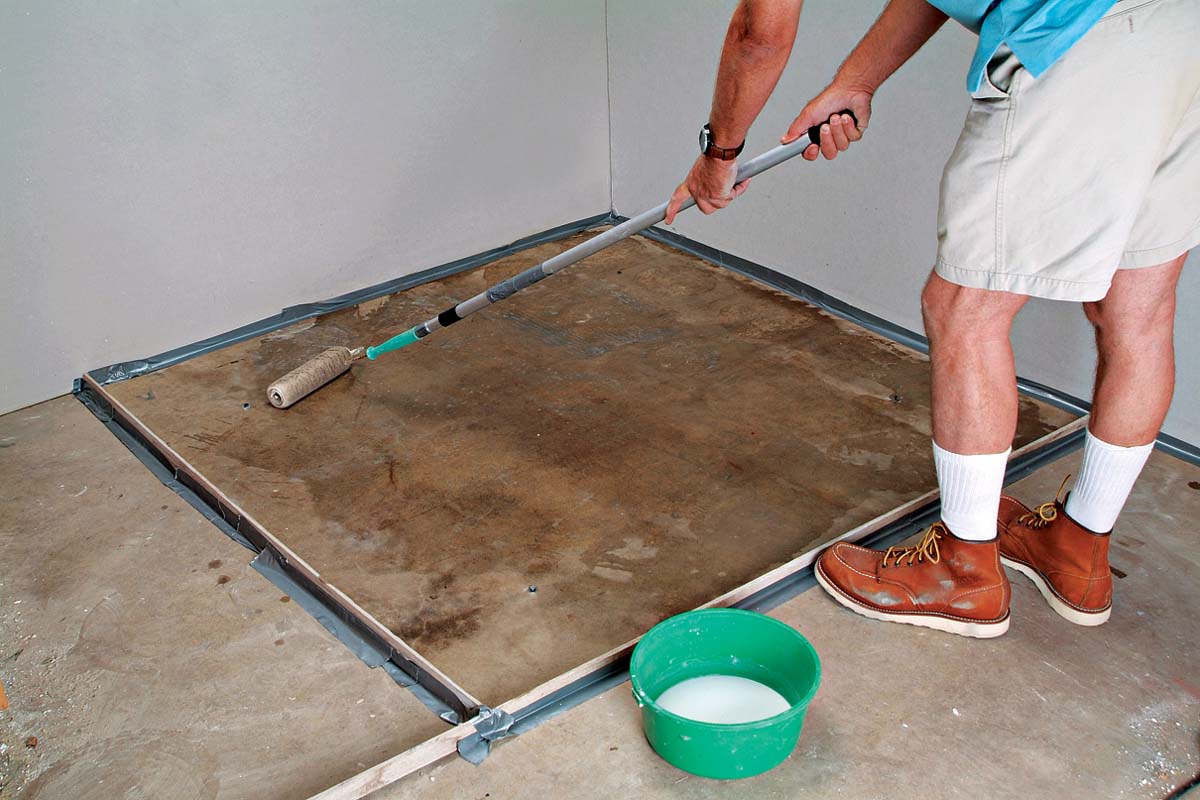
7. Apply primer to the floor with a roller and allow it to dry.
Use an accurate measuring container to add the proper amount of water. 
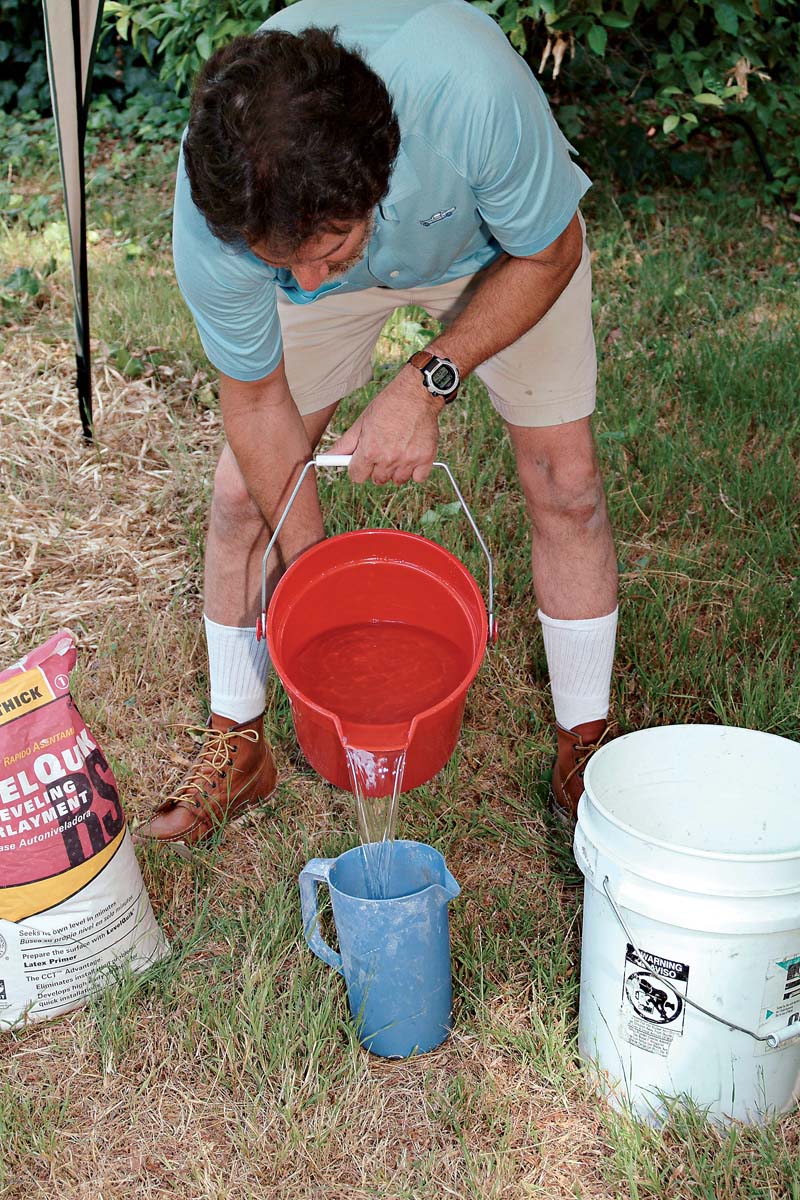
8. Use an accurate measuring container to add the proper amount of water.
Pour dry compound into the water-filled bucket slowly. Mix with a low-speed drill. 
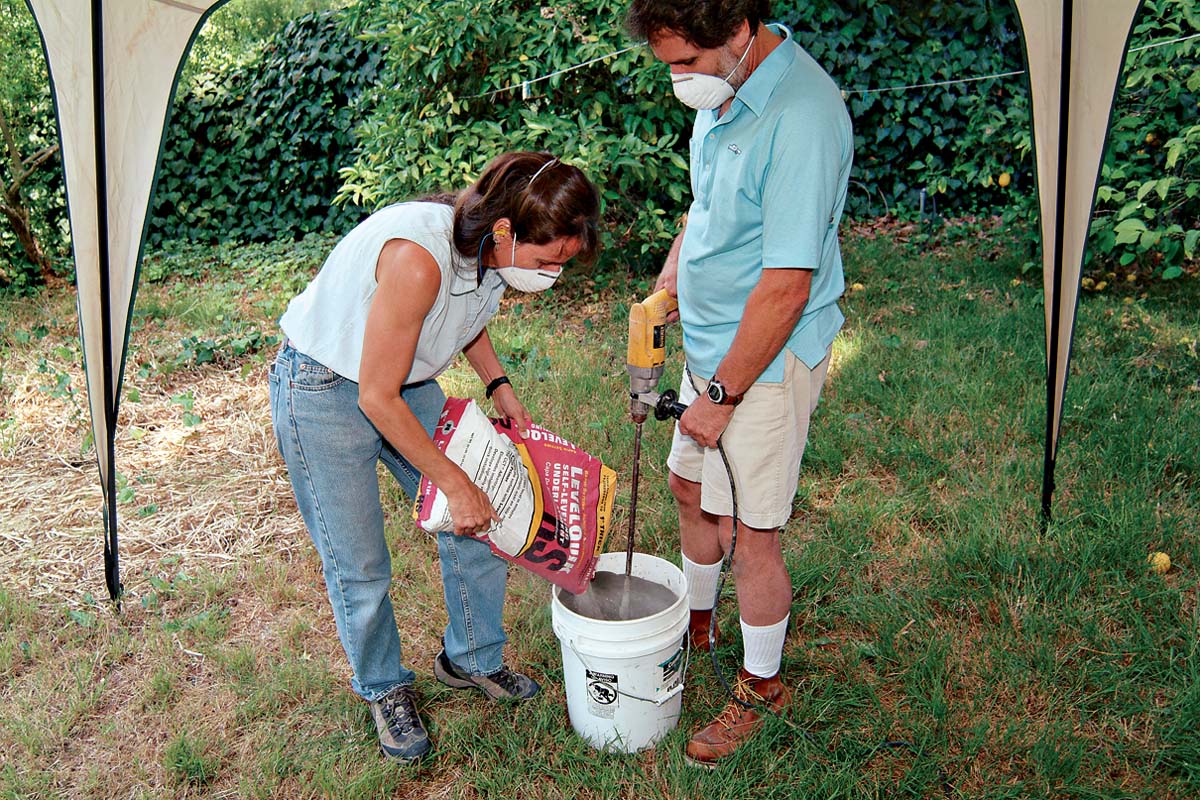
9. Pour dry compound into the water-filled bucket slowly. Mix with a low-speed drill.


Mix the compound outdoors because of the dust, and wear a dust mask. Stir the compound for two minutes with an electric drill fitted with a mixer, and pour it into your form until the liquid is even with the screw heads 10. Use a gardener’s hoe to help spread the liquid 11, but don’t work it too much once it has found its level. If the mix seeps through the taped areas, pour some sand on the leak to stop it. Sweep up the excess after the compound has dried 12. Allow the leveler to dry for a half hour, then pull the lath strips 13 and start a new area, as needed. Level each newly poured area to the previous hardened area, so your whole floor will be the same height. Once all areas are poured, you’re ready to tile on a perfectly flat and level surface.

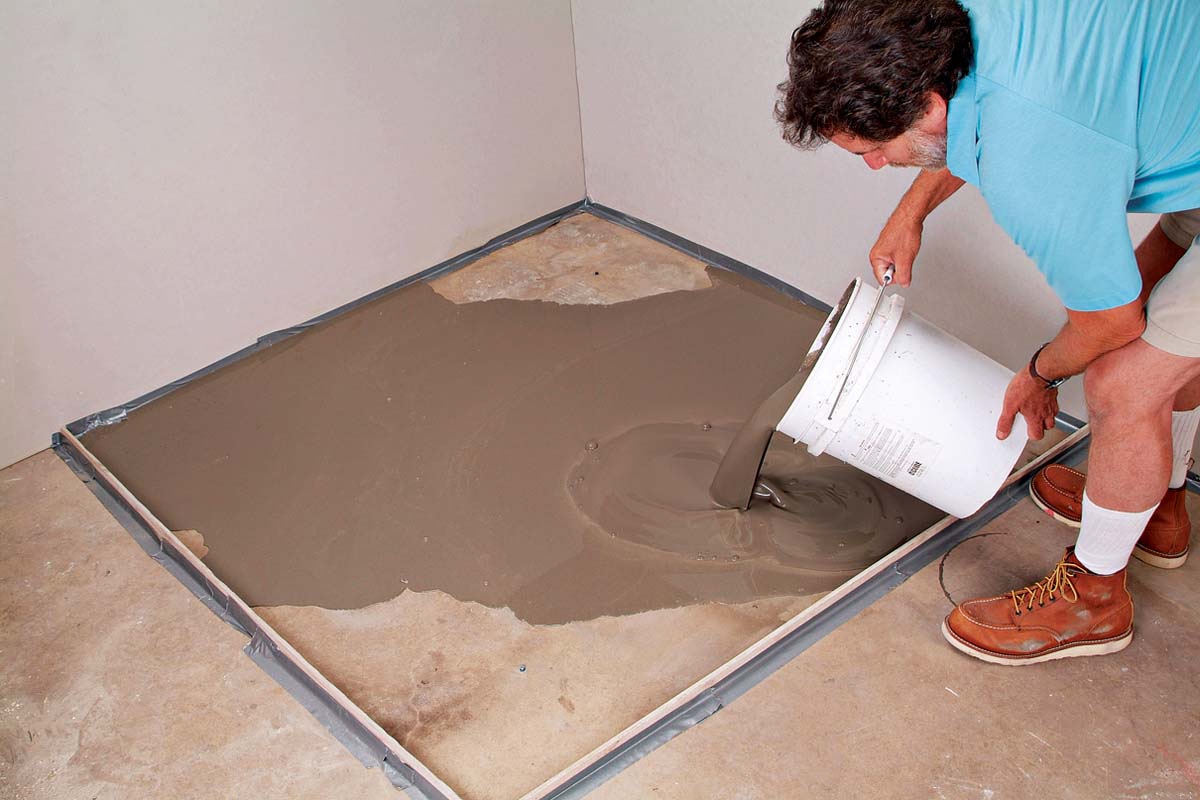
10. The poured compound starts to spread and seek its own level.
Use a long-handled hoe to help spread compound into the corners. 
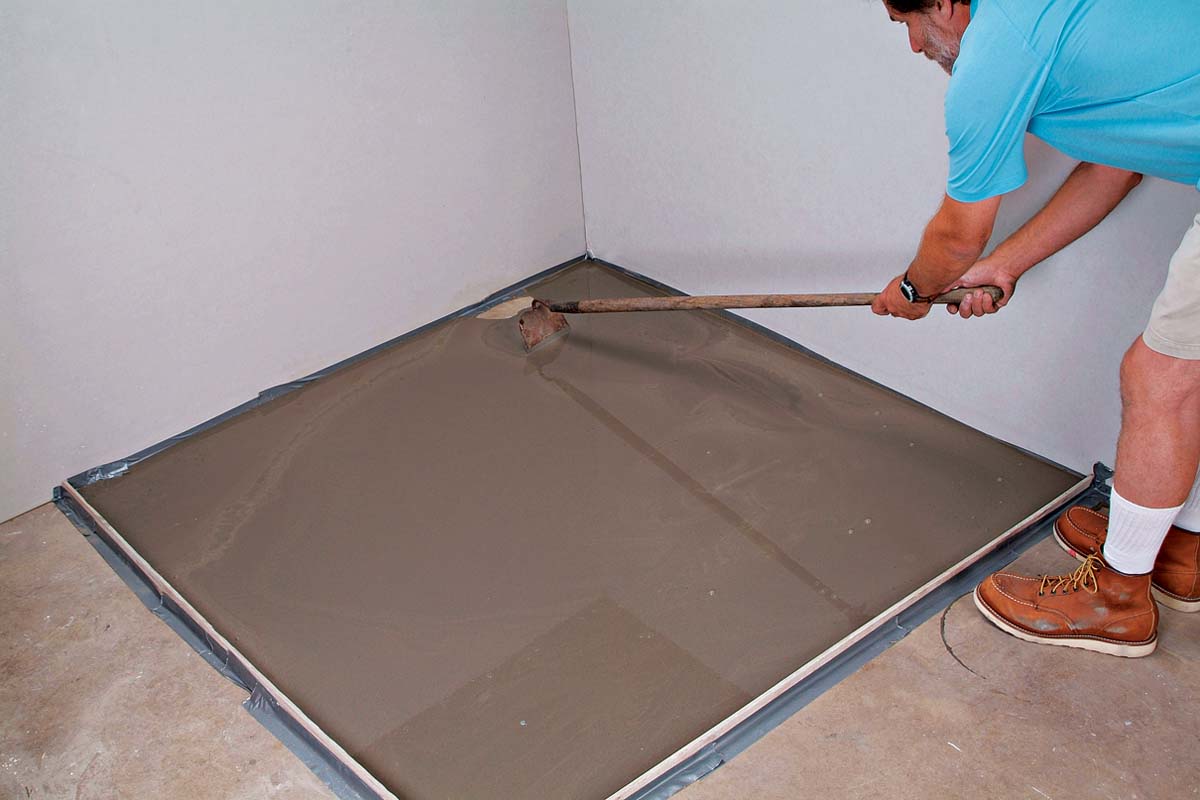
11. Use a long-handled hoe to help spread compound into the corners.
Shake out a small amount of sand to stop any leaks from the self-leveler. 
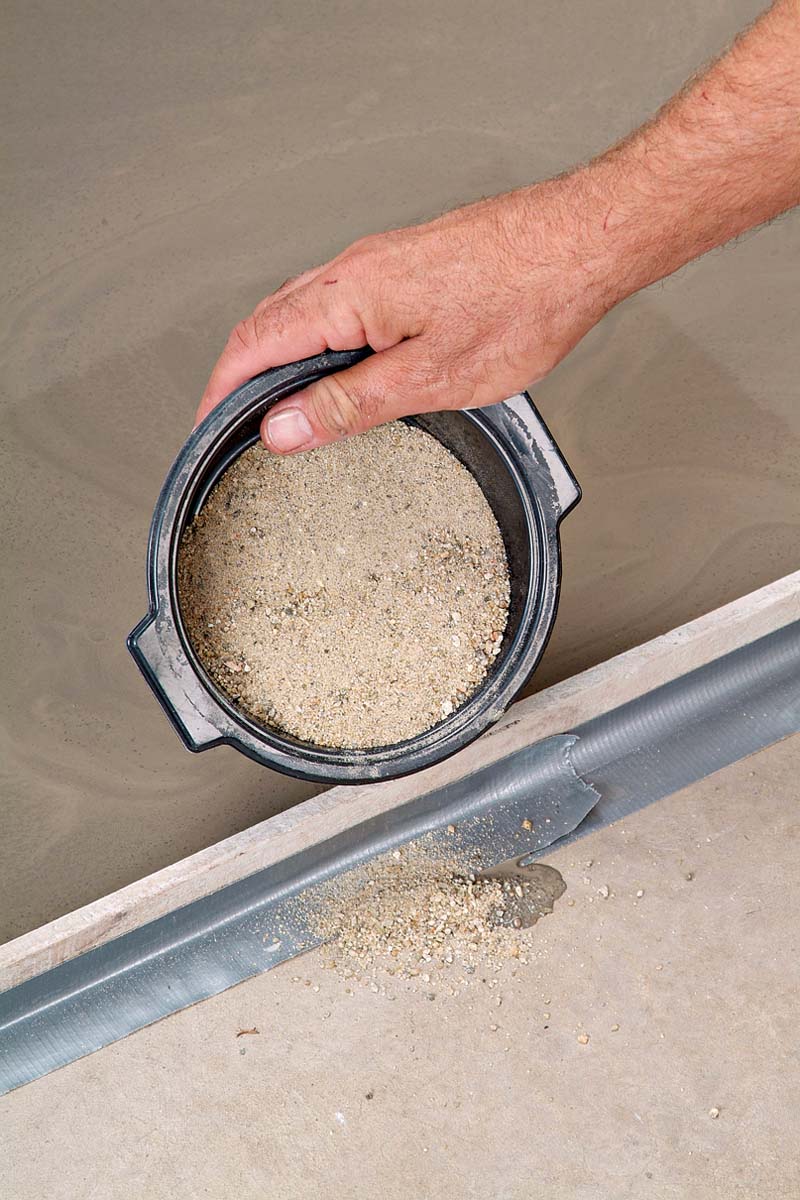
12. Shake out a small amount of sand to stop any leaks from the self-leveler.
After the floor has dried, lift the wood strips with the claw end of a hammer. 
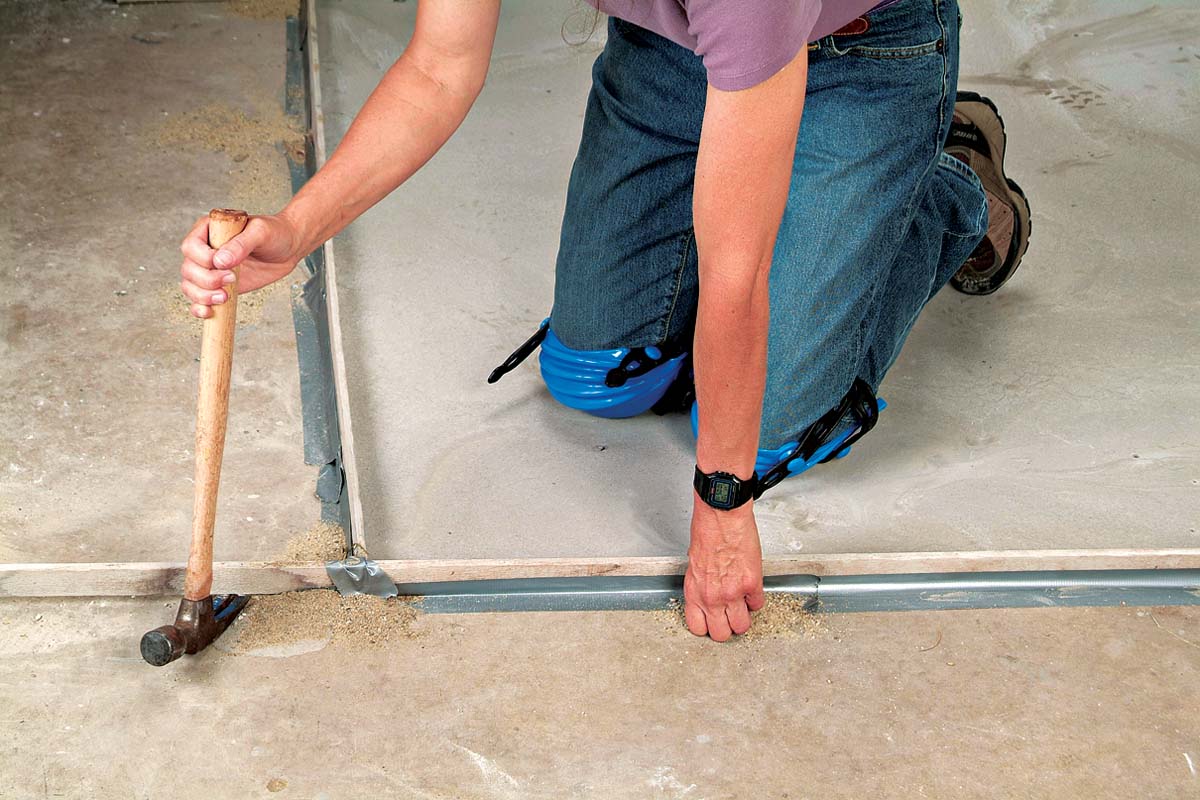
13. After the floor has dried, lift the wood strips with the claw end of a hammer.


TRADE SECRET: Pouring self-leveling compound is easier when two people do it. You’ll need to move quickly during the pour and clean up your tools quickly afterward.

Tiling Complete, 2nd EditionExcerpted from Tiling Complete, 2nd Edition by Robin Nicholas and Michael Schweit.

Available in the Taunton Store and at Amazon.com.

Sign up for eletters today and get the latest how-to from Fine Homebuilding, plus special offers.

Signing you up...

This site is protected by reCAPTCHA and the Google Privacy Policy and Terms of Service apply.
See all newsletters
See all newsletters
Previous: How to Prep a Plywood Subfloor for Tile Next: Applying an Antifracture Membrane

Guide

Tiling

Chapter

Preparation

Log in or create an account to post a comment.

Sign up Log in

Become a member and get full access to FineHomebuilding.com

Tiling

Tiling

Trusted, comprehensive guidance from the pros for a great-looking tile job in any room of the house

View Project Guide

View All Project Guides »

Become a member and get unlimited site access, including the Tiling Project Guide.

Start Free Trial

Selecting Tile
  • The Basics
  • Tile Options
Tools & Techniques
  • Job-Preparation Tools
  • Cutting Tiles
  • Setting & Grouting Tools
Installation Materials
  • Membranes & Substrates
  • Adhesives & Mortars
  • Grout
  • Sealers & Caulk
  • Spacers, Hardware & Trim
Preparation
  • The Prep Job
  • Repairs & Surface Prep
  • Installing Backerboard
Tiling Floors
  • Layout & Installation
  • Setting Specialty Tiles
Tiling Walls & Backsplashes
  • Preparation
  • Backsplashes
  • Walls
Tiling Showers
  • Tile Shower Basics
  • Waterproofing
  • Shower Pans
  • Shower Drains
  • Shower Niches
  • Video Series: Tile a Shower
  • Video Series: Tile a Barrier-Free Bathroom
Grouting, Sealing & Caulking
  • Grouting
  • Caulking
  • Sealing
Maintenance & Repair
  • Maintenance
  • Tile Repair
  • Grout Repair

Fine Homebuilding

Follow

  • twitter
  • facebook
  • instagram
  • pinterest

Newsletter

Get home building tips, offers, and expert advice in your inbox

Signing you up...

This site is protected by reCAPTCHA and the Google Privacy Policy and Terms of Service apply.
See all newsletters
See all newsletters

Membership & Magazine

  • Online Archive
  • Start Free Trial
  • Magazine Subscription
  • Magazine Renewal
  • Gift a Subscription
  • Customer Support
  • Privacy Preferences

Taunton Network

  • Green Building Advisor
  • Fine Woodworking
  • Fine Gardening
  • Threads
  • About
  • Contact
  • Advertise
  • Careers
  • Copyright
  • Terms of Use
  • Site Map
  • Do not sell or share my information
  • Privacy Policy
  • Accessibility
  • California Privacy Rights

© 2023 The Taunton Press, Inc. All rights reserved.

X
X
This is a dialog window which overlays the main content of the page. The modal window is a 'site map' of the most critical areas of the site. Pressing the Escape (ESC) button will close the modal and bring you back to where you were on the page.

Main Menu

  • How-To
  • Design
  • Tools & Materials
  • Video
  • Blogs
  • Forum
  • Reader Projects
  • Magazine
  • Members
  • FHB House

Podcasts

  • FHB Podcast
  • ProTalk

Webinars

  • Upcoming and On-Demand

Podcasts

  • FHB Podcast
  • ProTalk

Webinars

  • Upcoming and On-Demand

Popular Topics

  • Kitchens
  • Business
  • Bedrooms
  • Roofs
  • Architecture and Design
  • Green Building
  • Decks
  • Framing
  • Safety
  • Remodeling
  • Bathrooms
  • Windows
  • Tilework
  • Ceilings
  • HVAC

Magazine

  • Current Issue
  • Past Issues
  • Magazine Index
  • Subscribe
  • Online Archive
  • Author Guidelines

All Access

  • Member Home
  • Start Free Trial
  • Gift Membership

Shop the Store

  • Books
  • DVDs
  • Taunton Workshops

More

  • FHB Ambassadors
  • Reader Projects
  • Podcast
  • FHB House
  • Customer Support

Account

  • Log In
  • Join

Newsletter

Get home building tips, offers, and expert advice in your inbox

Signing you up...

This site is protected by reCAPTCHA and the Google Privacy Policy and Terms of Service apply.
See all newsletters
See all newsletters

Follow

  • twitter
  • facebook
  • instagram
  • pinterest

Join All Access

Become a member and get instant access to thousands of videos, how-tos, tool reviews, and design features.

Start Your Free Trial

Subscribe

FHB Magazine

Start your subscription today and save up to 70%

Subscribe

We hope you’ve enjoyed your free articles. To keep reading, become a member today.

Get complete site access to expert advice, how-to videos, Code Check, and more, plus the print magazine.

Start your FREE trial

Already a member? Log in