
Prep a Subfloor for Tile
A second layer of plywood stiffens floors for long-lasting tile installations.
Synopsis: This article covers the basics of installing plywood underlayment for use below ceramic tile. It discusses subfloor preparation, panel layout, and fastener spacing.
As a carpenter, I installed thousands of square feet of plywood underlayment over subflooring that the framers had fastened to the floor joists. Plywood underlayment can be used directly under tile in many instances, and it might still be necessary even if you’re using cementboard or one of the plastic isolation underlayment systems. For example, many isolation systems require the use of plywood underlayment with joists on 24-in. centers. These products make great tile bases, but they don’t strengthen floors like plywood does. Plywood underlayment helps to share loads between joists, reducing the overall deflection of the floor, and it reinforces the subflooring to stiffen the floor system between the joists. This is important because ceramic tile is pretty inflexible, and movement in the floor below it can cause cracking.
There are three primary sources for correct underlayment details available online, but they don’t agree on all points, and some of the details might seem counter-intuitive. (For example, underlayment should not be fastened into joists.) When in doubt, consult with the tile manufacturer, who’s the one responsible for deciding whether or not to honor warranty claims. For dry areas, or with the use of a water-proofing membrane, the Tile Council of North America’s (TCNA) 2015 Handbook for Ceramic, Glass, and Stone Tile Installation lists plywood rated either Exposure 1 or Exterior as a suitable base for floor tile in residential use, with the caveat that it be installed according to details from a different source: ANSI standard A108.01. Another source for information on wood floors is Ceramic Tile Over Wood Structural Panel Floors from APA – The Engineered Wood Association.
The TCNA handbook references A108.01, but not the APA’s guide. The APA guide references both the TCNA handbook and A108.01. And while the latter two sources require joists spaced on 16-in. centers, the APA has details for joists on 24-in. centers, as well as subfloor and underlayment combinations that the other two don’t. The APA claims that its specs meet the TCNA’s loading and deflection requirements. Also, in addition to the minimum of 5⁄8-in. nominal plywood subflooring that the APA references, A108.01 allows underlayment to be laid over nominal 1×6 tongue-and-groove wood-board subflooring, as is common in older houses.
For tile, all the standards agree that the floor needs to deflect no more than L/360 (L = the joist span) under a combined live and dead load of 50 lb. per sq. ft. That spec happens to be the code minimum for living spaces, so most houses built to modern standards are fine. (With older or poorly built houses, it may be worthwhile to get an engineer’s evaluation.) The deflection standard jumps to L/720 for natural stone, so you might need to double up the floor joists or seek an engineered solution to install stone to spec in most houses.
All sources call for underlayment to be installed perpendicular to the joists, and the fastening pattern is critical. Don’t fasten underlayment to the joists, which can result in fastener pops that detach or break tiles. Nail or screw the underlayment along its edges with at least 4d ring-shank nails spaced at most 6 in. apart. In the field, space fasteners no more than 8 in. apart.
While A108.01 requires adhesive (without specifying type or amount) between the underlayment and the subfloor, neither the APA guide nor the TCNA do. Construction adhesive below the underlayment definitely makes a stronger assembly, but it also makes the work less reversible. In other words, should anyone in the future decide to tear up your floor, they’ll have an ordeal on their hands. Because of this, I no longer glue the panels down. Instead, I use more fasteners, reducing the spacing to 3 in. along the edges and 6 in. in the field, and I use screws instead of nails. The screws should be long enough to fully penetrate the subfloor so that enough thread engages the wood to pull the screw heads slightly below the surface of the underlayment. With a typical combined plywood thickness of 1-1⁄4 in., use at least 1-1⁄2 in. screws.
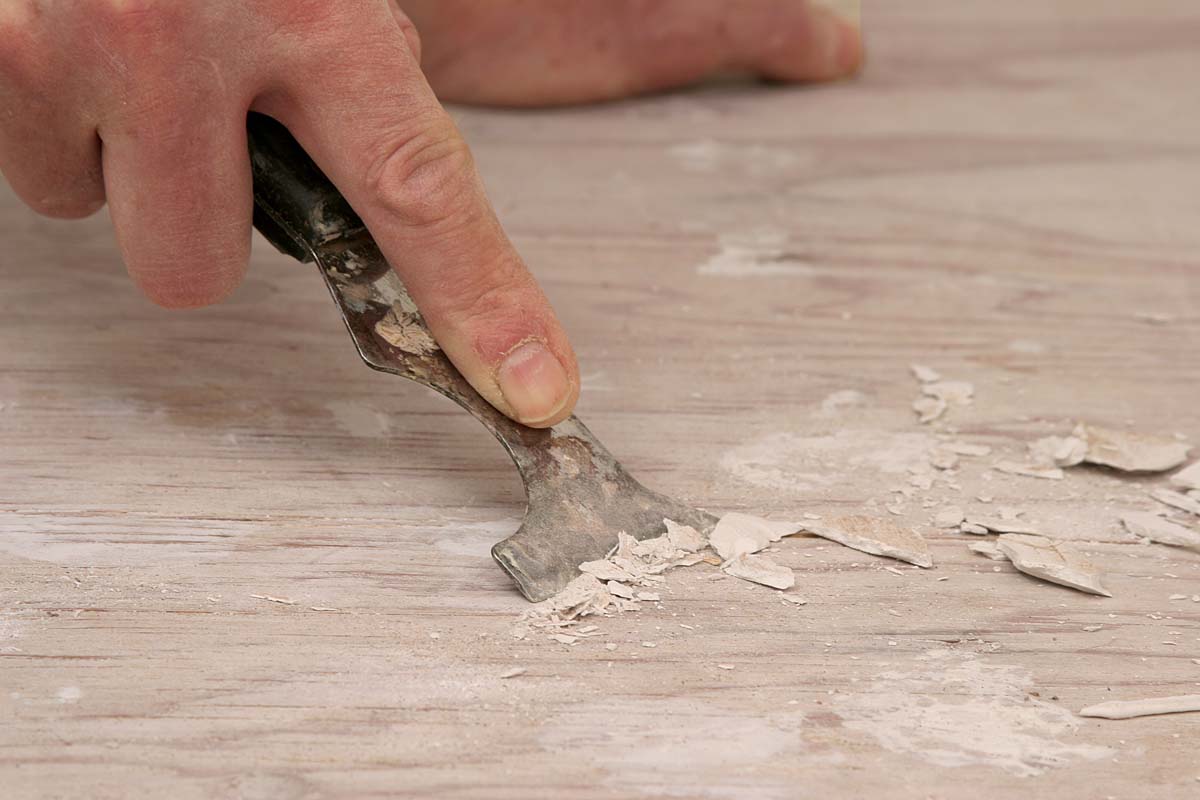 |
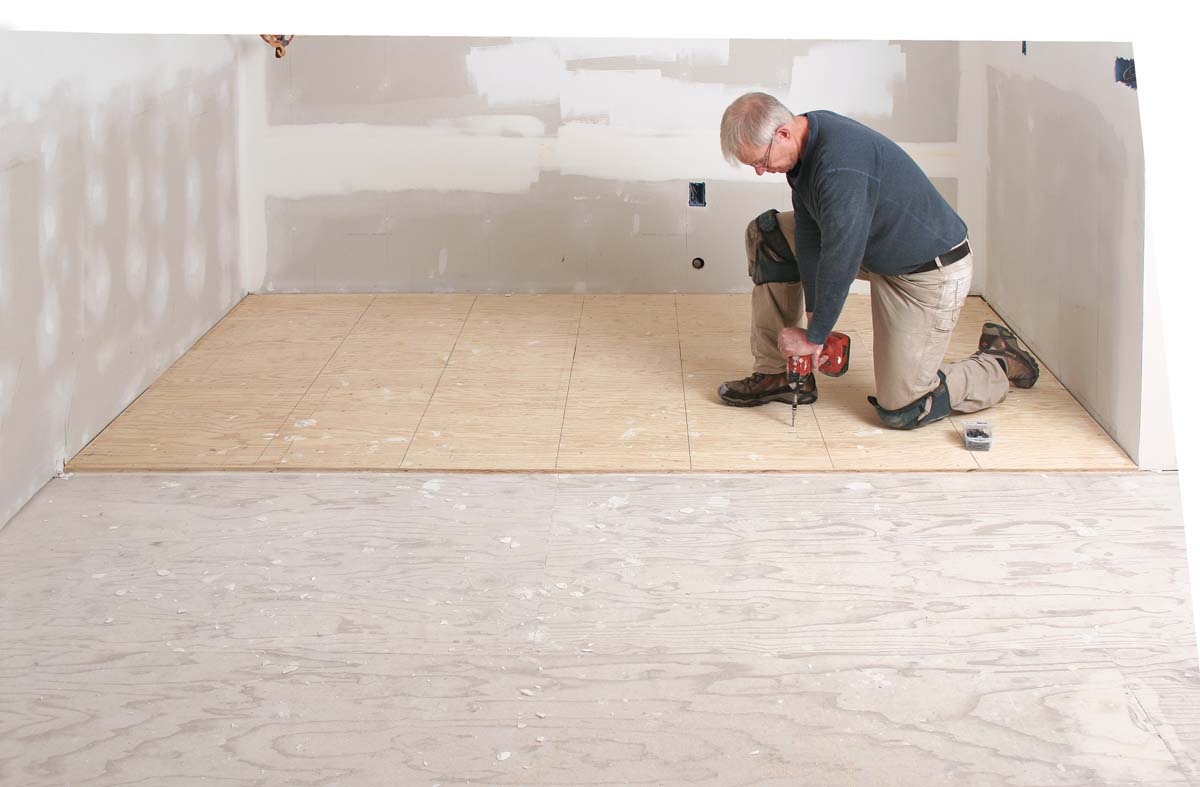
Start clean. Scrape up any lumps of dried drywall mud, and sweep the floor clean. Vacuum out the joints in the subfloor and in the corners where the walls meet the floor. |
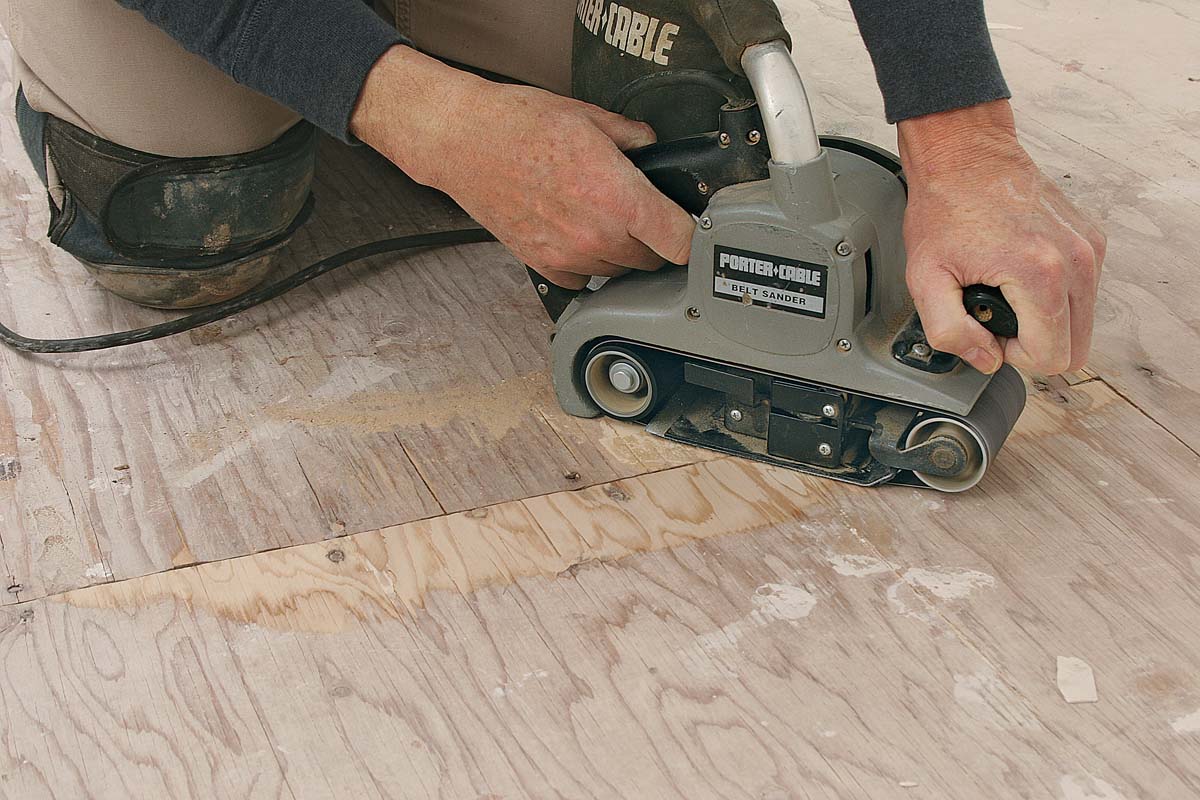 |
Fix any problems with the subfloor. Set any fasteners that stick up, and sand flush any joints with significant lippage. Screw down loose spots. |
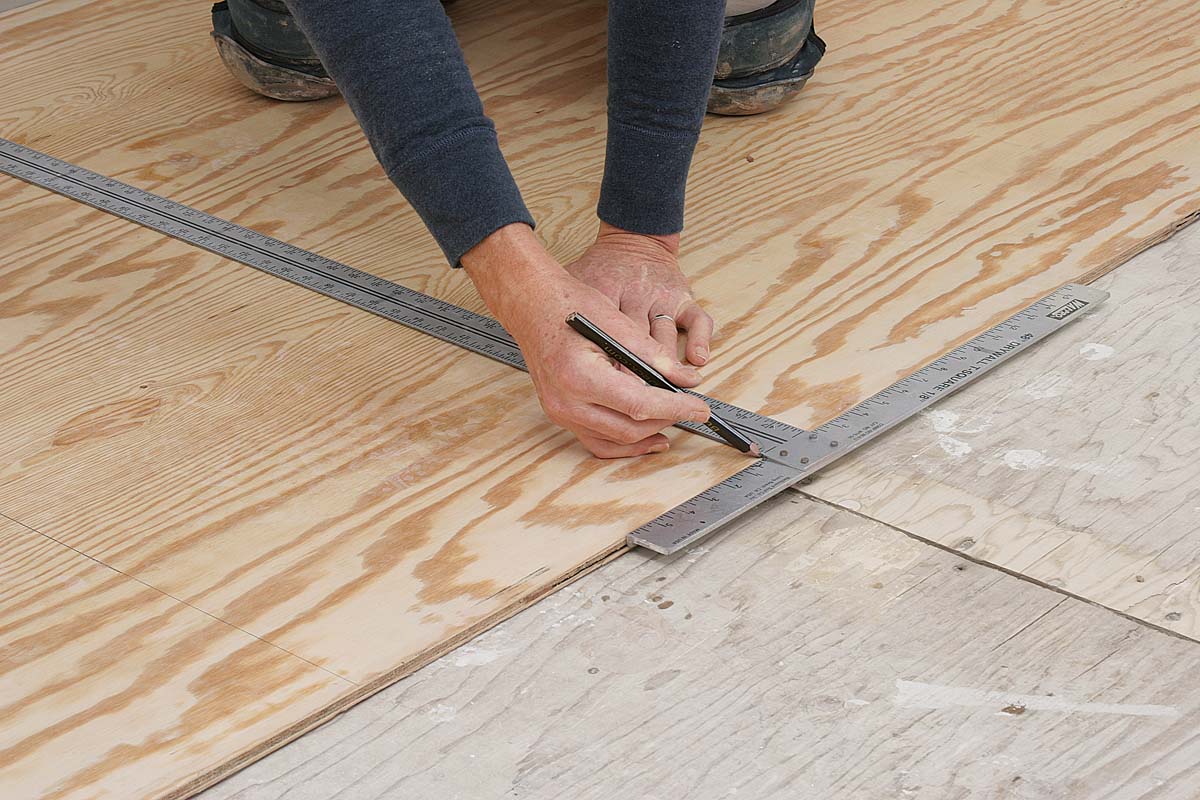 |
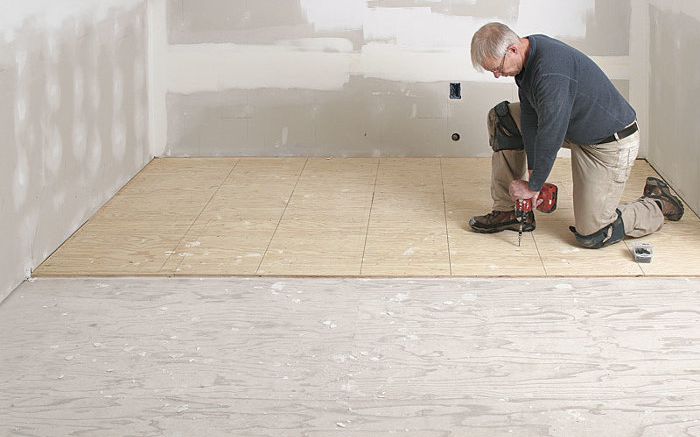
Get the layout right. Run the underlayment perpendicular to the joists, making sure its ends and edges miss the joists and seams in the subfloor by at least 2 in. Mark the joists so that you don’t fasten into them. All fasteners should go into the subfloor only. |
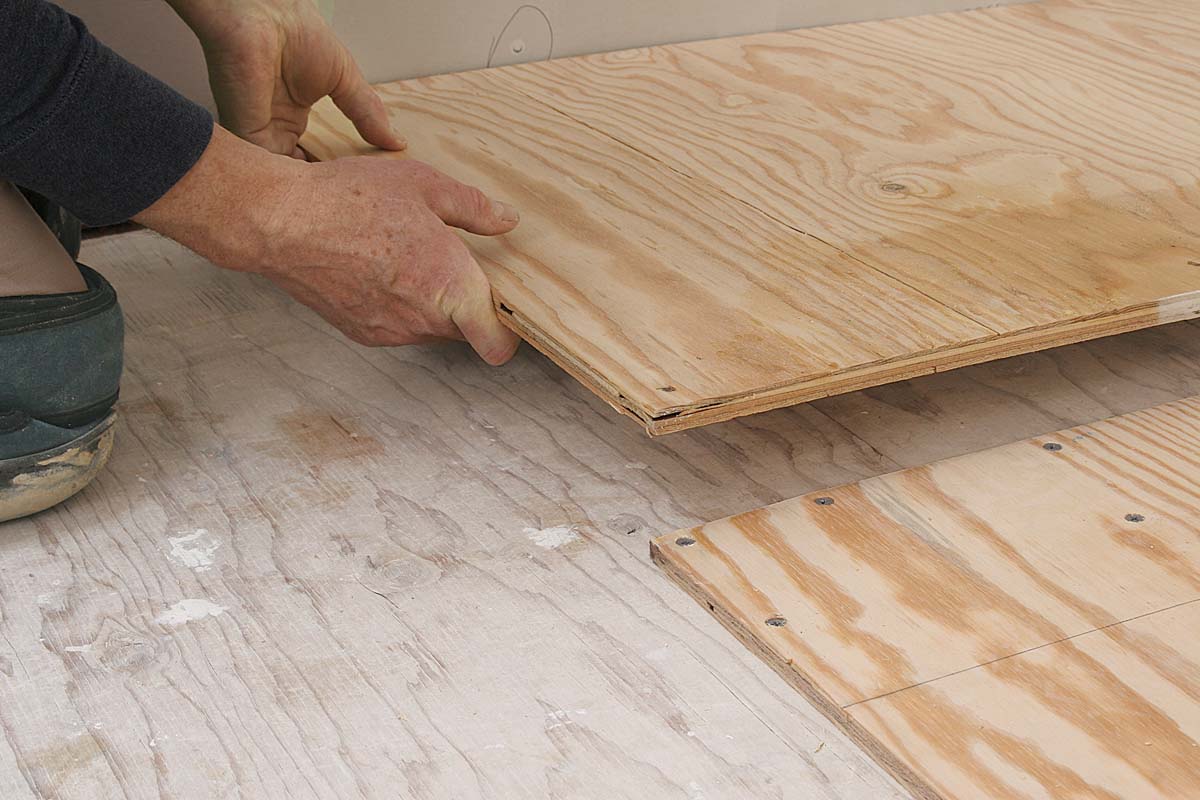 |
Space the panels correctly. Space underlayment panels 1⁄8 in. from each other and 1⁄4 in. from abutting walls and plumbing fixtures. The ends of underlayment panels in adjacent rows should be offset from each other by at least 16 in. |
 |
Fasten it. Whether you use screws or nails, install them 3⁄8 in. from the panel edges. Space them no farther apart than 6 in. along the edges of each panel and 8 in. in the field. Narrow the spacing if you aren’t using construction adhesive. |
For more photos and details, click the View PDF button below:

