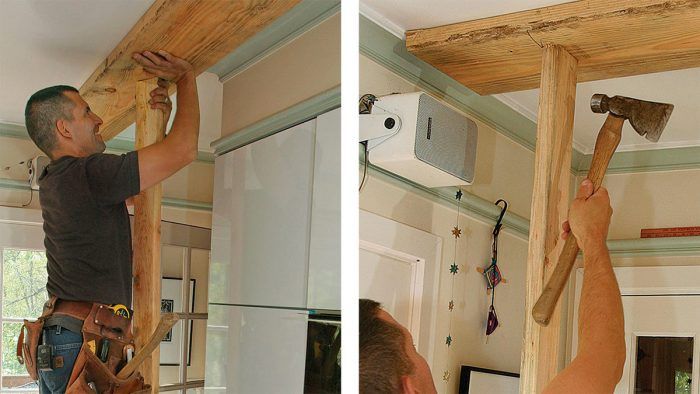
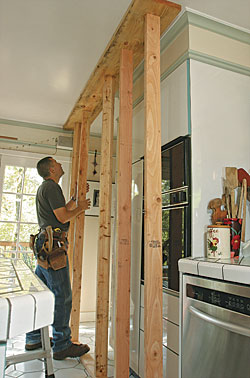
When I talk to my clients about improving sightlines and traffic patterns in their homes, the conversation often leads to somebody saying, “Well, let’s just tear out that wall,” followed by, “Can we do that?” As a remodeling contractor, I’ve learned that a simple “yes” is the best answer. When I get around to figuring out how to tear out that wall, things can get more complicated. The first step is to determine if the wall is load-bearing. If it is, I need to support the structure temporarily while the demolition and rebuilding work are done. There are different ways to provide support, but if the joists above are perpendicular to the wall, the easiest option is to build a temporary brace wall.
I use a 2×10 for the top plate to spread the weight over a large-enough area to avoid cracking the ceiling finish. For the bottom plate and studs, 2x4s are sufficient. If the brace wall needs to span a long distance, I break it up into 8-ft. or shorter sections to make it manageable for one person to build. I build the wall 3 ft. to 4 ft. from the opening—in this case, to enlarge the doorway beyond the cabinets. This distance is close enough to support the load adequately, yet it gives me enough room to work comfortably.
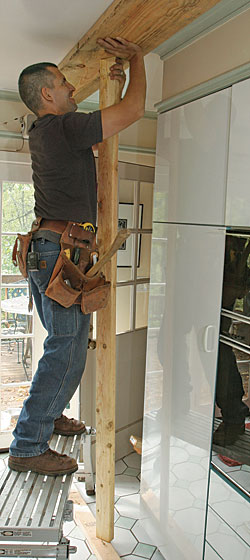
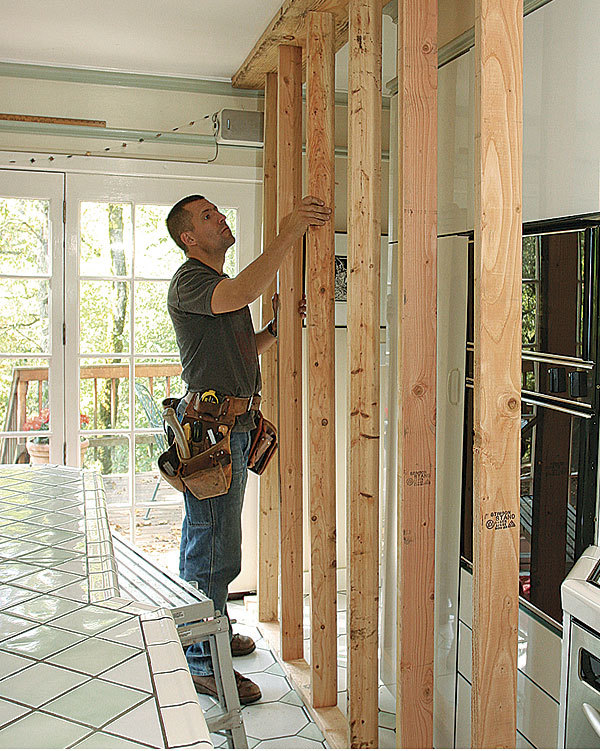
Place and plumb the middle stud first
Measure for the studs. I set both the top and bottom plates on the floor and stand on them while measuring for the studs. When reading a bent tape, I err on the long side. After cutting a stud or two, I get a feel for guesstimating the measurement.
Don’t say no to a helping hand. With the first stud within close reach, I lift the 2×10 top plank flat to the ceiling (in this case, with the help of an FHB photographer holding the other end of the board). I then wedge the center stud in place; the center stud holds the top plate until I add more studs.
What if one stud’s too short? If you’ve cut one stud too short, you can wedge it by using a nail as a shim. If the stud is too short by more than the thickness of a nail shank, then you’ll need to shim it or replace it.
Plumb the center stud. After I mark the locations of the ceiling joists on the top plate, I measure from the plumbed stud to match the layout marks on the bottom plate.
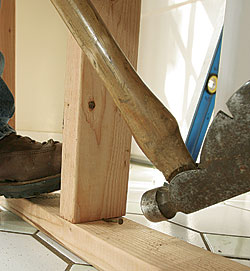
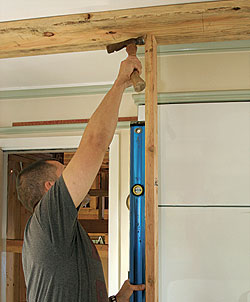
Friction-fit studs to complete the wall
Snug is a good fit. I like to be able to tap studs in place. If I have to pound on a stud with my hammer to get it in place, then it should be trimmed. After the center stud is snug, I start on the outside and work back to the center.
No nails needed. There’s no benefit to nailing the studs to the plates. If they are fit properly, they will remain in place. Nailing the wall together would only make it harder to take apart.
If I’m dealing with a multistory structure or if I think there is a significant load, I consult an architect or an engineer. Also, when I’m working over a crawlspace or a basement, I build a secondary brace wall below if I need to continue the load path down.
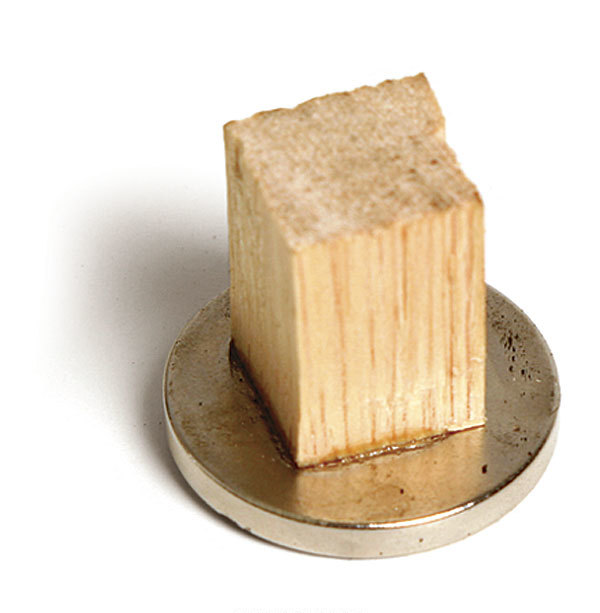
Make a stud finder that works
Using a typical stud finder to locate ceiling joists can be frustratingly inconclusive. However, a rare-earth magnet is a surprisingly accurate alternative. It’s strong enough to stick to fasteners even if they’re buried in old plaster. A quartersize magnet works great and can be purchased online (www.woodcraft.com). Use two-part epoxy to affix a small block of wood to the magnet as a handle. To use the homemade stud finder, run the magnet over the surface of the ceiling until it sticks. Chances are that you’ve located a drywall screw in the center of a joist.
—John Ross
Photos by: John Ross
Fine Homebuilding Recommended Products
Fine Homebuilding receives a commission for items purchased through links on this site, including Amazon Associates and other affiliate advertising programs.
Magoog Tall Stair Gauges
These are a must-have when laying out stairs with a framing square. They attach easily and save time, especially on long or multiple stringers.
This is a dialog window which overlays the main content of the page. The modal window is a 'site map' of the most critical areas of the site. Pressing the Escape (ESC) button will close the modal and bring you back to where you were on the page.
We use cookies, pixels, script and other tracking technologies to analyze and improve our service, to improve and personalize content, and for advertising to you.
We also share information about your use of our site with third-party social media, advertising and analytics partners.
You can view our Privacy Policy
here and our Terms of Use here.