Flashing a Chimney
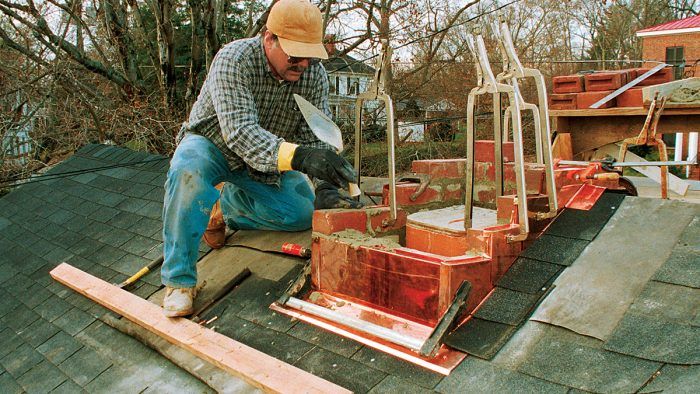
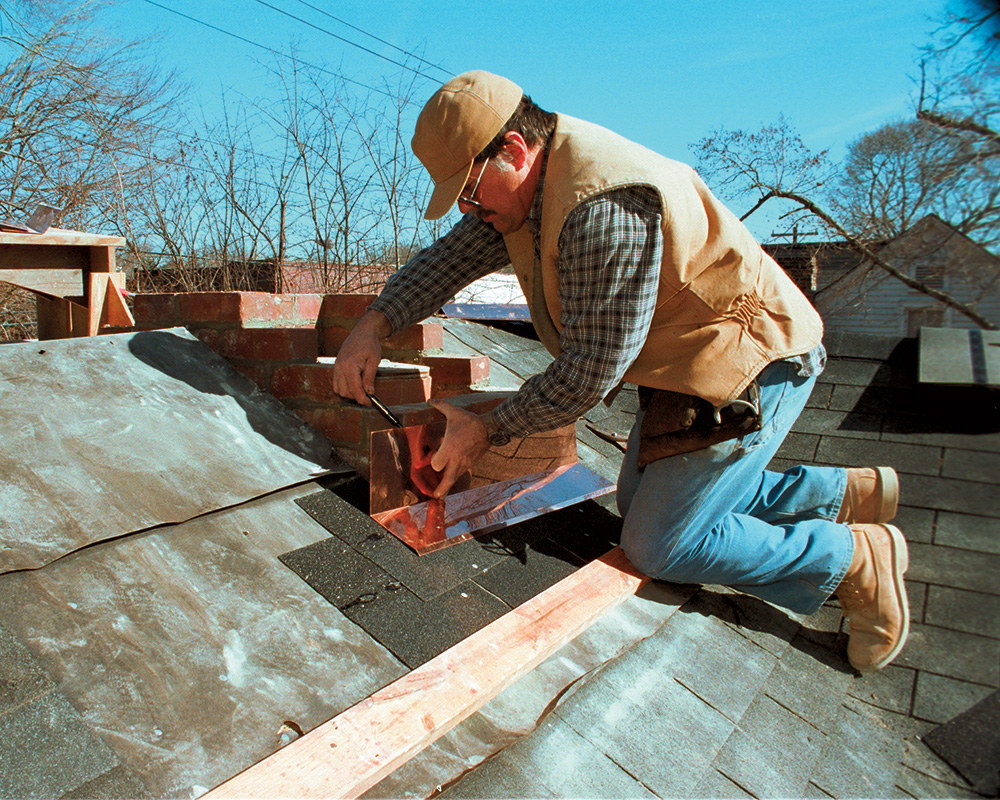
Installing the flashing along with the bricks makes for a more secure and much better-looking job.

Synopsis: A North Carolina builder shows how copper flashing can be integrated with a masonry chimney as it is built, an approach that yields a neat, weathertight seal.
In the early 1970s, my father and a friend went into the roofing business. The friend supplied the capital, and my father, who had six sons, supplied the labor. Being the most particular of the six boys, I was given the task of flashing chimneys. My work was good enough to justify my father’s confidence, but invariably, the finished product was a hodgepodge of incongruent shapes and oozing tar—nothing to be proud of.
In the intervening quarter-century, I’ve built as many chimneys as I’ve flashed. As I’ve grown from a schoolboy roofer to a seasoned builder and mason, experience has taught me that the best way, visually and structurally, to flash a chimney is to do so at the same time the bricks are being laid. Being skilled in both trades is convenient, but it’s not a requirement. If plumbers and carpenters can rough in a bath together, a mason and a roofer working in a spirit of cooperation can easily do this job.
Chimneys need double protection
Chimney flashing looks complicated because it involves two distinct components: base flashing and counterflashing. The base flashing covers the joint between the chimney and the roof, ensuring that all the water that flows down the roof is channeled back onto the surface of the shingles. The counter-flashing laps over the top of the base flashing to ensure that any water that runs down the chimney is channeled to the outside of the base flashing.
Chimneys break through the surface of roofs in every conceivable place: at the eaves,on the ridge, along the rake and almost everywhere in between. As different as these configurations might be, the strategies for directing water to move harmlessly around a chimney are basically the same. Whenever I’m installing roofing or flashing, I always visualize the flow of water. An upper piece of flashing always laps over a lower one. To ensure that every drop of water is deposited on the surface of the roof, the lower piece of flashing always laps over a shingle.
Flashing bends are made in advance
I certainly didn’t invent the idea of installing the flashing as the chimney is being built. Bricklayers in New England, where lead flashing is popular, often bed counter-flashing in the mortar joints, then bend the flexible metal upward until the roofers come along to fit the base flashing underneath. There is nothing wrong with this method, but I prefer to install all the flashing at the same time. This technique gives me complete control over the flashing process and allows me to use better-looking material.

Besides lead, there are many kinds of sheet metal that roofers use to flash chimneys. I prefer copper. Standard 16-oz. copper bends crisply and has enough body to stay straight and smooth. Unlike aluminum, it doesn’t corrode when embedded in wet portland cement; and unlike steel, it never rusts. To my eyes, copper looks great alongside brick or stone, and like those materials, its appearance improves with age. Handsome, durable, exuding quality, copper is truly the Irishman of flashing materials.
Flashing a chimney involves a lot of cuts and bends that must be made on site, but I prefer to have the rough shapes formed ahead of time in a sheet-metal shop. Getting these pieces fabricated in a shop means the bends are crisp and the material is straight and smooth. Besides just looking good, straight metal makes for a tight fit, and the tighter the fit, the less chance that water will seep into the house.
For more photos and information on step flashing, click the View PDF button below.
Fine Homebuilding Recommended Products
Fine Homebuilding receives a commission for items purchased through links on this site, including Amazon Associates and other affiliate advertising programs.

Roofing Gun

Flashing Boot

Shingle Ripper


