FHB Logo Facebook LinkedIn Email Pinterest Twitter Instagram Plus Icon Close Icon Navigation Search Icon Navigation Search Icon Arrow Down Icon Video Guide Icon Article Guide Icon Modal Close Icon Guide Search Icon Skip to content
Subscribe
Log In
  • How-To
  • Design
  • Tools & Materials
  • Videos
  • Blogs
  • Forum
  • Magazine
  • Members
  • FHB House
  • Podcast
Log In

Fine Homebuilding Project Guides

Roofing

Guide Home
  • Tools and Materials
  • Roof Replacement and Reroofing
  • Roof Ventilation
  • Waterproofing
  • Installing Asphalt Shingles
  • Installing Other Types of Roofs
  • Roof Maintenance and Repair
Building Skills

Installing Grace Ice & Water Shield Underlayment

Industry expert Dave Baur presents two easy ways to install self-adhering roofing membrane.

By Matt Higgins

A home is both shelter and investment and extreme weather is a real concern, so it’s no real surprise that consumers want to know that their home is constructed to withstand the likes of wind-driven rain, snow, and ice.

Dave Baur, product manager for Grace Residential Building Materials, provided the following step-by-step tips for contractors and builders on building homes for extreme weather. Follow along below as he outlines two methods of installing underlayment.

In 1978, Grace Construction Products developed the first self-adhered roofing underlayment, Grace Ice & Water Shield. It has been a go-to product that building professionals have trusted for over 37 years to protect their projects. Dave is an expert on the topic of how proper roofing underlayment installation can help protect from ice dam formation.

There are two easy ways to install roofing underlayment:

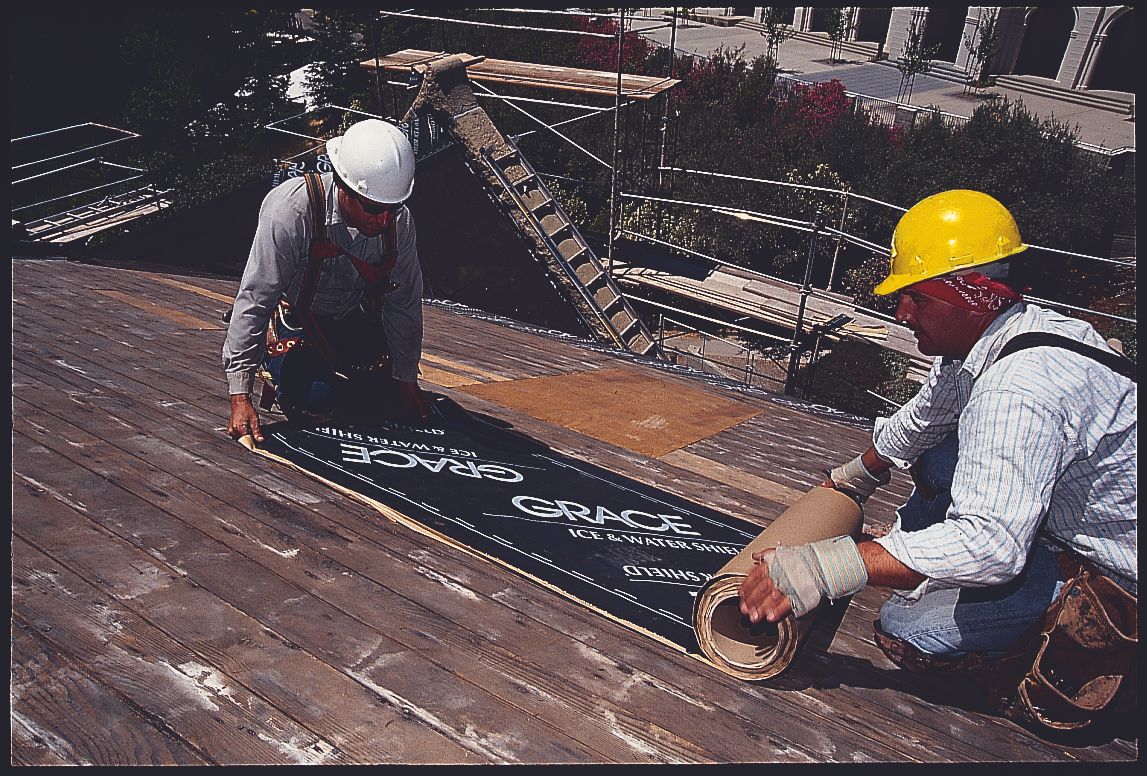
The Conventional Method

conventional method for underlayment installation

1. Cut the membrane into 10 ft. to 15 ft. lengths and re-roll loosely. Peel back 1 ft. to 2 ft. of release liner, align membrane.

roof underlayment

2. Peel the release liner from the membrane. Press the membrane in place with heavy hand pressure.

underlayment overlap

3. Minimum overlap guidelines are set by the manufacturer. Grace requires side laps to be a minimum of 3.5 in. and end laps a minimum of 6 in.

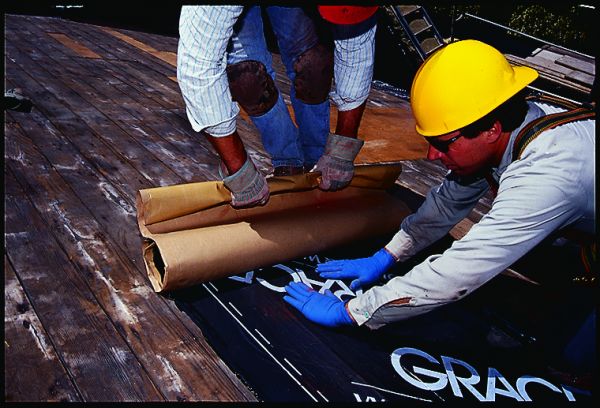
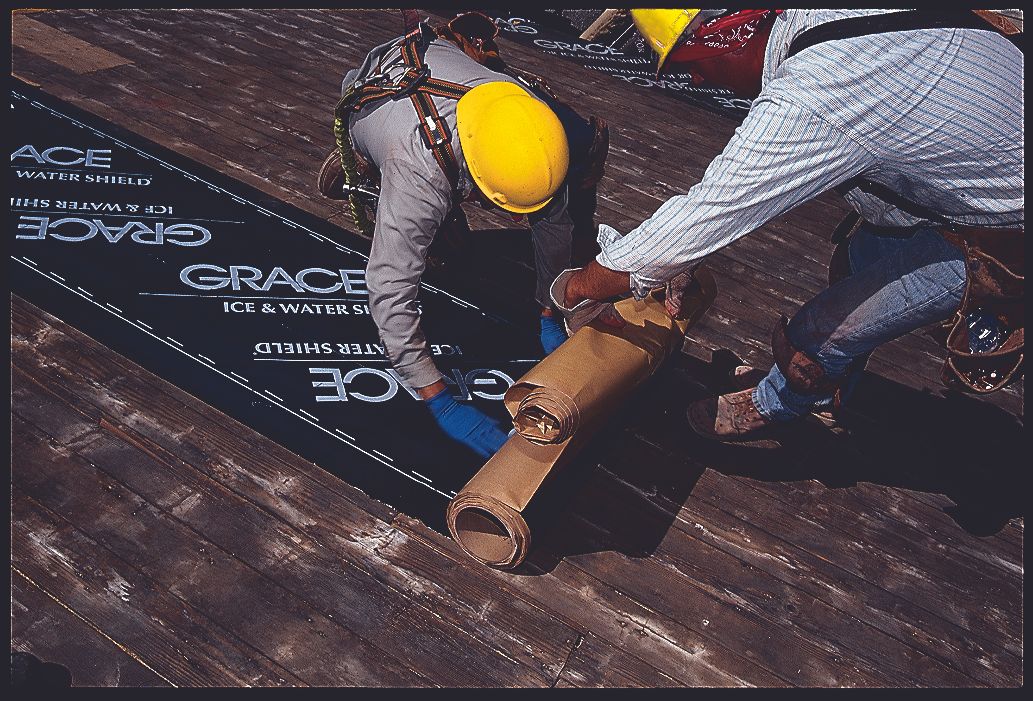
The Back-Roll Method

Some contractors prefer the back-roll method. The back-roll technique can be faster than the conventional method since you can lay down the membrane in just a few minutes.

back-roll underlayment install

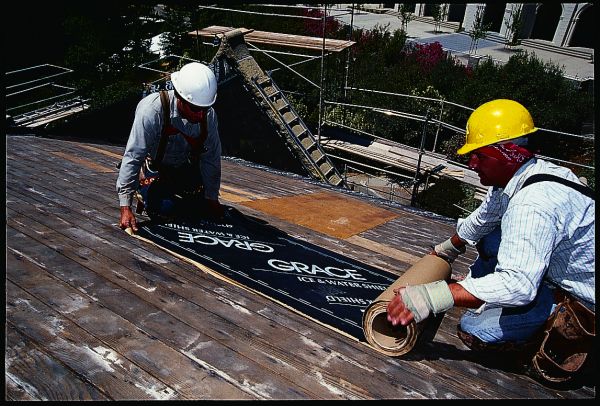
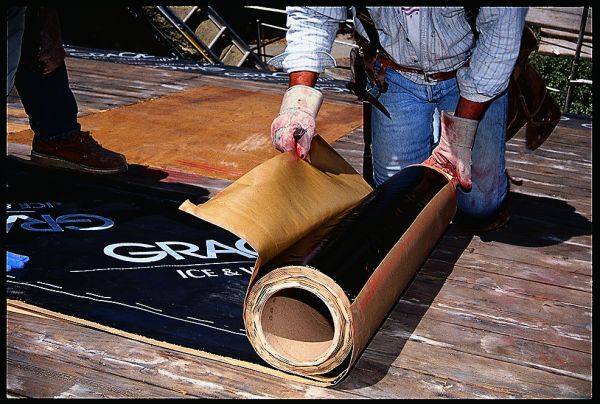
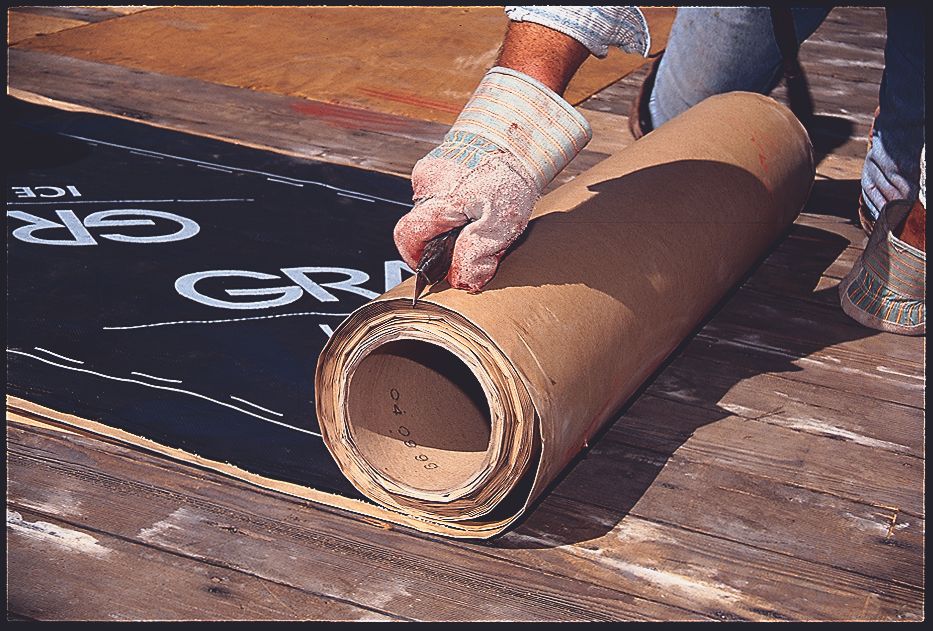
1. Start by unrolling a 10 ft. to 15 ft. piece of membrane, leaving the release liner in place. Align the membrane and roll in the intended direction of the membrane application.

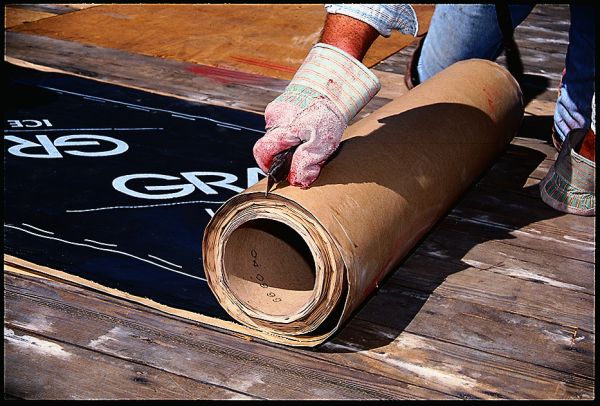
2. Carefully cut the release liner on top of the roll in the cross direction, being careful not to cut the membrane.

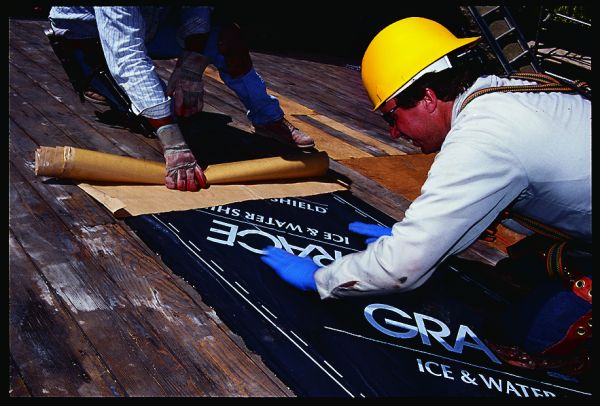
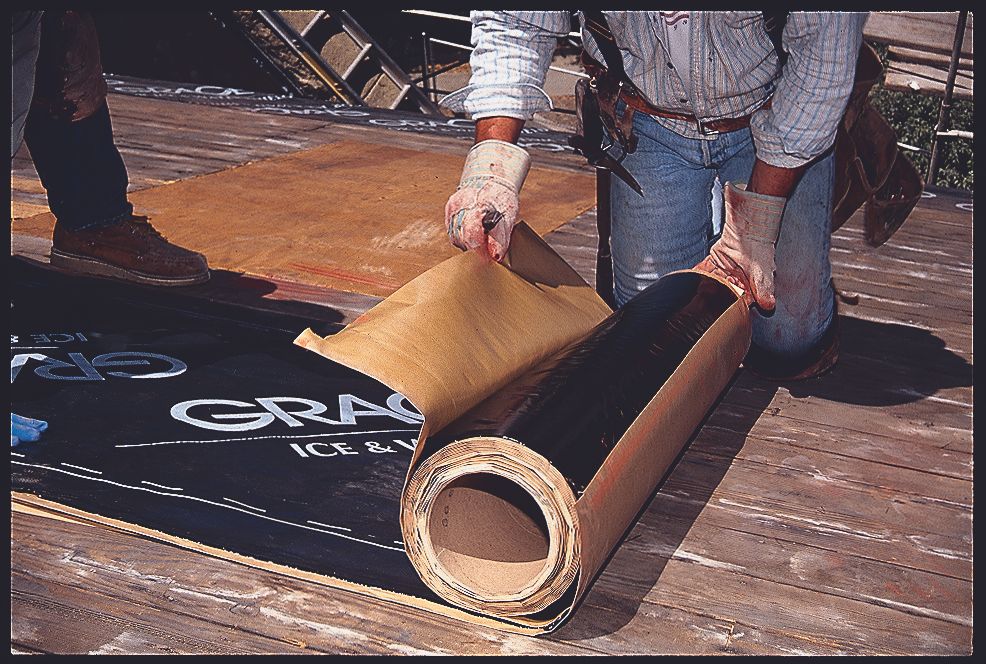
3. Peel back about 6 in. of the release liner in the opposite direction of the intended membrane application, exposing the black adhesive.

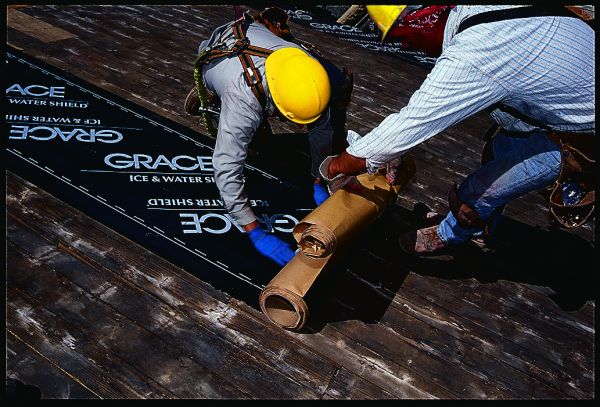
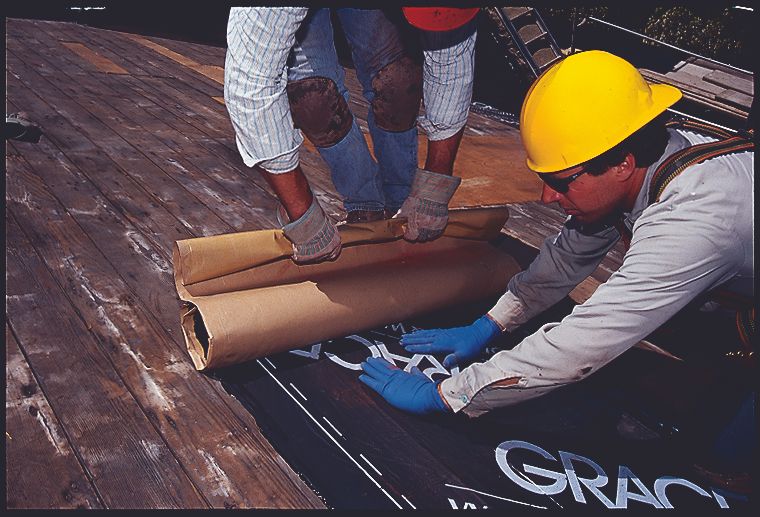
4. Hold the release liner with one hand and pull the roll along the deck with the release liner, leaving the applied membrane behind.

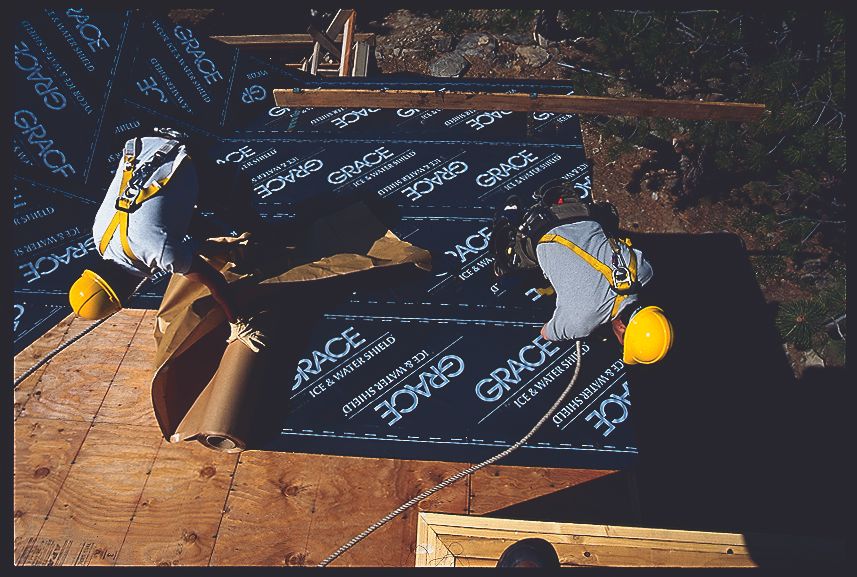
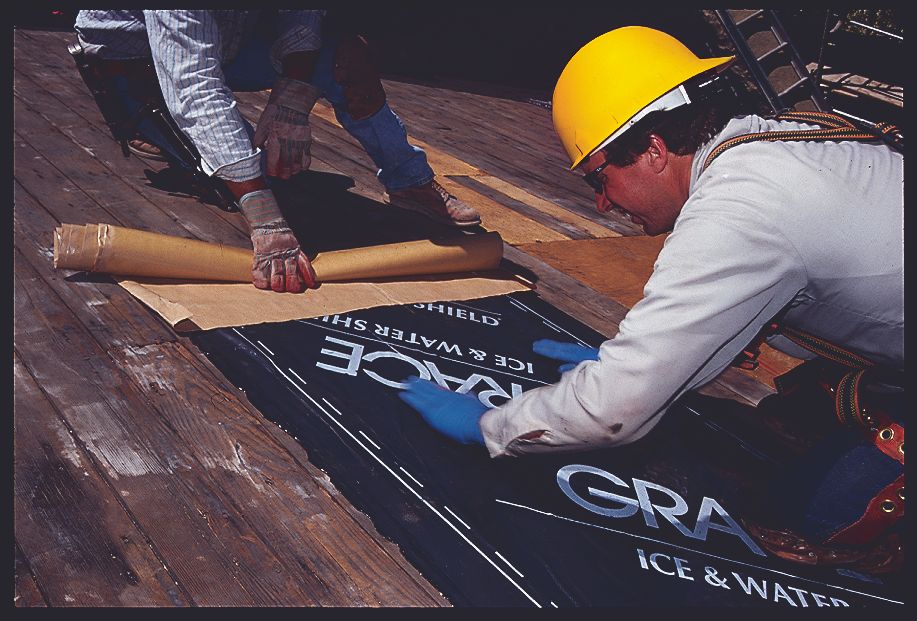
5. Stop frequently to press the membrane in place with heavy hand pressure, smoothing the membrane toward the outer edge.

6. When finished with the roll, go back and remove the remaining release liner. Smooth to the edge.

Detail drawings showing proper installation at eaves, valleys, skylights, chimneys, and other important details can be found on the Grace website here.

Sign up for eletters today and get the latest how-to from Fine Homebuilding, plus special offers.

Signing you up...

This site is protected by reCAPTCHA and the Google Privacy Policy and Terms of Service apply.
See all newsletters
See all newsletters
Previous: Webinar: Stormproof a Roof Next: Choosing Roofing Underlayment

Guide

Roofing

Chapter

Waterproofing

View Comments

  1. mohankrrishnaa | Jun 03, 2015 06:13am | #1

    great post

  2. CharlotteProRoofing | Aug 02, 2016 04:28pm | #2

    So I really like they way this is laid out, but I think that they are missing some information. After reading the following blog on http://charlotteproroofing.com/roofing-ice-water-shield-underlayment/ I noticed that the region depends on where the ice and water are installed and how it is installed. Please let me know if it makes a difference.

  3. CharlotteProRoofing | Aug 02, 2016 04:29pm | #3

    Charlotte Pro Roofing

Log in or create an account to post a comment.

Sign up Log in

Become a member and get full access to FineHomebuilding.com

Roofing

Roofing

A complete resource that includes the best materials and the right techniques to build a sturdy, leak-free, attractive roof on any house

View Project Guide

View All Project Guides »

Become a member and get unlimited site access, including the Roofing Project Guide.

Start Free Trial

Tools and Materials
  • Roof Coverings
  • Roofing Materials
  • Power Tools
  • Handy Helpers
  • Staging and Ladders
  • Safety Equipment
Roof Replacement and Reroofing
  • Preparing the Old Roof
  • Sheathing
  • Installing the New Roof
Roof Ventilation
  • Venting Basics
  • Installation
Waterproofing
  • Underlayment
  • Drip Edge
  • Flashing Adjoining Walls
  • Dormer and Skylight Flashing
  • Chimney Flashing
  • Vent Flashing
  • Gutters
Installing Asphalt Shingles
  • Calculating Shingles
  • Layout
  • Installation
  • Valleys
Installing Other Types of Roofs
  • Cedar Shingles
  • Metal
  • Low-Slope Roofs
  • Slate and Tile
Roof Maintenance and Repair
  • Assessing the Problem
  • Repairing Asphalt-Shingle Roofs
  • Other Roofing Repairs

Fine Homebuilding

Follow

  • twitter
  • facebook
  • instagram
  • pinterest

Newsletter

Get home building tips, offers, and expert advice in your inbox

Signing you up...

This site is protected by reCAPTCHA and the Google Privacy Policy and Terms of Service apply.
See all newsletters
See all newsletters

Membership & Magazine

  • Online Archive
  • Start Free Trial
  • Magazine Subscription
  • Magazine Renewal
  • Gift a Subscription
  • Customer Support
  • Privacy Preferences

Taunton Network

  • Green Building Advisor
  • Fine Woodworking
  • Fine Gardening
  • Threads
  • About
  • Contact
  • Advertise
  • Careers
  • Copyright
  • Terms of Use
  • Site Map
  • Do not sell or share my information
  • Privacy Policy
  • Accessibility
  • California Privacy Rights

© 2023 The Taunton Press, Inc. All rights reserved.

X
X
This is a dialog window which overlays the main content of the page. The modal window is a 'site map' of the most critical areas of the site. Pressing the Escape (ESC) button will close the modal and bring you back to where you were on the page.

Main Menu

  • How-To
  • Design
  • Tools & Materials
  • Video
  • Blogs
  • Forum
  • Reader Projects
  • Magazine
  • Members
  • FHB House

Podcasts

  • FHB Podcast
  • ProTalk

Webinars

  • Upcoming and On-Demand

Podcasts

  • FHB Podcast
  • ProTalk

Webinars

  • Upcoming and On-Demand

Popular Topics

  • Kitchens
  • Business
  • Bedrooms
  • Roofs
  • Architecture and Design
  • Green Building
  • Decks
  • Framing
  • Safety
  • Remodeling
  • Bathrooms
  • Windows
  • Tilework
  • Ceilings
  • HVAC

Magazine

  • Current Issue
  • Past Issues
  • Magazine Index
  • Subscribe
  • Online Archive
  • Author Guidelines

All Access

  • Member Home
  • Start Free Trial
  • Gift Membership

Shop the Store

  • Books
  • DVDs
  • Taunton Workshops

More

  • FHB Ambassadors
  • Reader Projects
  • Podcast
  • FHB House
  • Customer Support

Account

  • Log In
  • Join

Newsletter

Get home building tips, offers, and expert advice in your inbox

Signing you up...

This site is protected by reCAPTCHA and the Google Privacy Policy and Terms of Service apply.
See all newsletters
See all newsletters

Follow

  • twitter
  • facebook
  • instagram
  • pinterest

Join All Access

Become a member and get instant access to thousands of videos, how-tos, tool reviews, and design features.

Start Your Free Trial

Subscribe

FHB Magazine

Start your subscription today and save up to 70%

Subscribe

We hope you’ve enjoyed your free articles. To keep reading, become a member today.

Get complete site access to expert advice, how-to videos, Code Check, and more, plus the print magazine.

Start your FREE trial

Already a member? Log in