
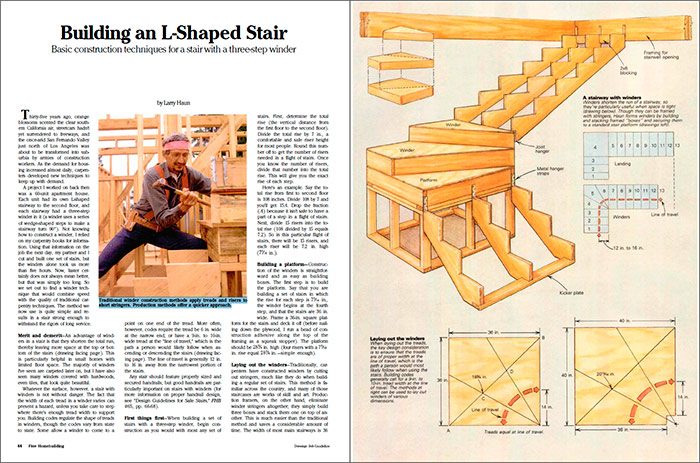
Building an L-Shaped Stair
Basic construction techniques for a stair with a three-step winder.
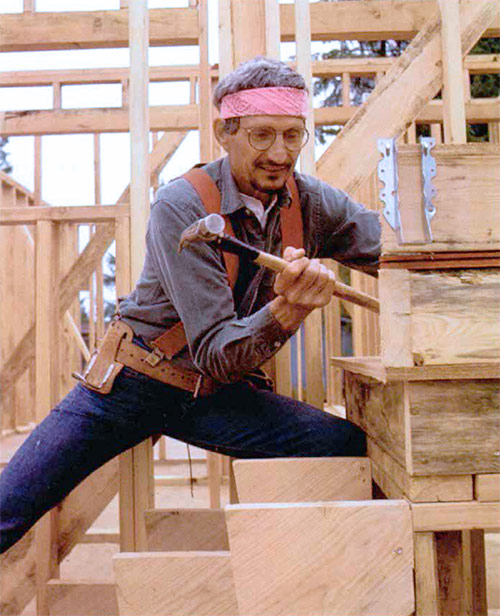
Synopsis: Larry Haun constructs an L-shaped stair by using a series of plywood boxes to turn the corner instead of cutting conventional stringers. He developed the technique during California’s post-war building boom to save time without sacrificing quality.
Thirty-five years ago, orange blossoms scented the clear southern California air, streetcars hadn’t yet surrendered to freeways, and the once-arid San Fernando Valley just north of Los Angeles was about to be transformed into suburbia by armies of construction workers. As the demand for housing increased almost daily, carpenters developed new techniques to keep up with demand.
A project I worked on back then was a 60-unit apartment house. Each unit had its own L-shaped stairway to the second floor, and each stairway had a three-step winder in it (a winder uses a series of wedge-shaped steps to make a stairway turn 90°). Not knowing how to construct a winder, I relied on my carpentry books for information. Using that information on the job the next day, my partner and I cut and built one set of stairs, but the winders alone took us more than five hours. Now, faster certainly does not always mean better, but that was simply too long. So we set out to find a winder technique that would combine speed with the quality of traditional carpentry techniques. The method we now use is quite simple and results in a stair strong enough to withstand the rigors of long service.
Merit and demerit
An advantage of winders in a stair is that they shorten the total run, thereby leaving more space at the top or bottom of the stairs. This is particularly helpful in small homes with limited floor space. The majority of winders I’ve seen are carpeted later on, but I have also seen many winders covered with hardwoods, even tiles, that look quite beautiful.
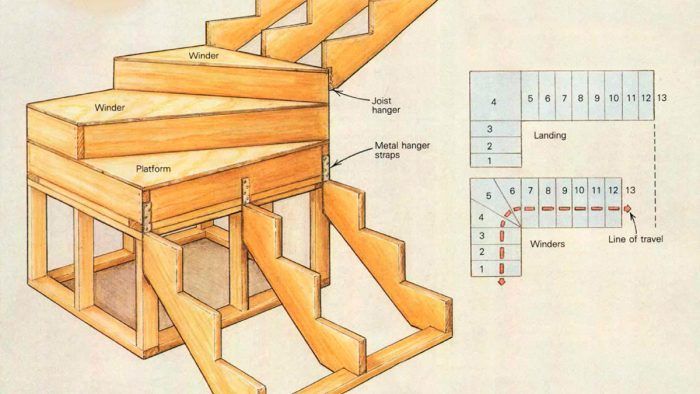
Whatever the surface, however, a stair with winders is not without danger. The fact that the width of each tread in a winder varies can present a hazard, unless you take care to step where there’s enough tread width to support you. Building codes regulate the shape of treads in winders, though the codes vary from state to state. Some allow a winder to come to a point on one end of the tread. More often, however, codes require the tread be 6 in. wide at the narrow end, or have a 9-in. to 10-in.-wide tread at the “line of travel,” which is the path a person would likely follow when ascending or descending the stairs. The line of travel is generally 12 in. to 16 in. away from the narrowest portion of the stairs.
Any stair should feature properly sized and secured handrails, but good handrails are particularly important on stairs with winders (for more information on proper handrail design, see “Design Guidelines for Safe Stairs“).
First things first
When building a set of stairs with a three-step winder, begin construction as you would with most any set of stairs. First, determine the total rise (the vertical distance from the first floor to the second floor). Divide the total rise by 7 in., a comfortable and safe riser height for most people. Round this number off to get the number of risers needed in a flight of stairs. Once you know the number of risers, divide that number into the total rise. This will give you the exact rise of each step.
From Fine Homebuilding #67
To view the entire article, please click the View PDF button below.
Fine Homebuilding Recommended Products
Fine Homebuilding receives a commission for items purchased through links on this site, including Amazon Associates and other affiliate advertising programs.
Short Blade Chisel

Guardian Fall Protection Pee Vee

Protective Eyewear


View Comments
There is a lot of good information here but it does need to be updated to reflect the new codes. One of which is that no part of the tread can be less than 6".