FHB Logo Facebook LinkedIn Email Pinterest Twitter Instagram Plus Icon Close Icon Navigation Search Icon Navigation Search Icon Arrow Down Icon Video Guide Icon Article Guide Icon Modal Close Icon Guide Search Icon Skip to content
Subscribe
SUBSCRIBE TODAY

Save up to

70% off

the cover price

In-depth articles, up-close photography, and detailed illustrations in every issue.

Subscribe Now!
Subscribe
  • How-To
  • Design
  • Tools & Materials
  • Videos
  • Blogs
  • Forum
  • Magazine
  • Members
  • FHB House
  • Podcast
  • Join
  • Log In
Subscribe

Fine Homebuilding Project Guides

Framing

Guide Home
Chapter
  • Introduction to Framing
  • Framing Tools, Techniques, and Materials
  • Framing Floors
  • Framing Walls
  • Framing Stairs
  • Framing Roofs
  • Efficient Framing Methods
  • Timber Framing
How-To

How to Frame an I-Joist Roof

Engineered rafters are lighter, straighter, and often have more room for insulation than dimensional lumber.

By Andrew Steele Issue 308 - July 2022

There are many choices for roof framing: dimensional lumber, trusses, or engineered lumber such as laminated veneer lumber (LVL) and I-joists. All have advantages and drawbacks. On a recent project, an accessory dwelling behind an in-town bungalow, I was tasked with building a 16-ft. clear-span monoslope roof with a soaring cathedral ceiling on the underside. The logical choice was to use 14-in. I-joist rafters.

Advantages of I-joists

I-joists are great for roofs because of their consistent dimensions. And because they’re very straight, they create a dead-flat ceiling. I’ve had 2x12s range from 11-1/8 in. to 11-5/8 in. in the same delivery, which can cause waviness that shows up on the finished ceiling or the roof, likely both. LVL or LSL (laminated strand lumber) are also options, but they are more expensive and heavier than I-joists.

I-joists come in longer lengths than readily available dimensional lumber, which is great for roof spans. They also come in many depths and flange widths to accommodate snow loads and design considerations. Their extra depth means they can meet insulation requirements for even the coldest parts of the country with less-expensive fibrous insulation rather than foam.

For this project, we needed stock longer than 16 ft. In my area right now, dimensional lumber longer than 16 ft. is a special order with a very long lead time, but I was able to get 18-ft., 14-in.-deep I-joists in just a few days through a local lumberyard. Most good lumberyards have someone who can help with I-joist engineering and design, and manufacturers have approved installation methods for common overhangs and ridges, as well as hip and valley details.
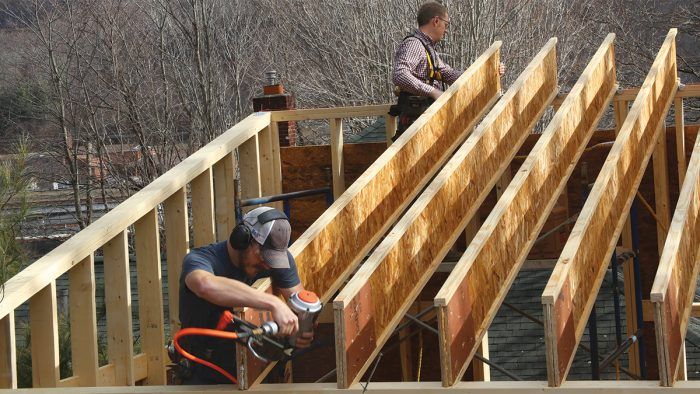
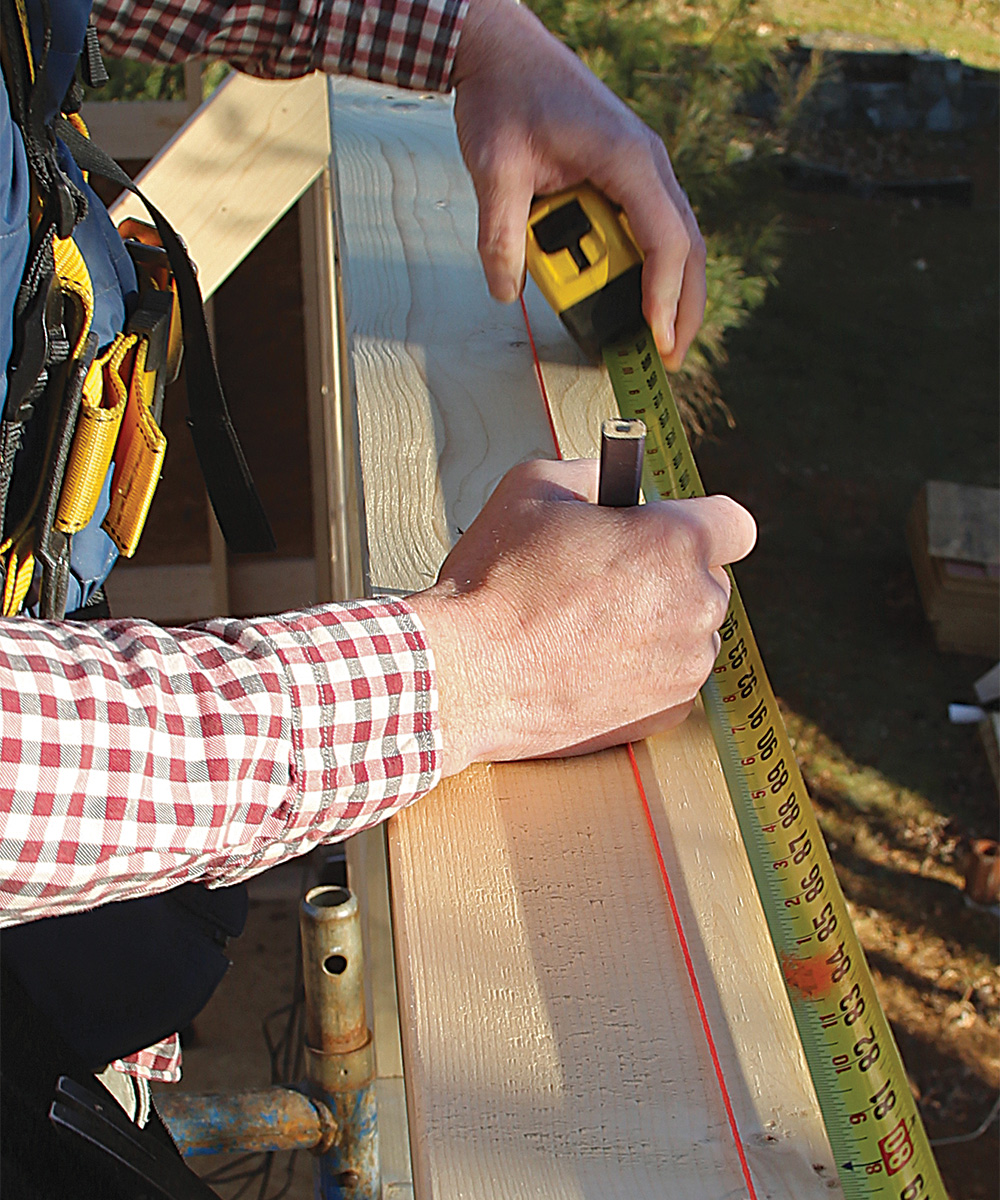
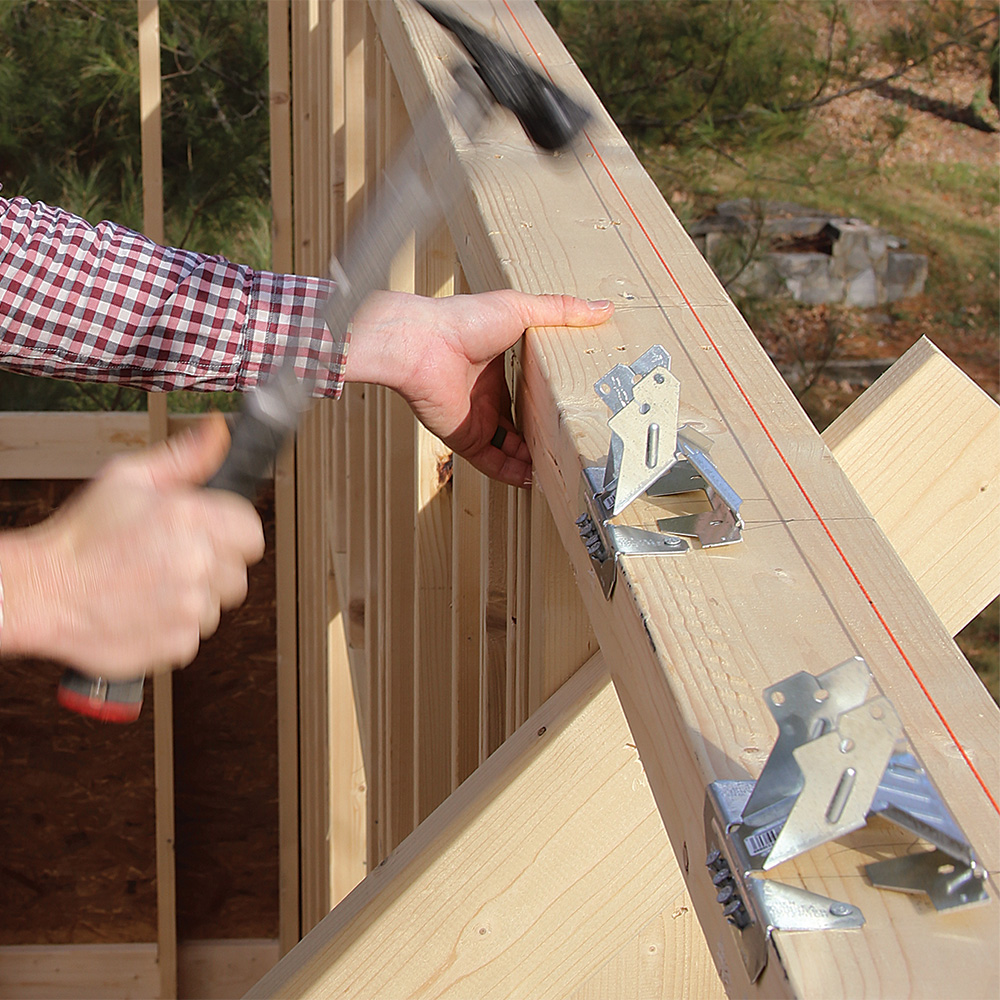
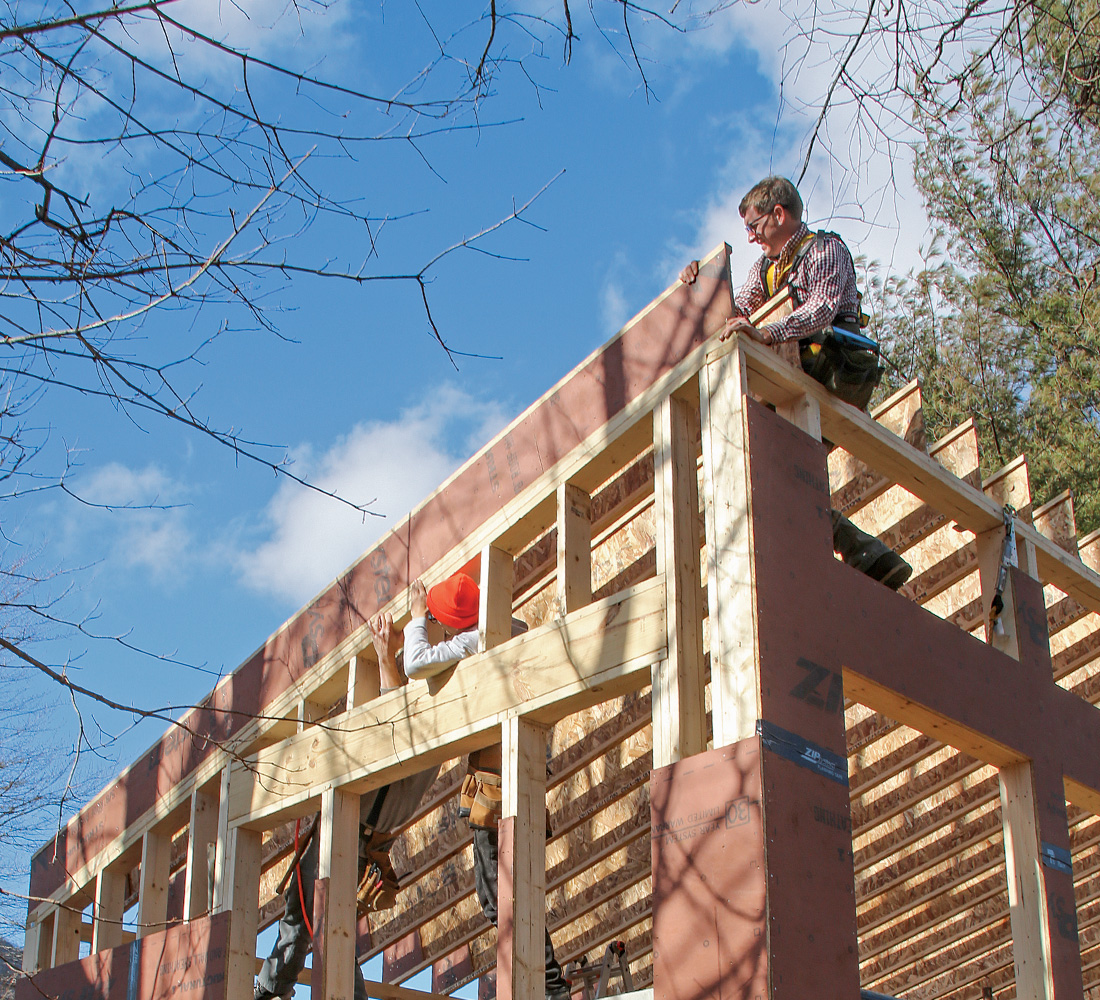

Lay out the roof

Rafters are spaced 16 in. on center and positioned 1-3/4 in. away from the edge of the wall plate at the ridge to allow for a continuous LVL that transfers the roof load around the large south-facing windows.

using a stringline to check wall framing is straight
Eyeball the wall. Use a stringline to check and adjust the wall framing until the wall is straight. (See “Frame Walls Plumb and Straight,” FHB #281.)

mark the layout for the rafters
Mark the layout. Lay out the rafter locations 16 in. on center with a tape measure, and extend the marks using a square. Here, to prevent creating a rafter cavity too small to insulate easily, we spaced the second rafter 12 in. from the first, ensuring the last rafter cavity would be large enough.

nailing on connectors
Nail on connectors. Simpson VPA Variable-Pitch Connectors secure the I-joist rafters
at the ridge end. They’re fastened with eight 3-in. common nails.
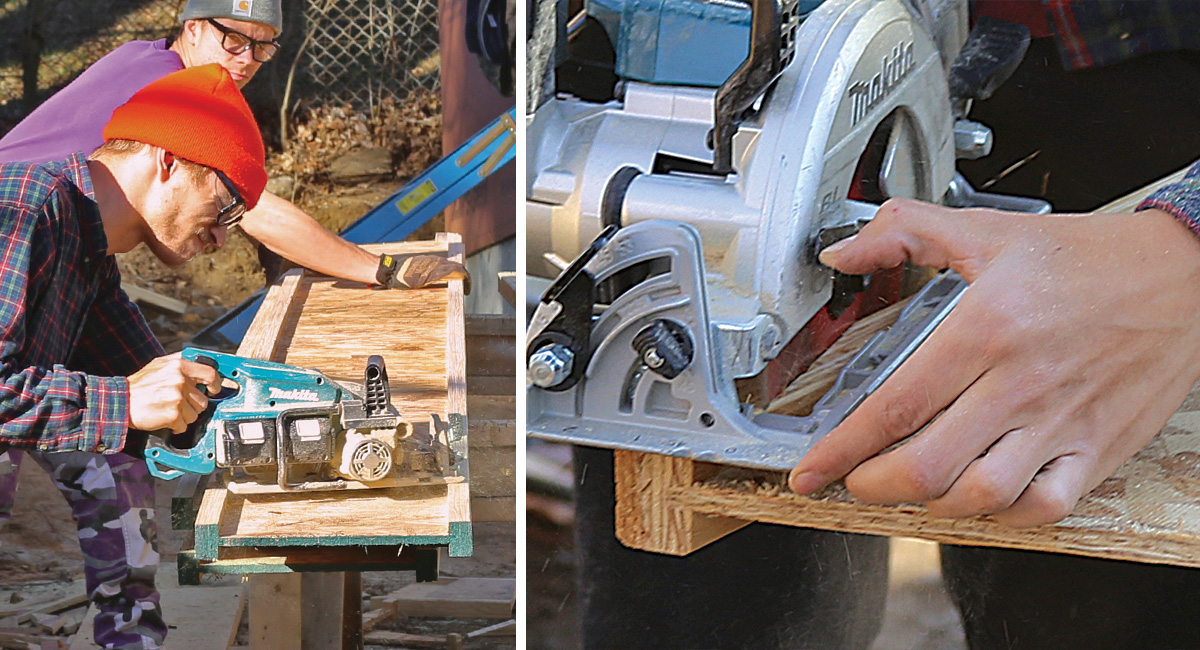
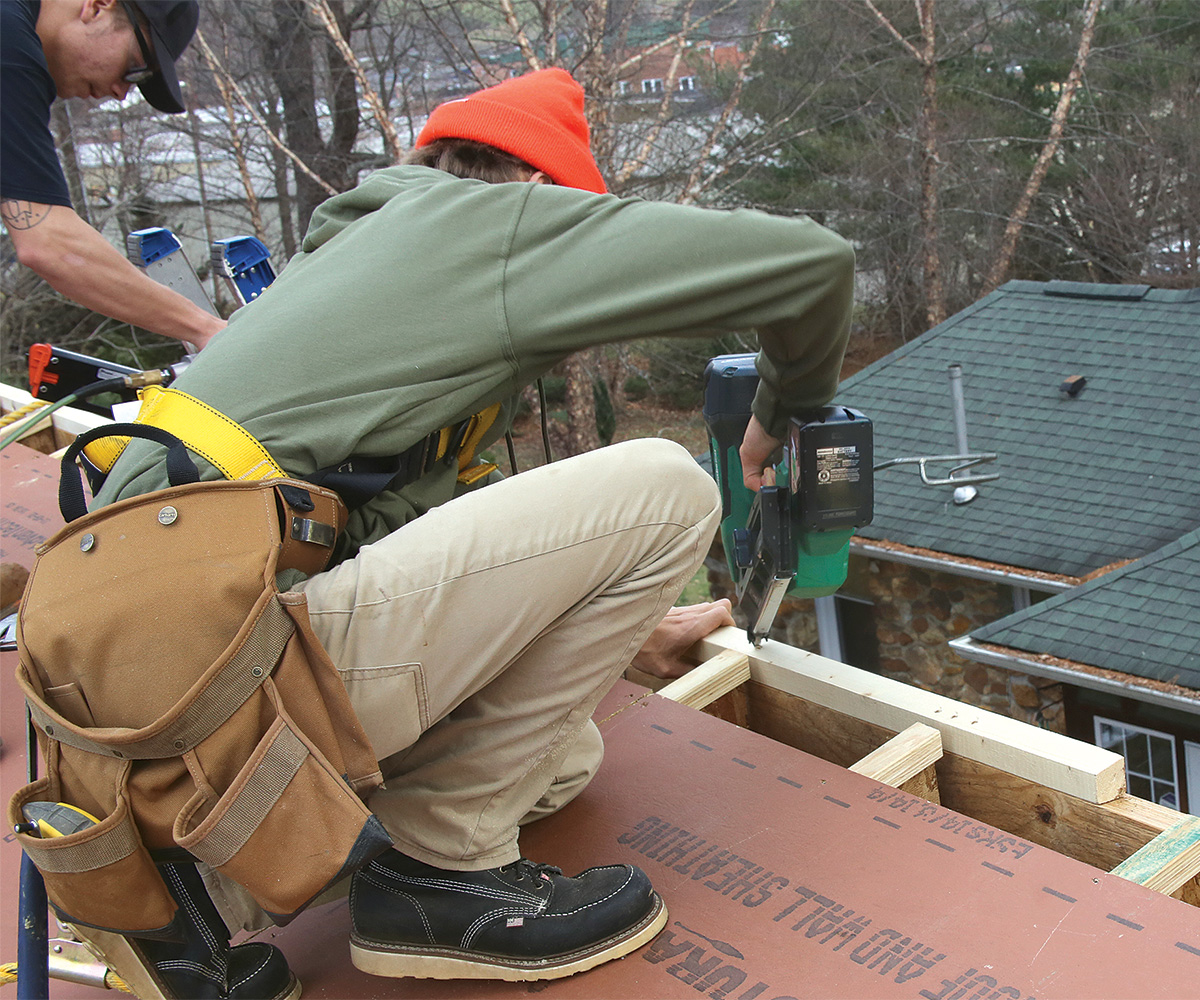
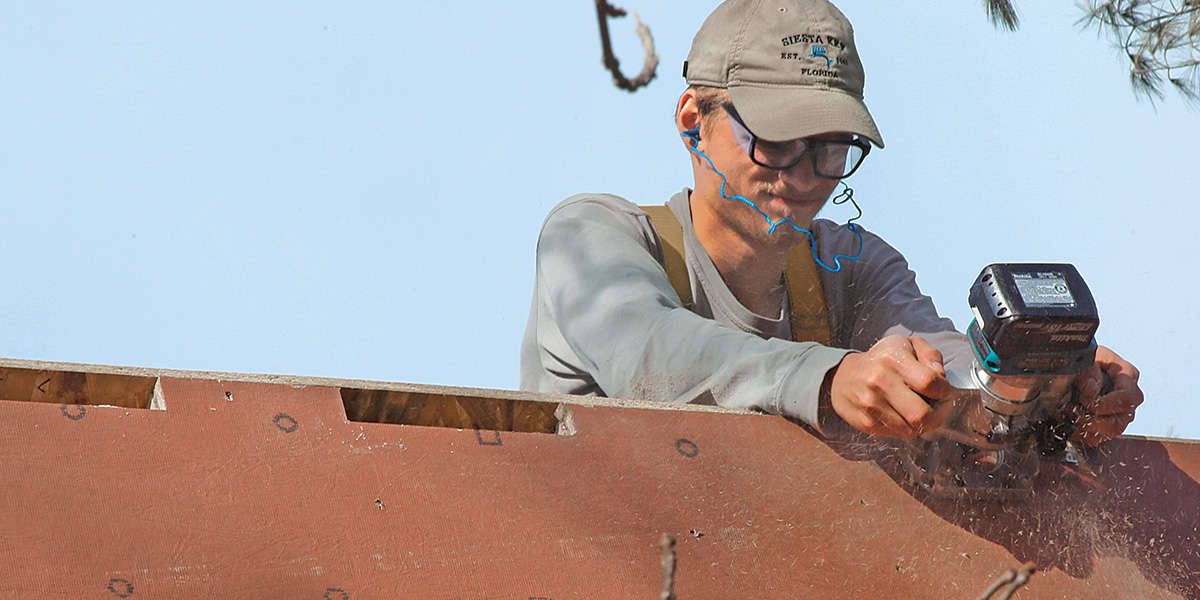
Prep the rafters

The rafters are cut and prepped on the ground on sawhorses before they’re lifted onto the roof. They should be stored banded together and lifted from both ends to prevent damage.

cutting a test rafter
Make a test. Cut a test rafter to length. Here, both ends have plumb cuts for a 4:12 pitch, and the eave end has a seat cut that sits on the top plate.
checking the rafter fit
Check the fit. Lift the test rafter onto the roof. Checking the length and angle of the cuts on the test rafter prevents making a roof’s worth of incorrect rafters.

nailing wed stiffeners on the test rafter
Stiffen the web. Place 5/8-in.-thick web stiffeners on both sides of the test rafter, and fasten them with 8d nails. Bend over the nails on the other side.

scribing and cutting the rafters from test rafter
Make the rest. Once you have confirmed the test rafter fit, scribe and cut the rest of the rafters using the test rafter as a template.

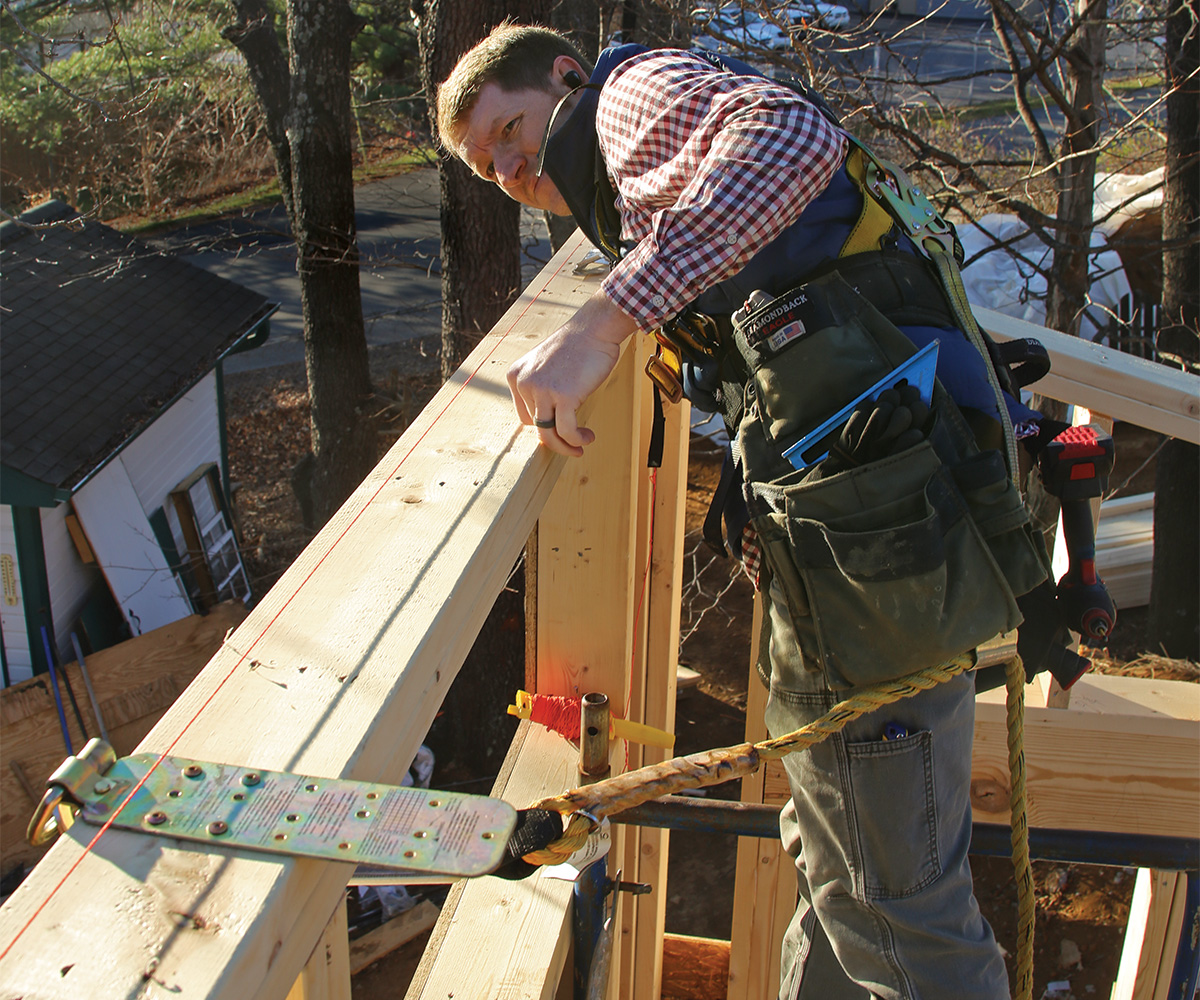
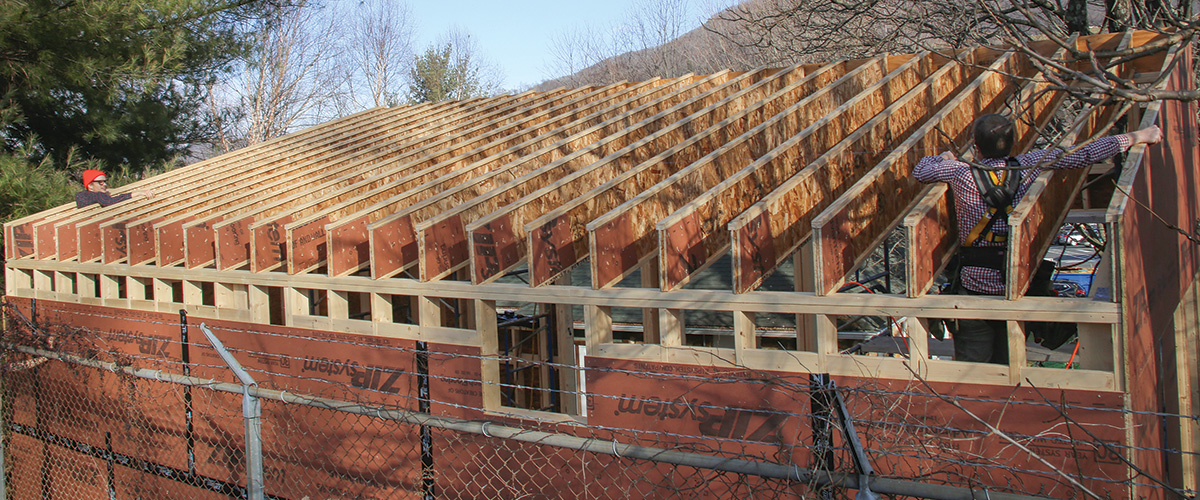
Approaching eaves and ridges

I-joist roofs have specific details for eave and ridge connections, and you have to follow the details provided by the specific manufacturer. Generally, there are several ways to deal with the bird’s mouths. The first is to avoid them completely with beveled top plates on the exterior walls. This works well if you are building with 2×4 walls, but not 2×6 walls; job-site tablesaws can’t rip a full-width bevel on a 2×6. You can bevel a 2×6 using a sled with a lunchbox planer, but it takes forever. I know—I’ve tried it.

Another option is to hang the rafters from a rim board with an adjustable face-mount hanger like Simpson’s LSSR. If you use this hanger, you have to pad out the web of the I-joist with 3-in.-wide pieces of plywood or OSB of a thickness that matches the width of the flanges. I attached the ridge end of my rafters with Simpson VPA Variable-Pitch Connectors (about $8 each), which can accommodate roof pitches from 3:12 to 12:12.

In order to create an uninterrupted taped-sheathing air barrier, we cut the “seat” portion of a bird’s mouth on the lower end of the joists but then trimmed them off flush with the wall framing. We installed the overhang later. To help the roof resist uplift, there are Simpson H2.5AZ connectors on every rafter on the inside. The I-joist webs are padded out for this connection.
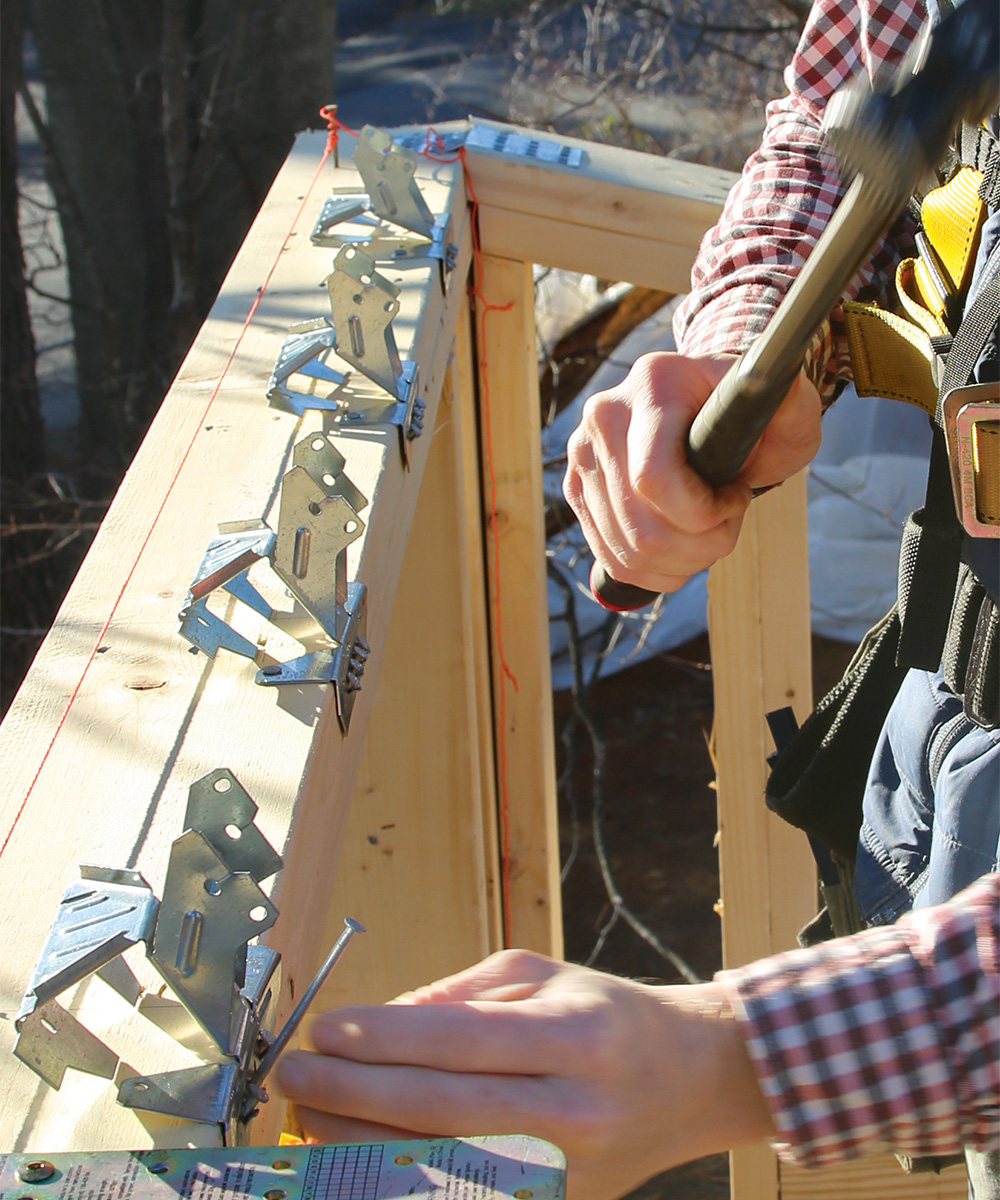
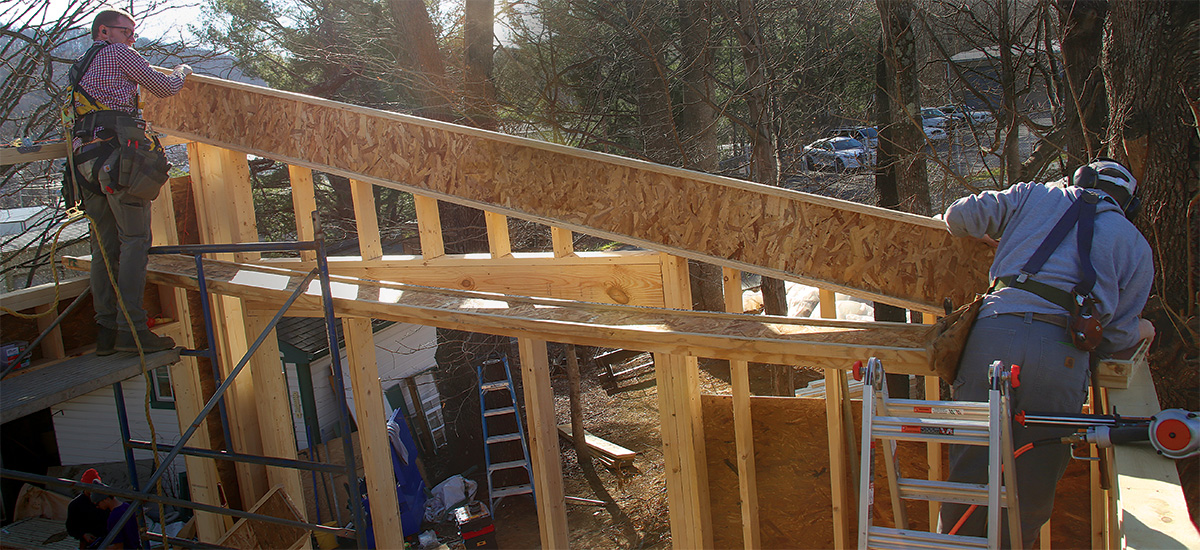
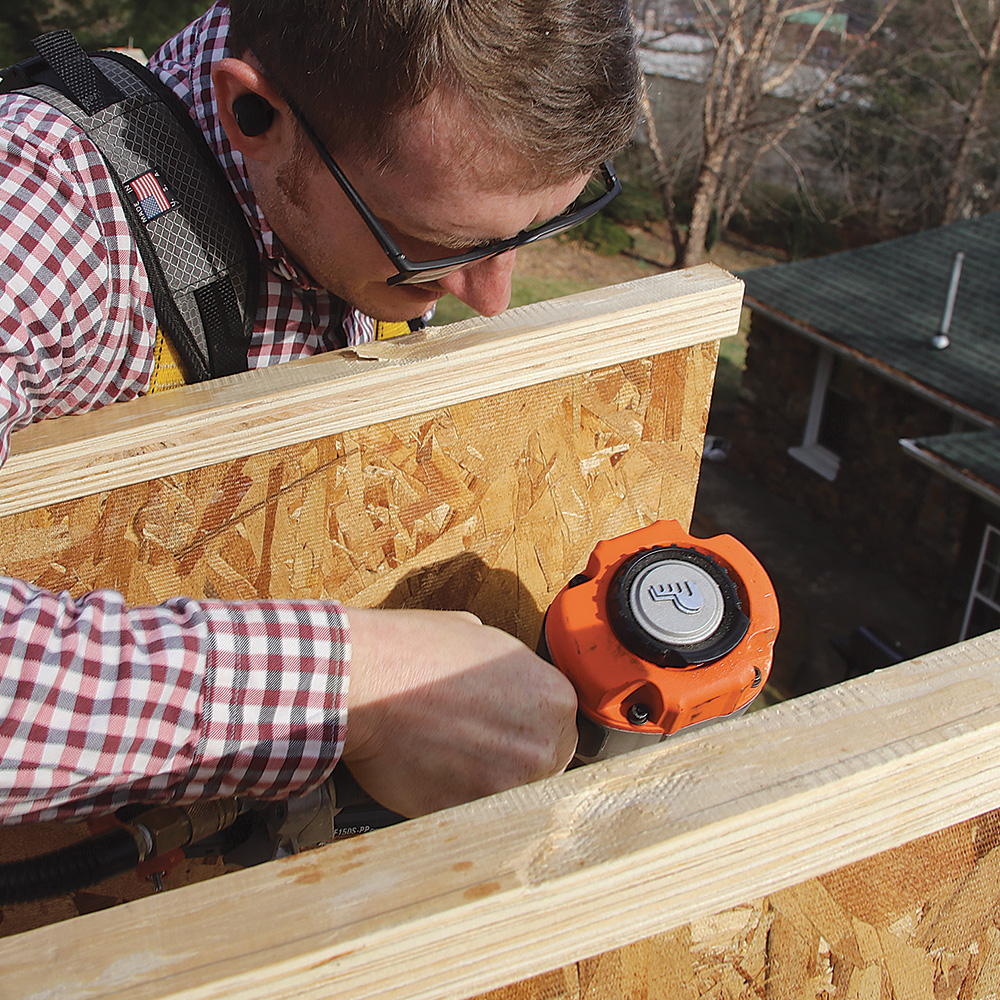
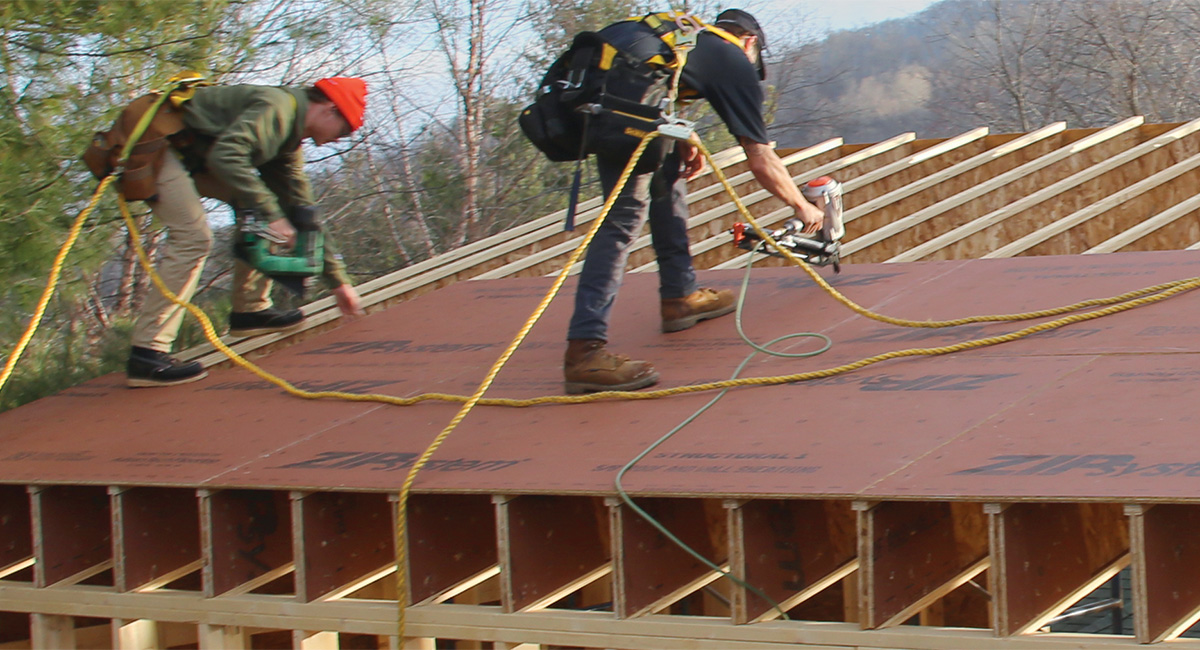

Set the rafters

While a crew of two cuts and preps rafters, two other workers start nailing rafters in place, starting with the second rafter. The first and the last rafters that form the gable ends will be nailed in place later.
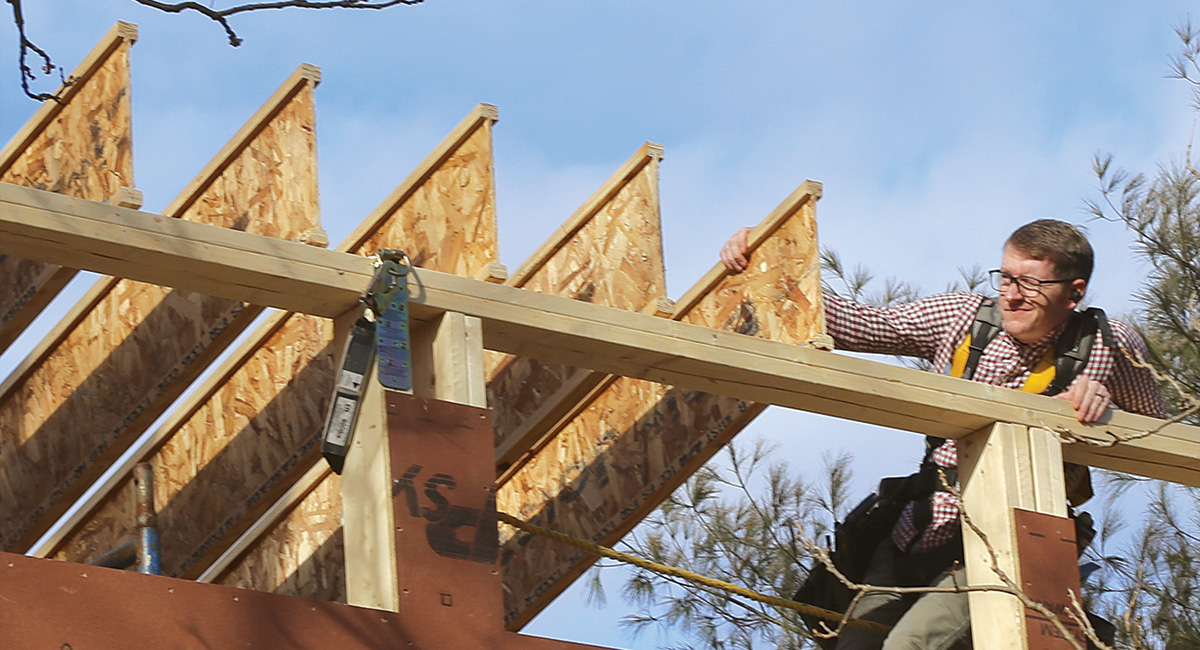
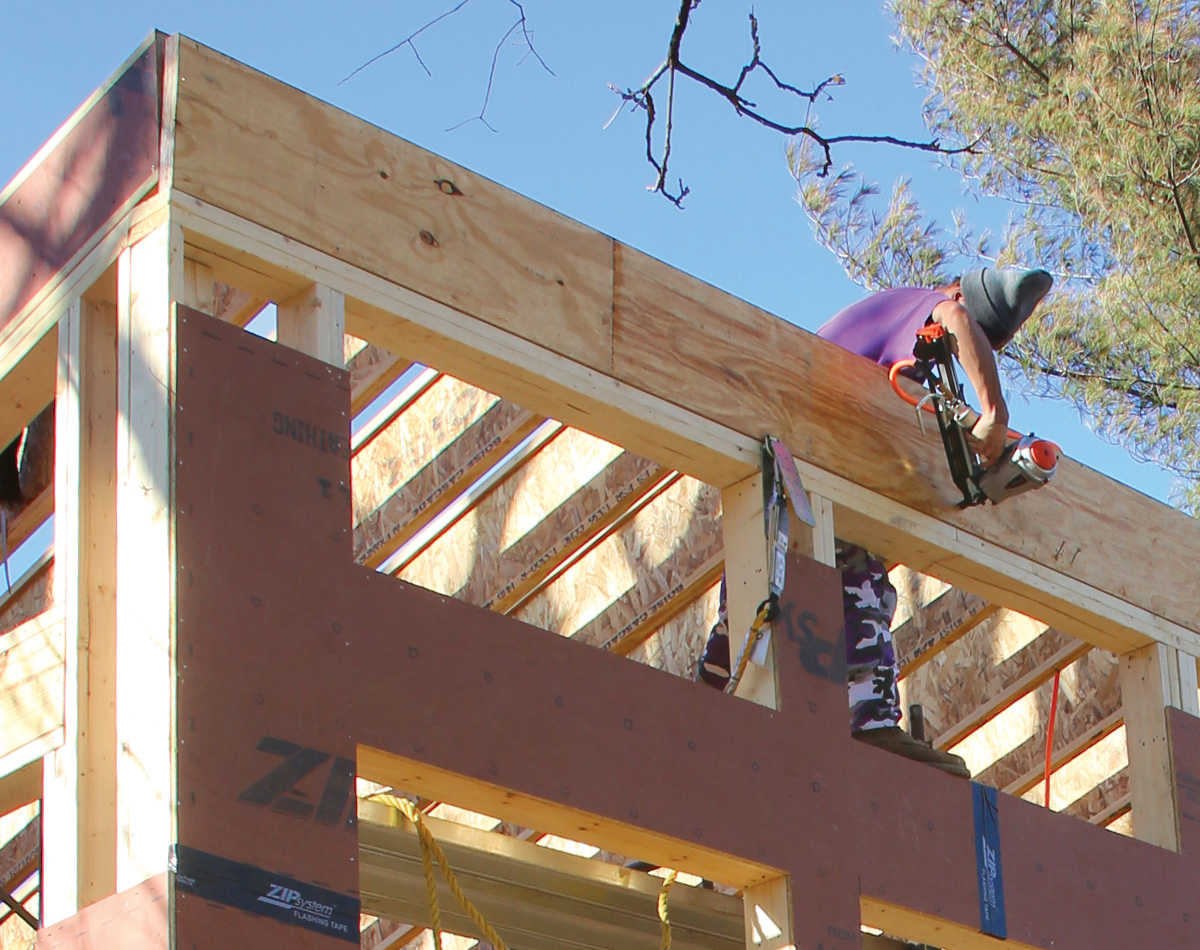
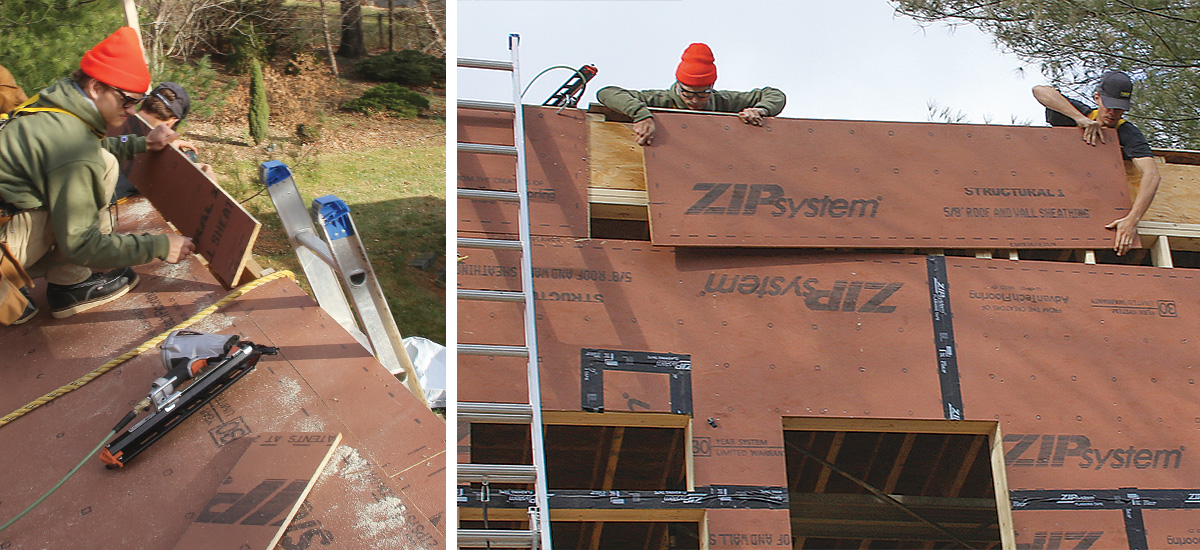
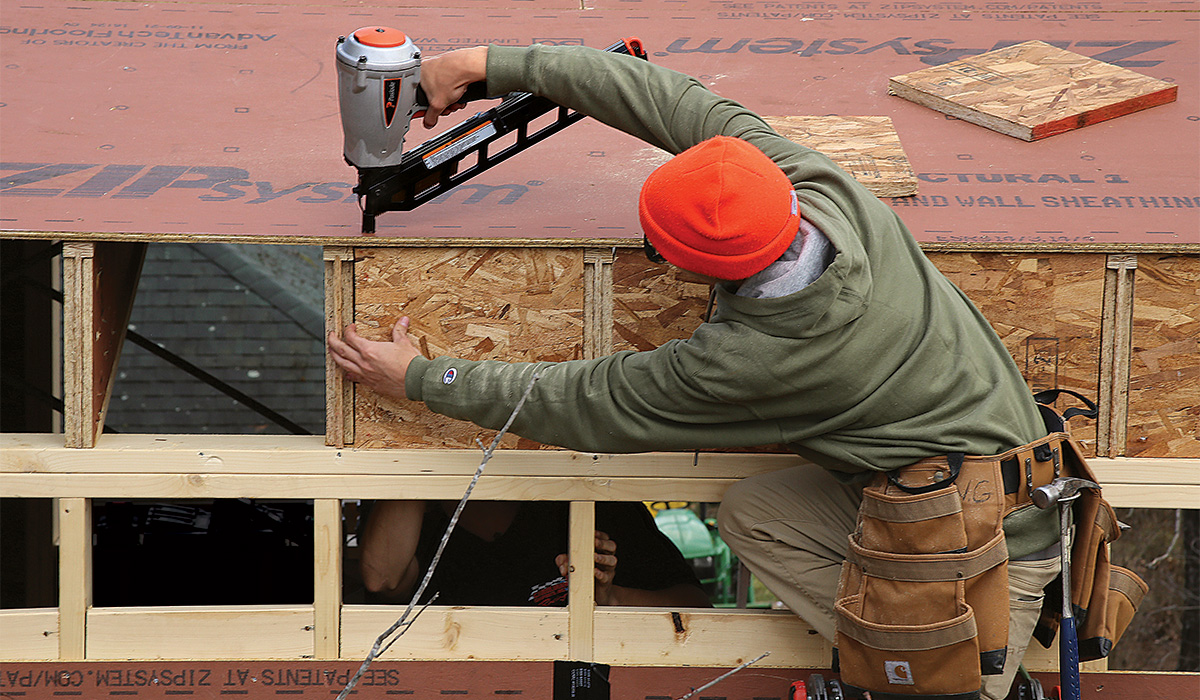
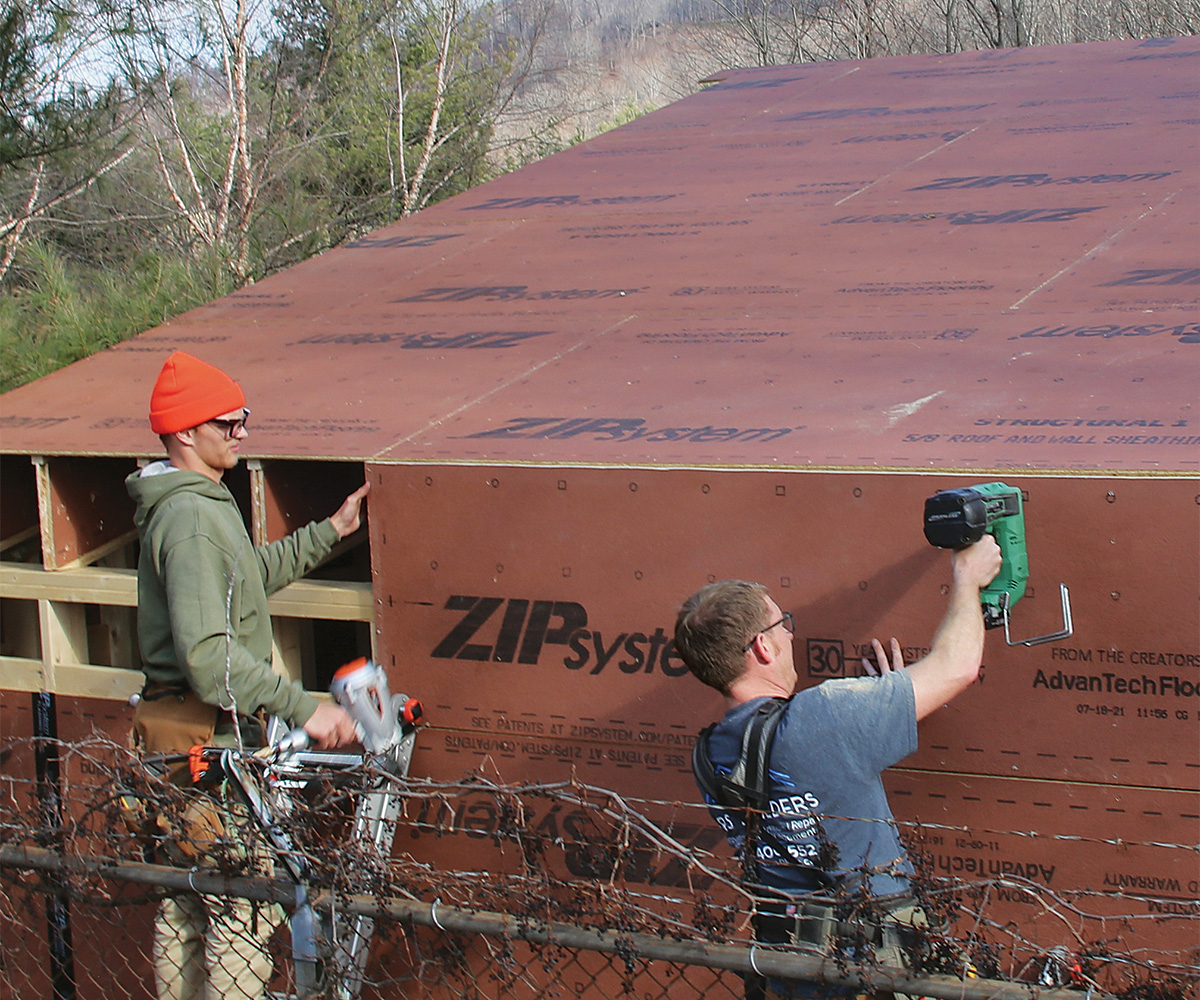
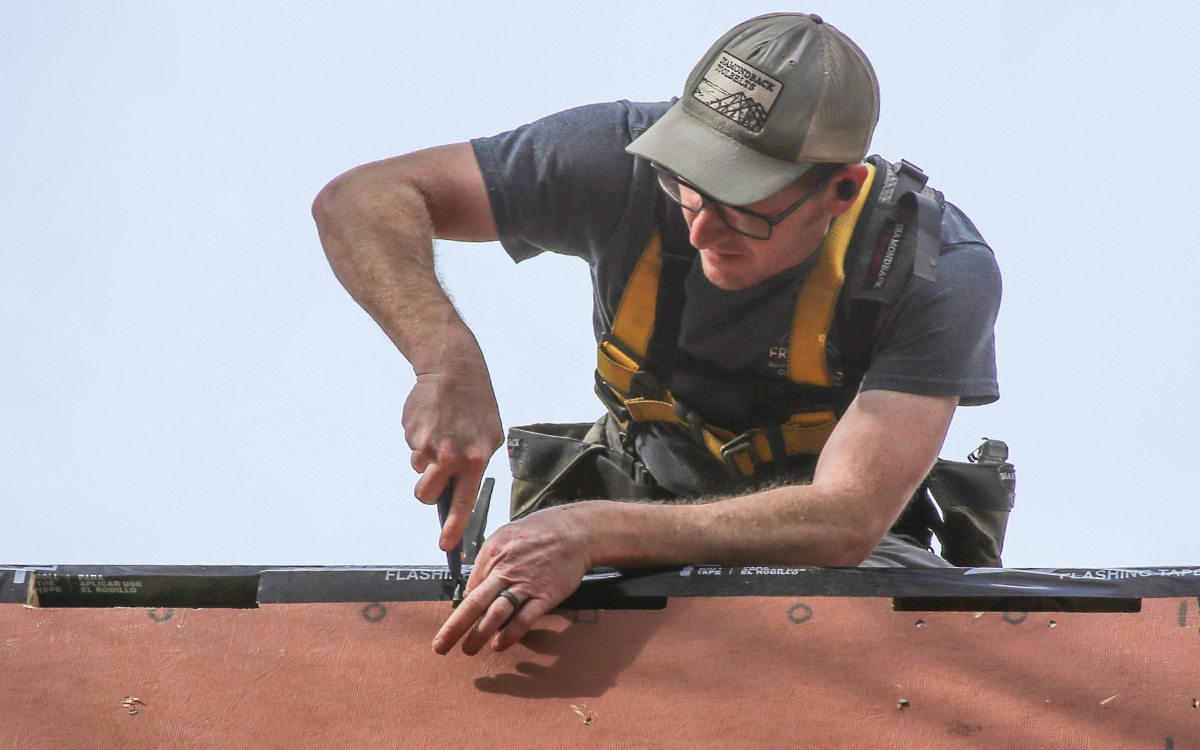
nailing the eave through the flange
Nail the eave. Nail the eave through the flange with 8d nails at least 1-1/2 in. from the end of the I-joists. Here, the nailer is angled because of the web stiffener.

bending the metal connectors before attaching joists
Bend the connector. It is easier to bend the metal connectors before attaching the I-joists because you need less pounding on the top of the I-joist to match the hanger to the slope.

attaching the I-joists to the connectors
Nail the ridge. Attach the I-joists to the connectors with a pair of 1-1⁄2-in. nails. Bend the small tabs on the connector over the bottom flange and fasten through them with a connector nailer.
checking rafter line up
Have a look. Once a few rafters are in place, look down their ends to ensure that they are lined up and that the wall hasn’t moved since it was straightened.
placing rafters on the roof
Keep it moving. Working across the roof, place and fasten the rafters one at a time. Every few rafters, check the layout at the top and bottom of the roof to ensure that it’s straight and that the rafters are spaced correctly.

Sheathe the roof

The roof and the tops of the walls are sheathed together. Here, the top course was left off of the wall sheathing so that the crew could tie the wall sheathing into the roof system for greater uplift resistance in high winds.

fill webs of the rafters with sheathing
Fill in gable webs. Fill the webs of the rafters on the gable end with 5/8-in.-thick sheathing nailed and glued with construction adhesive. This additional layer allows the wall sheathing to be attached to the entire rafter for extra uplift resistance.

installing gable rafters
Install gable rafters. The gable-end rafters are attached like the common rafters. We could have started with a gable rafter on this build, but had to wait for a wall sheathing delivery.
fastening a heavy header
Lift and fasten a heavy header. A single piece of 14-in. LVL spans the ridge. It’s toenailed to the top plate and fastened into the rafter ends at the top and bottom flange. We rented an all-terrain forklift for a day to lift this header and the roof sheathing.
connecting walls and roof with sheathing
Connect the walls and roof. Attach the wall sheathing with 8d nails spaced about 6 in. on center and fastened into the studs and rafters.
snap a line to mark the edge of roof sheathing
Line it up. Snap a line 4 ft. up from the eave to mark the edge of the first row of roof sheathing.
sheathing the roof
Sheathe out and up. The first step in sheathing the roof is to create a safe work area near the edge from which to pull the sheets from the forklift. After that, work away from the unloading area, staggering the seams by a half-sheet and fastening with 8d nails 6 in. on center at edges and 12 in. o.c. in the field.

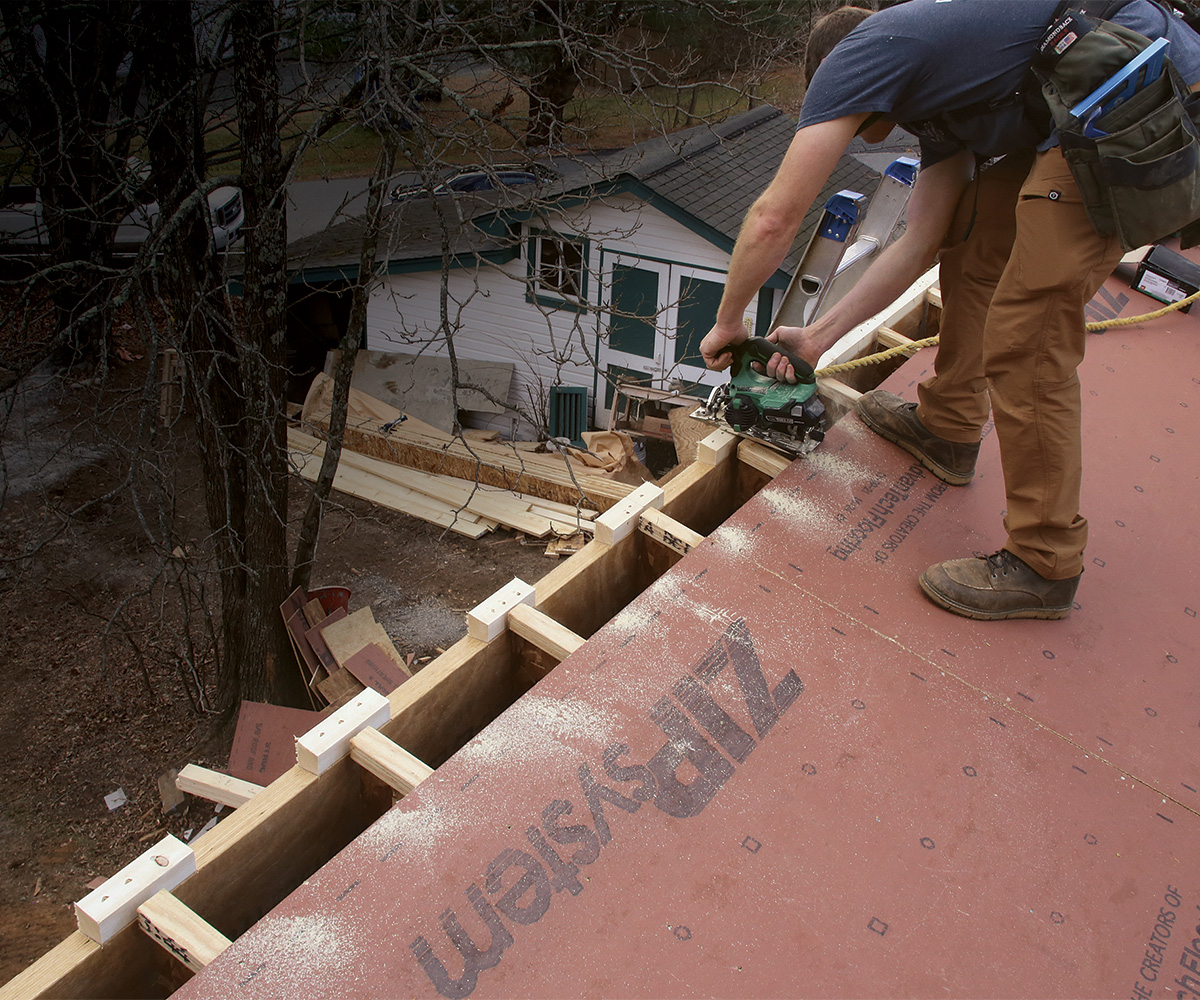
Details for blocking and venting

To prevent the rafters from rolling over under load, I used a manufacturer detail with blocking between each rafter on the low end of the roof using LSL rim board. (The blocking is also the attachment point for the applied rafter tails that will be installed later.) I waited to install this blocking until sheathing the roof and taping the seams so that I’d have a dry place for priming and painting exterior trim on rainy days. If I had to do it again, I would install the blocking before the roof sheathing, because fitting the blocking tight to the rafters is more difficult with the sheathing in place.

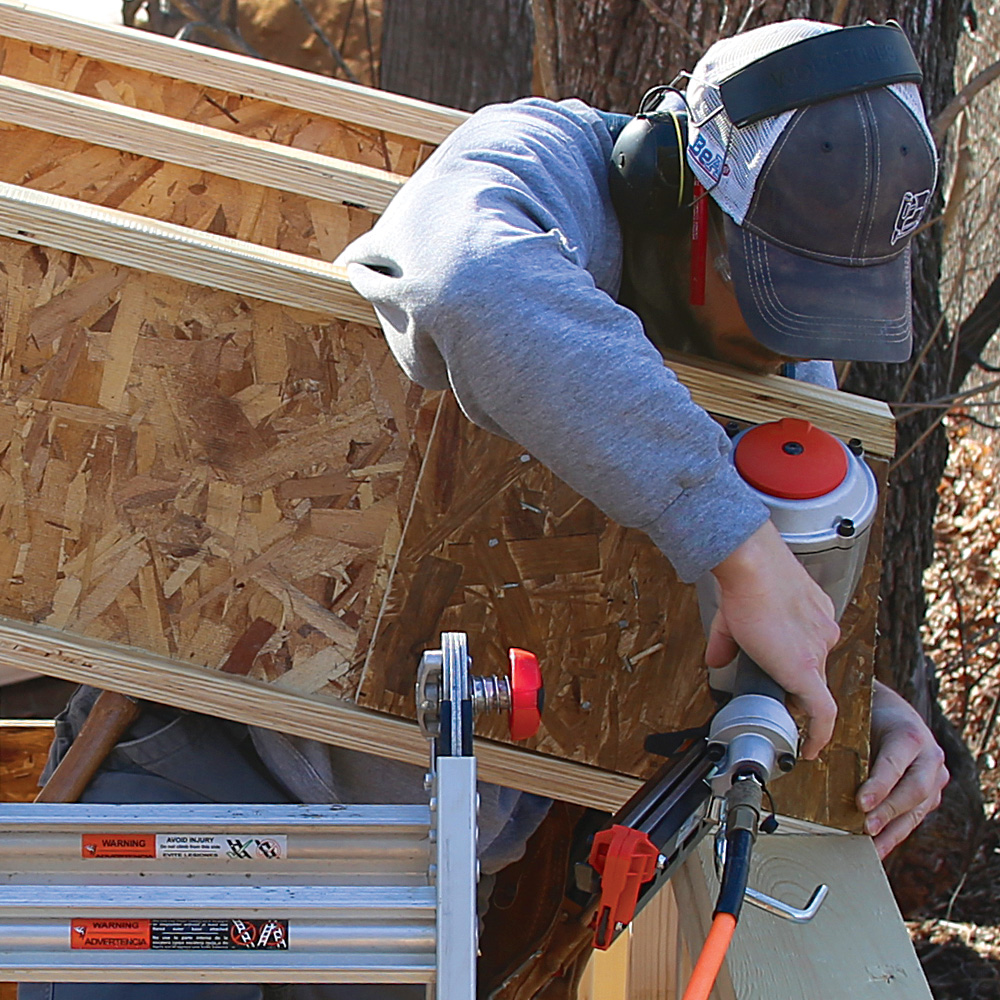
Creating a cathedral ceiling with an air space for venting is easy with I-joists. We used the top flange of the I-joist as a mounting point for 3/4-in. XPS foam. The space above the foam is the vent channel, and there’s still enough room for R-38 fiberglass insulation below the foam, the code minimum for a sloping ceiling in my climate zone.

The XPS foam was nailed to the underside of the flange using a roofing nailer, and the edges were sealed with canned spray from. On the lower end we drilled a series of 3/4-in. holes through the sheathing to connect the vent space to the outside. On the ridge end we cut holes in every bay with a router.


Plan for venting

With I-joist roof framing you can attach rigid insulation to the bottom of the top flange to create a space for a vented roof. The ridge and eave are treated differently when it comes to venting.

extending the LVL
Stretch the LVL. We were not able to get a 16-in. LVL to match the length of the plumb cut. The LVL had to be extended with a 2x ripped to width, with a bevel to match the roof pitch.

cutting the LVL extension
Cut the extension. We installed and nailed the 2x LVL extension in three parts and then added gaps to every rafter bay, which was faster than handling and nailing small pieces.
installing the last row of sheathing
Finish the sheathing. Install the last row of wall sheathing from above after the roof sheathing is complete.
cutting vents in the sheathing
Cut the vents. Using a router and a straight bit with a bottom bearing, cut the vents in the sheathing. The bit follows the gaps in the 2x extension on top of the LVL.

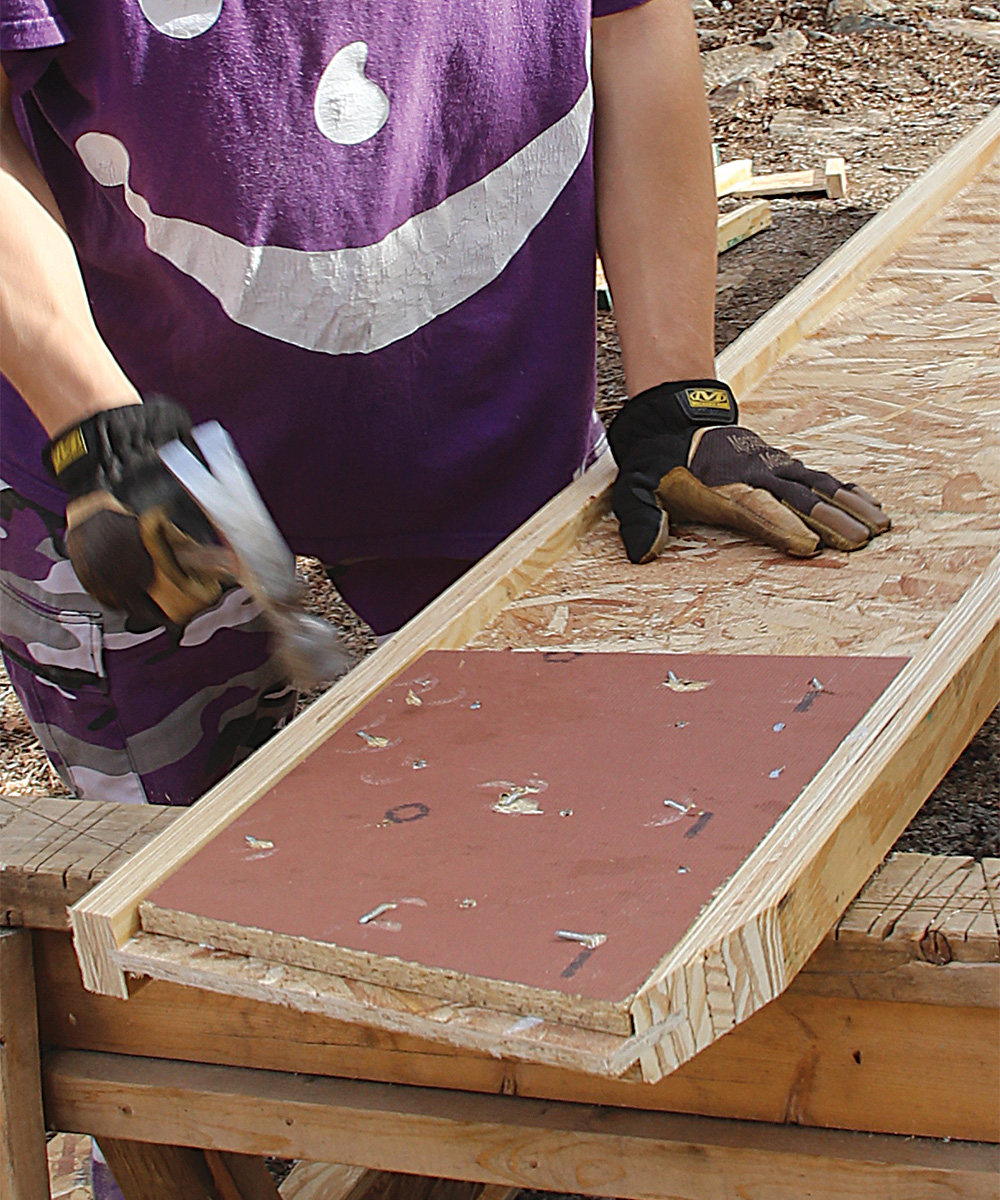
Addressing overhangs

The design called for exposed rafter tails with exposed tongue-and-groove roof sheathing that could be seen from the ground. Obviously an exposed I-joist would look bad and rot quickly. Since we had a solid LVL spanning the front of the building on the upper end of the roof and solid blocking on the lower end, we were able to build applied rafter tails to attach at these locations.

I-joist-framed roofs have some fussy details, but the long, straight engineered lumber solved a number of problems on this build. First off, I could find light, one-piece, freespan rafters, and I was able to get them onto the roof without heavy equipment. For another, they simplified the roof-venting strategy. And last but certainly not least, they were available when I needed them.


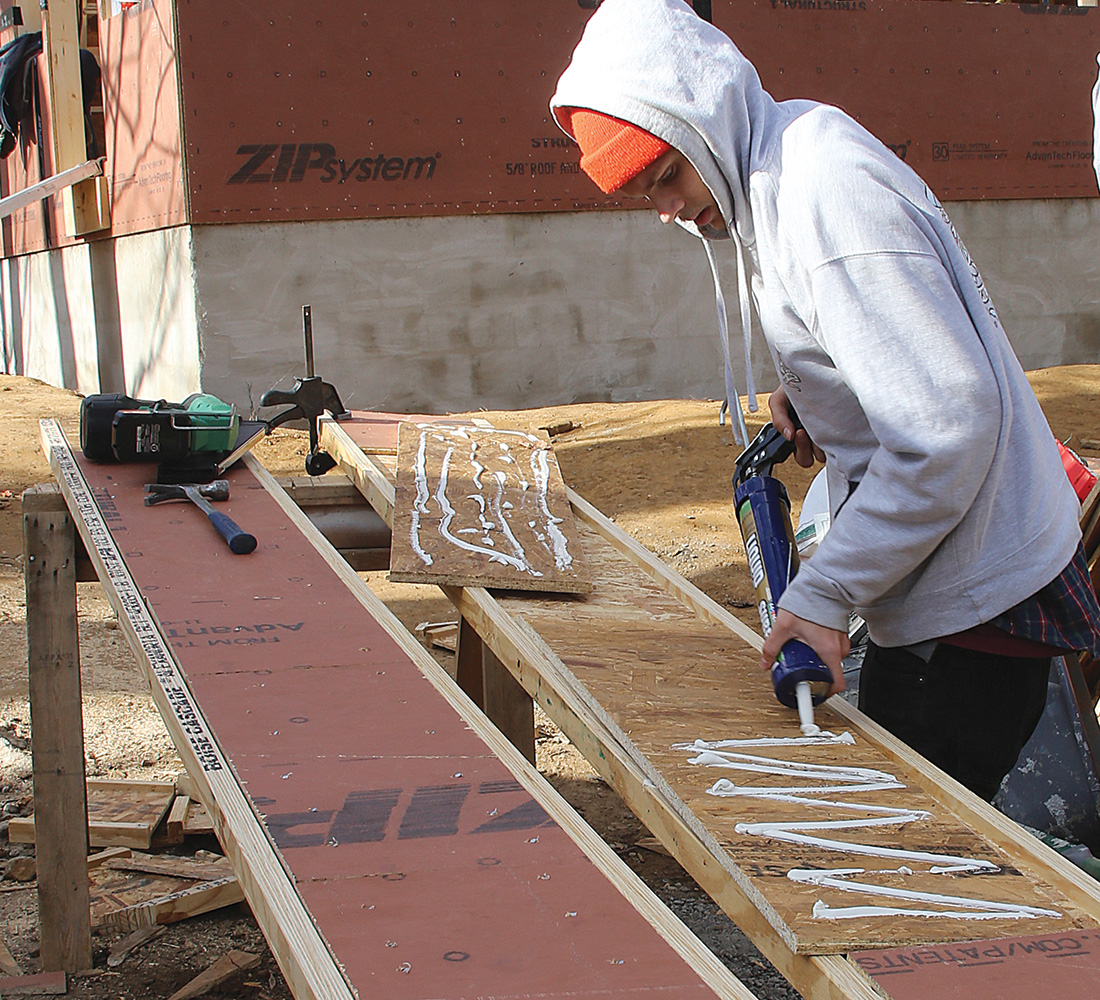
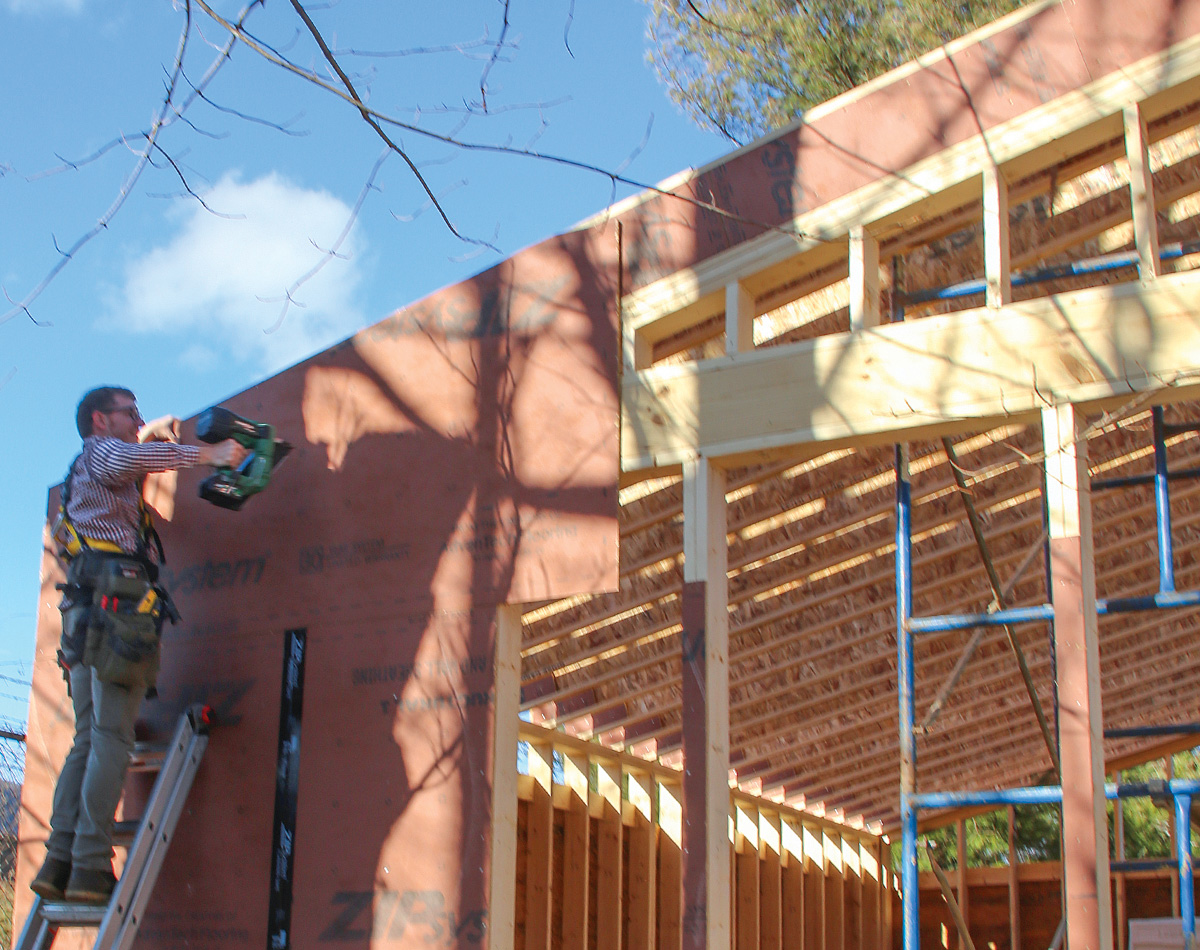
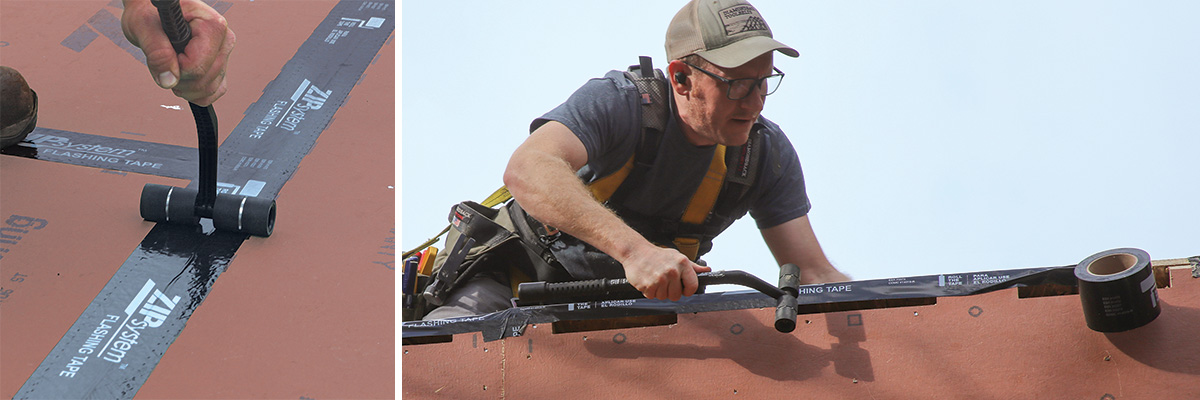
Make it air- and watertight

The taped sheathing on this house is its primary air and water barrier. Like the other walls, the eave wall is tied to the roof system for uplift resistance.

Adding LSL blocks
Add blocking. LSL blocks help the rafters resist lateral loads that could overturn them. The blocks must fit tight on all sides.
sheathing the eave
Sheathe the eave. Sheathing pieces bridge the gap between the roof and wall sheathing and connect the roof and walls structurally. Four 1-in. holes near the top of the wall sheathing will be drilled later to create intakes for the vented roof.

installing seam tape to seal any gaps in sheathing

cutting seam tape around the vent openings
Tape the seams. With flashing and seam tape sealing any gaps in the sheathing, the structure is kept dry throughout the rest of the construction. Cut the tape around the vent openings.

Andrew Steele is the owner of FRS Builders in Purlear, N.C.

Photos by Patrick McCombe

From Fine Homebuilding #308


RELATED STORIES

  • Perfect Roof Rafters
  • Roof Framing with Engineered Lumber
  • Guide to Roof Sheathing

Sign up for eletters today and get the latest how-to from Fine Homebuilding, plus special offers.

Sign Up
Previous: Efficient Custom Roof Cutting Next: Roof-Framing Design

Guide

Framing

Chapter

Framing Roofs

Log in or create an account to post a comment.

Sign up Log in

Become a member and get full access to FineHomebuilding.com

Framing

Framing

Trusted, in-depth guidance from the pros for framing a durable, code-compliant house

View Project Guide

View All Project Guides »

Become a member and get unlimited site access, including the Framing Project Guide.

Start Free Trial

Introduction to Framing
  • House Framing Concepts, Tips, and More
Framing Tools, Techniques, and Materials
  • Tools
  • Techniques
  • Framing Lumber
  • Steel
Framing Floors
  • Floor Framing
  • Engineered Floors
  • Floor Sheathing
Framing Walls
  • Wall Framing Basics
  • Layout
  • Wall Assembly
  • Raising and Straightening Walls
  • Framing Rough Openings
  • Blocking
Framing Stairs
  • Stair Layout
  • Building Stairs
Framing Roofs
  • Roof-Framing Basics
  • Roof Design
  • Laying Out and Cutting Rafters
  • Framing Valleys
  • Working with Trusses
  • Dormers
  • Special Situations
Efficient Framing Methods
  • Advanced Framing
  • Double-Stud Walls
Timber Framing
  • Timber-Frame Construction
  • Timber-Frame Design

Fine Homebuilding

Follow

  • twitter
  • facebook
  • instagram
  • pinterest

Newsletter

Get home building tips, offers, and expert advice in your inbox

Sign Up
This site is protected by reCAPTCHA and the Google Privacy Policy and Terms of Service apply.
See all newsletters

Membership & Magazine

  • Online Archive
  • Start Free Trial
  • Magazine Subscription
  • Magazine Renewal
  • Gift a Subscription
  • Customer Support
  • Privacy Preferences

Taunton Network

  • Green Building Advisor
  • Fine Woodworking
  • Fine Gardening
  • Threads
  • About
  • Contact
  • Advertise
  • Careers
  • Copyright
  • Terms of Use
  • Site Map
  • Do not sell my information
  • Privacy Policy
  • Accessibility
  • California Privacy Rights

© 2022 The Taunton Press, Inc. All rights reserved.

X
X
This is a dialog window which overlays the main content of the page. The modal window is a 'site map' of the most critical areas of the site. Pressing the Escape (ESC) button will close the modal and bring you back to where you were on the page.

Main Menu

  • How-To
  • Design
  • Tools & Materials
  • Video
  • Blogs
  • Forum
  • Reader Projects
  • Magazine
  • Members
  • FHB House

Podcasts

  • FHB Podcast
  • ProTalk

Webinars

  • Upcoming and On-Demand

Account

  • Log In
  • Join

Podcasts

  • FHB Podcast
  • ProTalk

Webinars

  • Upcoming and On-Demand

Popular Topics

  • Kitchens
  • Business
  • Bedrooms
  • Roofs
  • Architecture and Design
  • Green Building
  • Decks
  • Framing
  • Safety
  • Remodeling
  • Bathrooms
  • Windows
  • Tilework
  • Ceilings
  • HVAC

Magazine

  • Current Issue
  • Past Issues
  • Magazine Index
  • Subscribe
  • Online Archive
  • Author Guidelines

All Access

  • Member Home
  • Start Free Trial
  • Gift Membership

Shop the Store

  • Books
  • DVDs
  • Taunton Workshops

More

  • FHB Ambassadors
  • Reader Projects
  • Podcast
  • Customer Support

Account

  • Log In
  • Join

Newsletter

Get home building tips, offers, and expert advice in your inbox

Sign Up See all newsletters

Follow

  • twitter
  • facebook
  • instagram
  • pinterest

Join All Access

Become a member and get instant access to thousands of videos, how-tos, tool reviews, and design features.

Start Your Free Trial

Subscribe

FHB Magazine

Start your subscription today and save up to 70%

Subscribe

We hope you’ve enjoyed your free articles. To keep reading, become a member today.

Get complete site access to expert advice, how-to videos, Code Check, and more, plus the print magazine.

Start your FREE trial

Already a member? Log in