
Tips for Sheathing a Roof with Plywood
You're 30 ft. in the air, walking on narrow framing members and handling sheets of plywood that'll catch the wind like canvas sails. You'd better know what you're doing.
Synopsis: A variety of tips that will make it easier to sheathe a roof with plywood. Among other topics, the author, a custom home builder in Massachusetts, discusses panel layout, explains how to nail off panels, and looks at the advantages of using roof staging. A sidebar rounds up comments from other carpenters via email to the magazine’s Breaktime forum.
My earliest roof-sheathing memories are of extra trips up tall ladders with a circular saw in tow on the end of a long, heavy extension cord. The plug would inevitably snag on the edge of the sheathing when I least expected it.
Besides the adrenaline rush of being pulled off balance, it always seemed ironic that to make the sheathing fit properly, I had to cut pieces from the sheets that I had just struggled to lift onto the roof, only to watch the cutoffs fall back to earth. Many years and many roofs later, I’ve developed much better methods for sheathing a roof accurately and efficiently.
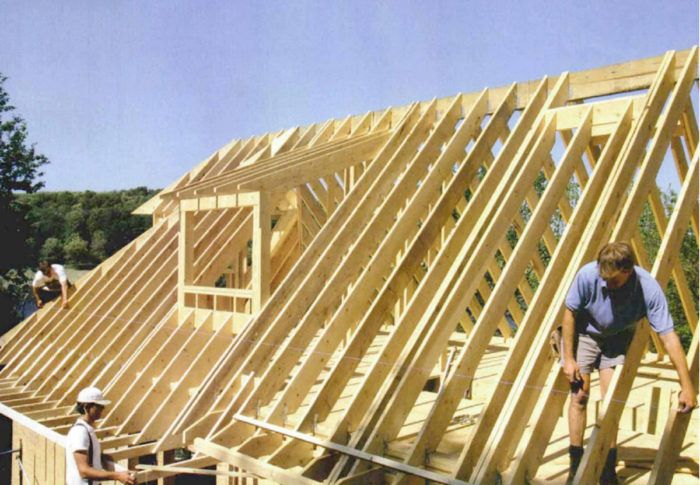
A good sheathing job begins with proper rafter layout
To minimize waste and to simplify cutting, the sheathing courses should begin either with full or half sheets. But laying out the rafters isn’t as simple as duplicating the stud layout on the wall below. To get the starting pieces of sheathing to fall properly on the rafters, the layout must reflect the gable overhang, which, of course, varies depending on the rake detail.
Taking the gable overhang into account when I lay out rafters minimizes cutting and wasting plywood. With a simple rake detail, accounting for the difference in rafter layout is easy math. But when I add an overhang with 1x rake trim and crown molding, as many of our houses have, I stop trusting my math skills and make a full-scale drawing of the rake detail on a sheet of plywood. Not only will the drawing ensure that our rafter layout is right on, but my crew and I can also measure — for items such as the blocking for the overhangs — directly off the drawing.
Once we’re sure of the layout, we cut and assemble the roof carefully, paying special attention to orienting the crown, or convex curve of each rafter, to face the sky. One crown facing down can cause a dip in the roof plane that will be a pain to sheathe and can’t be hidden with shingles. When the roof framing is finished, we make sure that the gable is plumb and that the frame is square so that the ends of our sheets don’t wander off the rafters.
Measure from the top and the bottom to lay out sheathing courses

 Before hoisting that first sheet up to the roof, we figure out how wide the final course of plywood will be when we reach the ridge. The object is to avoid having to install a narrow (less than 12 in. wide) and flimsy course at the peak. We begin by measuring the length of the rafter plus any additional length needed to make up for the thickness of the ridge beam, the ridge vent and the fascia detail. If the measurement falls within a few inches of a 4-ft. increment, say 16 ft. 5 in. (drawings above), we shrink the bottom course 12 in. so that the top course becomes a much more substantial 17-in. width. The added strength for the final course more than makes up for any extra effort it might take to rip the sheathing.
Framing and sheathing a curved eave When the architect designed this roof, he threw us a curve. A few feet from the bottom, the roof plane flares out to form a curved eave. Once we’d drawn the curve full scale (photo above), we decided that the easiest way to frame the curve was with lookouts and a continuous cleat to suck in the middle (photo below left). It would have been tough to get the -in. plywood to conform to the curve, so we went with a layer of -in. plywood covered with a layer of in.We started by installing a full sheet of -in. plywood a bit back from one hip (photo below center). The sheet was first fastened along the top edge. Nailing lines were, then snapped where the curve began as well as in the middle of the continuous cleat, and the rafter layout was copied onto the lines so that the sheet could be drawn into the curve at each rafter. After the first layer of plywood was nailed in, we nailed on a layer of -in. plywood in the same way, making sure to overlap the seams on the bottom layer (photo below right).—R. W.
Plotting a curved hip For the curved hip and valley, we projected measurements from the edge of the full sheet to the framing for the curve at four different points top to bottom. Those points were transferred to a sheet of plywood, and a nail was driven at each point. A thin wooden batten was then bent into the curve against the nails, and a second set of nails was driven to keep the batten in place (photo above). The curved line was drawn by following the batten, and the curve was cut with a circular saw. After cutting and testing the curve in both the hip and the valley, the curved cutoff was saved, labeled and used as a template. –R. W. |


If the eave or fascia detail of the roof is unusual or complex, such as the curved eave on the house shown here (sidebar above), we make a full-scale drawing to help visualize any framing features as well as to see how the sheathing might be affected by the detail. In these cases, it’s usually easier to measure in three steps. First, we measure up 4 ft. from the bottom edge of the sheathing. Next, we measure down from the peak to the nearest 4-ft. increment. The distance between these two points is the size of the top course of plywood.

When we’ve figured out how wide the bottom course of plywood is going to be (3 ft. or 4 ft.), we measure up that distance from the bottom edge and snap a line to guide the first course of sheathing (photo above). We check the measurement on a number of rafters to make sure there are no significant differences that would indicate problems at the eave and to make sure we are running parallel to the ridge.
Lean the plywood against the fascia for easy picking


tacked in place.
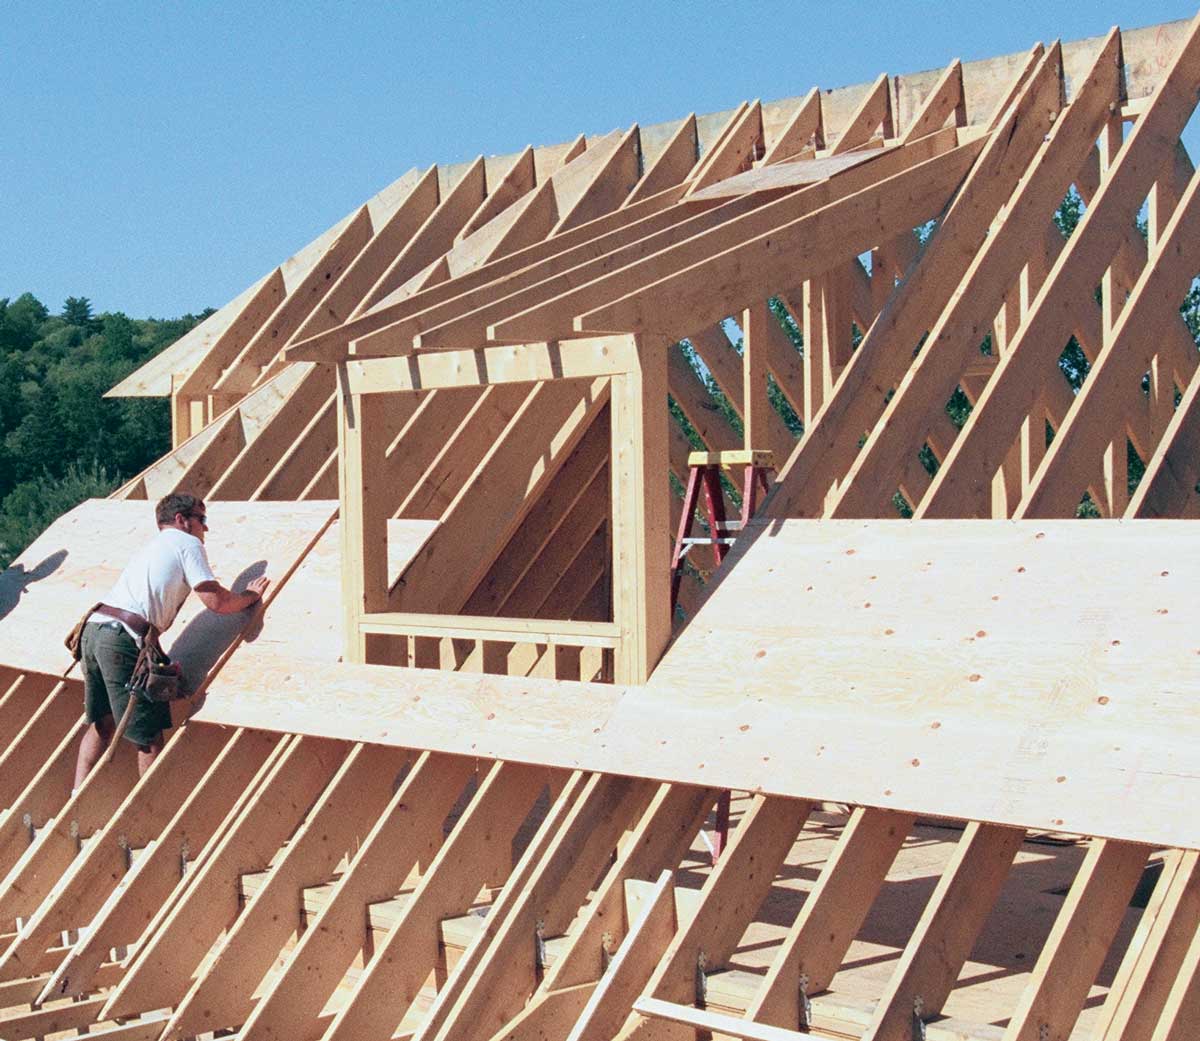
There are many methods of getting plywood onto the roof. If the house is a single story, such as the house featured in this article, we find it easiest to put two sawhorses on the ground next to the roof and stand the plywood on them, leaning it against the fascia (photo above). From there, the carpenters can pull the plywood onto the roof while standing on the wall plates. If the house is more than a single story, we haul the plywood up to the top floor and feed the sheets out from between two rafters. One or more sections of sheathing can be strategically left off the roof for this purpose. Leaving the framing from around a window opening in a dormer also can help both with getting plywood from the ground and with getting plywood onto the roof.
If the bottom course of sheathing is full width and if the roof has a shallow-enough pitch so that it’s easy to work from (6-in-12 or less), we work off wall staging and start installing sheathing at the eave, keeping the top edge aligned with the snapped line. However, with steeper pitches or with complicated bottom courses as we had with this house, we start with the second course, which allows us to work while standing on the wall plates.
To start the sheathing with the second course, the bottom edge of the plywood is aligned with the snapped line. To help counteract our old friend gravity, we drive some 8d nails into a couple of rafters on the snapped line, leaving them sticking out about 1 in. (photo right). Now we’re ready for the first sheet of plywood.
Nail guns are quick, but a hammer does a better job
Our nail of choice for roof sheathing is an 8d galvanized common, preferably driven by hand. When a nail is driven with a hammer, we can be certain that the plywood has been snugged down tight to the rafters, and we know instantly if the nail has missed the rafter, a subtlety that too often goes unnoticed with an air nailer.
We use galvanized nails because they resist pulling out of the wood better than bright nails. Also, the streaks and stains of rusting bright nails are an ugly blemish on a nice job, even if it is just sheathing.
We usually nail off the field of each sheet with an air gun, but before pulling the trigger, we draw or snap lines to keep the nails going into the rafters. We keep a close eye on the nail depth and back the pressure off until the nail head is driven flush without breaking through the plywood veneers. Each veneer that the nail crunches reduces the nail’s holding power. Nails are driven every foot or so along each rafter in the field, and every 6 in. to 8 in. on the ends.
The first course of sheathing keeps the rest of the sheathing straight
Most of our roofs are sheathed with -in. CDX plywood. The plywood often bears the message “Sized for spacing” printed on its face, which according to The Engineered Wood Association (EWA; 253-565- 6600) is supposed to alert installers that the sheet might have been manufactured in. smaller in each dimension than a normal sheet of plywood. A space is then supposed to be left between the sheets of sheathing to allow for expansion as moisture content in the sheets varies with changes in the environment.
However, the sheathing we get is always a full 48 in. by 96 in. The EWA says that even in these cases, a space should be left between the sheets. But because leaving such a space would cause a cumulative error in our layout, we always butt our sheathing together and have never had a problem with buckling or distortion, even on roofs exposed to a lot of wet weather before they are shingled. (For more on spacing sheathing, see sidebar below) The rafters on most of our roofs are 16 in. o. c. However, for rafters that are 2 ft. o. c., we install aluminum H-clips between the rafters. The clips are slipped over the edges of the sheathing between rafters to keep the edge of each sheet aligned with its neighbor, which reduces the likelihood of warping.
Forum Discussion: Spacing sheathingThe Forum is Fine Homebuilding’s online discussion group. When the issue of spacing sheathing came up for this article, we posted the following questions:
Here are excerpts from the responses:
|
We set our first sheet beginning at the gable where our layout starts, in this case next to the sheet under the blind valley. We never try to lay a sheet of plywood exactly where it’s supposed to go. Instead, we flop the plywood onto the rafters several inches above the line and then slide it down to the nail stops. Once the sheet is resting on the nails, we tack one corner and adjust the sheet until it’s where we want it on the line before tacking the other corners.
We continue down the first course, tacking the rest of the sheets in place (photo above). The sheets are held precisely to the snapped line, and we make sure that the 4-ft. ends run parallel with the rafters. If we find a problem, we pull the corner tacks, adjust the sheets and try again.
For this house, our first course of sheathing wrapped around a small shed dormer. We extended the plywood around the dormer and to the hip rafter to make sure that when we got to the ridge, our courses would still be in line. With the course straight, we drove home all our nails.
Sheathing keeps the rafters straight
along one edge. The rafters are then moved to the mark and nailed in place.
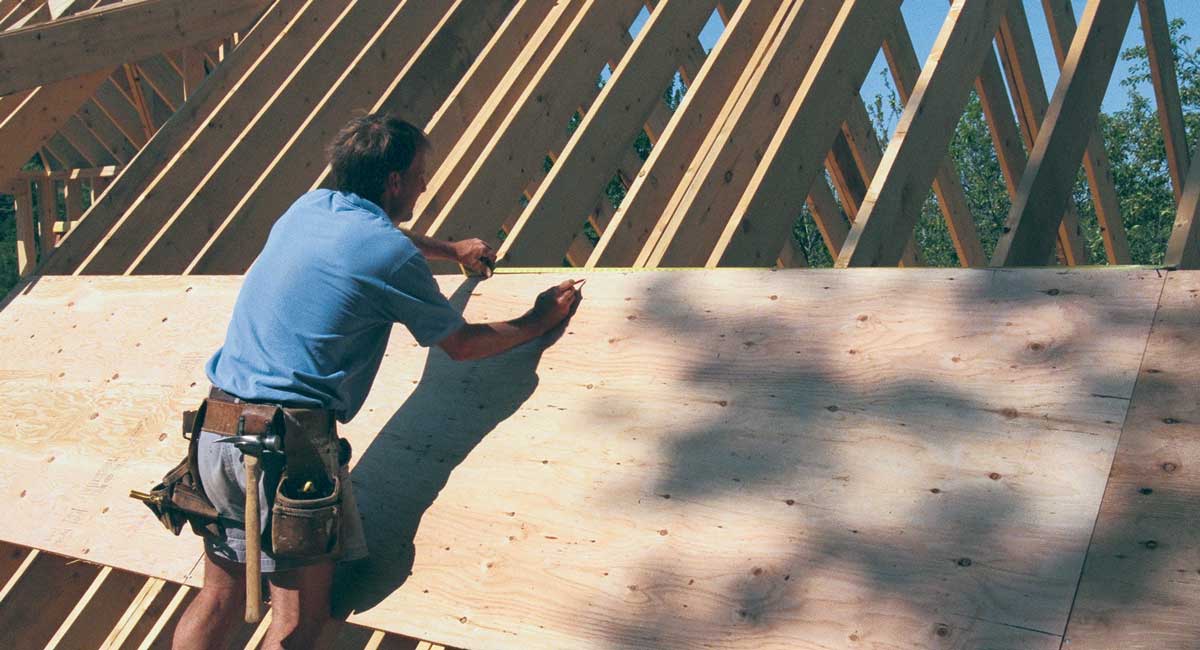
Before we put on more plywood, the common rafters need to be nailed at their proper spacing. We hook a tape measure on the rafter nailed to a top corner of the sheathing and mark the rafter layout on the plywood along the 8-ft. edge (photo above). Each rafter is then moved to its mark and nailed.
Spacing the rafters this way along one course of sheathing is usually enough to keep them straight for the rest of the roof, especially if we’ve skipped a course at the eave. But it doesn’t hurt to check the spacing on the next courses as well.
If the roof we’re sheathing has regular gable ends, the rake must be straightened before the sheathing is nailed to the gable-end rafter or to the fly rafter of the overhang. The casual approach to this step is squinting up the rake, but stringing the rake is much more precise. We stretch a string from peak to plate using a small chunk of plywood or 2x scrap as a spacer at both ends. A third chunk of the same material is then used as a gauge between rafter and string. The rafter is moved in or out until the space between the string and the rafter is consistent.
Roof staging makes the upper courses go on quickly and easily
Once the first course is nailed off, we put on a row of roof-staging brackets and planks (photo above). Many contractors just nail cleats of 2x stock on top of the sheathing to provide a foothold for carpenters. But at least one row of a proper staging is well worth the extra effort, especially on a steeply pitched roof. The staging provides security, comfort and a convenient place to rest a sheet of sheathing before it is put in place. On this job, we did nail on a 2x cleat above the staging for the small additional boost we needed to reach the peak.
The butt seams of the plywood sheets should be staggered between courses for strength. So with each course, we alternate between using a full 4×8 sheet and a 4×4 half-sheet for the first piece. For this roof, we started our second course off the plywood under the blind valley that had already been staggered back 4 ft.
If we get to the other end of the roof and need only a short piece of sheathing spanning a single rafter bay to finish a course, we resist the temptation. A short piece is bound to sag and ruin a nice flat roof plane. Instead, we cut back the preceding piece of plywood so that the last piece spans at least two rafter bays. The support from the rafter in the middle and the additional length discourage warpage and sagging.
Do the cutting on the ground
A lot of builders just run their sheathing out over the rakes or hips and right over roof openings. When all the sheets are nailed in place, they send a carpenter up with a chalkline and a circular saw to do all the cutting in place. But we consider a sheathing job successful if we never have to drag a saw up onto the roof.

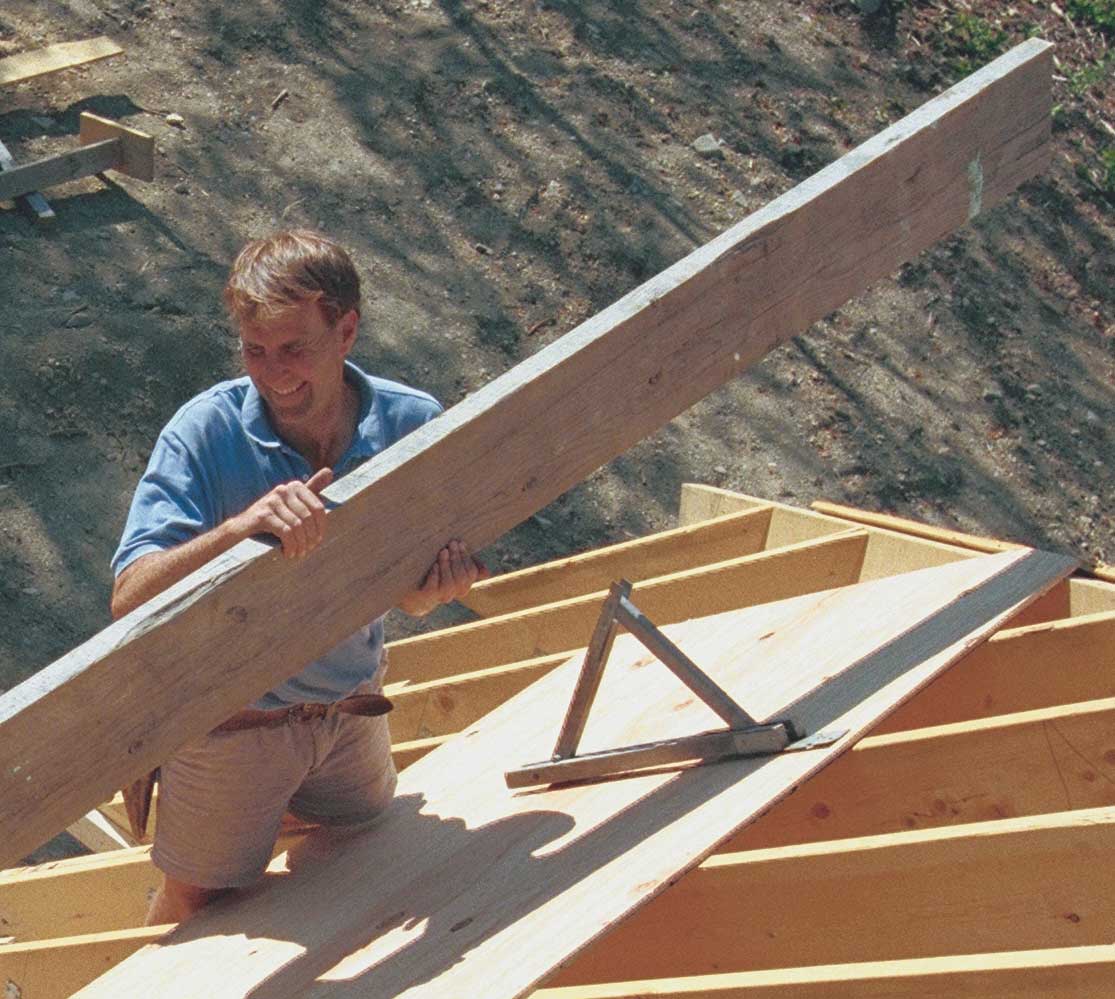
Aside from the obvious safety issues of operating power tools while trying to keep balance on a sloping surface, we believe that the cuts are more accurate when done on terra firma. We split the crew with crew members on the roof nailing the sheathing and taking measurements for any cut pieces, while a crew member on the ground acts as the designated cutter (photo above).
One person doing all the cutting can keep track of templates and maintain a scrap inventory to keep from cutting into full sheets. A good cutter establishes a rhythm and can often have pieces cut and ready before they’re needed. This person is also responsible for ripping the sheets needed to close in the peak or the eave.

The roof on this house had openings on each ridge for a chimney and a cupola. The sheathing around these openings was precut so that it went in with no on-roof modifications. Hips and valleys pose a slightly different challenge (photos above), however. If a course ends in a valley, we simply extend chalklines along the course edges in a straight line until they reach the valley rafter.
Then we measure the upper and lower edges, and the cutter makes the angled piece. After cutting valley pieces for one or two courses, the cutter has established the difference in length between the top and bottom edges. At that point, we can just give the cutter the measurement for the bottom edge, and he’s able to cut the piece by adding on that difference for the top length.
If all the roof pitches are the same, the angle cuts should be the same for the hips and the valleys. So an angled cutoff can be saved and used as a template for the rest of the angled pieces. If we decide to go this route, we label the pattern clearly so that the angled cuts stay true all the way up the valley or hip.
Robert Weatherall builds custom homes and timber-frame houses in Ipswich, Massachusetts. Photos by Roe A. Osborn, except where noted. Drawings: Vince Babak
From Fine Homebuilding #119
RELATED STORIES
Fine Homebuilding Recommended Products
Fine Homebuilding receives a commission for items purchased through links on this site, including Amazon Associates and other affiliate advertising programs.

Shingle Ripper

Roofing Gun

Fall Protection
