FHB Logo Facebook LinkedIn Email Pinterest Twitter X Instagram Tiktok YouTube Plus Icon Close Icon Navigation Search Icon Navigation Search Icon Arrow Down Icon Video Guide Icon Article Guide Icon Modal Close Icon Guide Search Icon Skip to content
Subscribe
Log In
  • How-To
  • Design
  • Tools & Materials
  • Restoration
  • Videos
  • Blogs
  • Forum
  • Magazine
  • Members
  • FHB House
  • Podcast
Log In

Fine Homebuilding Project Guides

Decks

Guide Home
  • Design & Planning
  • Tools & Materials
  • Footings & Foundations
  • Framing a Deck
  • Installing Decking
  • Installing Railings
  • Deck Stairs
  • Custom Details
  • Finishes, Repairs, and Maintenance
  • Complete Deck Builds
How-To

Decking on the Diagonal

Dress up your next deck by setting the boards at an angle.

By Bobby Parks Issue 274 - April/May 2018
  • X
  • facebook
  • linkedin
  • pinterest
  • email
  • add to favorites Log in or Sign up to save your favorite articles

Synopsis: This article gives seven tips for installing a deck in a diagonal pattern.


The decking is the finished surface of a deck, so we put a lot of effort into its visual details and installation. Because these particular clients liked the look of natural wood but wanted to minimize maintenance, we opted for the stability of 2×5 vertical grain pressure-treated yellow pine that was kiln-dried after treatment (KDAT). We often use a diagonal decking pattern as well—not just because it looks good, but because it allows us to run single boards out to the perimeter, avoiding butt joints in the field. Although hidden fasteners are always an option, on this project we attached the decking with coated deck screws, drilling pilot holes for all the screws to reduce splits. And for the sake of accuracy, we used impact drivers one screw at a time rather than collated screw guns with extensions.

1. Establish the angle

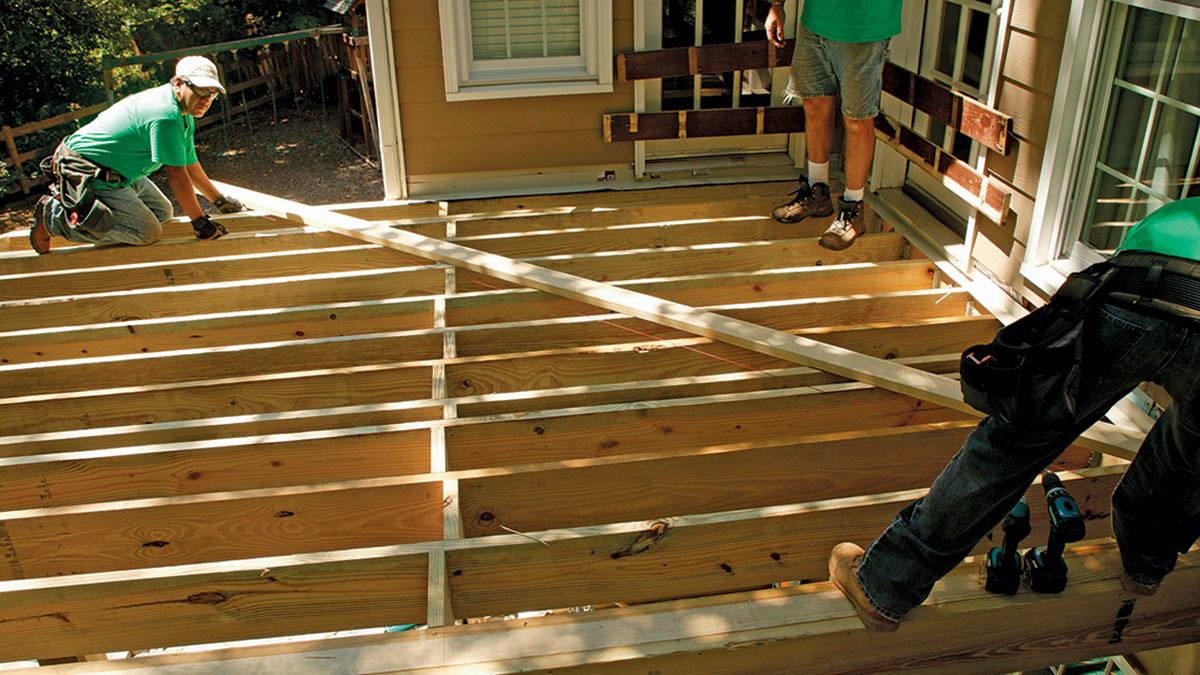
Run the first board from the corner. The 45° decking angle is established by measuring a right triangle from the intersection of the house and the parting beam, then snapping a chalkline as a reference for the first board.


2. Install decking efficiently

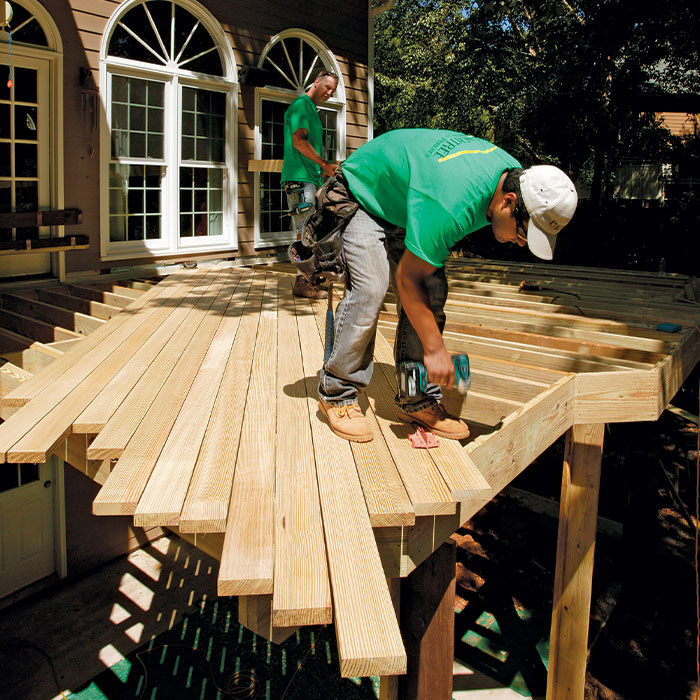
Cover the area quickly. For better workflow, lay out the decking from the first board toward the perimeter, leave it long, and tack it into position. Later, go back, drive all the remaining screws, and trim the board ends where they overhang the perimeter.


3. Slow down in small areas

This is the place for precise cuts. Once the outer portion is filled in, the inner corner can be tackled. Hemmed in by the house, each board must be cut to fit on both ends.


4. Create a space for the parting board

Chalk the midline, and cut. When one side of the decking is complete, chalk a line just inside the parting beam, and trim the deck-board ends at the line. Always use blue or white chalk; red is indelible.


5. Fill in the other side

Start in the middle. To establish the duplicate angle, dry-lay a group of three boards, aligning them with the opposite side. Starting in the middle reduces the chance of accumulated error. Check the angle, then fasten the boards and fill in on both sides of the group.


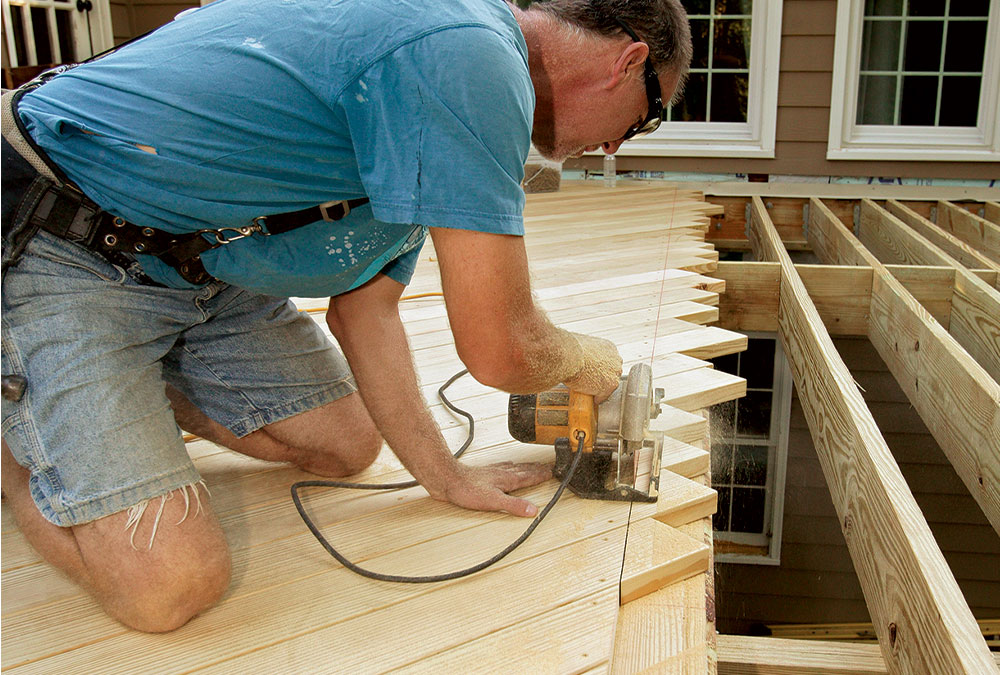
6. Chalk another line, and cut

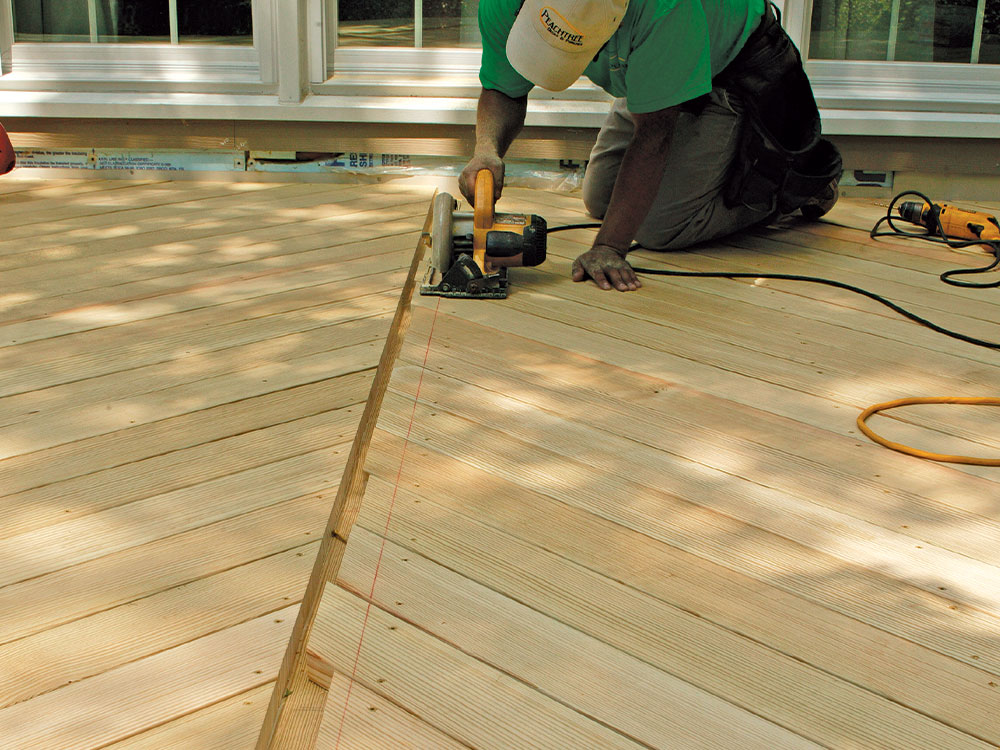
Trim the centerline. Once the decking is installed, snap and cut a line on the parting beam to create the exact space for the parting board that will run down the center. A straight line looks better, so work slowly, follow a guide, or use a track saw.


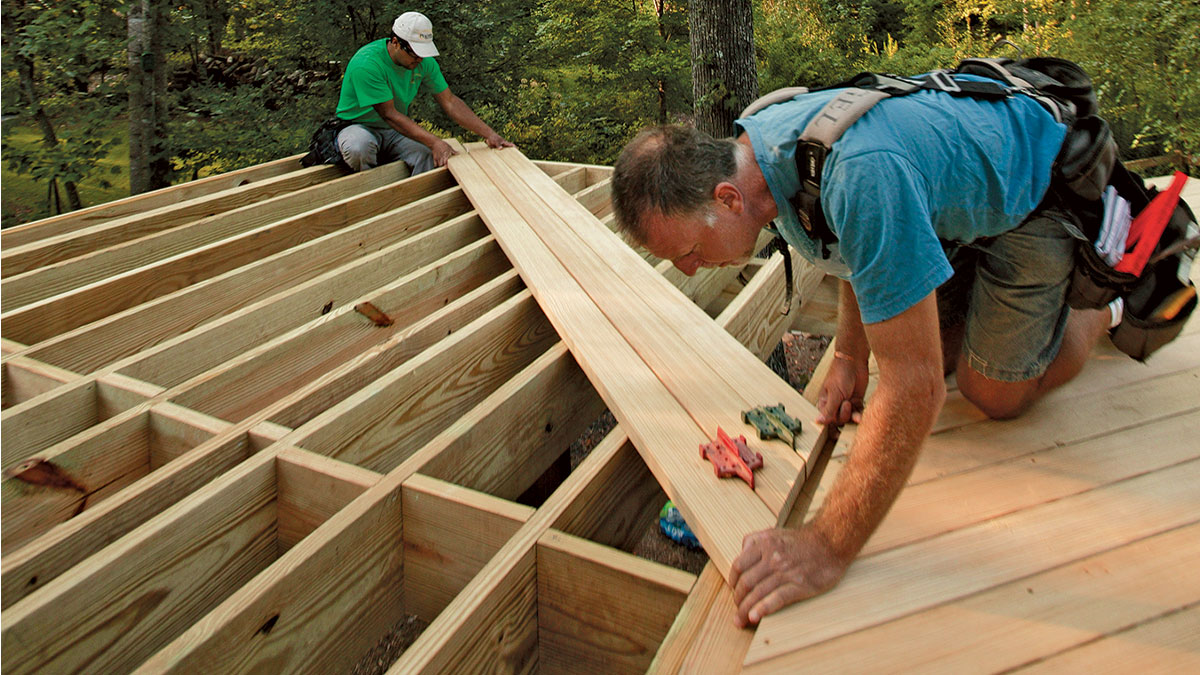
7. Install the parting board

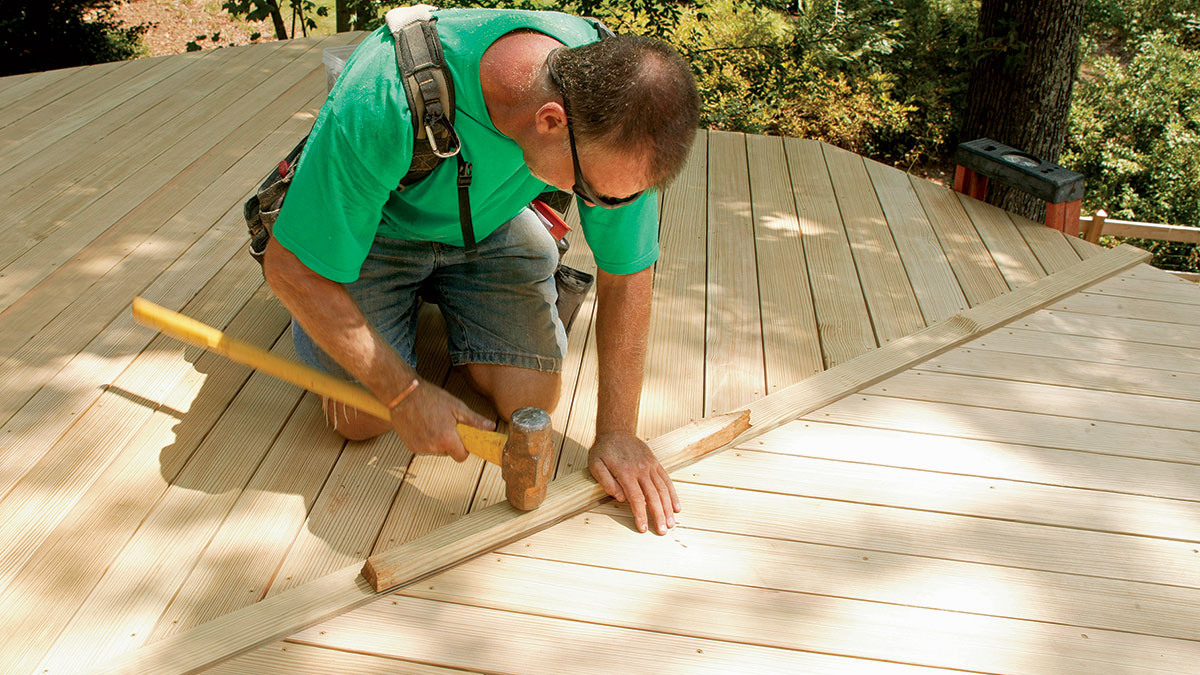
Make it tight. Rip the parting board with a slight bevel on both edges so that it fits snugly in the space between the two fields of decking. A sledge hammer and a block help persuade the fit.


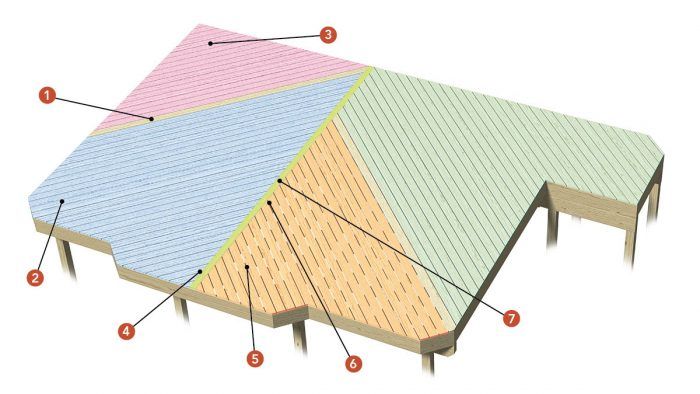
Framing for diagonal decking

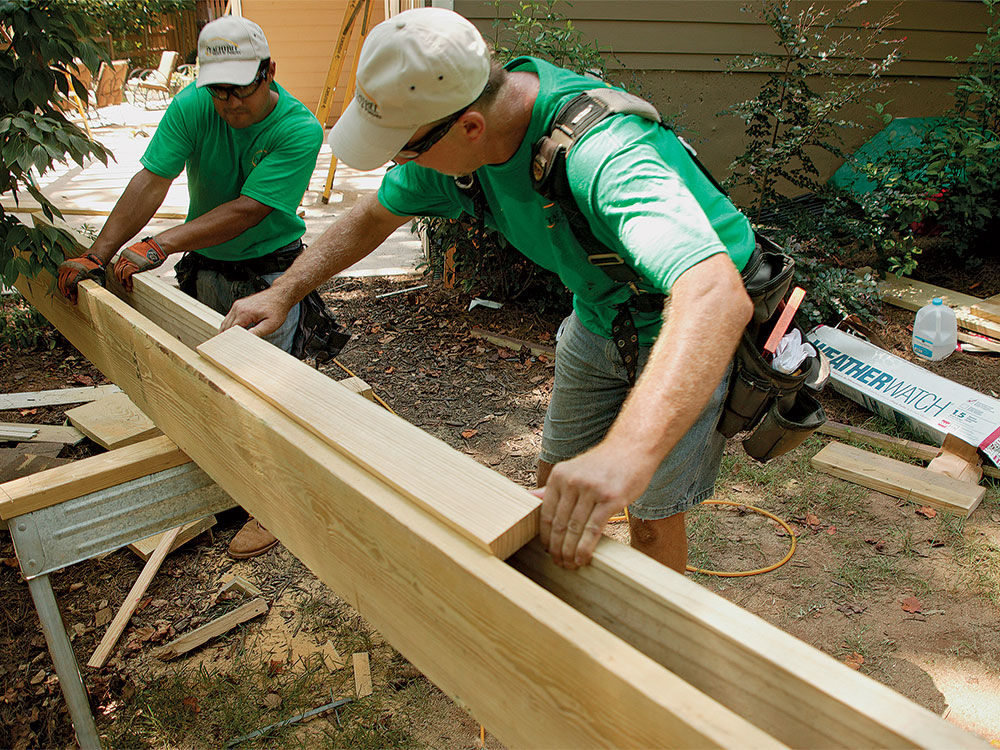
A parting beam, added during the framing stage, supports the board ends at the center of the deck. Join two joists with a full-length 2×4 along the top edge and 2×4 blocking underneath.

Fine Homebuilding Recommended Products

Fine Homebuilding receives a commission for items purchased through links on this site, including Amazon Associates and other affiliate advertising programs.

Drill Driver/Impact Driver

Whether you're pre-drilling holes or driving screws, this Milwaukee® compact cordless driver is the way to go when it comes to building decks.
Buy at Amazon

Lithium-Ion Cordless Palm Nailer

This tool is nice to have for fitting in tight spaces when fastening hardware. While you may not use it often, you'll be glad you have it when you need it.
Buy at Amazon

MicroFoam Nitrile Coated Work Gloves

These gloves are comfortable and have a good grip, making for splinter-free work.
Buy at Amazon
View PDF
Previous: Build an Elevated Deck Series: Laying Down Decking Next: How to Install Composite Decking

Guide

Decks

Chapter

Installing Decking

Sign up for eletters today and get the latest how-to from Fine Homebuilding, plus special offers.

Signing you up...

This site is protected by reCAPTCHA and the Google Privacy Policy and Terms of Service apply.
See all newsletters
See all newsletters

Log in or create an account to post a comment.

Sign up Log in

Become a member and get full access to FineHomebuilding.com

Decks

Decks

Hundreds of articles and videos by top deck-building pros on how to design and build a beautiful, sturdy, and safe deck

View Project Guide

View All Project Guides »

Become a member and get unlimited site access, including the Decks Project Guide.

Start Free Trial

Design & Planning
  • Basic Design Options
  • Generating Plans
  • Calculating Deck Loads
  • Code Compliance
Tools & Materials
  • Deck Building Tools
  • Foundation and Framing Materials
  • Decking Materials
  • Fasteners and Hardware
Footings & Foundations
  • Choosing a Foundation
  • Sizing and Laying Out Footings
  • Excavation
  • Pouring the Foundation
Framing a Deck
  • Framing Overview
  • Installing the Ledger
  • Setting Posts and Beams
  • Installing Joists
Installing Decking
  • Decking Basics
  • Installation Process
  • Adding Fascia and Other Decorative Elements
Installing Railings
  • Installing Deck Railing Posts
  • Building Wood Rails and Balustrades
  • Non-Wood Railing Options
  • Installing Nonwood Balustrades
Deck Stairs
  • Deck Stairs Overview
  • Laying Out, Cutting, and Installing the Stringers
  • Installing Treads, Risers, and Stair Railings
Custom Details
  • Benches, Planters, and Privacy Features
  • Pergolas
  • Lighting
Finishes, Repairs, and Maintenance
  • Deck Finishes
  • Cleaning and Refinishing
  • Inspection and Repair
Complete Deck Builds
  • Grade-Level Decks
  • Raised Decks

Fine Home Building

Newsletter Sign-up

  • Fine Homebuilding

    Home building tips, offers, and expert advice in your inbox.

  • Green Building Advisor

    Building science and energy efficiency advice, plus special offers, in your inbox.

  • Old House Journal

    Repair, renovation, and restoration tips, plus special offers, in your inbox.

Signing you up...

This site is protected by reCAPTCHA and the Google Privacy Policy and Terms of Service apply.
See all newsletters

Follow

  • Fine Homebuilding

    Dig into cutting-edge approaches and decades of proven solutions with total access to our experts and tradespeople.

    Start Free Trial Now
    • Facebook
    • Instagram
    • X
    • LinkedIn
  • GBA Prime

    Get instant access to the latest developments in green building, research, and reports from the field.

    Start Free Trial Now
    • Facebook
    • YouTube
  • Old House Journal

    Learn how to restore, repair, update, and decorate your home.

    Subscribe Now
    • Facebook
    • Instagram
    • X

Membership & Magazine

  • Online Archive
  • Start Free Trial
  • Magazine Subscription
  • Magazine Renewal
  • Gift a Subscription
  • Customer Support
  • Privacy Preferences
  • About
  • Contact
  • Advertise
  • Careers
  • Terms of Use
  • Site Map
  • Do not sell or share my information
  • Privacy Policy
  • Accessibility
  • California Privacy Rights

© 2025 Active Interest Media. All rights reserved.

Fine Homebuilding receives a commission for items purchased through links on this site, including Amazon Associates and other affiliate advertising programs.

  • Home Group
  • Antique Trader
  • Arts & Crafts Homes
  • Bank Note Reporter
  • Cabin Life
  • Cuisine at Home
  • Fine Gardening
  • Fine Woodworking
  • Green Building Advisor
  • Garden Gate
  • Horticulture
  • Keep Craft Alive
  • Log Home Living
  • Military Trader/Vehicles
  • Numismatic News
  • Numismaster
  • Old Cars Weekly
  • Old House Journal
  • Period Homes
  • Popular Woodworking
  • Script
  • ShopNotes
  • Sports Collectors Digest
  • Threads
  • Timber Home Living
  • Traditional Building
  • Woodsmith
  • World Coin News
  • Writer's Digest
Active Interest Media logo
X
X
This is a dialog window which overlays the main content of the page. The modal window is a 'site map' of the most critical areas of the site. Pressing the Escape (ESC) button will close the modal and bring you back to where you were on the page.

Main Menu

  • How-To
  • Design
  • Tools & Materials
  • Video
  • Blogs
  • Forum
  • Project Guides
  • Reader Projects
  • Magazine
  • Members
  • FHB House

Podcasts

  • FHB Podcast
  • ProTalk

Webinars

  • Upcoming and On-Demand

Podcasts

  • FHB Podcast
  • ProTalk

Webinars

  • Upcoming and On-Demand

Popular Topics

  • Kitchens
  • Business
  • Bedrooms
  • Roofs
  • Architecture and Design
  • Green Building
  • Decks
  • Framing
  • Safety
  • Remodeling
  • Bathrooms
  • Windows
  • Tilework
  • Ceilings
  • HVAC

Magazine

  • Current Issue
  • Past Issues
  • Magazine Index
  • Subscribe
  • Online Archive
  • Author Guidelines

All Access

  • Member Home
  • Start Free Trial
  • Gift Membership

Online Learning

  • Courses
  • Project Guides
  • Reader Projects
  • Podcast

More

  • FHB Ambassadors
  • FHB House
  • Customer Support

Account

  • Log In
  • Join

Newsletter

Get home building tips, offers, and expert advice in your inbox

Signing you up...

This site is protected by reCAPTCHA and the Google Privacy Policy and Terms of Service apply.
See all newsletters
See all newsletters

Follow

  • X
  • YouTube
  • instagram
  • facebook
  • pinterest
  • Tiktok

Join All Access

Become a member and get instant access to thousands of videos, how-tos, tool reviews, and design features.

Start Your Free Trial

Subscribe

FHB Magazine

Start your subscription today and save up to 70%

Subscribe

This is your last free article.

Don't miss another expert tip or technique from building pros. Start your free trial today.

Start your FREE trial

Already a member? Log in

We hope you’ve enjoyed your free articles. To keep reading, become a member today.

Get complete site access to expert advice, how-to videos, Code Check, and more, plus the print magazine.

Start your FREE trial

Already a member? Log in

Privacy Policy Update

We use cookies, pixels, script and other tracking technologies to analyze and improve our service, to improve and personalize content, and for advertising to you. We also share information about your use of our site with third-party social media, advertising and analytics partners. You can view our Privacy Policy here and our Terms of Use here.

Cookies

Analytics

These cookies help us track site metrics to improve our sites and provide a better user experience.

Advertising/Social Media

These cookies are used to serve advertisements aligned with your interests.

Essential

These cookies are required to provide basic functions like page navigation and access to secure areas of the website.

Delete My Data

Delete all cookies and associated data