Synopsis: In this article, Fine Homebuilding editorial adviser Mike Guertin details code-compliant methods of attaching deck-railing posts using FastenMaster bolts and screws combined with blocking made from framing lumber. It details the construction of custom, site-built deck railings and shows how to make and use an elastic layout template that automatically adjusts baluster layout to fit a variety of railing lengths.
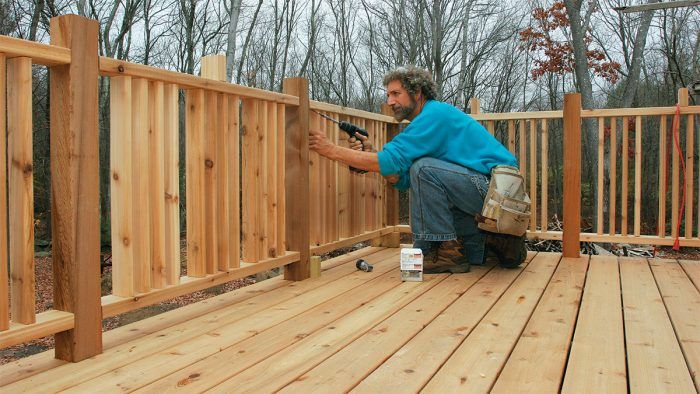
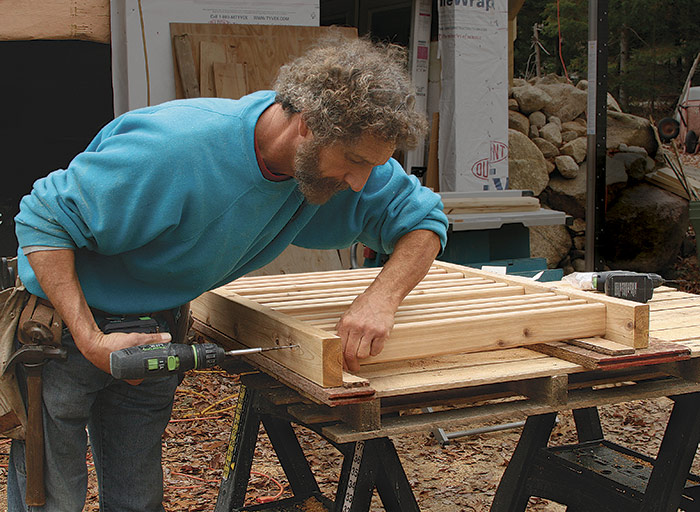
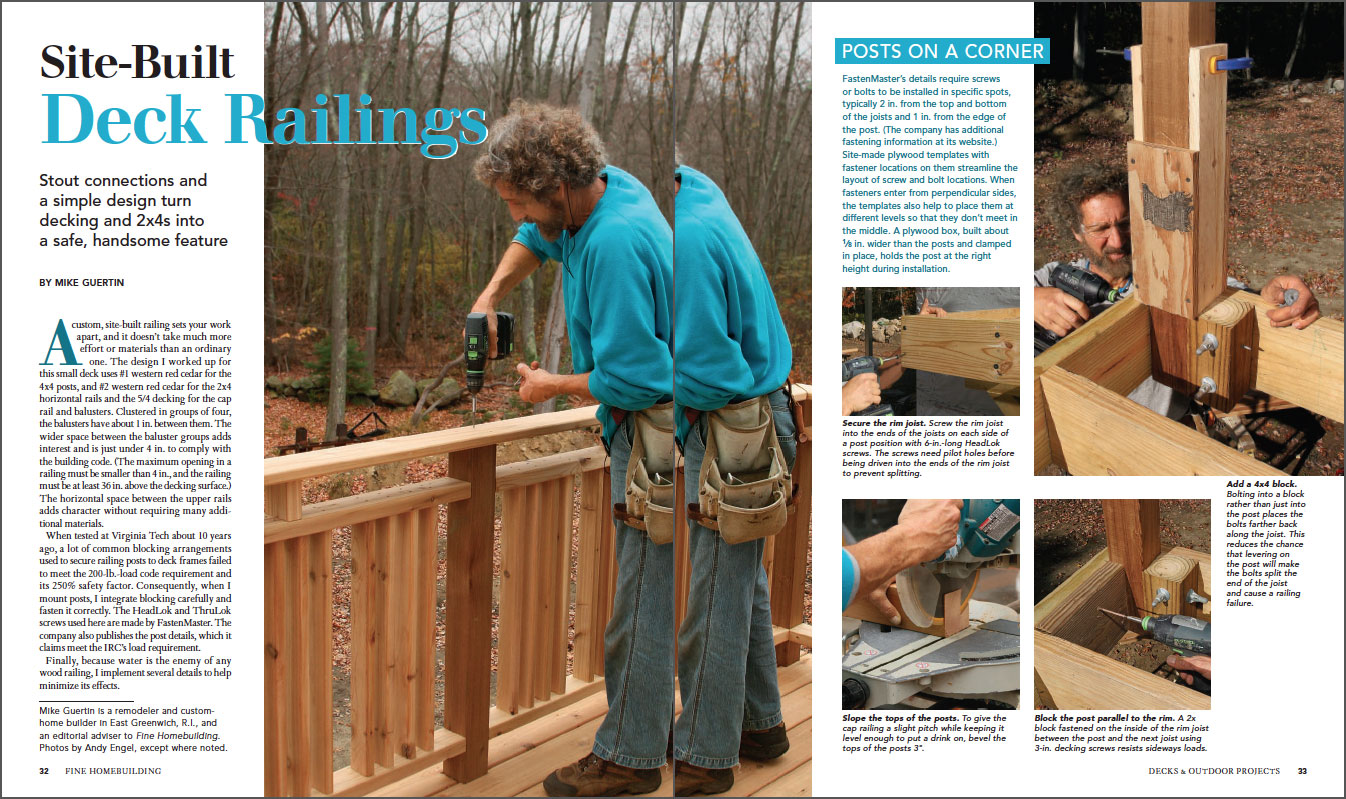
A custom, site-built railing sets your work apart, and it doesn’t take much more effort or materials than an ordinary one. The design I worked up for this small deck uses #1 western red cedar for the 4×4 posts, and #2 western red cedar for the 2×4 horizontal rails and the 5/4 decking for the cap rail and balusters. Clustered in groups of four, the balusters have about 1 in. between them. The wider space between the baluster groups adds interest and is just under 4 in. to comply with the building code. (The maximum opening in a railing must be smaller than 4 in., and the railing must be at least 36 in. above the decking surface.) The horizontal space between the upper rails adds character without requiring many additional materials.
When tested at Virginia Tech about 10 years ago, a lot of common blocking arrangements used to secure railing posts to deck frames failed to meet the 200-lb.-load code requirement and its 250% safety factor. Consequently, when I mount posts, I integrate blocking carefully and fasten it correctly. The HeadLok and ThruLok screws used here are made by FastenMaster. The company also publishes the post details, which it claims meet the IRC’s load requirement.
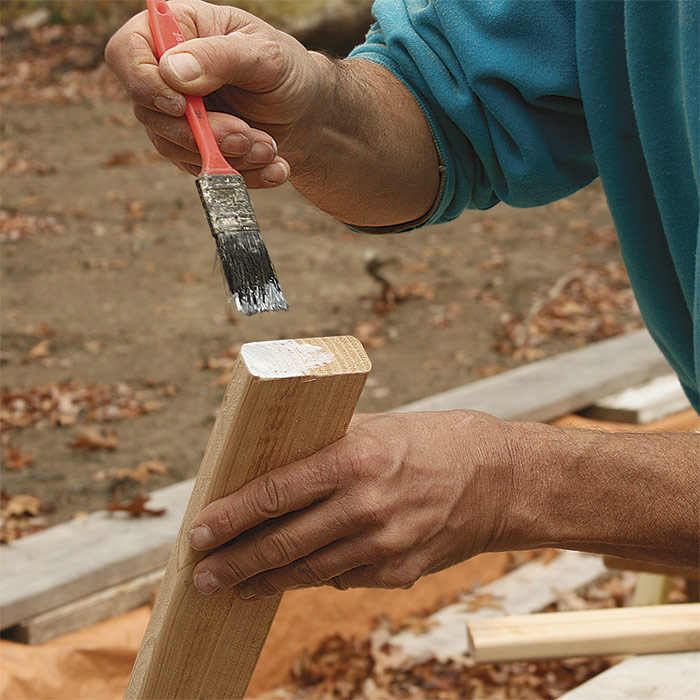
Finally, because water is the enemy of any wood railing, I implement several details to help minimize its effects.
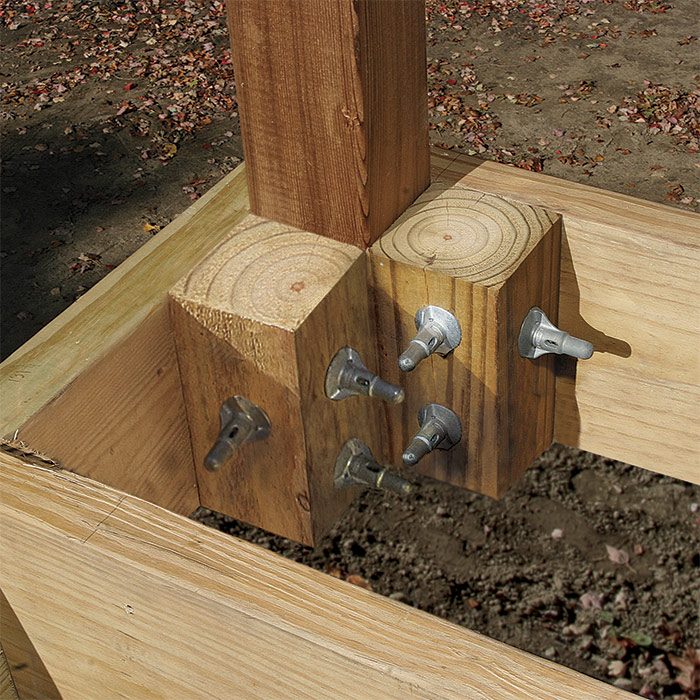
POSTS ON A CORNER
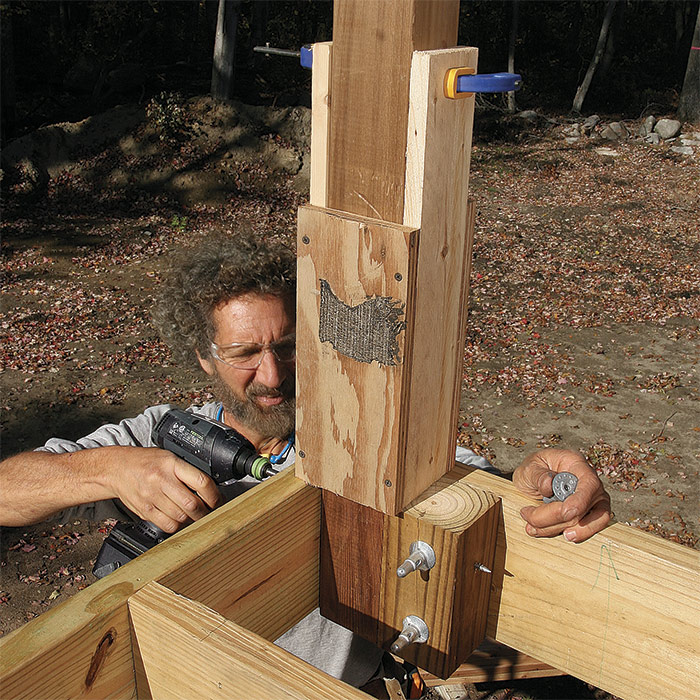
FastenMaster’s details require screws or bolts to be installed in specific spots, typically 2 in. from the top and bottom of the joists and 1 in. from the edge of the post. (The company has additional fastening information at its website.) Site-made plywood templates with fastener locations on them streamline the layout of screw and bolt locations. When fasteners enter from perpendicular sides, the templates also help to place them at different levels so that they don’t meet in the middle. A plywood box, built about 1⁄8 in. wider than the posts and clamped in place, holds the post at the right height during installation.
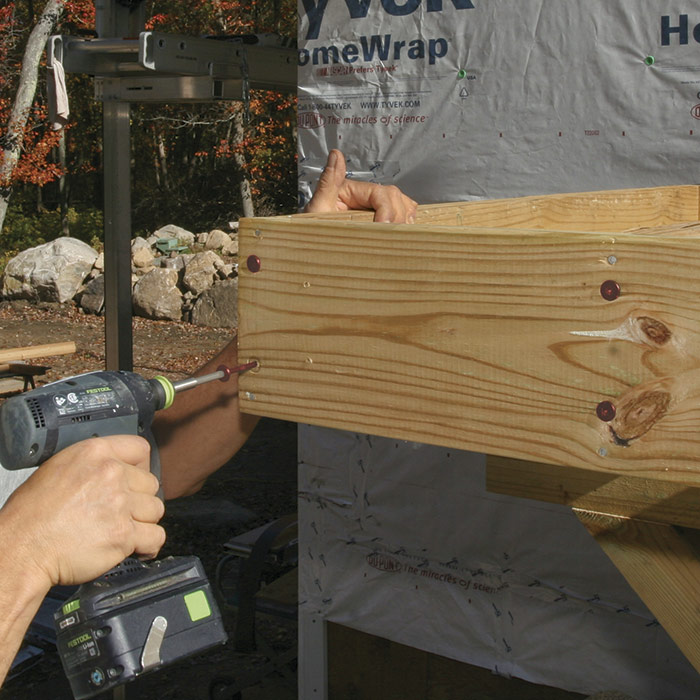
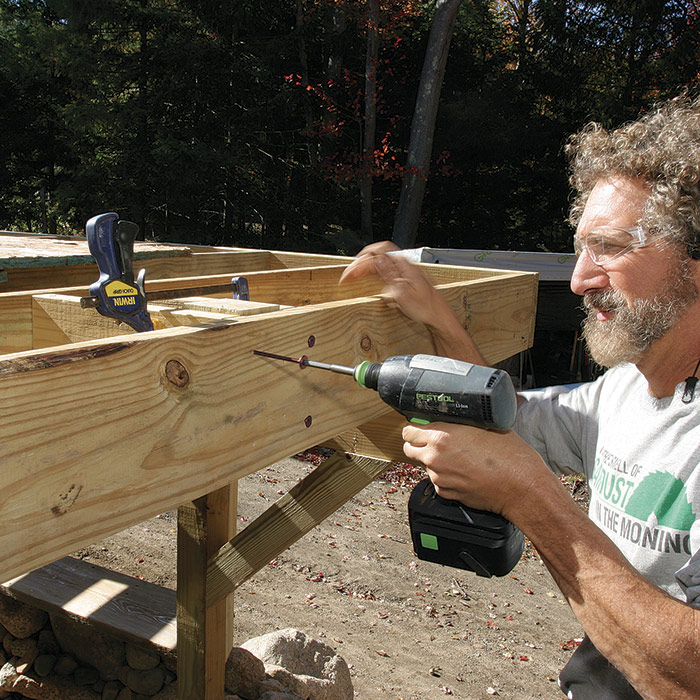
Secure the rim joist. Screw the rim joist into the ends of the joists on each side of a post position with 6-in.-long FlatLok screws. Normally these fasteners don’t require pilot holes, but I use them at these end locations to keep the rim joist from splitting.
Slope the tops of the posts. To give the cap railing a slight pitch while keeping it level enough to put a drink on, bevel the tops of the posts 3°.
Add 4×4 blocking. Bolting into a block rather than just into the post places the bolts farther back along the joist. This reduces the chance that levering on the post will make the bolts split the end of the joist and cause a railing failure. Fasten 4×4 blocks
Fasten 4×4 blocks cut the same height as the joists with two ThruLoks in each, driven 2 in. from the top and bottom edges of the framing. Then drive longer ThruLoks through the end and rim joists, post, and blocking.
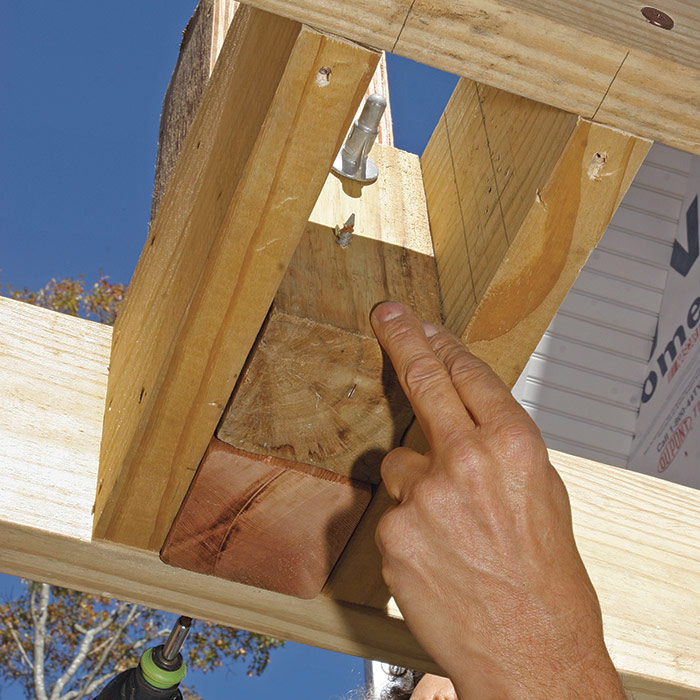
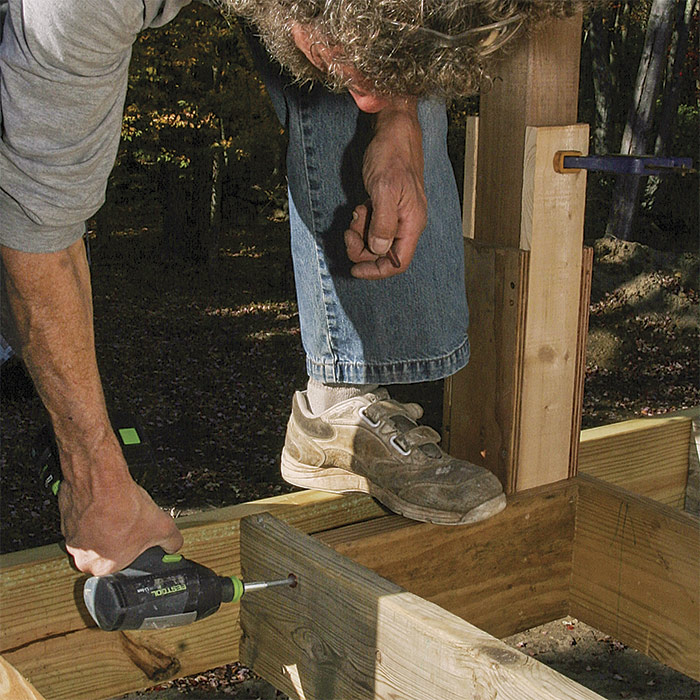
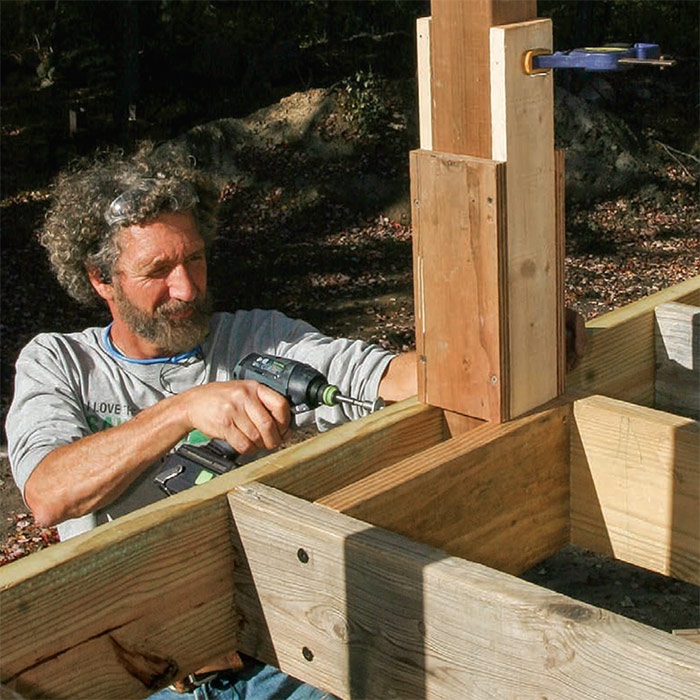
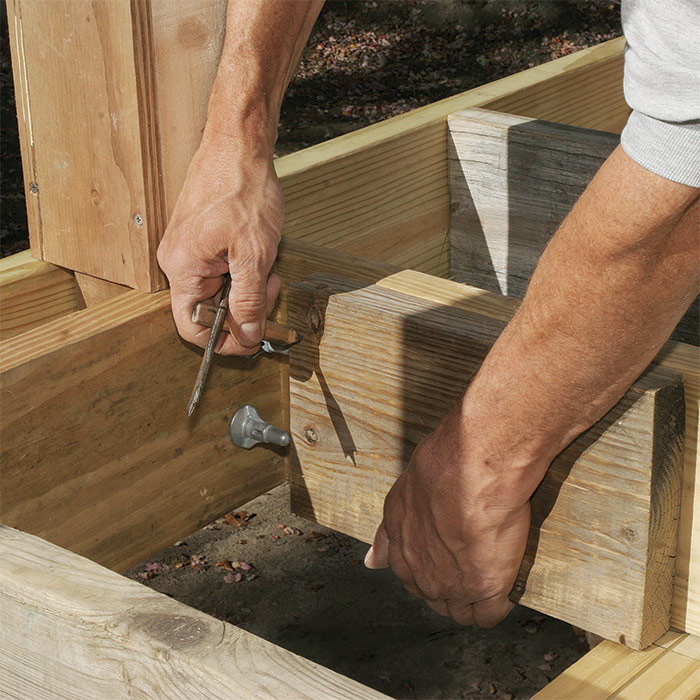
POSTS ON AN END JOIST
To securely mount a post to an end joist, use blocking to tie the end joist to the first joist inboard. As with the corner post, a 4×4 block is bolted behind the post, in this case to reduce the chances of the bolts splitting the 2x blocking if the post is subjected to a heavy load.
Tie the joists together with blocks. Spaced with a scrap of post material, screw two blocks of joist material between the outer pair of joists using 6-in. FlatLoks.
Back up the post with a 4×4 block. Cut to the height of the joists and positioned between the 2x blocks behind the post, the block is secured to the end joist and post with ThruLoks.
Tie the assembly together.
A pair of ThruLok bolts locks the 4×4 block between the 2x blocking to reinforce the post.
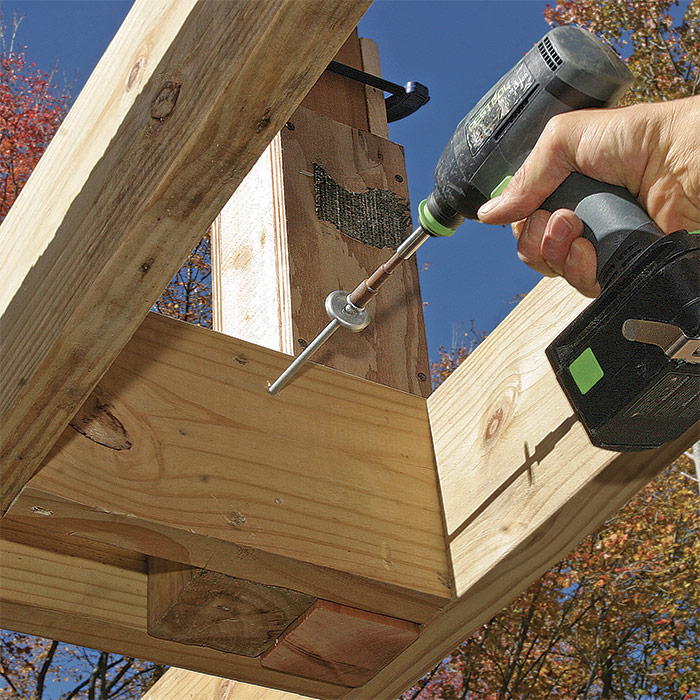
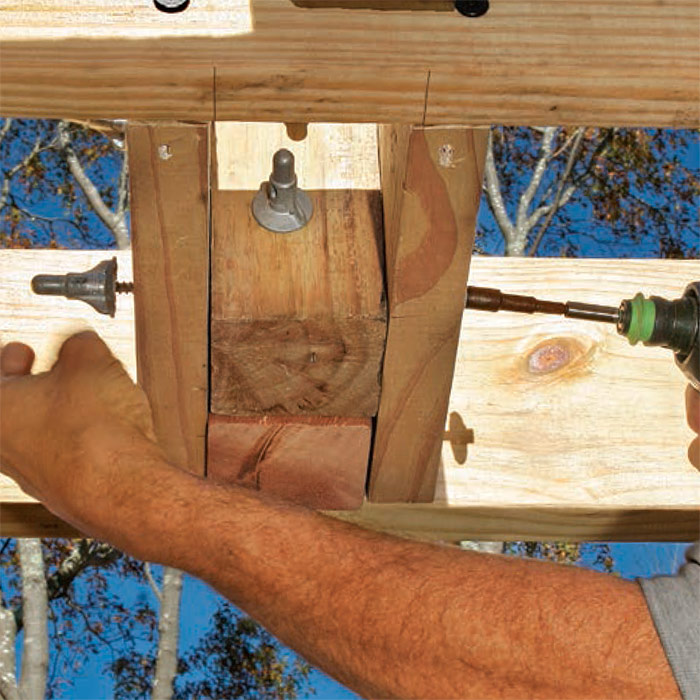
POSTS ON A RIM JOIST
This post could be placed anywhere between two joists. The rim joist is attached to these two joists with two 6-in. FlatLok screws in each. Blocking behind the post and parallel to the rim is reinforced with more blocking screwed to the joists themselves with 3-in. decking screws.
Tie the joists together. Using 6-in. FlatLok screws, secure a piece of blocking to give the post lateral stability.
Screw the post to the rim joist. A pair of 8-in. ThruLoks tie the rim, post, and blocking together.
Add backup. Fasten 16-in.-long 2x blocks behind the blocking sandwiching the post to resist outward forces. Here, a block is marked for notches to clear the ThruLok nuts.
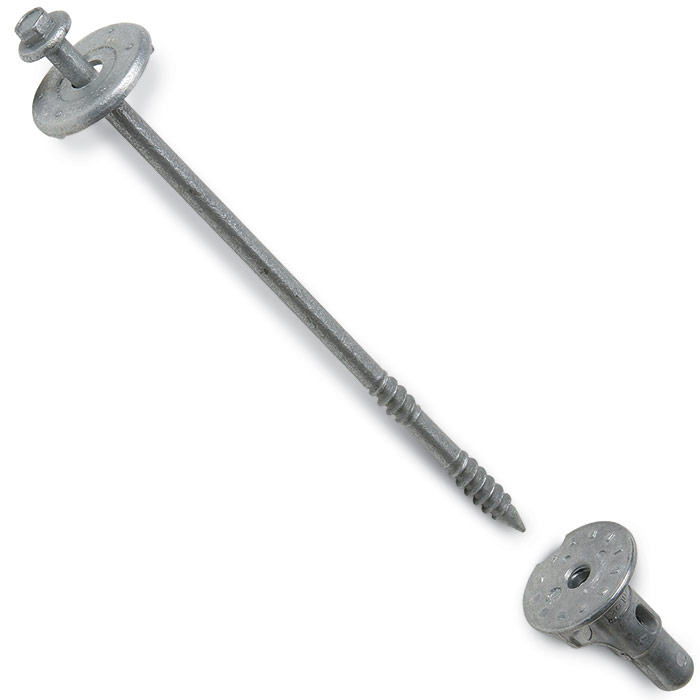
No-drill bolts. FastenMaster’s ThruLok bolts can substitute for 1⁄2-in. galvanized bolts in many deck-building applications. They’re pricier than common bolts but far faster to use. Simply drive the ThruLok through the framing members like a screw. No pilot holes are required. When the fastener protrudes from the far side but is not fully driven, thread on the special nut, and finish driving the fastener. The nut will pull tight as the screw is driven.
ASSEMBLING THE RAIL SECTIONS
To ease matching the baluster spacing between sections, the posts on the outside of the deck are spaced equally, as are the posts along the end of the deck. But the distance between the outside posts differs from that between the end posts by about 2 in., so there are two different baluster layouts. The first step in laying out the balusters is calculating the spacing for the longer railing sections. This involves approximating the spacing and then fiddling with the numbers until they work out evenly.
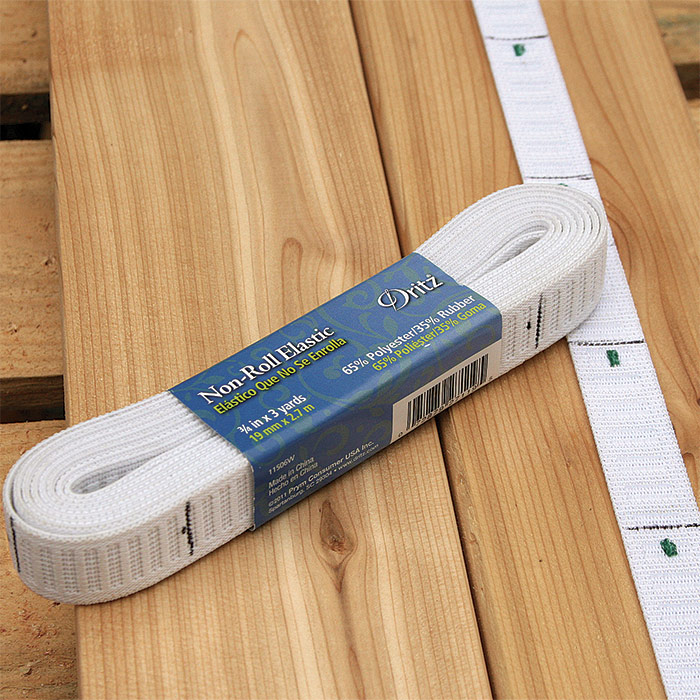
To avoid a noticeable difference in baluster spacing between the railing sections, the spaces between the balusters are microadjusted to hide the 2-in. difference. To do this, I used a template made from 1-in.-wide ribbed nonroll elastic bought for $3 at a fabric store. Because elastic stretches equally along its length, it can be used to lay out baluster patterns on rail sections of different lengths. It changes the spacing proportionately, growing or shrinking depending on the length of the piece being laid out, with no math required.
MAKE THE BALUSTERS
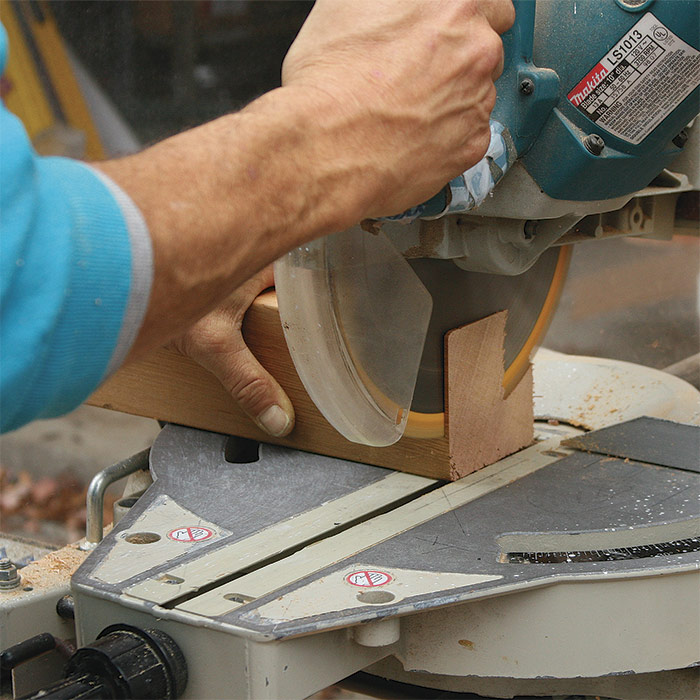
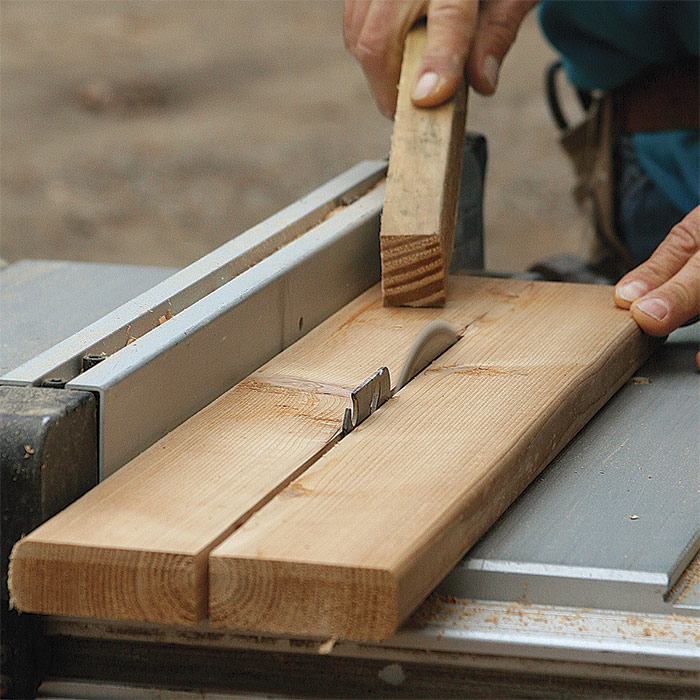
Rip 5/4×6 decking in half. Since the balusters are only 25 in. long, they can be made from scraps and full boards too twisted for decking but fine when cut into short pieces.
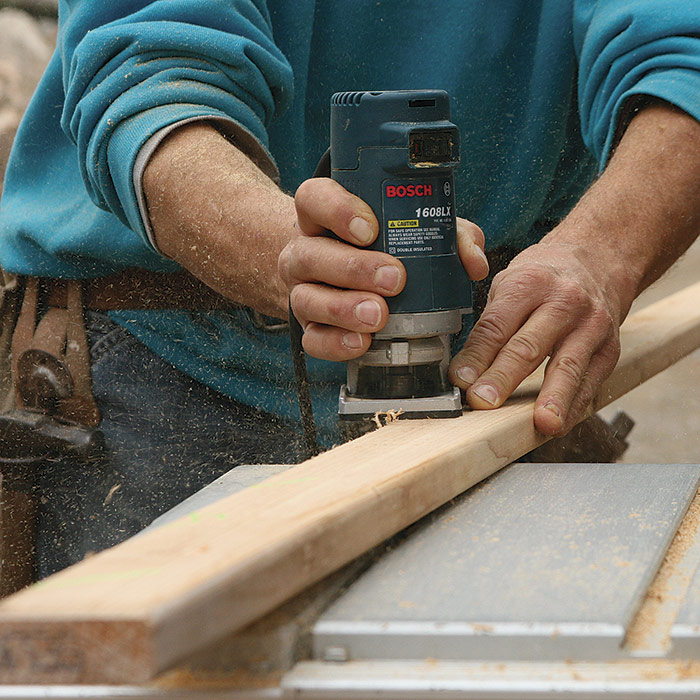
Ease the balusters’ cut edges with a roundover bit in a small router.
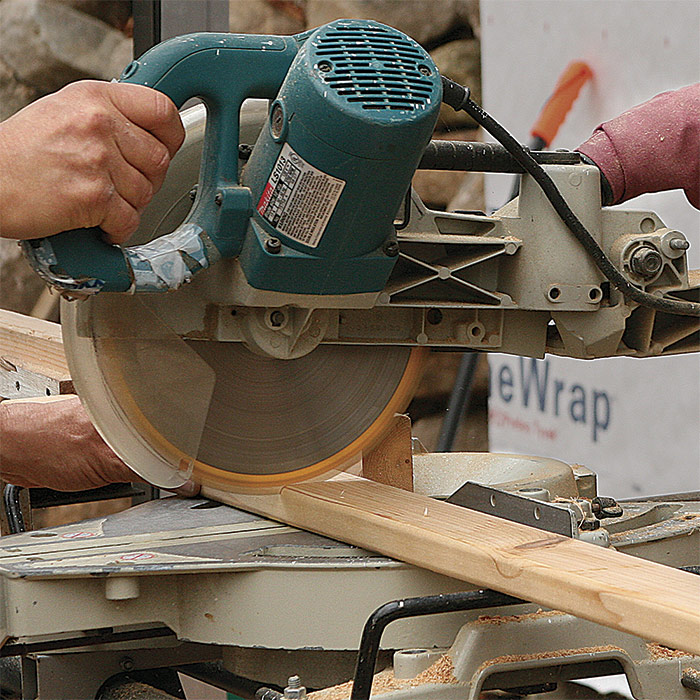
Cutting 70 balusters calls for precision. A stop block on a miter saw helps to make repeated cuts quickly and accurately.
Seal the end grain with Anchorseal (uccoatings.com), a wax-based coating that reduces water wicking and discoloration.
I use 1-in.-wide ribbed non-roll elastic bought for $3 at a fabric store. It changes the spacing proportionately, growing or shrinking depending on the length of the piece being laid out, with no math required.
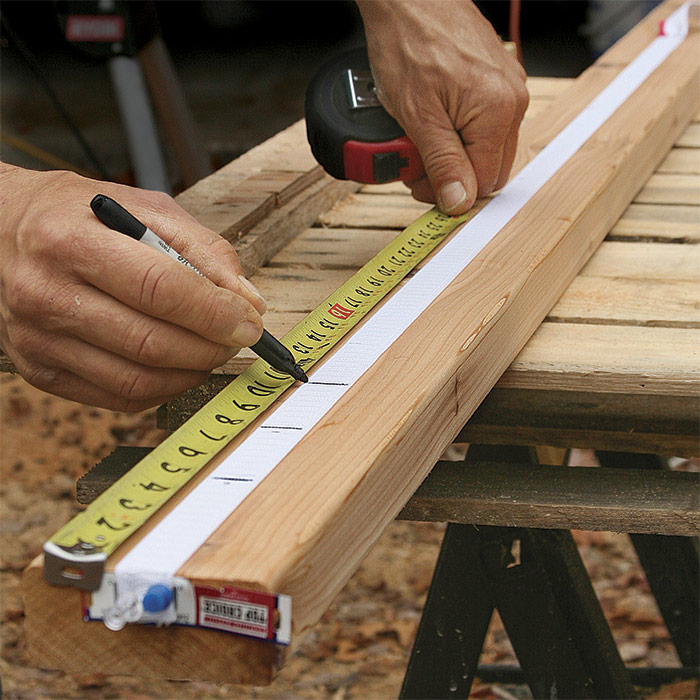
Mark the template. With one end pinned, stretch the elastic about 1 ft. longer than the longest rail. Relax it about 10 in., and pin the other end. Snap it a couple of times to equalize the stretch, then mark the ends of the longest rail and the baluster spacing.
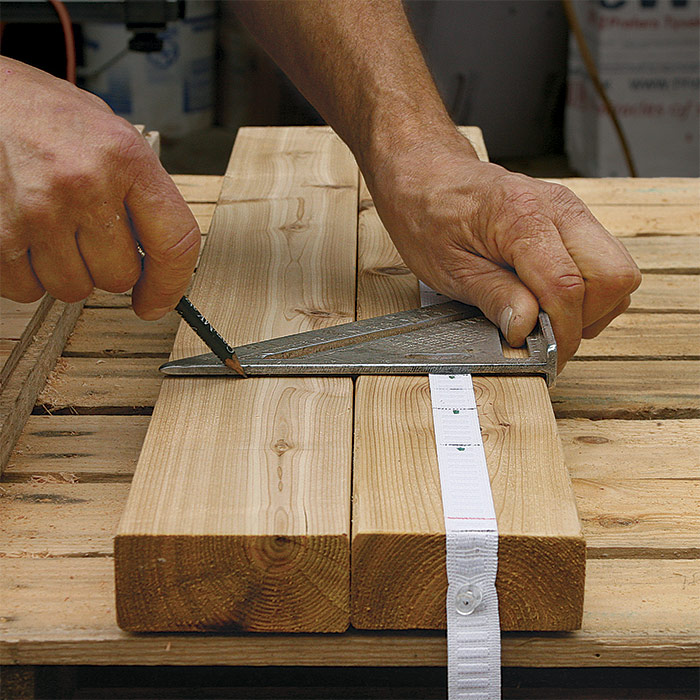
Transfer the layout. Pin the elastic to the shorter rail so that the end marks align with the end of the rail. Snap it a couple of times to equalize it, then transfer the baluster position marks.
Use a template made from aluminum coil stock to drill the rail sections. The two holes in the template are half the baluster thickness in from the edge. Align the template edge with the baluster-edge marks on the rails to center the holes in the balusters.
Assembly bench doubles as a jig. Spaced 24 in. apart, strips of 1⁄2-in. plywood raise the 2-1⁄2-in.-deep balusters 1⁄2 in. off the bench, aligning them perfectly on the 2×4 rails. Two 2-1⁄2-in. stainless-steel trim-head screws hold each baluster to each rail.
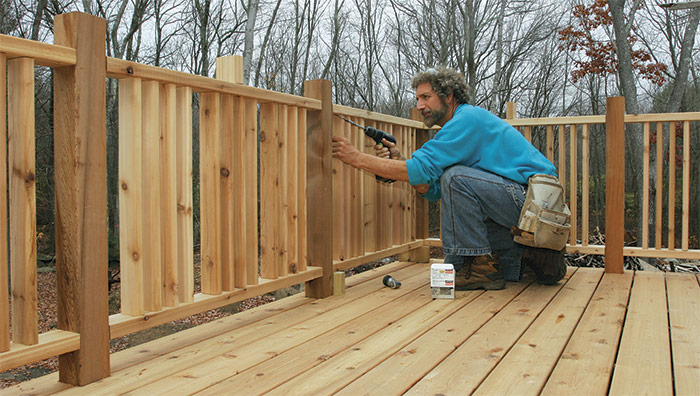
INSTALLING THE RAIL SECTIONS
I like to fasten the preassembled rail sections to the posts from below, hiding the fasteners and making it so that the screw holes won’t collect moisture.
The 5/4×6-decking cap rail runs the length of each side of the deck and is screwed to the posts. Additional 2×4 blocking supports the cap rail between the posts and ensures that the railing height and the space between the cap and the rail below remain code-compliant. All the fasteners are stainless steel to prevent corrosion from weakening the connections and staining the cedar.
Fasten the top first. Spacer blocks hold the railing the correct height off the decking. A long extension helps to set the screws without the spinning driver marring the balusters.
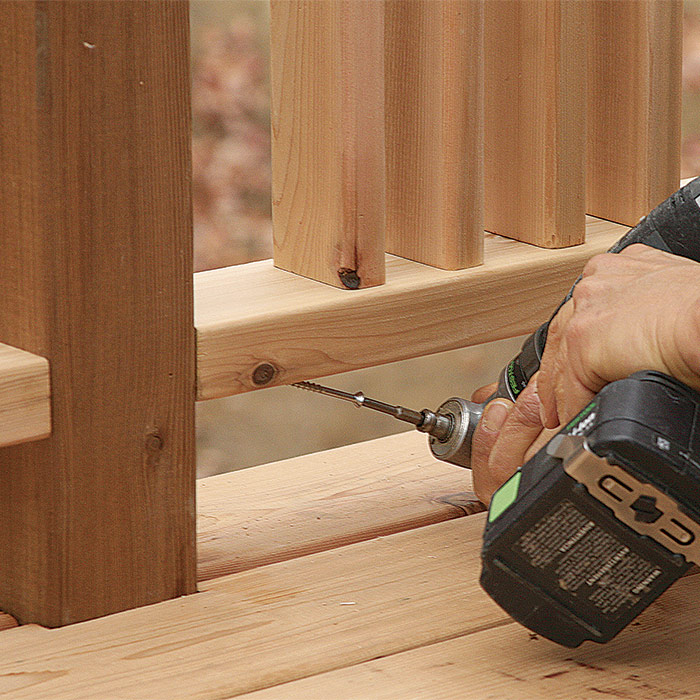
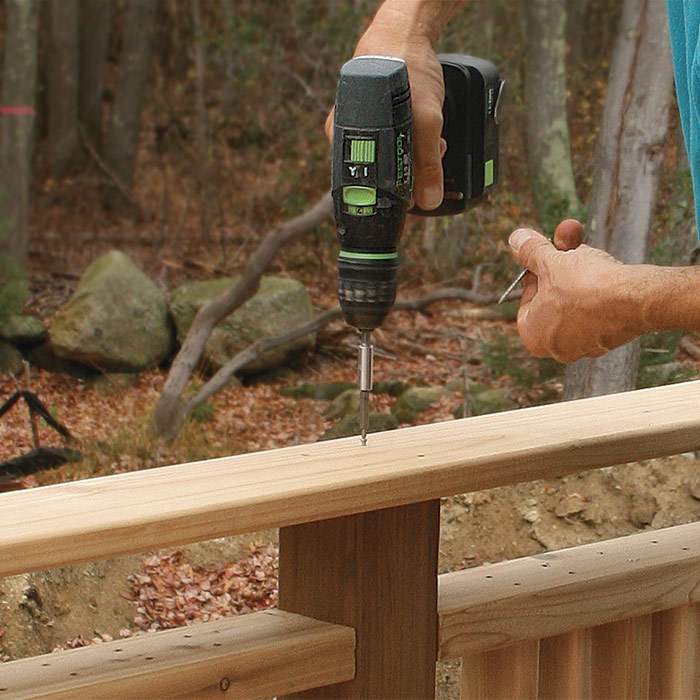
Drill the rails for toe-screws. The rails are screwed to the 4×4 posts from the bottom to hide the 2-1⁄2-in. stainless-steel screws. Drill the pilot holes at about a 60° angle through the bottom ends of the rails.
Fasten the bottom. After removing the blocks spacing the rail off the deck surface, drive the lower screws. The clearance is tight, but a right-angle drill attachment helps to set them.
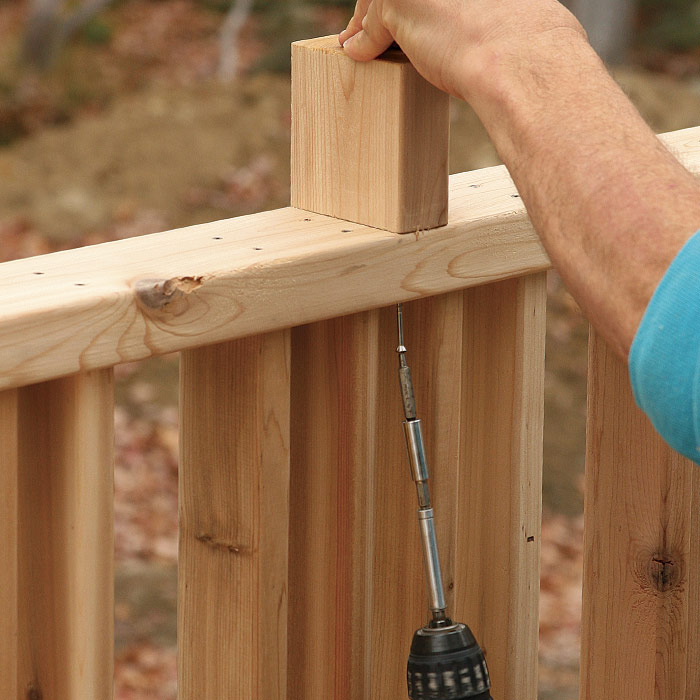
Screw the center blocks. To maintain the 4-in. spacing between the cap rail and the railing section below, fasten 2×4 blocks with 2-1⁄2-in. stainless-steel screws. Like the posts, the tops pitch 3° for drainage.
Make the cap rail from straight decking boards. Because the tops of the posts are pitched slightly, the cap rail slopes outward to shed water. Screw the cap rail down with stainless-steel trim-head screws.
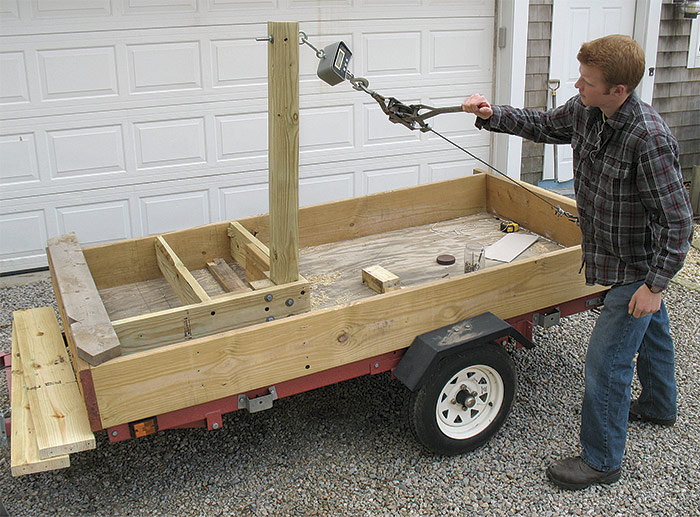
Testing post connections About 15 years ago, Virginia Tech’s Frank Woeste tested common post connections, all of which failed before they reached the IRC’s 200-lb. load requirement (plus the standard safety factor of 250%, which loaded the assemblies to 500 lb.). I approximated his methods to test my connections with FastenMaster’s hardware and with 1⁄2-in. bolts. In my tests, all of the connections shown here met the 500-lb. load requirement. I have not tested the railing-to-post connection, but smaller single screws resisted 1400 lb., and each section of rail is held in place by eight such screws.
For more photos and details on deck railings, click the View PDF button below.
Fine Homebuilding Recommended Products
Fine Homebuilding receives a commission for items purchased through links on this site, including Amazon Associates and other affiliate advertising programs.
Flashing and Joist Tape
Flashing joists is a great way to prolong the life of a deck frame — after all, moisture management is key to longevity.
This is a dialog window which overlays the main content of the page. The modal window is a 'site map' of the most critical areas of the site. Pressing the Escape (ESC) button will close the modal and bring you back to where you were on the page.
We use cookies, pixels, script and other tracking technologies to analyze and improve our service, to improve and personalize content, and for advertising to you.
We also share information about your use of our site with third-party social media, advertising and analytics partners.
You can view our Privacy Policy
here and our Terms of Use here.