How to Install Composite Decking
Builder Clemens Jellema details the process of finishing a custom deck using capstock planks and hidden fasteners.
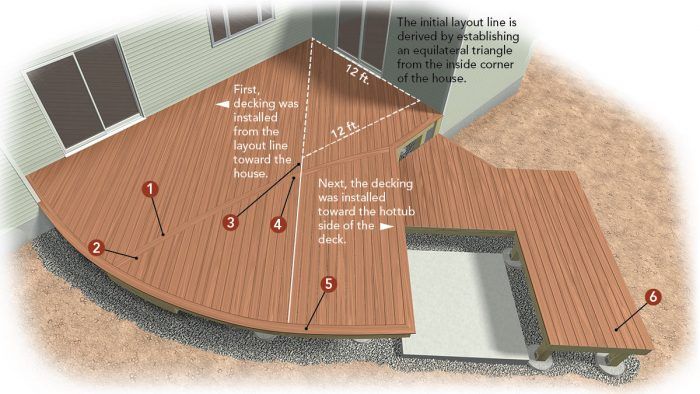
Click here to enlarge the illustration.
The decking is the finish that everyone notices, so the material choice, installation, and design are important. First, it should provide a durable finish for the deck. After years of trial and error, I’ve decided that capstock composite decking is the best. (Capstock has a thin skin of tough plastic applied to its surface. Capping makes the surface last longer and increases its resistance to staining and fading.) We used Fiberon’s Horizon decking on this job, but I also like the capped products made by Trex, Azek, and EverGrain. They often cost $1 to $2 per ft. more than regular composite decking.
The Fiberon decking is installed with hidden fasteners, which give the deck a clean look. We screwed and plugged the perimeter and accent boards, which couldn’t be securely attached with the hidden fasteners.
The homeowners didn’t want to see any field joints in the decking, but that meant board lengths would exceed the 20-ft. pieces available. I decided to use a one-board outer perimeter of a darker color, and then run an accent board bent in the same radius across the center of the deck. The accent board provides a clean break in the decking and lends some flair to the field.
1. Trace the accent
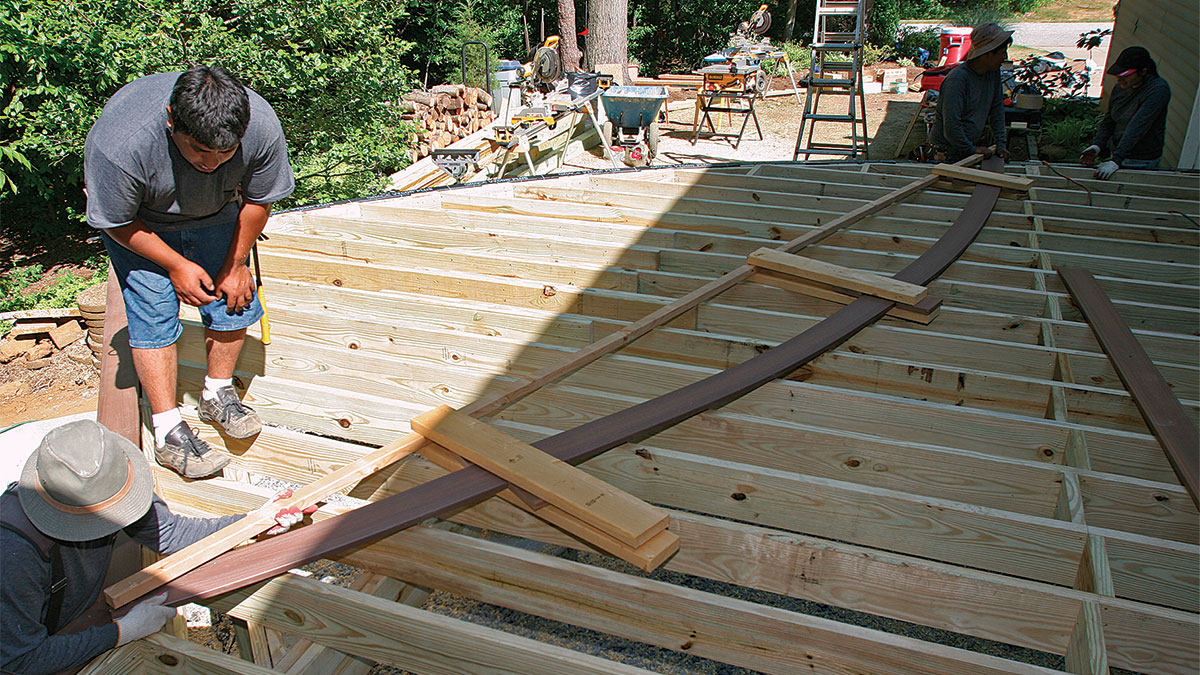
Template for blocking. The easiest way to locate the blocking for the curved accent is to lay the board in place and mark its position (sidebar a bottom).
2. Blocking comes next
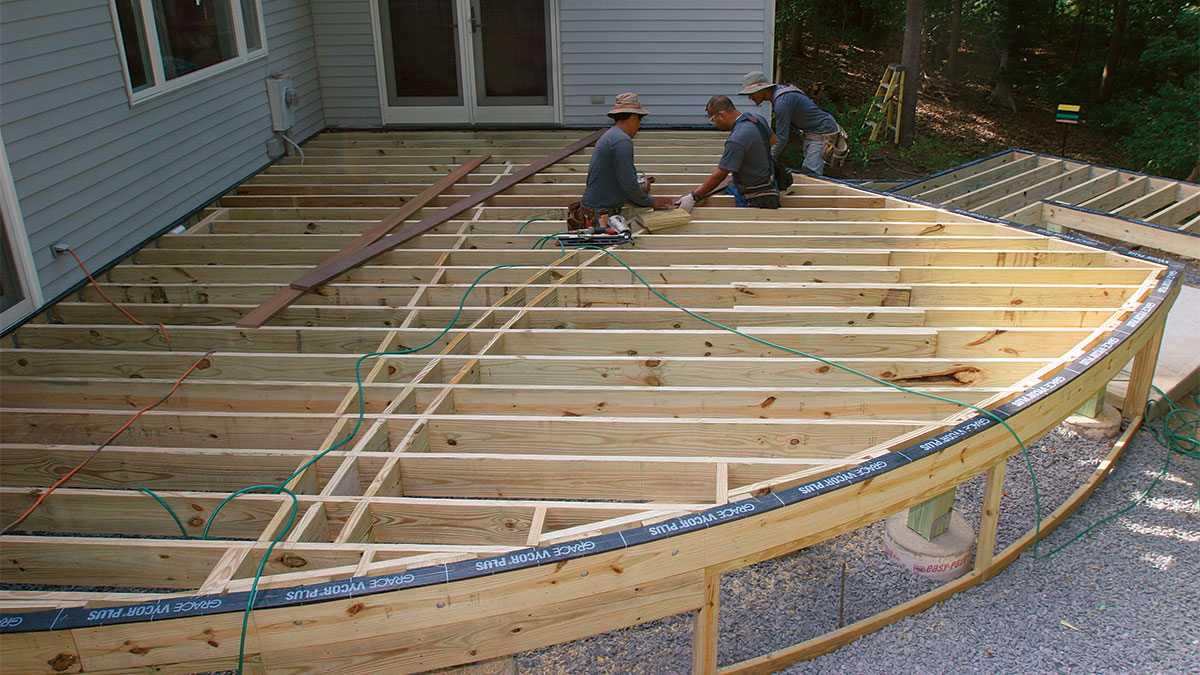
Proper support counts. Workers cut and nail blocking on each side of the accent strip to provide a nail base for the decking ends that terminate against the strip.
3. Decking is laid out
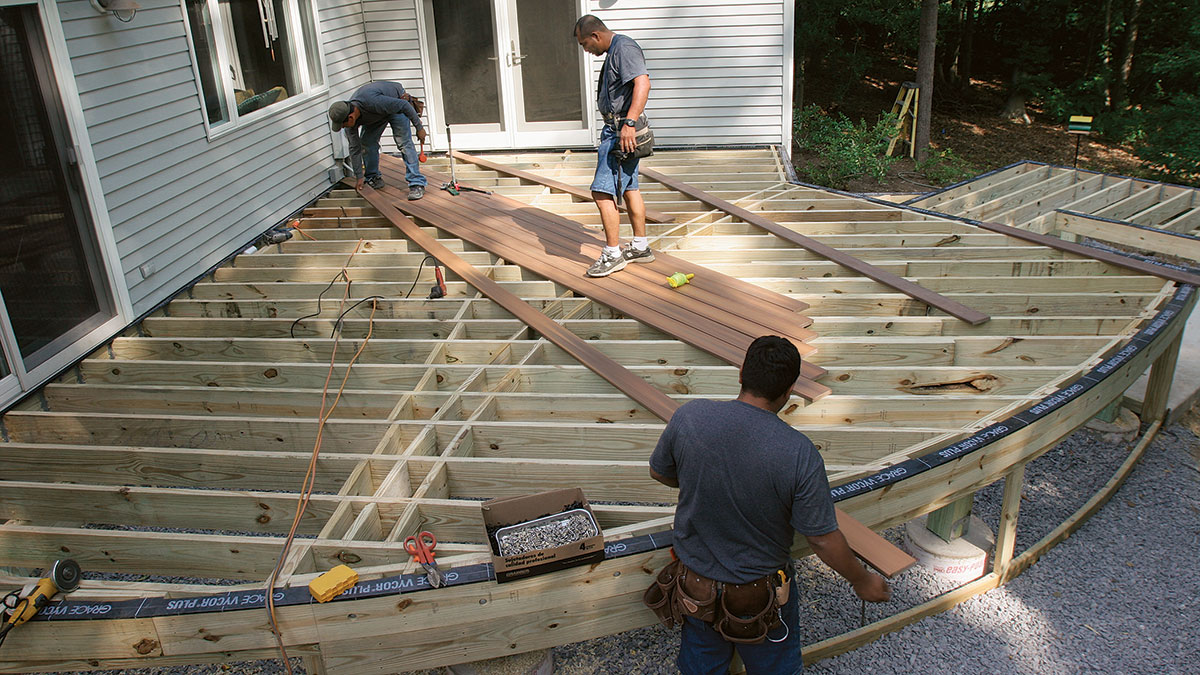
Diagonal layout starts from the corner. To add visual interest, the decking is installed at a 45° angle. After snapping a reference line at the deck’s midpoint, the crew works toward the house, then back toward the hot-tub deck.
4. Trim creates an accent
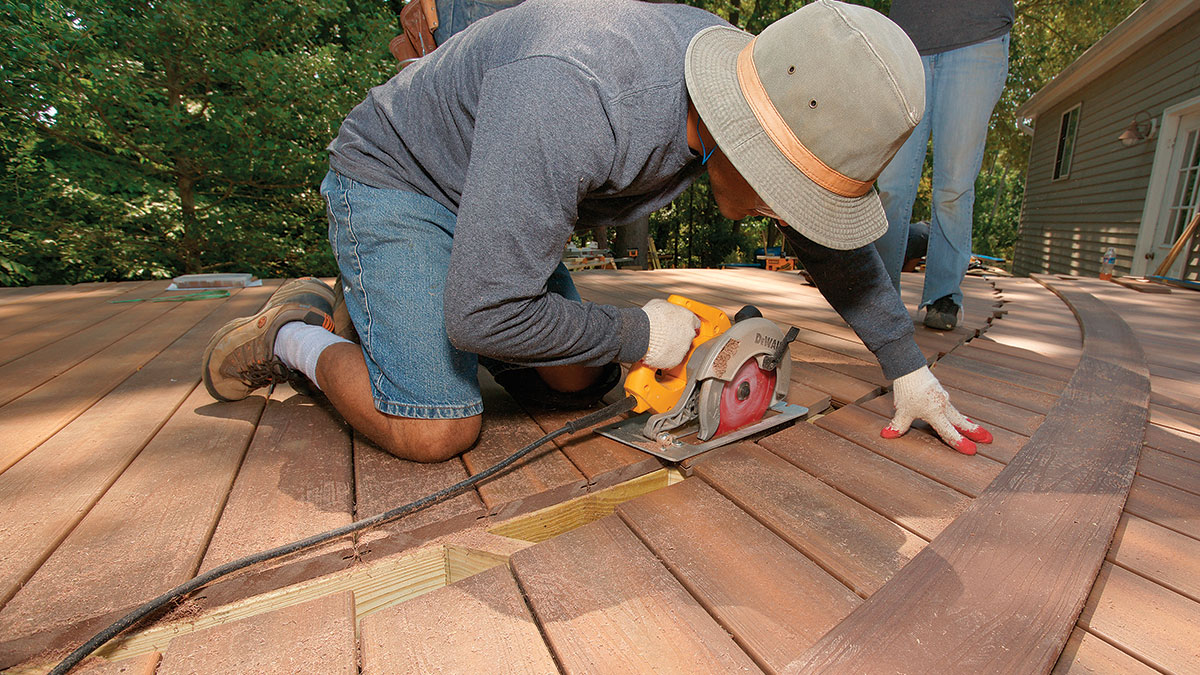
A long, careful cut. After the decking is installed and rough-cut to end at the decorative strip, the curved accent strip is scribed onto the decking. The line is then cut with a saw set to a shallow depth.
5. Wrap the perimeter
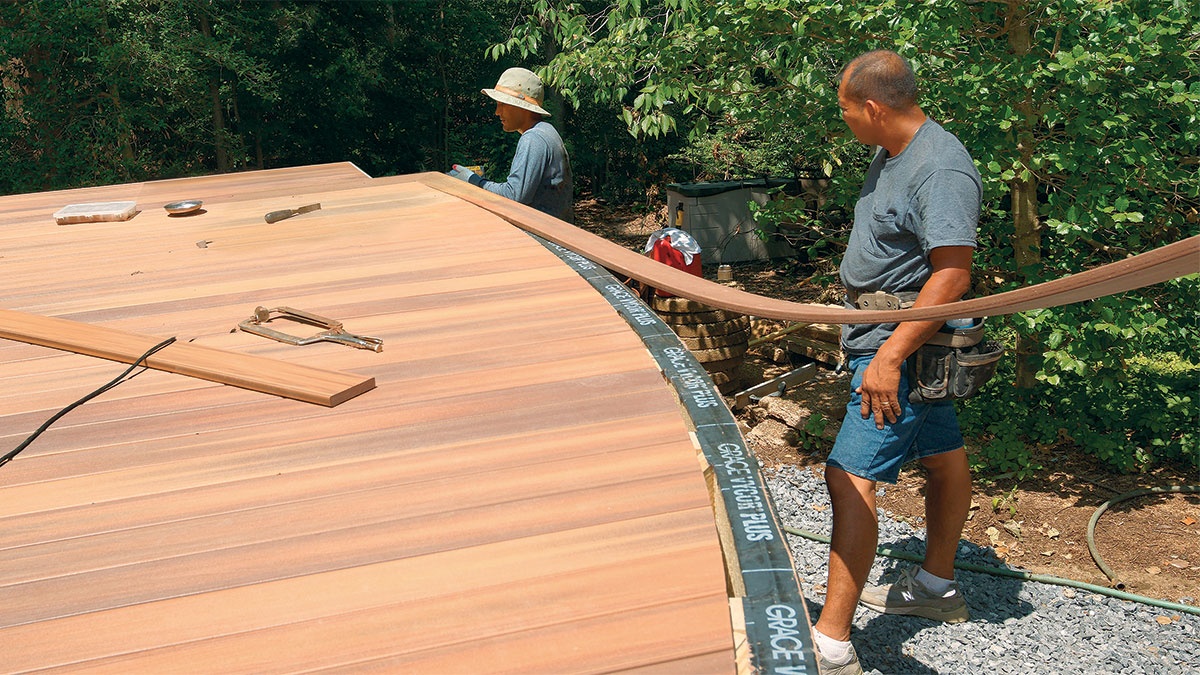
Perimeter goes on last. Once the decking is run past the edge, the perimeter board is scribed in place. The decking ends are trimmed, and the board is installed with screws and plugs.
6. Be sure to keep decking parallel
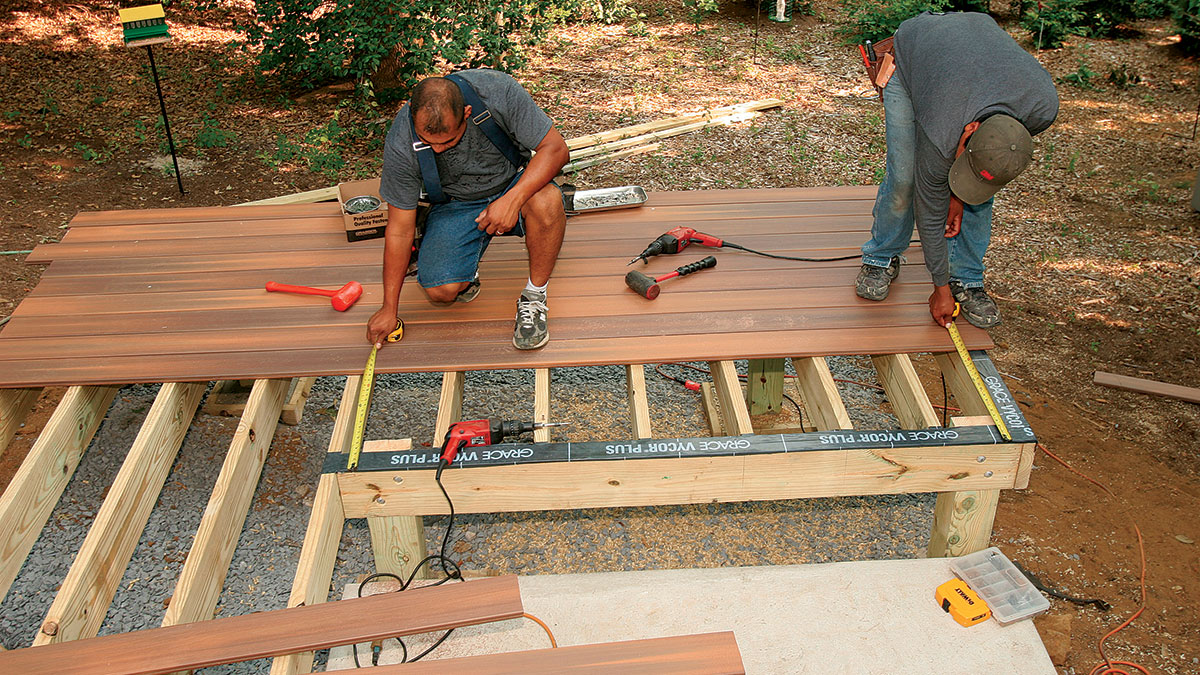
Don’t assume perfection. Despite the fact that the decking is factory-made, the layout can get off track due to inconsistencies in the material and the hidden fasteners. Checking the measurements every three or four boards keeps the layout under control.
Low-tech bending techniques
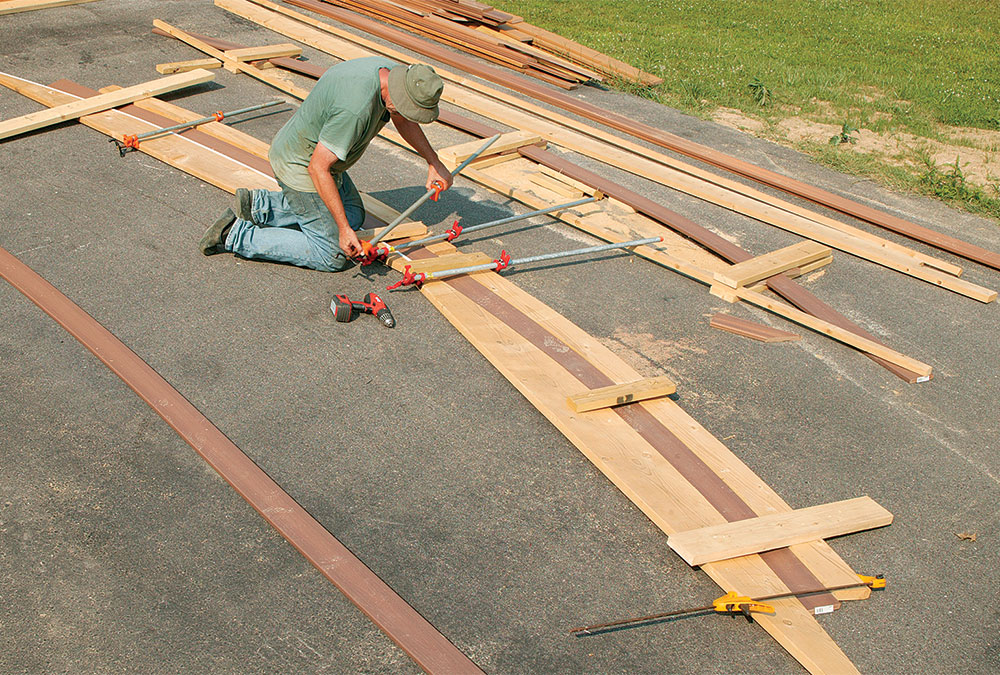
We couldn’t kerf the decking as we did the rim because the required bend was across the flat, not the edge. Luckily, we needed to bend only three boards, they were made of plastic, and it was summer. First, I cut a template of the curve from a pair of 2x12s laid end to end. On a hot day, I laid a 16-ft. length of decking on the driveway. After a few hours, the decking was about 120°F and limp as a noodle. I clamped it between both sides of the template, screwing a brace across the top every few feet. I cooled the board with cold water, bringing down the temperature enough to keep the correct radius in place. I reinforced the curve by keeping the board in a brace until I was ready to use it.
To see how we built this entire deck, read the article:
The Complete Guide to Building a Multi-Level Deck
Fine Homebuilding Recommended Products
Fine Homebuilding receives a commission for items purchased through links on this site, including Amazon Associates and other affiliate advertising programs.

Metal Connector Nailer

Standard Marking Chalk

Flashing and Joist Tape




View Comments
If the intent of the decking layout is to bisect the angle between the house wall and the small wing to the right (i.e. decking is oriented at 45° to each wall), the whoever anointed the first photo must have flunked geometry - that is NOT an equilateral triangle (which is 3 equal length sides). It is a right triangle with equal length legs each side of the 90° corner. The longer leg's length would be just short of 17'.
I've some suggestions to share based on my recent experience. The step-by-step approach helped the process smoothly. Planning the layout was key – took a bit of time, but totally worth it for the polished finish. I opted for hidden fasteners, and the result is a sleek, screw-free surface. Plus, the low-maintenance aspect is a game-changer.