
Framing Basics: 3 Tips for Laying Out Wall Plates
Pro framers Larry Haun and Scott Grice share their top layout tips for wall framing.
Simplicity and clarity are the key to a perfect wall layout. Here are Larry Haun and Scott Grice’s top three tips for laying out wall plates.
1. Mark the corners and wall intersections first
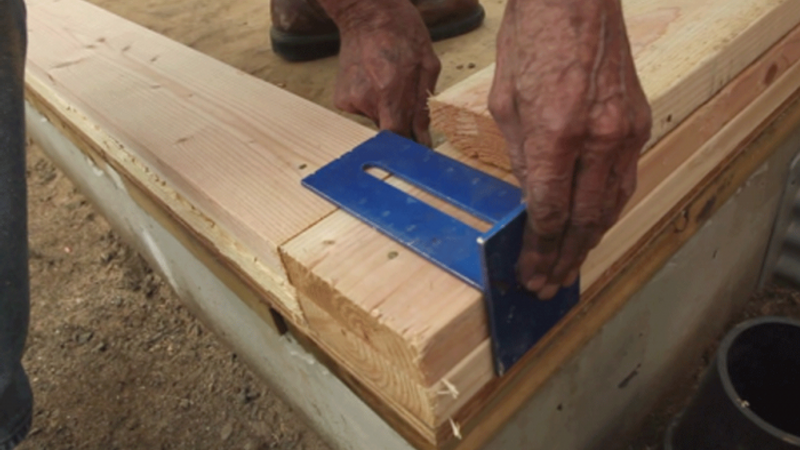
Use a corner marker (which may be a tool you’ve never seen before) or square to mark the locations where the butt walls hit the through walls. This is where the stud layout starts. To use a square, follow the plates up, square it across, and square it down. Lay the corner marker on the corner, and mark both edges and the outside. You can make a corner marker with either a piece of 2×6 or 2×4. Allow 3 in. (the thickness of the plates) to hang over one side of a T, and nail the two pieces of wood together. It’s important that all interior walls have marks because this shows where the butt or interior wall goes.
2. Use double top plates to guide the second-floor layout
A double top plate has to span any break in the plates below by 4 ft. minimum on each side. Applying the double top plate first allows you to run the joist layout done while the walls are on the ground. This way, you’re not running the joist layout on a ladder. Or you can just double-top-plate the walls that have joists on them. Walls without joists don’t need to be double-top-plated; this can be done during framing.
3. Use the right tools to mark the layout quickly and accurately
Detail or lay out all studs, windows, doors, etc. You can use either a 50-ft. tape or a layout stick. Using the layout stick, place the edge half on the end of the wall plates. Mark both sides of the layout stick every 2 ft. The mark on the double top plate is where the joist will sit, and the mark on the top plate is where the stud will fall. Lay out every stud in every wall, but keep in mind that simplicity and clarity are the key. Too many marks, and the framers can’t follow your work.
Watch Scott and Larry’s previous videos on wall framing:
Framing Basics: 6 Tips for Spreading Wall Plates on a Subfloor
The Top 10 Tips for Wall-Framing Layout on a New Subfloor

View Comments
Whats upp here.. When laying out walls on the floor we were told to save time by only marking and popping one side of the wall..Now we are seeing this out dated archaic aluminum layout story pole marking oth sides of every stud.. There are much quicker ways to get this done.. Not too many ways to do it slower
Whats upp here.. When laying out walls on the floor we were told to save time by only marking and popping one side of the wall..Now we are seeing this out dated archaic aluminum layout story pole marking both sides of every stud.. There are much quicker ways to get this done.. Not too many ways to do it slower
You may think it's archaic, but how long would it take you to hook on your tape, travel along the plates marking out the stud locations, then go back along the plates squaring lines across - up & down. If your using a 25ft tape you'd have to unhook it, drive in a nail or awl & start where you left off.
Layout of the joist or truss locations can be accomplished you follow Scott & Larry's technique of placing the double top plates as well...safer & quicker as well.
The layout tool does both jobs in one pass instead of 4.
Some good tips guys. Didn't know Willie Nelson worked as a framer in the off-season!