FHB Logo Facebook LinkedIn Email Pinterest Twitter Instagram Tiktok YouTube Plus Icon Close Icon Navigation Search Icon Navigation Search Icon Arrow Down Icon Video Guide Icon Article Guide Icon Modal Close Icon Guide Search Icon Skip to content
Subscribe
Log In
  • How-To
  • Design
  • Tools & Materials
  • Videos
  • Blogs
  • Forum
  • Magazine
  • Members
  • FHB House
  • Podcast
Log In

Fine Homebuilding Project Guides

Decks

Guide Home
  • Design & Planning
  • Tools & Materials
  • Footings & Foundations
  • Framing a Deck
  • Installing Decking
  • Installing Railings
  • Deck Stairs
  • Custom Details
  • Finishes, Repairs, and Maintenance
  • Complete Deck Builds
How-To

Adding LED Lights to Deck Stair Risers

Install low-voltage stair lights for safety and style.

By David Toht

It’s not every day that safety combines so nicely with aesthetics, but adding LED lights to stair risers is a finishing touch that does just that. The small LED fixtures put light exactly where you need it—right on the tread. At the same time, they add a pleasing bit of glamour to the deck. The number of lights per riser is up to you, but plan on a minimum of one every other riser for adequate stairway illumination. Usually these lights come in complete kits with everything you need to install them. If you can’t find them locally, Amazon.com or other online retailers are a good place to look.

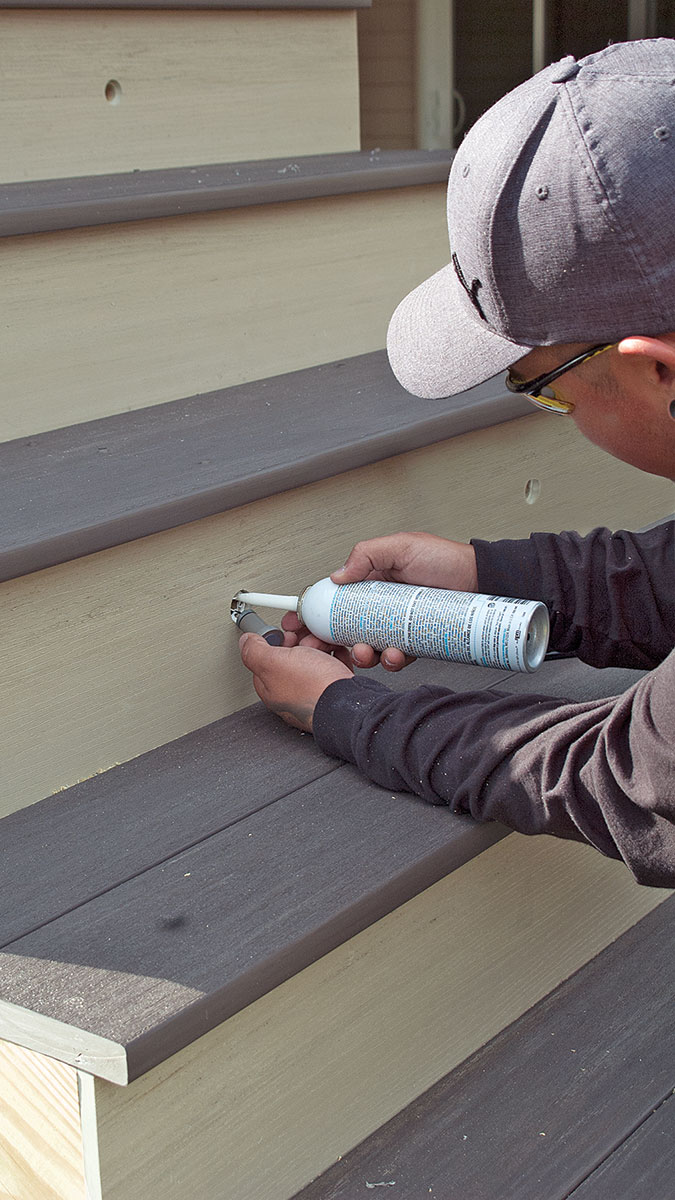
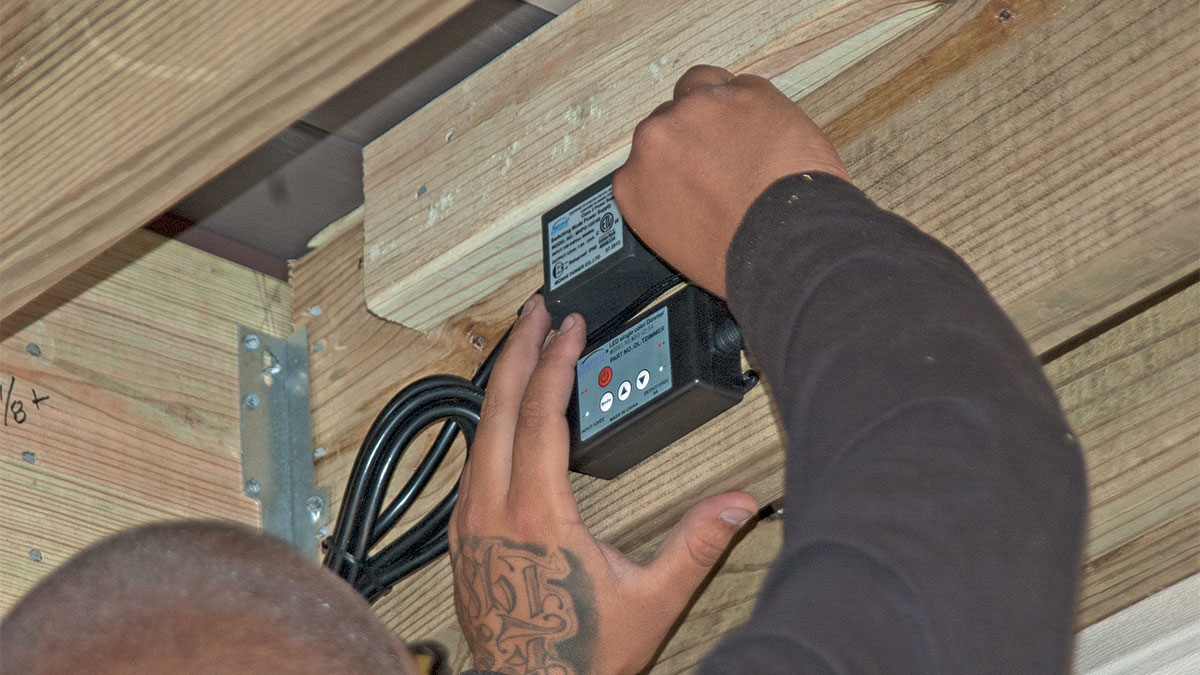
Thanks to a specialty bit that comes with the lighting kit, these LEDs install in a couple of hours. The two-level bit bores an access hole for the cylindrical fixture. Once you feed in the leads, the fixture glues in place with just a touch of caulk. Wired in a series, the lights can be quickly connected to the LED transformer and dimmer control so you can control stair and post lights with one click of a remote. Here’s how to install them.

the tools necessary to complete this job

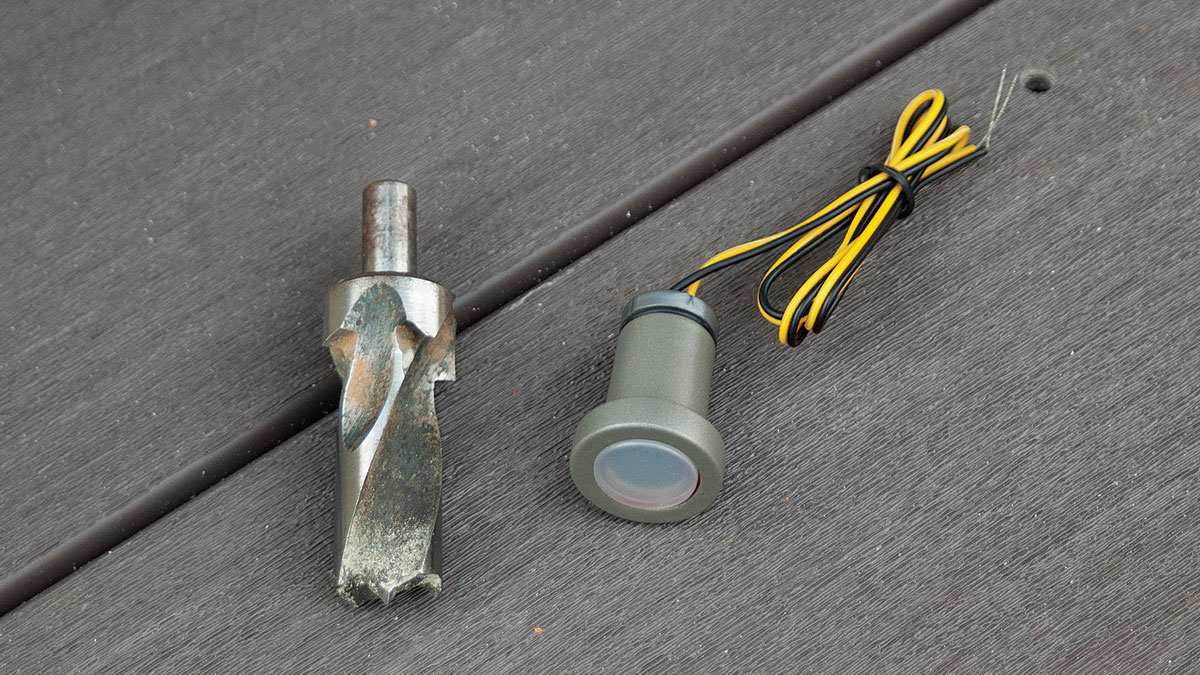
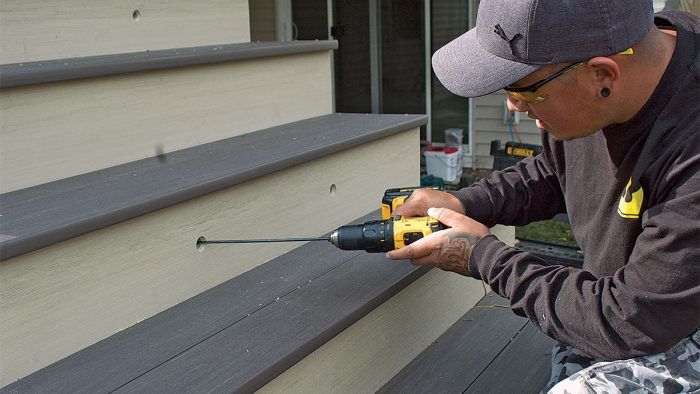
1. Gather the stair-lighting hardware. This type of LED light fits flush into the riser. What makes that possible is a clever bit included in the lighting kit that bores a hole just the right size for the fixture housing, then bores a hole for the fixture trim so the light pushes in flush with the surface.

person drilling a hole 
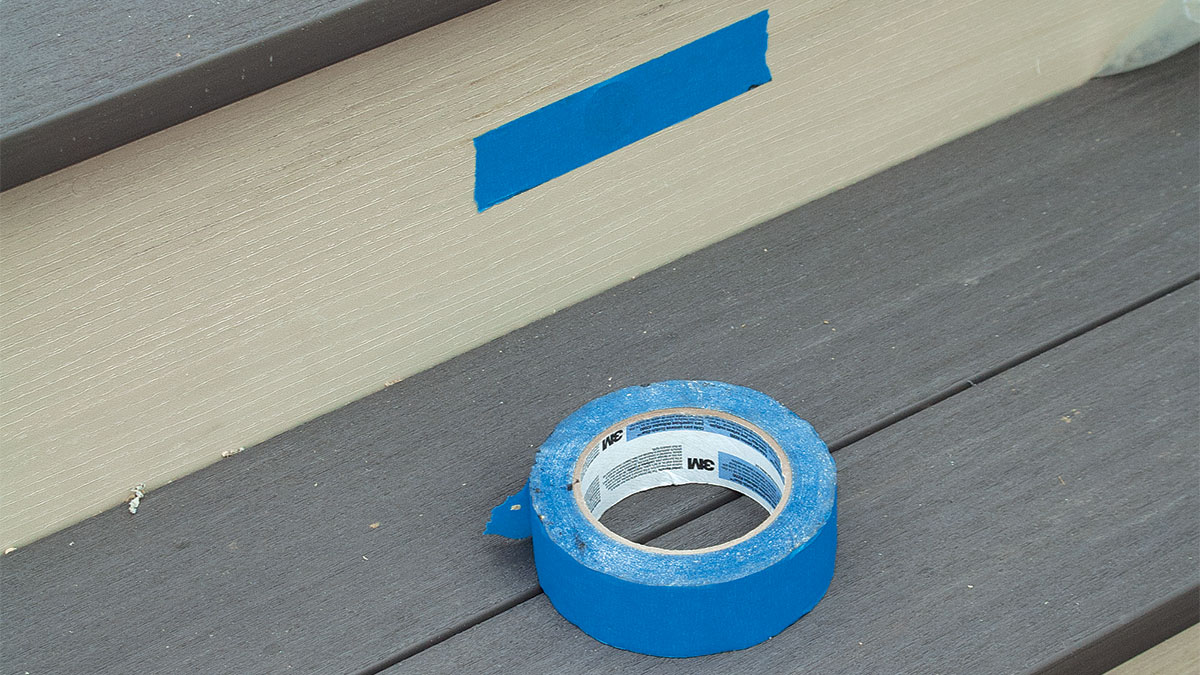
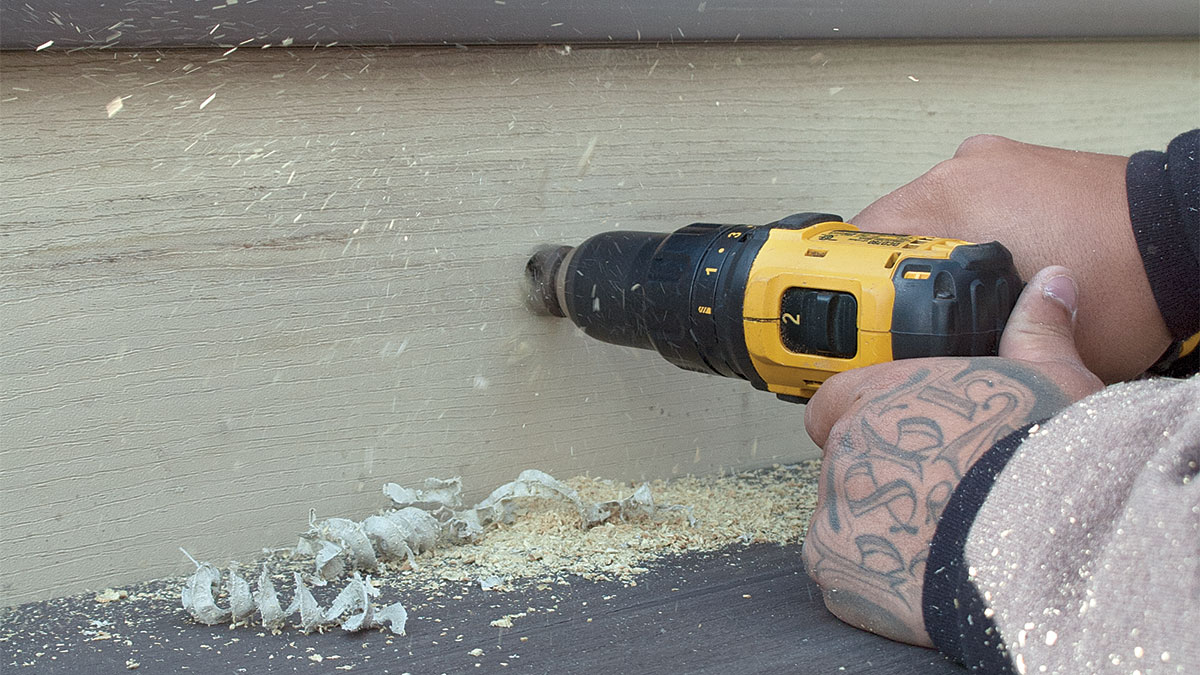
2. Bore holes in risers. Mark the location for each light. Adding lights to every other riser provides adequate illumination and keeps the stairway from looking busy. Two lights spaced evenly in every other riser do the job. Use the specialty bit to bore the tiered hole for each light. additional image of person holding a drill creating a hole 3. Drill wire access hole. In some cases, your light might be located directly in front of a stringer. If so, use a long 1/2-in. bit to drill through the stringer so you can feed wires to the back of the stairway.
person pushing wire through 
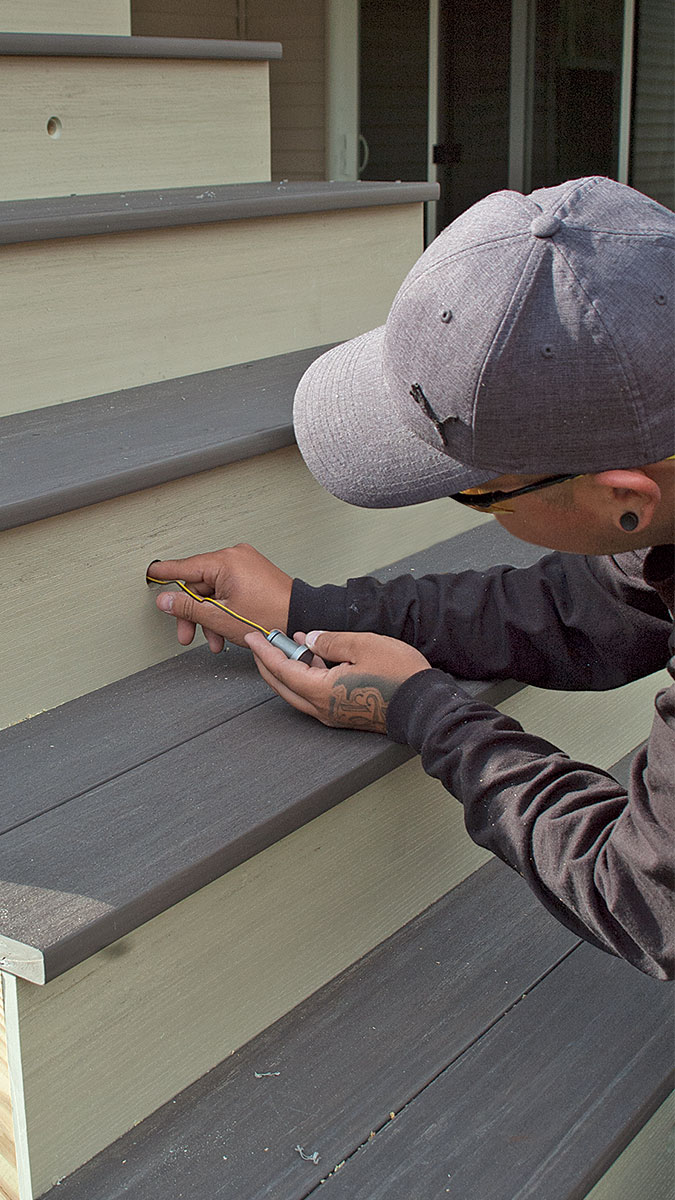
4. Push in the wires. Twist the ends of the wires together and gently feed them into the riser. adding caulk to the drilled hole 5. Add caulk. Before pushing the light into place, add a bit of caulk as an adhesive.
pushing the light in 
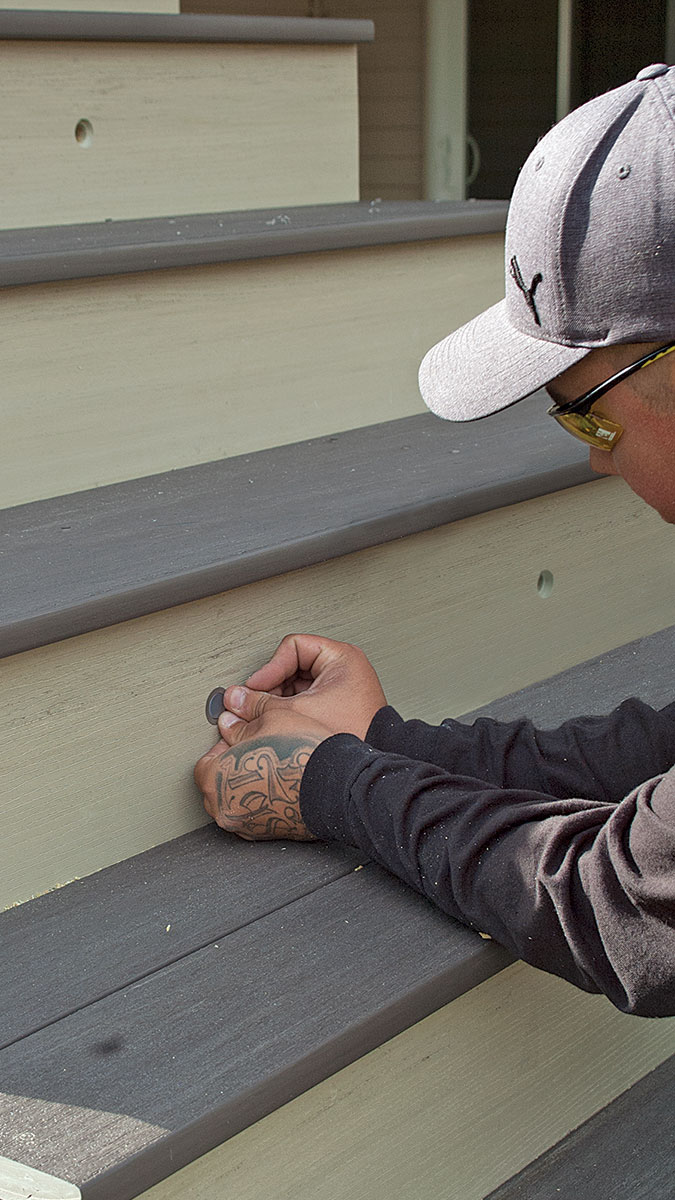
6. Push in the light. Press the light into the riser until its rim is flush with the surface. covering the light with masking tape 7. Let caulk dry. Cover the light with masking tape to stabilize it while wiring. Leave the tape on overnight to allow the caulk to set up.
person holding a cable 
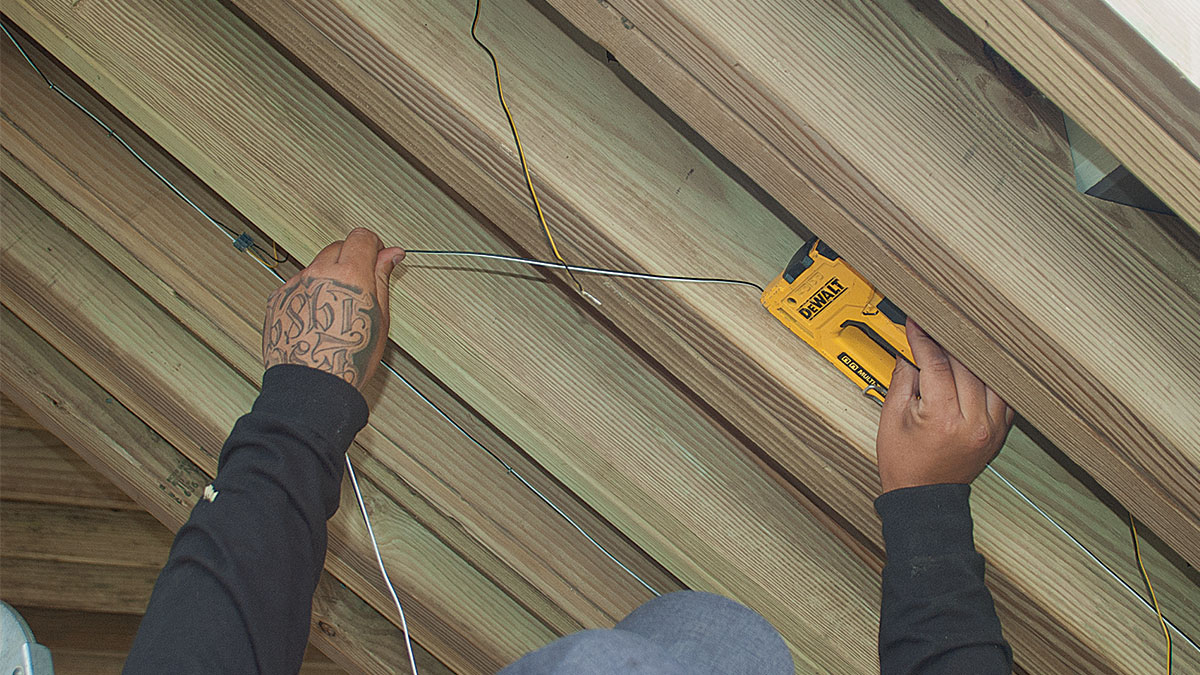
8. Run cable. Staple a two-wire feeder line—the main cable to which the leads from the lights are attached—behind the stairway. Leave some slack in it so you can easily make connections. person holding pliers trimming the cable 9. Trim the leads from the light. Trim the lead from each light, leaving enough wire to easily reach the feeder line.
the crimp on connector 
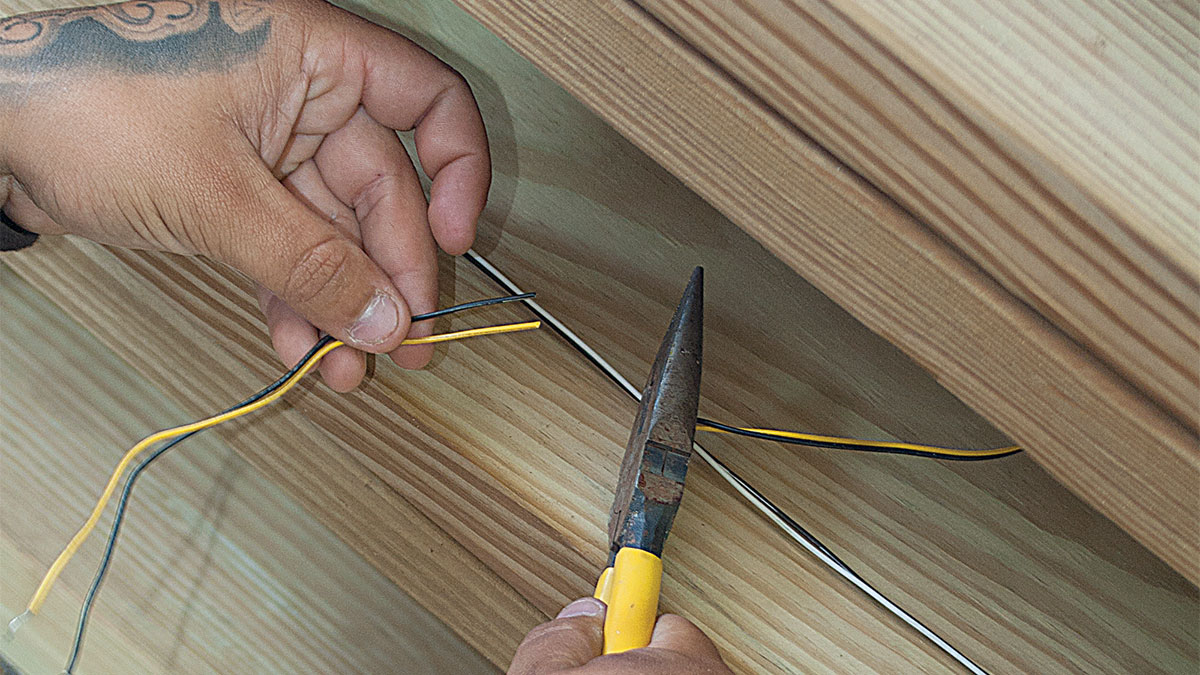
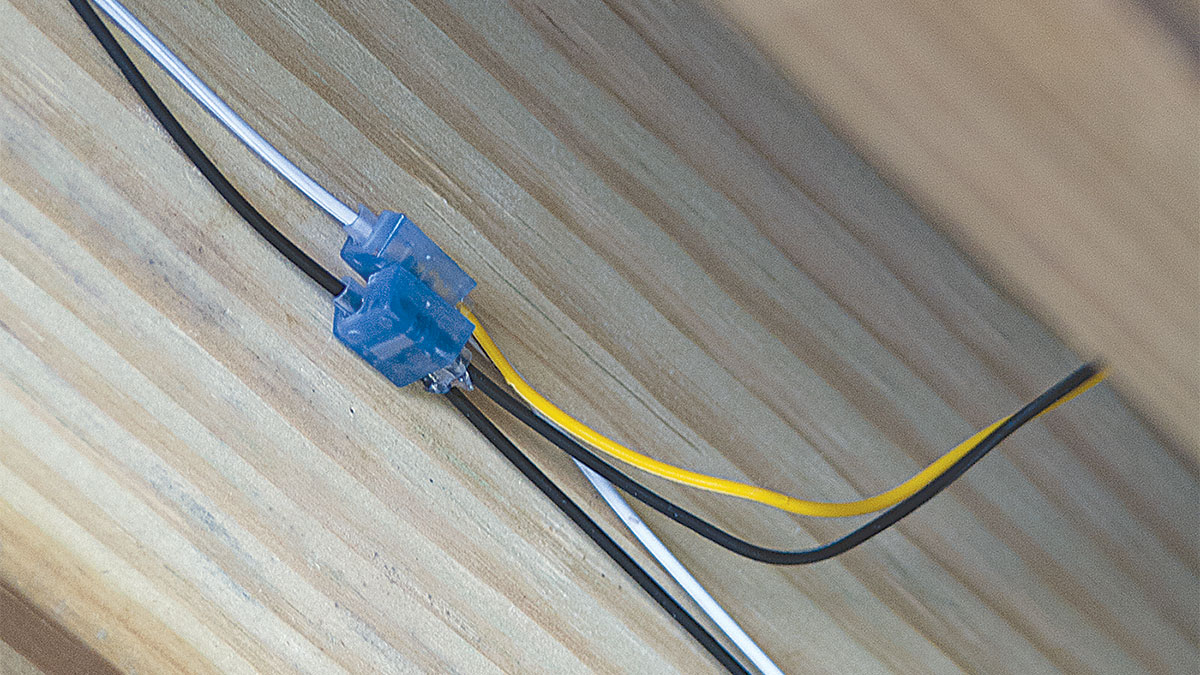
10. Splice the leads to the feeder. A crimp-on connector joins the leads to the feeder line. You simply clip the connector onto a feeder line and then push in one of the leads. No stripping is necessary—the connector bites into the wires as you crimp it with pliers. Once crimped, the connection is permanent. the LED transformer is shown here 11. Make connections at the LED transformer and dimmer. Install the LED transformer and dimmer control within reach of a GFCI receptacle. Connect the feeder lines, plug in the transformer, and use the remote switch provided to test your installation.


Sign up for eletters today and get the latest how-to from Fine Homebuilding, plus special offers.

Signing you up...

This site is protected by reCAPTCHA and the Google Privacy Policy and Terms of Service apply.
See all newsletters
See all newsletters
Previous: High-Quality Deck Lighting Next: Deck Lighting

Guide

Decks

Chapter

Custom Details

Log in or create an account to post a comment.

Sign up Log in

Become a member and get full access to FineHomebuilding.com

Decks

Decks

Hundreds of articles and videos by top deck-building pros on how to design and build a beautiful, sturdy, and safe deck

View Project Guide

View All Project Guides »

Become a member and get unlimited site access, including the Decks Project Guide.

Start Free Trial

Design & Planning
  • Basic Design Options
  • Generating Plans
  • Calculating Deck Loads
  • Code Compliance
Tools & Materials
  • Deck Building Tools
  • Foundation and Framing Materials
  • Decking Materials
  • Fasteners and Hardware
Footings & Foundations
  • Choosing a Foundation
  • Sizing and Laying Out Footings
  • Excavation
  • Pouring the Foundation
Framing a Deck
  • Framing Overview
  • Installing the Ledger
  • Setting Posts and Beams
  • Installing Joists
Installing Decking
  • Decking Basics
  • Installation Process
  • Adding Fascia and Other Decorative Elements
Installing Railings
  • Installing Deck Railing Posts
  • Building Wood Rails and Balustrades
  • Non-Wood Railing Options
  • Installing Nonwood Balustrades
Deck Stairs
  • Deck Stairs Overview
  • Laying Out, Cutting, and Installing the Stringers
  • Installing Treads, Risers, and Stair Railings
Custom Details
  • Benches, Planters, and Privacy Features
  • Pergolas
  • Lighting
Finishes, Repairs, and Maintenance
  • Deck Finishes
  • Cleaning and Refinishing
  • Inspection and Repair
Complete Deck Builds
  • Grade-Level Decks
  • Raised Decks

Fine Homebuilding

Follow

  • YouTube
  • instagram
  • facebook
  • pinterest
  • Tiktok
  • twitter

Newsletter

Get home building tips, offers, and expert advice in your inbox

Signing you up...

This site is protected by reCAPTCHA and the Google Privacy Policy and Terms of Service apply.
See all newsletters
See all newsletters

Membership & Magazine

  • Online Archive
  • Start Free Trial
  • Magazine Subscription
  • Magazine Renewal
  • Gift a Subscription
  • Customer Support
  • Privacy Preferences

Taunton Network

  • Green Building Advisor
  • Fine Woodworking
  • Fine Gardening
  • Threads
  • About
  • Contact
  • Advertise
  • Careers
  • Copyright
  • Terms of Use
  • Site Map
  • Do not sell or share my information
  • Privacy Policy
  • Accessibility
  • California Privacy Rights

© 2023 The Taunton Press, Inc. All rights reserved.

X
X
This is a dialog window which overlays the main content of the page. The modal window is a 'site map' of the most critical areas of the site. Pressing the Escape (ESC) button will close the modal and bring you back to where you were on the page.

Main Menu

  • How-To
  • Design
  • Tools & Materials
  • Video
  • Blogs
  • Forum
  • Project Guides
  • Reader Projects
  • Magazine
  • Members
  • FHB House

Podcasts

  • FHB Podcast
  • ProTalk

Webinars

  • Upcoming and On-Demand

Podcasts

  • FHB Podcast
  • ProTalk

Webinars

  • Upcoming and On-Demand

Popular Topics

  • Kitchens
  • Business
  • Bedrooms
  • Roofs
  • Architecture and Design
  • Green Building
  • Decks
  • Framing
  • Safety
  • Remodeling
  • Bathrooms
  • Windows
  • Tilework
  • Ceilings
  • HVAC

Magazine

  • Current Issue
  • Past Issues
  • Magazine Index
  • Subscribe
  • Online Archive
  • Author Guidelines

All Access

  • Member Home
  • Start Free Trial
  • Gift Membership

Shop the Store

  • Books
  • DVDs
  • Taunton Workshops

More

  • FHB Ambassadors
  • Reader Projects
  • Podcast
  • FHB House
  • Customer Support

Account

  • Log In
  • Join

Newsletter

Get home building tips, offers, and expert advice in your inbox

Signing you up...

This site is protected by reCAPTCHA and the Google Privacy Policy and Terms of Service apply.
See all newsletters
See all newsletters

Follow

  • YouTube
  • instagram
  • facebook
  • pinterest
  • Tiktok
  • twitter

Join All Access

Become a member and get instant access to thousands of videos, how-tos, tool reviews, and design features.

Start Your Free Trial

Subscribe

FHB Magazine

Start your subscription today and save up to set_percent%

Subscribe

We hope you’ve enjoyed your free articles. To keep reading, become a member today.

Get complete site access to expert advice, how-to videos, Code Check, and more, plus the print magazine.

Start your FREE trial

Already a member? Log in