FHB Logo Facebook LinkedIn Email Pinterest Twitter X Instagram Tiktok YouTube Plus Icon Close Icon Navigation Search Icon Navigation Search Icon Arrow Down Icon Video Guide Icon Article Guide Icon Modal Close Icon Guide Search Icon Skip to content
Subscribe
Log In
  • How-To
  • Design
  • Tools & Materials
  • Restoration
  • Videos
  • Blogs
  • Forum
  • Magazine
  • Members
  • FHB House
  • Podcast
Log In

Fine Homebuilding Project Guides

Decks

Guide Home
  • Design & Planning
  • Tools & Materials
  • Footings & Foundations
  • Framing a Deck
  • Installing Decking
  • Installing Railings
  • Deck Stairs
  • Custom Details
  • Finishes, Repairs, and Maintenance
  • Complete Deck Builds
How-To

Installing Low-Voltage LED Lighting

LED post lights are simple to wire and connect.

By David Toht
  • X
  • facebook
  • linkedin
  • pinterest
  • email
  • add to favorites Log in or Sign up to save your favorite articles

Evening on the deck. Time to light the Citronella candles. They create a mellow atmosphere until—whammo!—someone turns on the floodlight and you suddenly feel as if you are in the middle of a prison break.

It doesn’t have to be that way. LED lighting systems put lighting where it belongs—a splash of illumination on every other stair tread, a puddle of light at each post. With bulbs that virtually sip electricity, LEDs give your deck enough light to help you get around without spoiling the evening blue.

A further advantage is that LED deck lighting is low voltage. That means wiring LED lights requires only running lamp-cord-like cables and making simple connections. (You’ll also need an LED driver box located near an outdoor outlet.) None of the complications of 120-volt wiring are required—no underground cable, junction boxes, conduit, etc. Here’s how to install LED post lights.
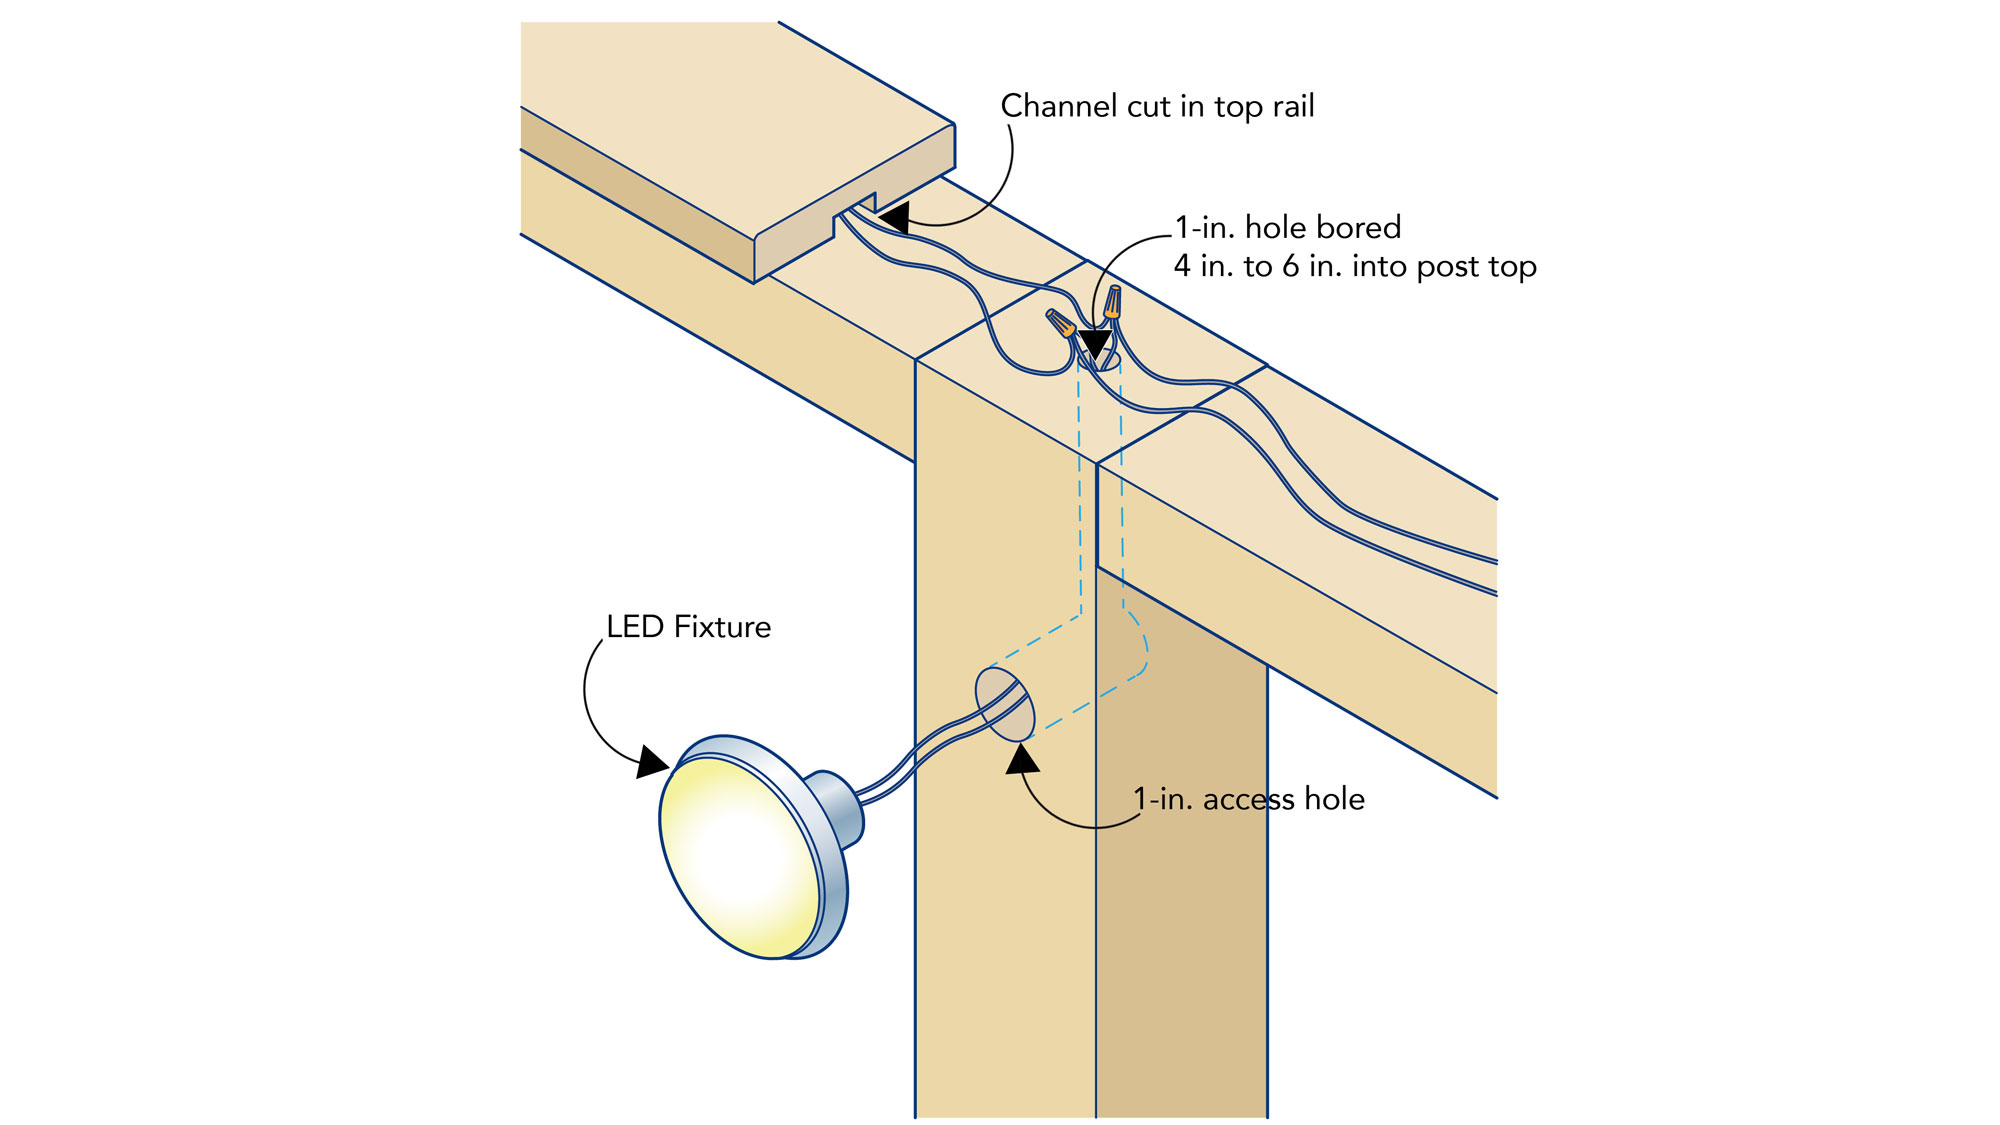
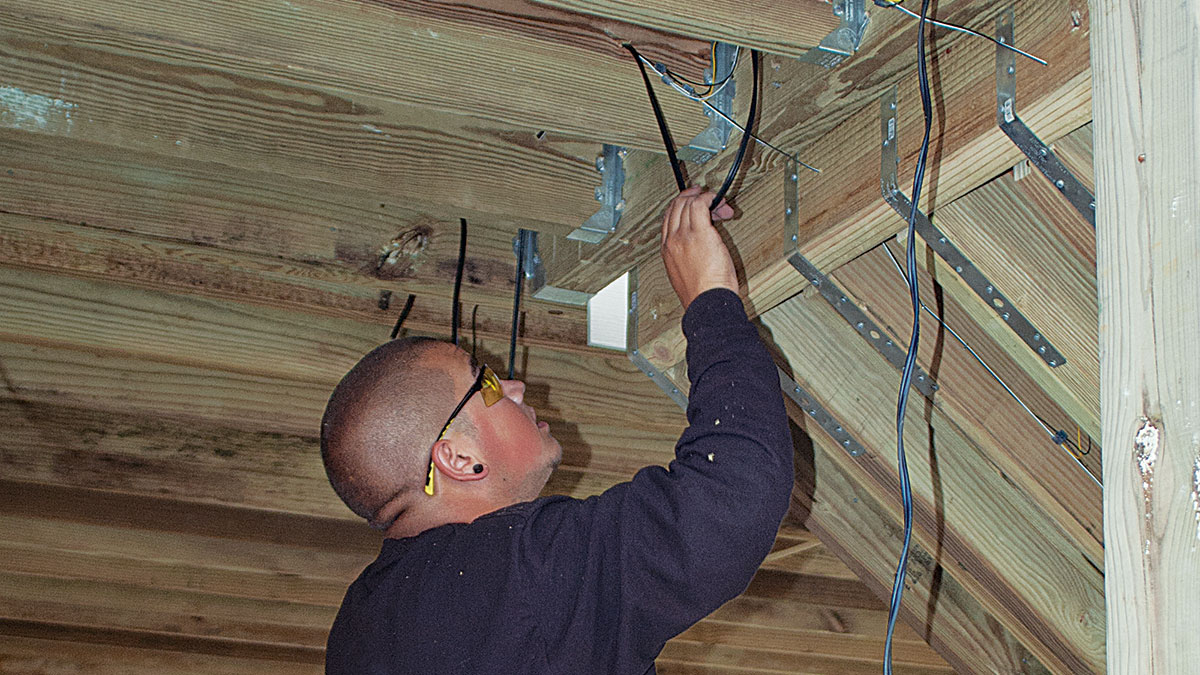
Wiring a Wood Post

With the aluminum posts shown in the photo series that follows, it’s easy to fish the wires through the hollow posts. With wood posts, you can bore a hole down into the top of the post and drill a hole in the side of the post for running wires from an LED down light. Rip or rout a channel in the top rail for running cable to the post. Push the wire nut connections into the post before fastening the cap rail in place.

diagram of light


gather the hardware 
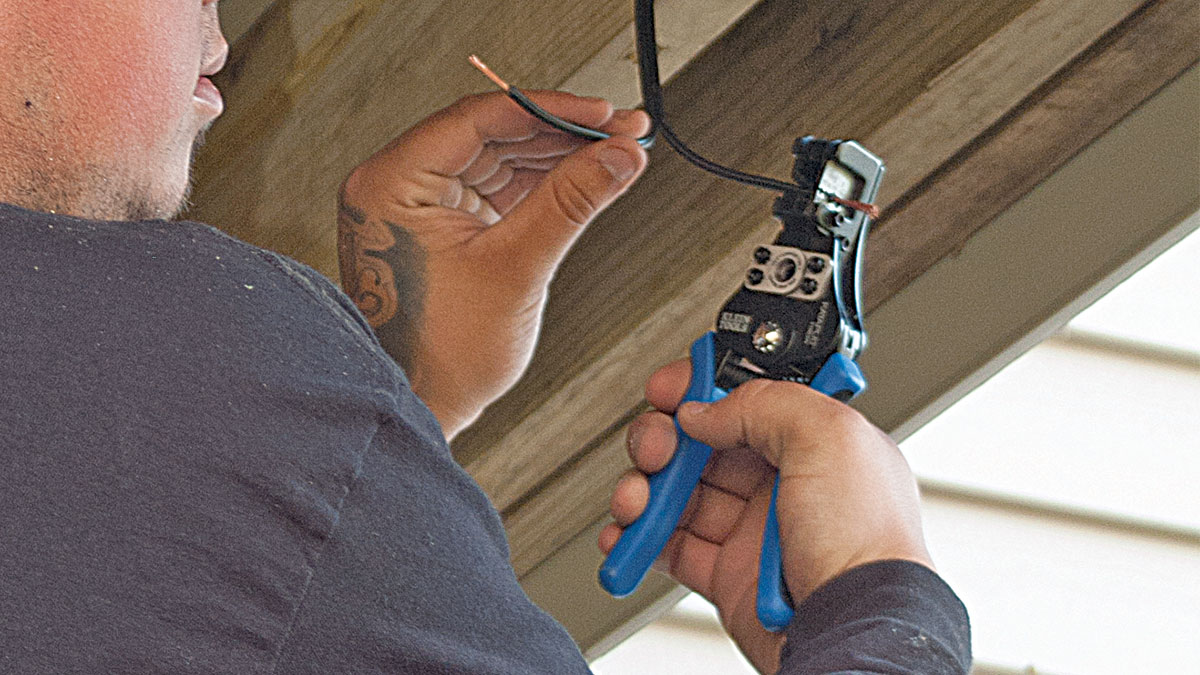
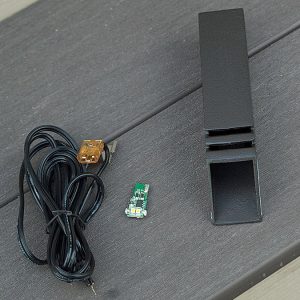
1. Gather the hardware. The components for this system include an LED fixture with cable attached, the LED, and a slide-on cap. If not included with the fixtures, gather suitable cable, wire nuts, transformer, dimmer control, and cable staples for the installation.
choosing the light post location
2. Choose a post light location. Plan out the location of the fixture so you like the look of the installed light with its cover in place. In this instance, it makes sense to bore a hole for the cable 2 in. from the ­upper balustrade rail so the top of the cover will line up with the top of the balustrade.
drilling holes into the post 
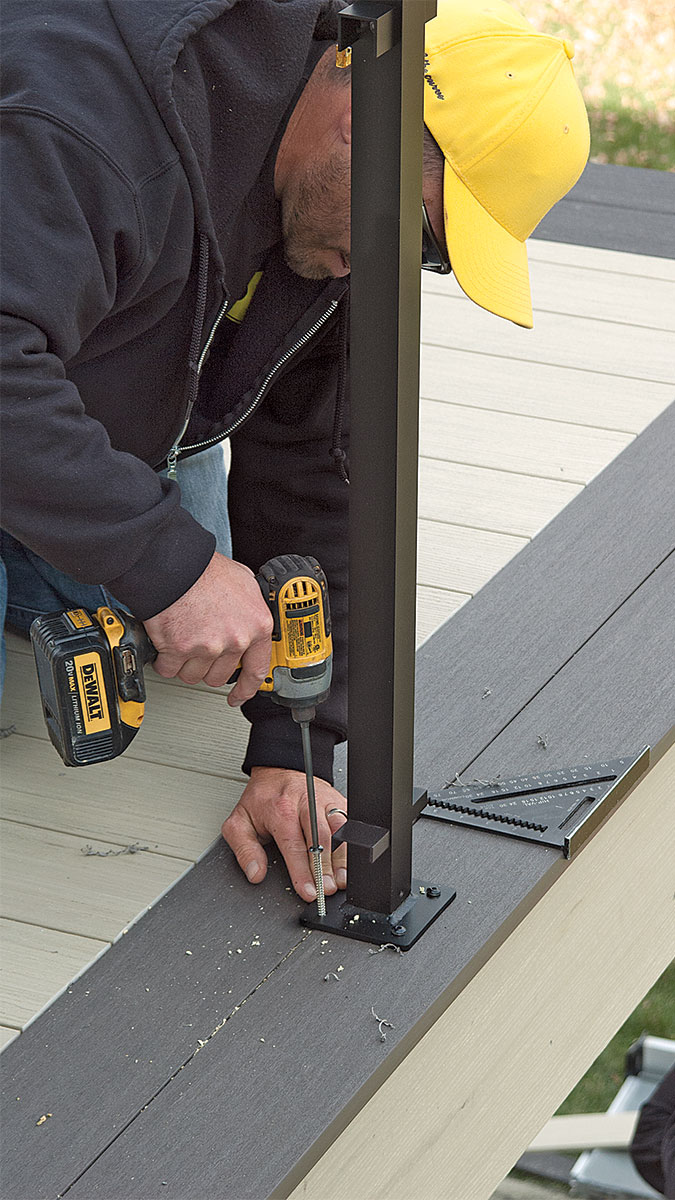
3. Bore access holes in the posts. The step bit shown makes quick work of drilling into aluminum. It also lets you drill holes of a variety of sizes without having to change the bit. Bore at least a 1/2-in. hole for ease of fishing the cable into the post. Bore a 1-in. hole in the bottom of the base of the post for pulling the cable through. fishing the cable 
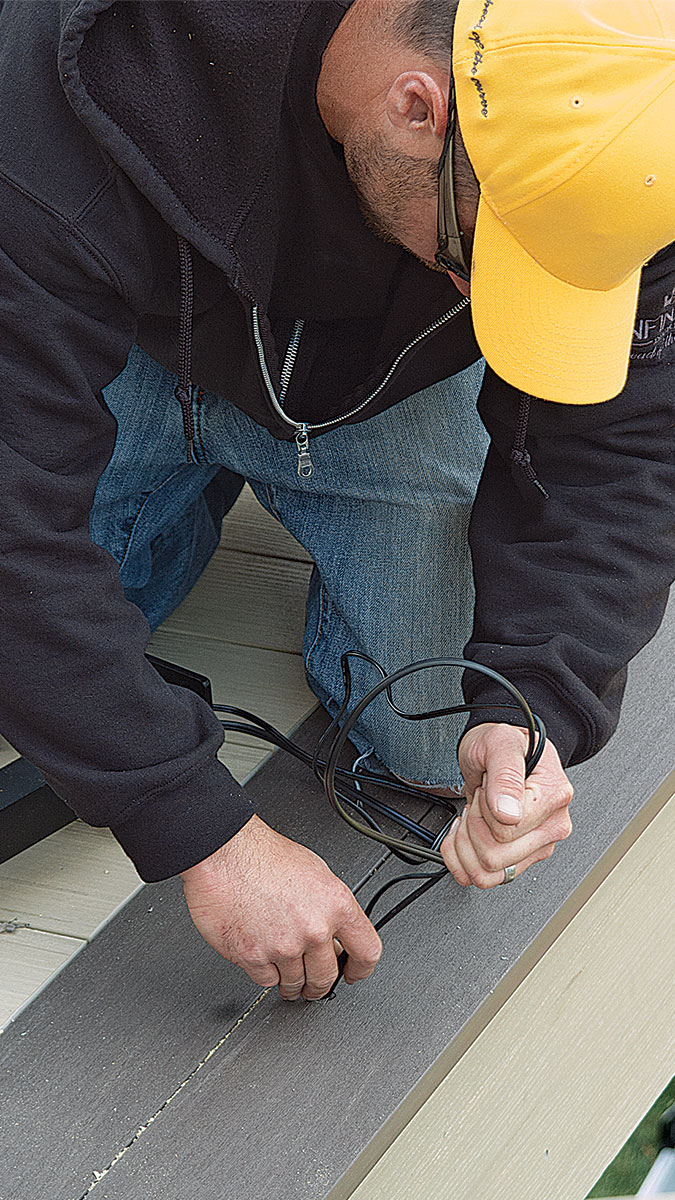
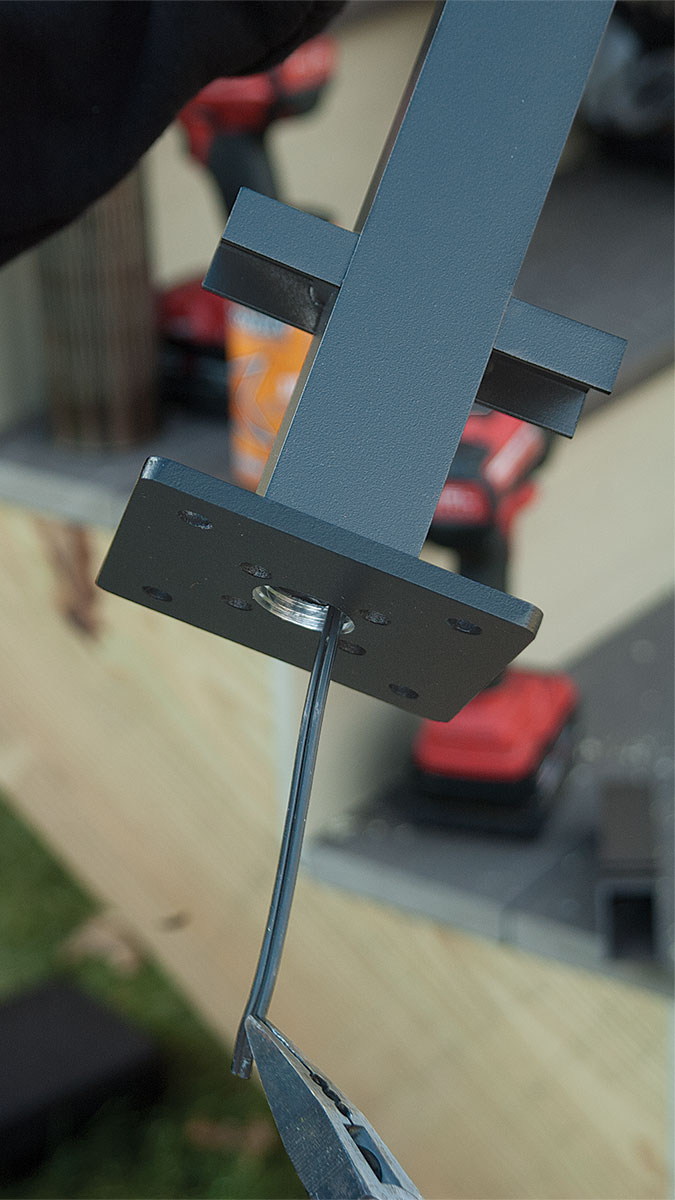
4. Fish the cable. Push the cable into the fixture hole and down toward the bottom of the post. You’ll likely need long-nosed pliers to grab the cable and pull it out.
adding the LED fixture 
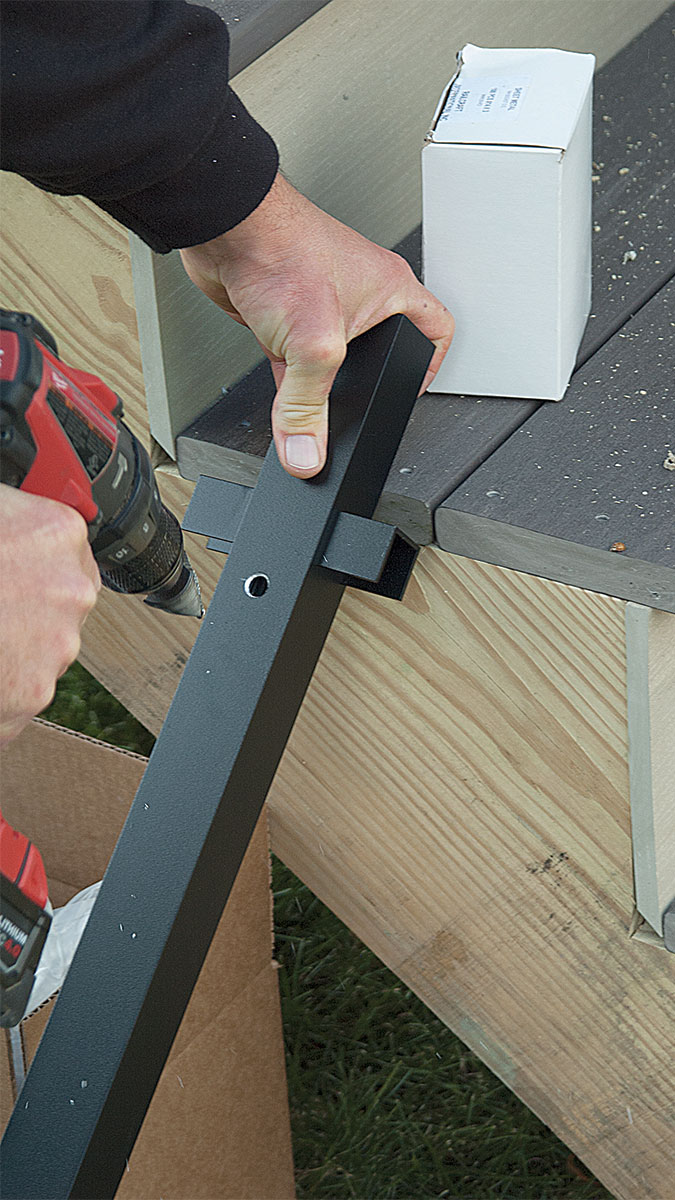
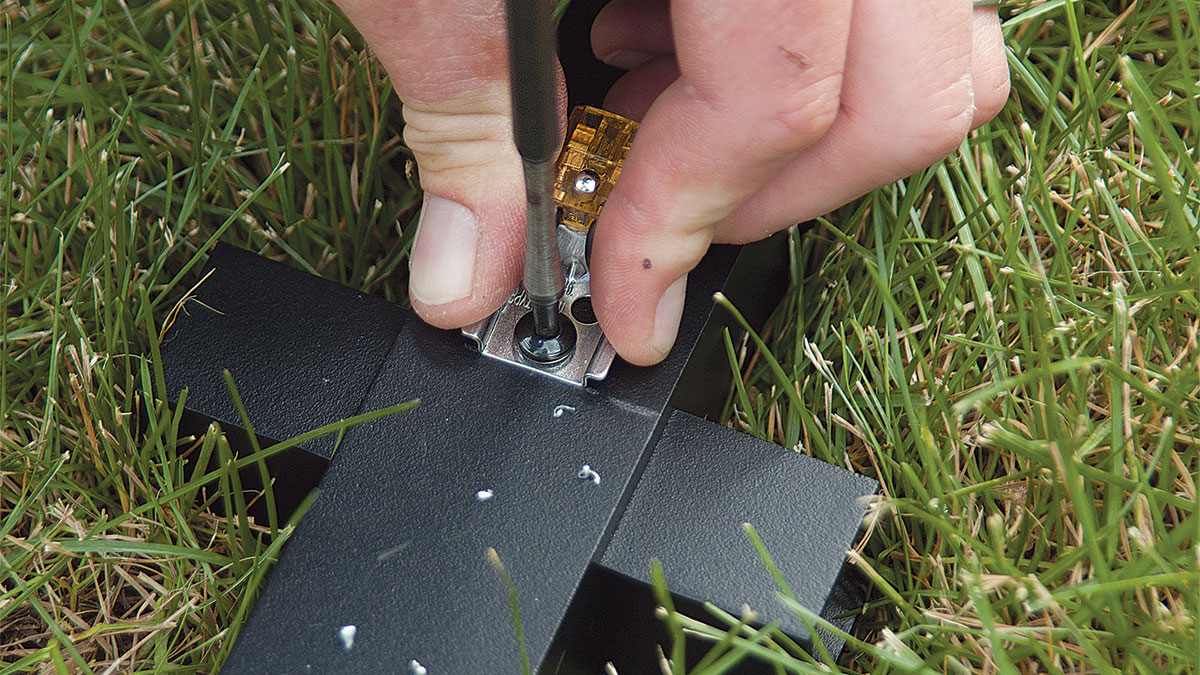
5. Add the LED fixture. Drill holes and fasten the LED fixture in place using the screws provided. posts lying on the floor 
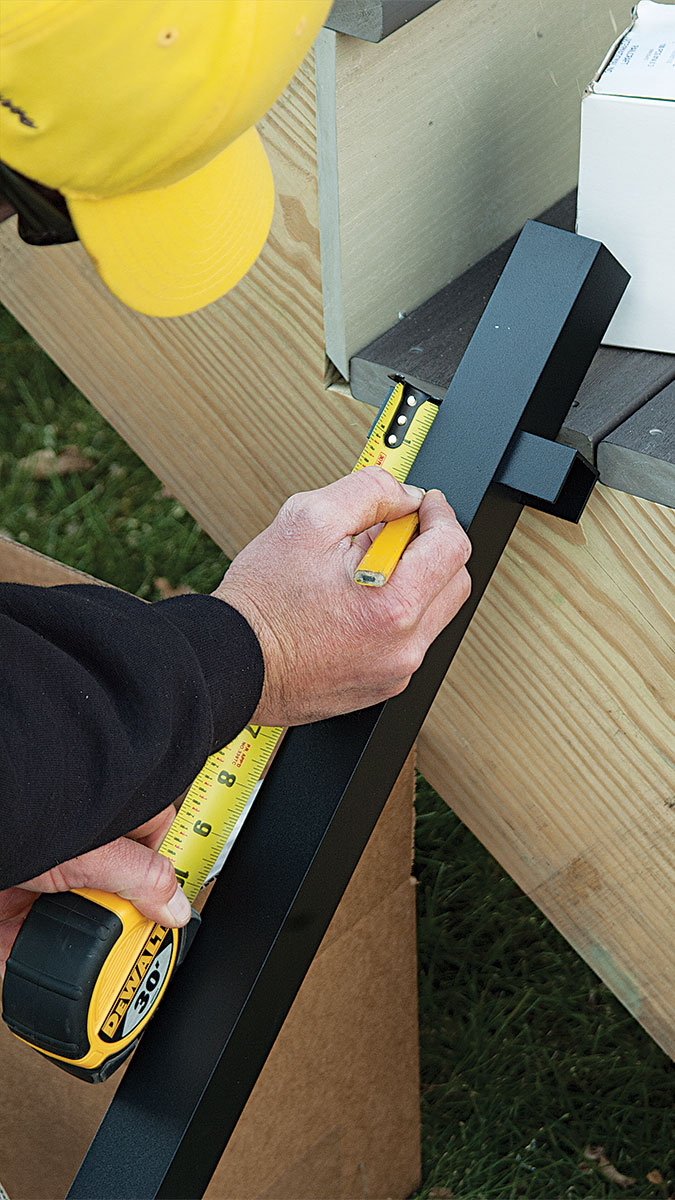
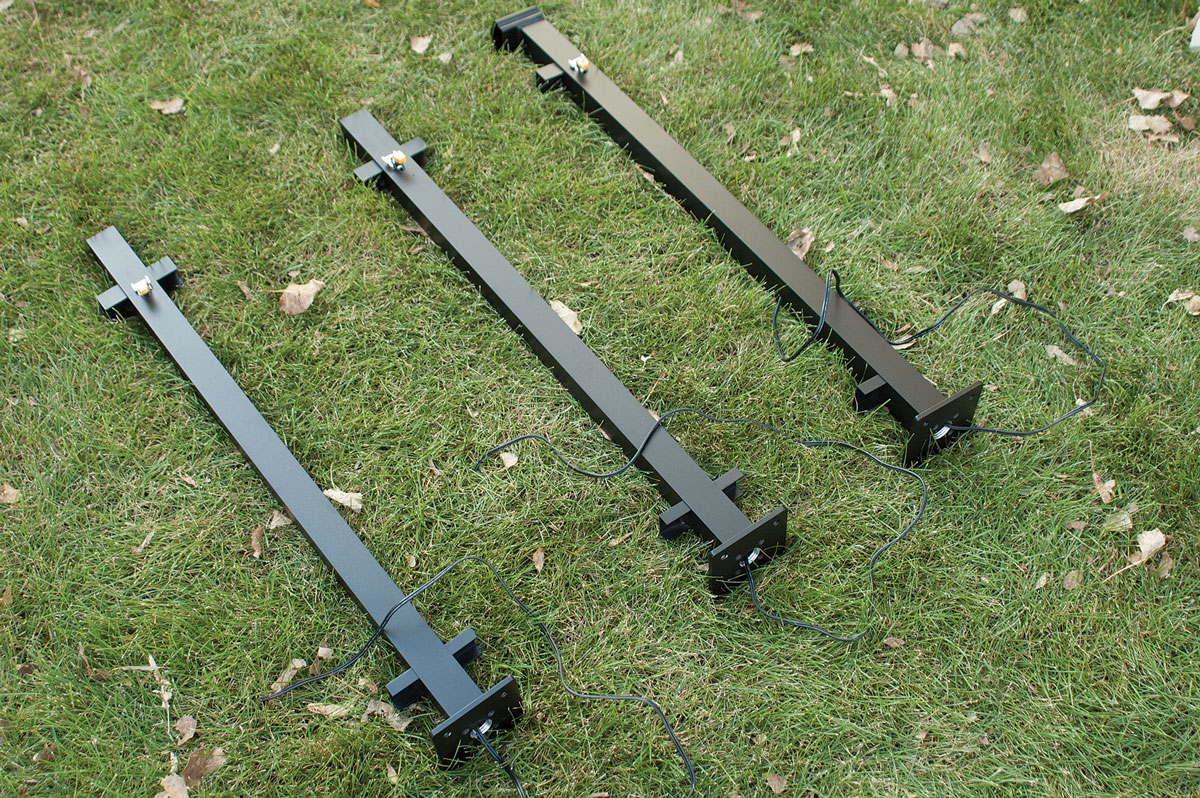
6. Prep the posts. Once you’ve confirmed the positioning of the LED fixture, for efficiency’s sake prep all your posts at one time so it’s easy to keep your measurements consistent.
person spray painting the posts
7. Paint the fixture caps.
Should you find that the fixture caps don’t match your chosen railing color, spray-paint the caps with an exterior-grade enamel.
person running the cable through the posts
8. Run the cable for each post.
Bore a 1/2-in. hole at each post location. Push the cable from your prepped post into the hole.
person installing the post on the deck
9. Install the post.
Being careful not to pinch the cable, square up and fasten the post base to the deck.
installing the cap on the post 
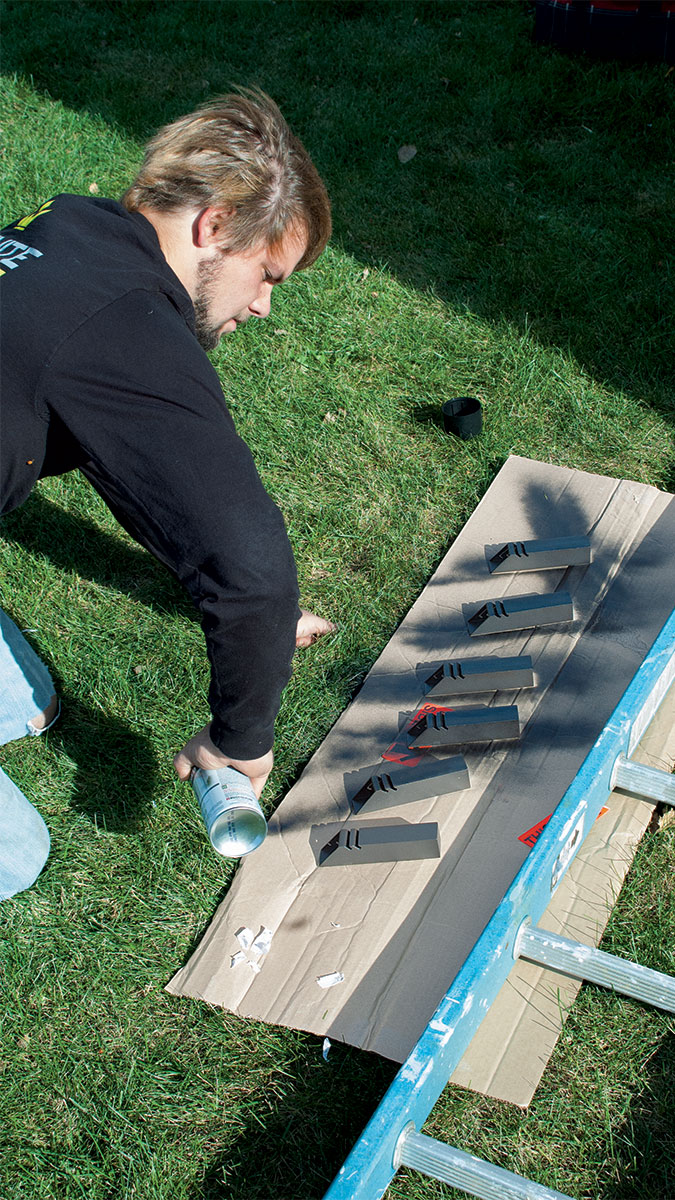
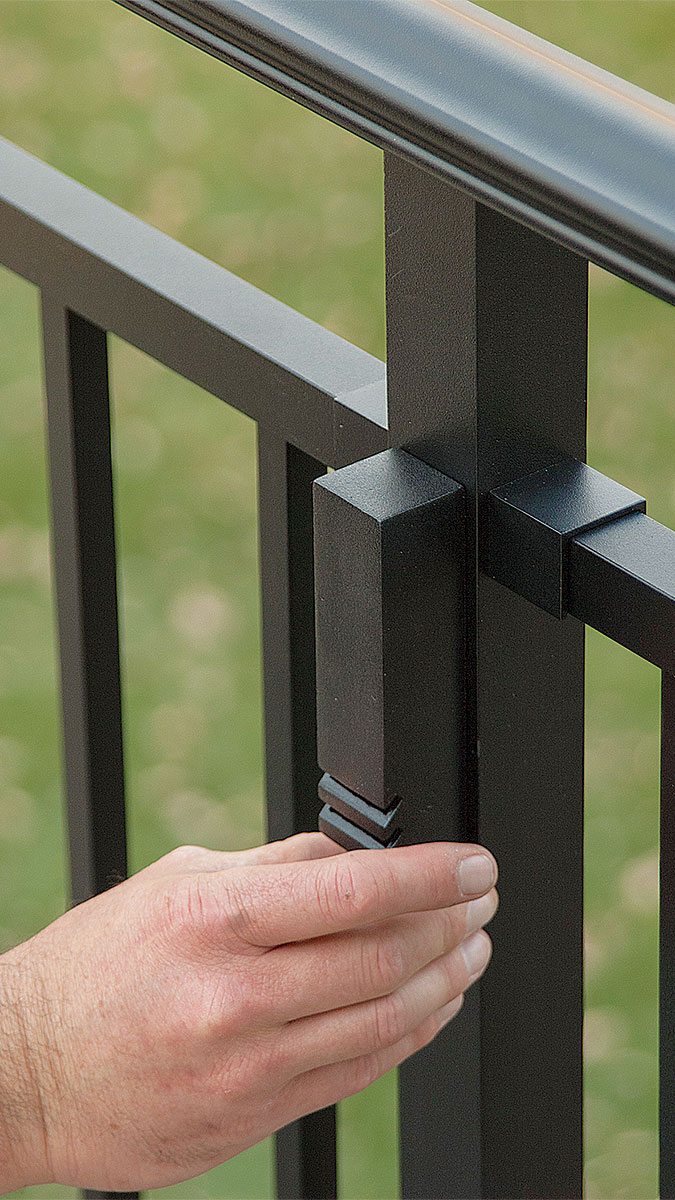
10. Install the cap. The newly painted cap easily slips onto the LED fixture. The cap requires no fasteners.


Wiring a Post Sleeve

Post sleeves slip over a post for a low-maintenance surface and a color match to your PVC or composite decking. As an added benefit, the sleeves make wiring deck lights easy.

This view of a post top has supports already attached for a railing-mounted buffet table. The sleeve, notched for the supports, has several channels for running low-voltage wiring.


running the cable
11. Run cable.
In preparation for connecting the lights into a series, drill holes and feed the cable through the deck framing. Attach cable staples every 2 ft. where the cable runs along joists.
striping the wire for connections
12. Strip wire for connections.
Using a wire stripper set to the gauge of wire you are using, strip off about 3/4 in. of insulation in preparation for making the connections.
making weatherproof connections
13. Make weatherproof connections.
Twist the ­cable wires together and trim them so the ­exposed wire connection is about 1/2 in. long. Using a weatherproof wire nut, twist it on until all bare wire is covered and the nut is completely on. Give the nut a firm pull to confirm the connection is solid.
securing the connection
14. Secure the connection.
Loop the connections as shown and apply cable staples so there is no pressure on the wire nuts.

Make connections at the LED transformer and dimmer

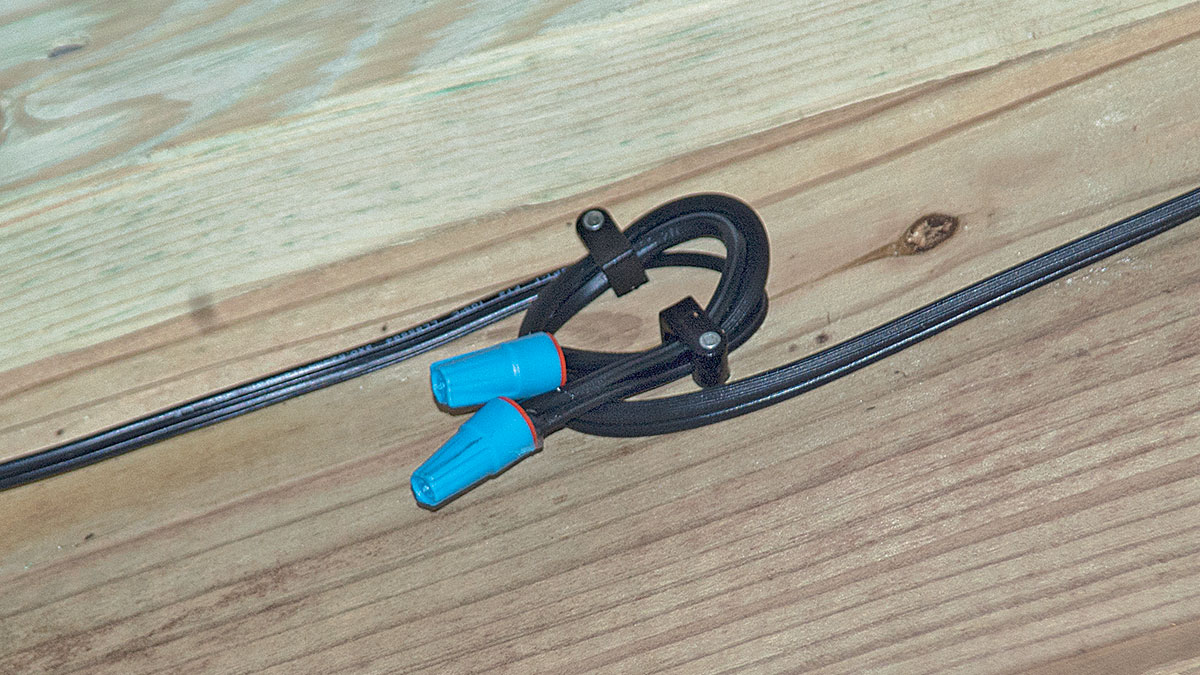
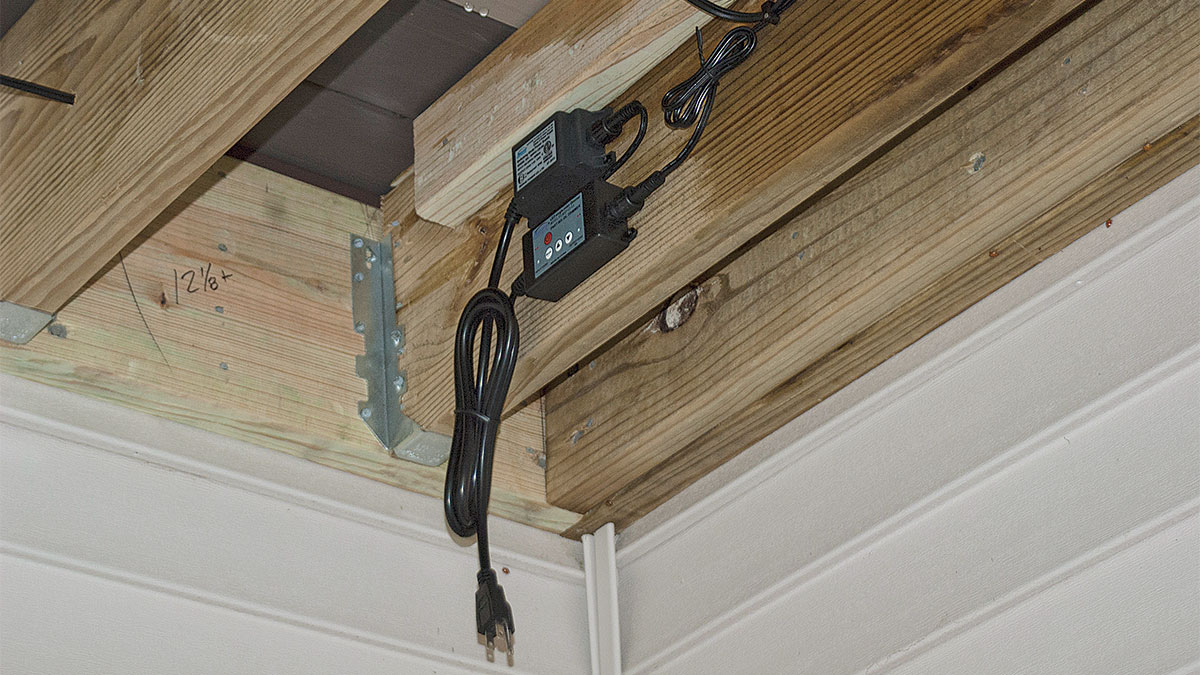
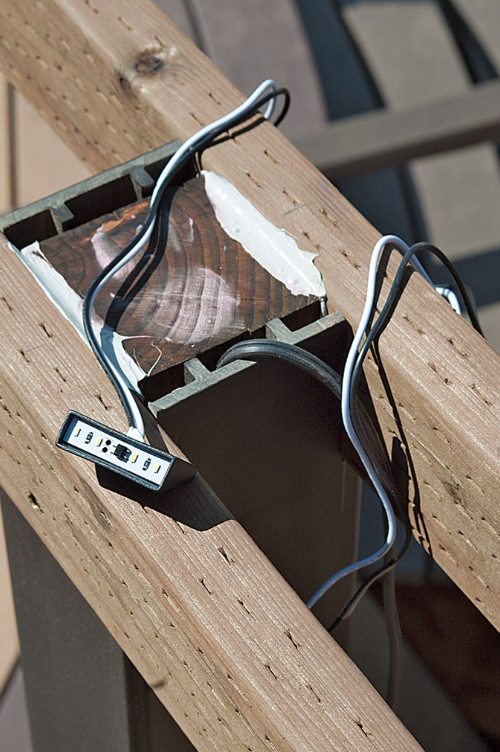
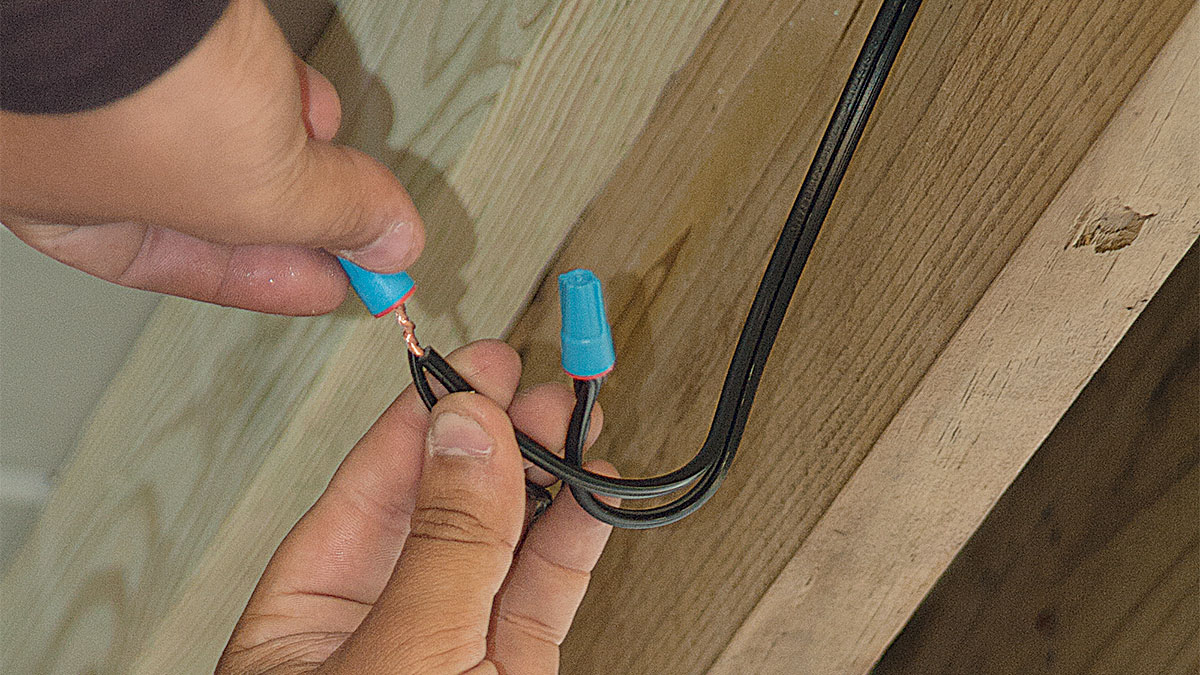
15. Make connections at the LED transformer and dimmer. Complete the wiring connections at the LED transformer and the dimmer control, the brains of the system controlled with a handy remote. Plug the driver into a nearby GFCI receptacle or hire an electrician to hardwire it.

TIP

Low-voltage wiring is safe for amateurs to install, but if you feel uncomfortable with electrical work or are baffled by how to organize the series of connections, don’t hesitate to call in a pro. Have your railing planned out in advance of asking for bids. Discuss the possibility of saving money by preboring access holes for the electrician.


Wire Ahead

Run your LED wiring before installing your posts and railings so you can feed the wiring up through the posts. Low-voltage lights typically don’t fall under the code requirements for 120-volt wiring, though you should have a ground-fault circuit interrupter (GFCI) receptacle for the driver box as required by code for outdoor service.


Fine Homebuilding Recommended Products

Fine Homebuilding receives a commission for items purchased through links on this site, including Amazon Associates and other affiliate advertising programs.

Standard Marking Chalk

We like white chalk because it’s non-permanent and wears off easily — this is especially helpful when marks are exposed and need to disappear.
Buy at Amazon

Flashing and Joist Tape

Flashing joists is a great way to prolong the life of a deck frame — after all, moisture management is key to longevity.
Buy at Amazon

FastenMaster Screw Bolt Fastening System

These solid, time-saving bolts don't require pre-drilling and come in very handy when it comes to guard rail posts.
Buy at Amazon
Previous: Accent Lighting for Your Deck Next: High-Quality Deck Lighting

Guide

Decks

Chapter

Custom Details

Sign up for eletters today and get the latest how-to from Fine Homebuilding, plus special offers.

Signing you up...

This site is protected by reCAPTCHA and the Google Privacy Policy and Terms of Service apply.
See all newsletters
See all newsletters

Log in or create an account to post a comment.

Sign up Log in

Become a member and get full access to FineHomebuilding.com

Decks

Decks

Hundreds of articles and videos by top deck-building pros on how to design and build a beautiful, sturdy, and safe deck

View Project Guide

View All Project Guides »

Become a member and get unlimited site access, including the Decks Project Guide.

Start Free Trial

Design & Planning
  • Basic Design Options
  • Generating Plans
  • Calculating Deck Loads
  • Code Compliance
Tools & Materials
  • Deck Building Tools
  • Foundation and Framing Materials
  • Decking Materials
  • Fasteners and Hardware
Footings & Foundations
  • Choosing a Foundation
  • Sizing and Laying Out Footings
  • Excavation
  • Pouring the Foundation
Framing a Deck
  • Framing Overview
  • Installing the Ledger
  • Setting Posts and Beams
  • Installing Joists
Installing Decking
  • Decking Basics
  • Installation Process
  • Adding Fascia and Other Decorative Elements
Installing Railings
  • Installing Deck Railing Posts
  • Building Wood Rails and Balustrades
  • Non-Wood Railing Options
  • Installing Nonwood Balustrades
Deck Stairs
  • Deck Stairs Overview
  • Laying Out, Cutting, and Installing the Stringers
  • Installing Treads, Risers, and Stair Railings
Custom Details
  • Benches, Planters, and Privacy Features
  • Pergolas
  • Lighting
Finishes, Repairs, and Maintenance
  • Deck Finishes
  • Cleaning and Refinishing
  • Inspection and Repair
Complete Deck Builds
  • Grade-Level Decks
  • Raised Decks

Fine Home Building

Newsletter Sign-up

  • Fine Homebuilding

    Home building tips, offers, and expert advice in your inbox.

  • Green Building Advisor

    Building science and energy efficiency advice, plus special offers, in your inbox.

  • Old House Journal

    Repair, renovation, and restoration tips, plus special offers, in your inbox.

Signing you up...

This site is protected by reCAPTCHA and the Google Privacy Policy and Terms of Service apply.
See all newsletters

Follow

  • Fine Homebuilding

    Dig into cutting-edge approaches and decades of proven solutions with total access to our experts and tradespeople.

    Start Free Trial Now
    • Facebook
    • Instagram
    • X
    • LinkedIn
  • GBA Prime

    Get instant access to the latest developments in green building, research, and reports from the field.

    Start Free Trial Now
    • Facebook
    • YouTube
  • Old House Journal

    Learn how to restore, repair, update, and decorate your home.

    Subscribe Now
    • Facebook
    • Instagram
    • X

Membership & Magazine

  • Online Archive
  • Start Free Trial
  • Magazine Subscription
  • Magazine Renewal
  • Gift a Subscription
  • Customer Support
  • Privacy Preferences
  • About
  • Contact
  • Advertise
  • Careers
  • Terms of Use
  • Site Map
  • Do not sell or share my information
  • Privacy Policy
  • Accessibility
  • California Privacy Rights

© 2025 Active Interest Media. All rights reserved.

Fine Homebuilding receives a commission for items purchased through links on this site, including Amazon Associates and other affiliate advertising programs.

  • Home Group
  • Antique Trader
  • Arts & Crafts Homes
  • Bank Note Reporter
  • Cabin Life
  • Cuisine at Home
  • Fine Gardening
  • Fine Woodworking
  • Green Building Advisor
  • Garden Gate
  • Horticulture
  • Keep Craft Alive
  • Log Home Living
  • Military Trader/Vehicles
  • Numismatic News
  • Numismaster
  • Old Cars Weekly
  • Old House Journal
  • Period Homes
  • Popular Woodworking
  • Script
  • ShopNotes
  • Sports Collectors Digest
  • Threads
  • Timber Home Living
  • Traditional Building
  • Woodsmith
  • World Coin News
  • Writer's Digest
Active Interest Media logo
X
X
This is a dialog window which overlays the main content of the page. The modal window is a 'site map' of the most critical areas of the site. Pressing the Escape (ESC) button will close the modal and bring you back to where you were on the page.

Main Menu

  • How-To
  • Design
  • Tools & Materials
  • Video
  • Blogs
  • Forum
  • Project Guides
  • Reader Projects
  • Magazine
  • Members
  • FHB House

Podcasts

  • FHB Podcast
  • ProTalk

Webinars

  • Upcoming and On-Demand

Podcasts

  • FHB Podcast
  • ProTalk

Webinars

  • Upcoming and On-Demand

Popular Topics

  • Kitchens
  • Business
  • Bedrooms
  • Roofs
  • Architecture and Design
  • Green Building
  • Decks
  • Framing
  • Safety
  • Remodeling
  • Bathrooms
  • Windows
  • Tilework
  • Ceilings
  • HVAC

Magazine

  • Current Issue
  • Past Issues
  • Magazine Index
  • Subscribe
  • Online Archive
  • Author Guidelines

All Access

  • Member Home
  • Start Free Trial
  • Gift Membership

Online Learning

  • Courses
  • Project Guides
  • Reader Projects
  • Podcast

More

  • FHB Ambassadors
  • FHB House
  • Customer Support

Account

  • Log In
  • Join

Newsletter

Get home building tips, offers, and expert advice in your inbox

Signing you up...

This site is protected by reCAPTCHA and the Google Privacy Policy and Terms of Service apply.
See all newsletters
See all newsletters

Follow

  • X
  • YouTube
  • instagram
  • facebook
  • pinterest
  • Tiktok

Join All Access

Become a member and get instant access to thousands of videos, how-tos, tool reviews, and design features.

Start Your Free Trial

Subscribe

FHB Magazine

Start your subscription today and save up to 70%

Subscribe

We hope you’ve enjoyed your free articles. To keep reading, become a member today.

Get complete site access to expert advice, how-to videos, Code Check, and more, plus the print magazine.

Start your FREE trial

Already a member? Log in

Privacy Policy Update

We use cookies, pixels, script and other tracking technologies to analyze and improve our service, to improve and personalize content, and for advertising to you. We also share information about your use of our site with third-party social media, advertising and analytics partners. You can view our Privacy Policy here and our Terms of Use here.

Cookies

Analytics

These cookies help us track site metrics to improve our sites and provide a better user experience.

Advertising/Social Media

These cookies are used to serve advertisements aligned with your interests.

Essential

These cookies are required to provide basic functions like page navigation and access to secure areas of the website.

Delete My Data

Delete all cookies and associated data