How to Lay Out Deck Footings
Use this fast and accurate method to get footings in the right spots.

Synopsis: Getting the footings in the right spots is a crucial first step in building a deck. In this article, deck builder Greg DiBernardo shows how to determine the centerline of the footings with a simple line parallel to the house. You locate the footings on the line by first finding the edge of the deck with a line squared off the house. Photo: Andy Engel
Installing deck footings is rigorous work. Even though I use a machine-driven auger instead of digging by hand, clearing rocks and mixing and placing concrete is still hard.
The vast majority of decks are rectangular and are supported by being bolted to the house on the inside and by a built-up beam on the outside. Most deck beams are “dropped,” that is, set below so that the joists rest on the beam and cantilever beyond by a couple of feet. In some cases, the beam is “flush,” or set at the same level as the joists, which attach to the beam with joist hangers. In either case, the beam location determines how far the footings will be from the house. The first step in footing layout is to establish the line of the deck beam parallel to the house. I do this with stakes and string, extending the line beyond where I know the ends of the deck will be. Then I locate and lay out one side of the deck so that it’s square to the house, and I use that as a reference for spacing the footing locations.
Deck footings have to be placed just right so that the posts they support land in the center of each footing. Pay attention to the framing plans. They might not call out the location of the footings, but they will at least show the centerline of the beam and the spacing of the posts.
String the layout straight
Any deck begins with a plan, whose theoretical outline has to be transferred to the ground in order to locate the footings and begin construction. String is the right tool for establishing the straight lines and square corners of a deck. Although any string will do, braided mason’s line is strong, stretches less than other string, and comes in highly visible colors.
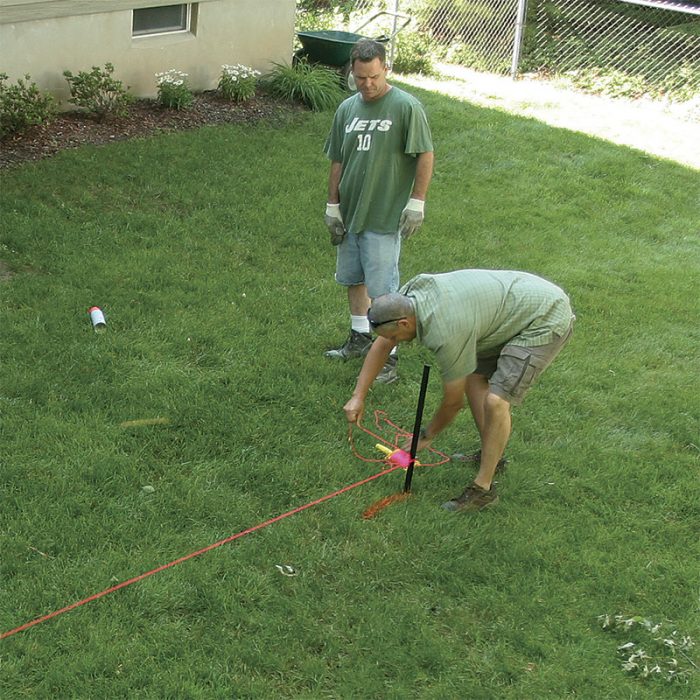
1. Determine where the footings will go. Measure out from the foundation to where the centerline of the footings will be. Mark the ground with paint at each side of the future deck, a short distance beyond its ends.
Verify square with Pythagoras
While you often can start a square layout by eyeballing a string stretched along a foundation corner, foundation corners are not always square. Because of this, square should still be verified with a version of the Pythagorean theorem. Any triangle whose sides measure 3, 4, and 5 (or multiples of those numbers, such as 6, 8, and 10) has a square corner opposite the hypotenuse. With this knowledge, it’s easy to verify that your string is square to the house using only a tape measure.
 |
 |
| 1. Mark the wall. For accuracy, use a 6, 8, 10 triangle. Mark the wall at 8 ft. from the string. | 2. Mark the string. Being careful not to stretch it, mark the string at 6 ft. from the wall. |
3. Verify a square corner. Pull a tape from the 8-ft. mark on the foundation to the 6-ft. mark on the string. Verify a 10-ft. measurement on the tape or the stringline will need to be adjusted square.
Mark the footing locations
Once you’ve strung the line of the footings parallel to the house and measured their locations so the deck will end up square and the footings properly spaced, it’s time to mark the ground. Upside-down spray paint in bright colors makes marks that won’t get lost in the job-site shuffle.
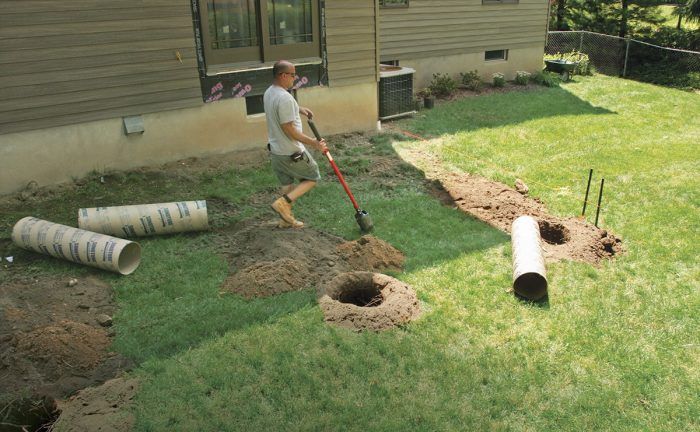
3. Dig ‘em out. Whether you use a mechanical auger or dig by hand, an accurate layout will keep you from putting a hole in the wrong spot. (These mini-skid steers can be rented.)
RELATED STORIES
A Solid Deck Begins with Concrete Piers
How to Precisely Lay Out Deck Footings
For more photos, illustrations, and details, click the View PDF button below:
Fine Homebuilding Recommended Products
Fine Homebuilding receives a commission for items purchased through links on this site, including Amazon Associates and other affiliate advertising programs.

Drill Driver/Impact Driver

MicroFoam Nitrile Coated Work Gloves

Jigsaw


