FHB Logo Facebook LinkedIn Email Pinterest Twitter Instagram Plus Icon Close Icon Navigation Search Icon Navigation Search Icon Arrow Down Icon Video Guide Icon Article Guide Icon Modal Close Icon Guide Search Icon Skip to content
Subscribe
Log In
  • How-To
  • Design
  • Tools & Materials
  • Videos
  • Blogs
  • Forum
  • Magazine
  • Members
  • FHB House
  • Podcast
Log In

Fine Homebuilding Project Guides

Decks

Guide Home
Chapter
  • Design & Planning
  • Tools & Materials
  • Footings & Foundations
  • Framing a Deck
  • Installing Decking
  • Installing Railings
  • Deck Stairs
  • Custom Details
  • Finishes, Repairs, and Maintenance
  • Complete Deck Builds

Multi-Feature Curved Deck: Bending a PVC Plank

Build a form, apply heat, and bend the radiused edge planks for a stylish custom look.

By David Toht

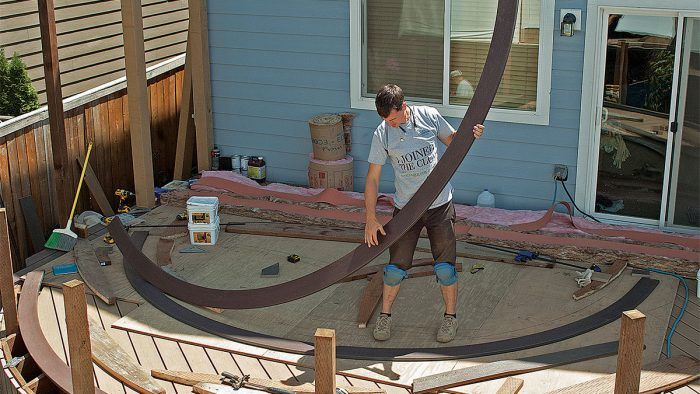
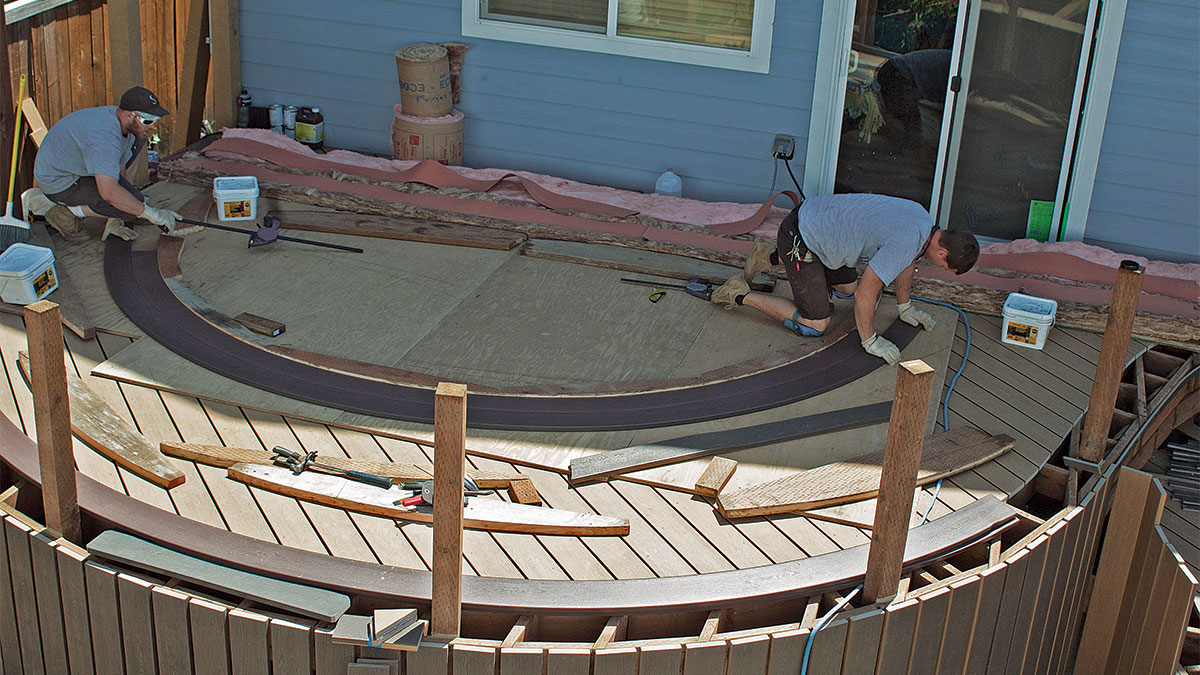
As a finishing touch on this deck, deck designer Kim Katwijk opted to edge the decking with a double band of bent planks in a contrasting color. On the upper level, the planks are bent to a radius of 9 ft. 8 in. and 9 ft. 2 in. The lower level called for a radius of 7 ft. 6 in. and 7 ft.

Once a piece of PVC decking is heated to about 210°F (composite decking takes up to 265°F because of its wood content), it briefly becomes as limp as a wet noodle. Clamped into forms, it can easily be bent into sweeping curves. Once cooled, the piece holds its new shape, rigid as ever. Simple as the process sounds, it takes planning—as well as some commercial-grade blanket heaters, fiberglass insulation batts, an accurate form with plenty of clamps, and a crew of nimble workers who know what they are doing.
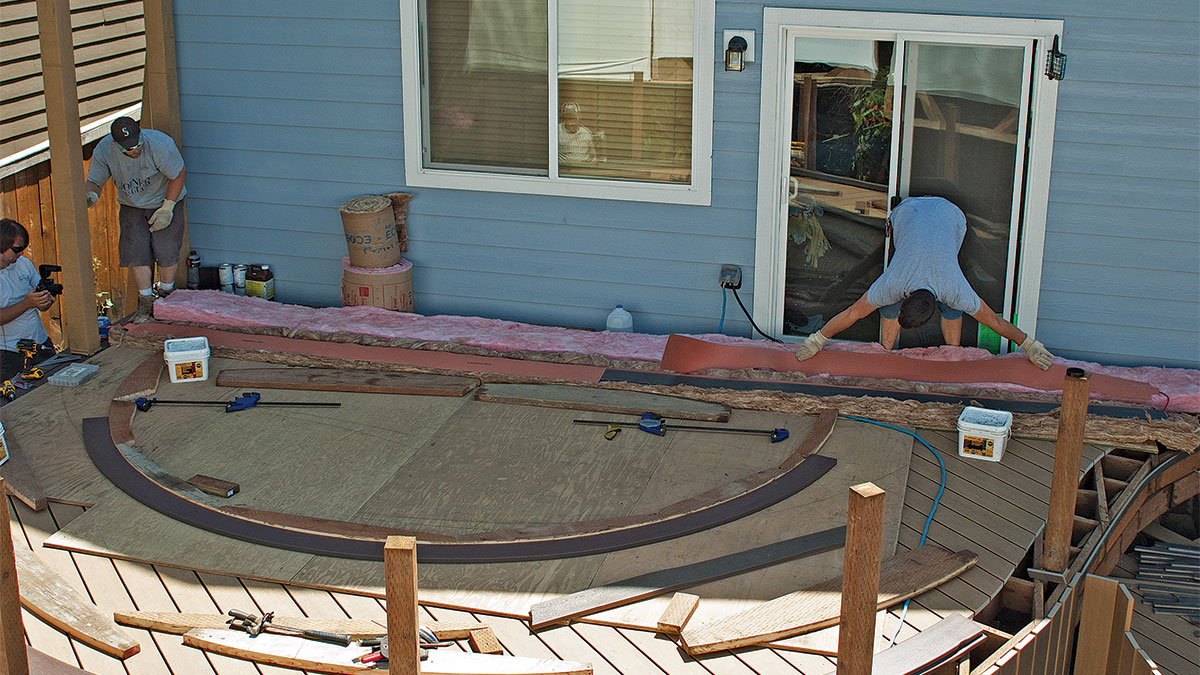
Making the Form

There is a smidge of give in the bent planks, but the more accurate the form, the better. Because of the intense heat of the planks, they cannot be laid on the decking itself—a lesson some deck builders have learned the hard way when the surface of their deck blistered under the plank. Instead, lay down plywood and attach it to the joists by running fasteners into the gap between planks. Mark and cut scrap 2x8s to make a radius to which the heated decking can be clamped. This deck calls for two pieces of edging. The second piece can be clamped to the first without allowing for the gap; there is enough give in the plank to add spacers while fastening.


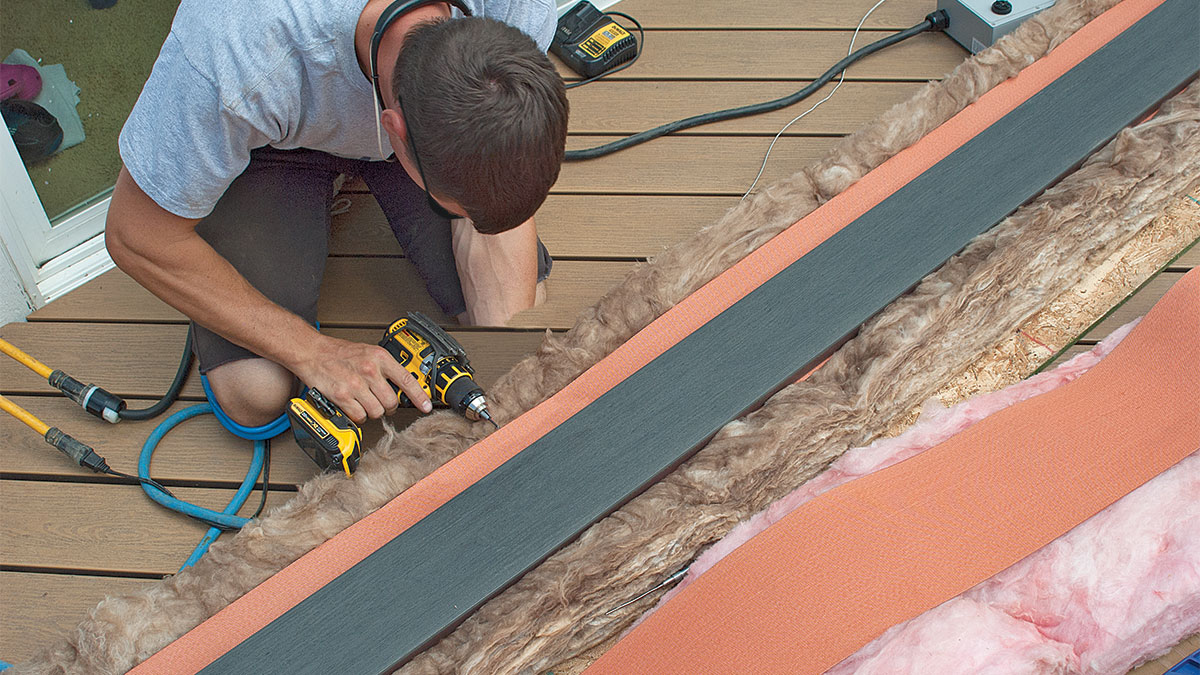
1. Prepare the “oven.” With insulation rolled out the full length of the decking, lay down the heat blankets. Position the decking and bore a 4-in.-deep, 1/8-in. hole for the thermostat probe.

 2. Insert the heat probes. Because the 20-ft. plank requires two 10-ft. heat blankets, each with its own control, you’ll need to drill for two probes. Locate them roughly 5 ft. from each end of the decking.

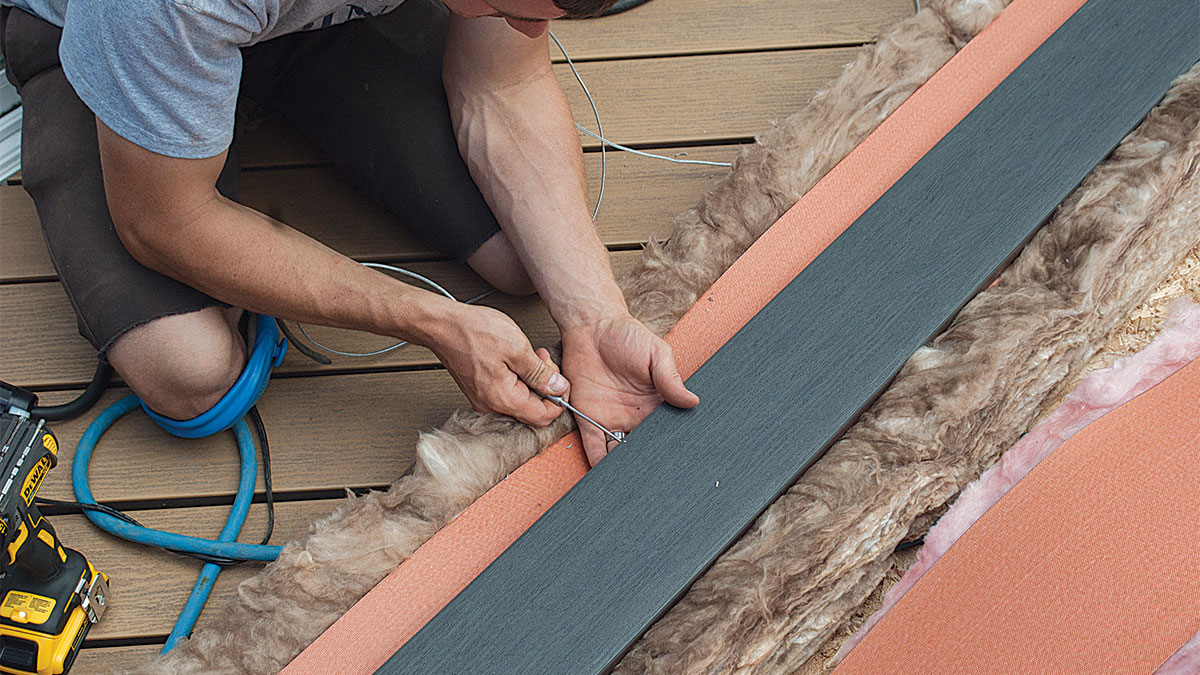
3. Add the top blankets. Lay the top blanket in place. The heating filaments stop about 1/2 in. short of the end of each blanket. Overlap them to avoid a cool area in the plank.

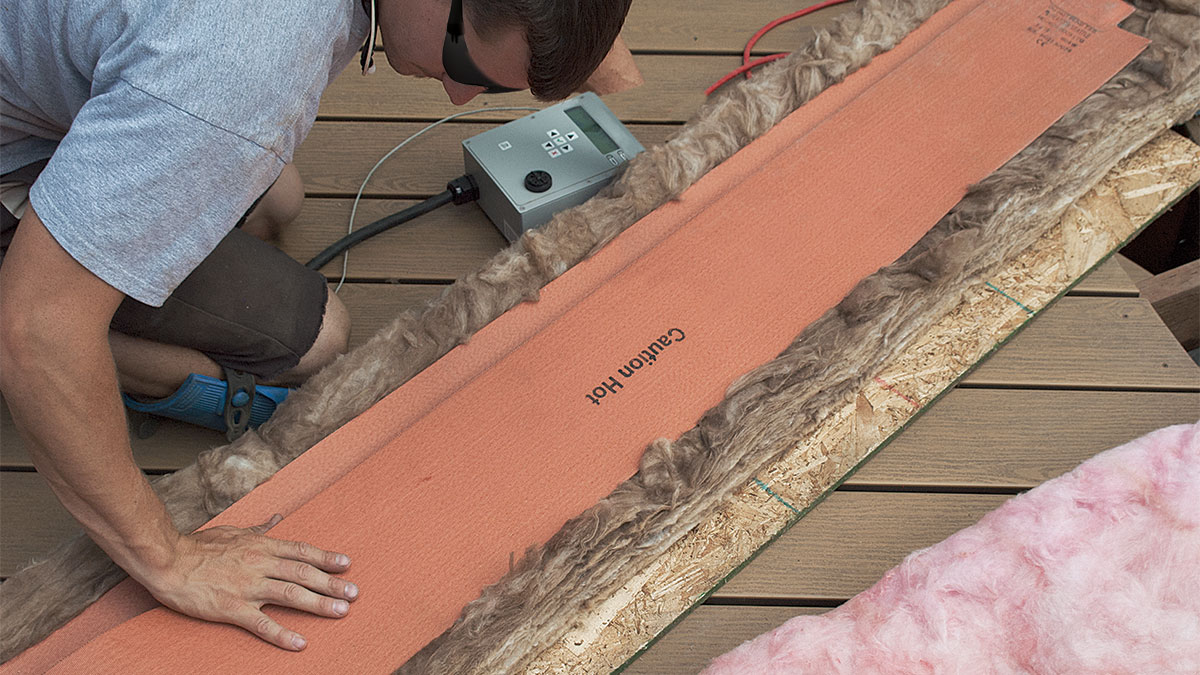
4. Stagger the blankets. To avoid overheating the edges, stagger the blankets slightly. Smooth them out so they are in complete contact with the decking.

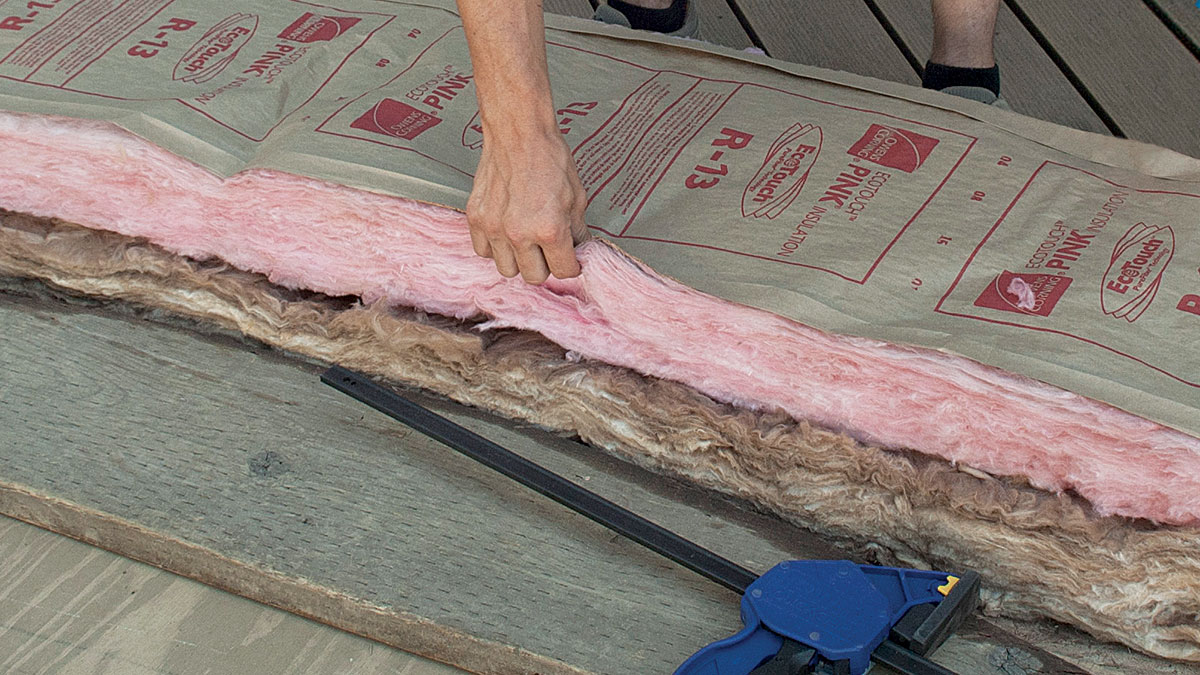
5. Add the insulation. Complete the oven by laying a second roll of insulation on top of the plank and the heat blankets.

6. Set the thermostats. Set the thermostats for the desired temperature, in this case 210°F. The readout on each shows the internal temperature as the plank heats up. Each unit has a buzzer that signals when the temperature is reached. 7. Lift the decking. When both thermostats signal that the internal temperature has been reached, uncover the decking and remove the temperature probes. Wearing a pair of heavy gloves, set the heated planks into the form.

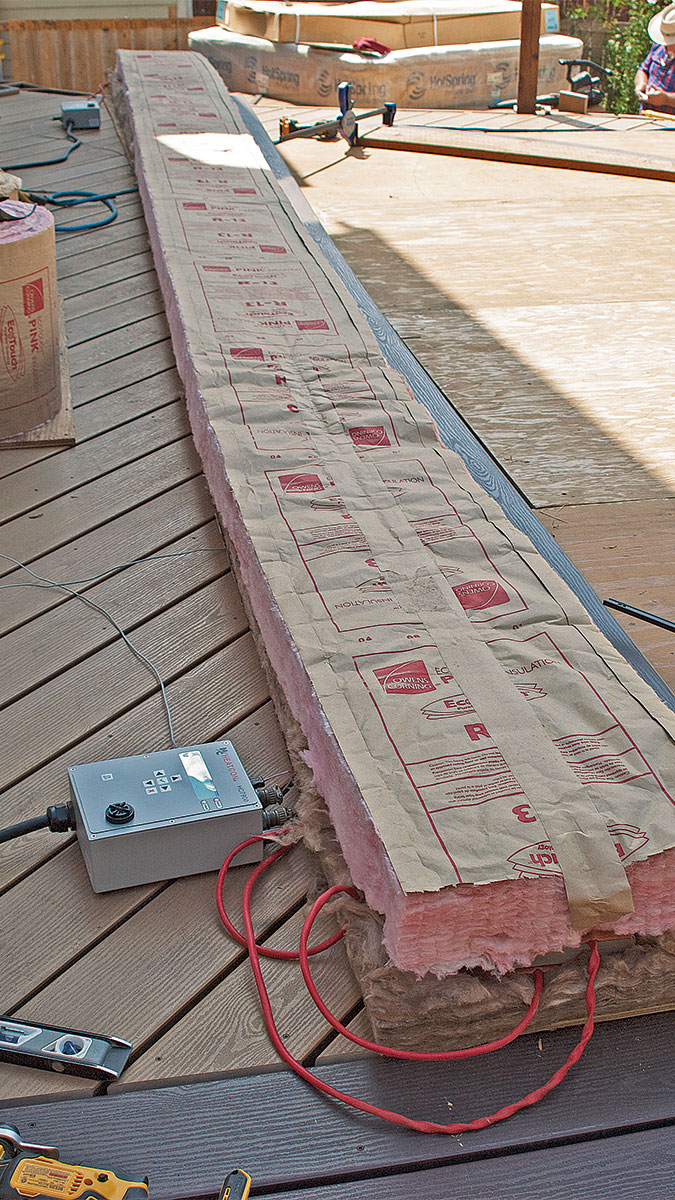
8. Form up the decking. With one piece of decking already bent, wrap the second piece around it and clamp the ends.

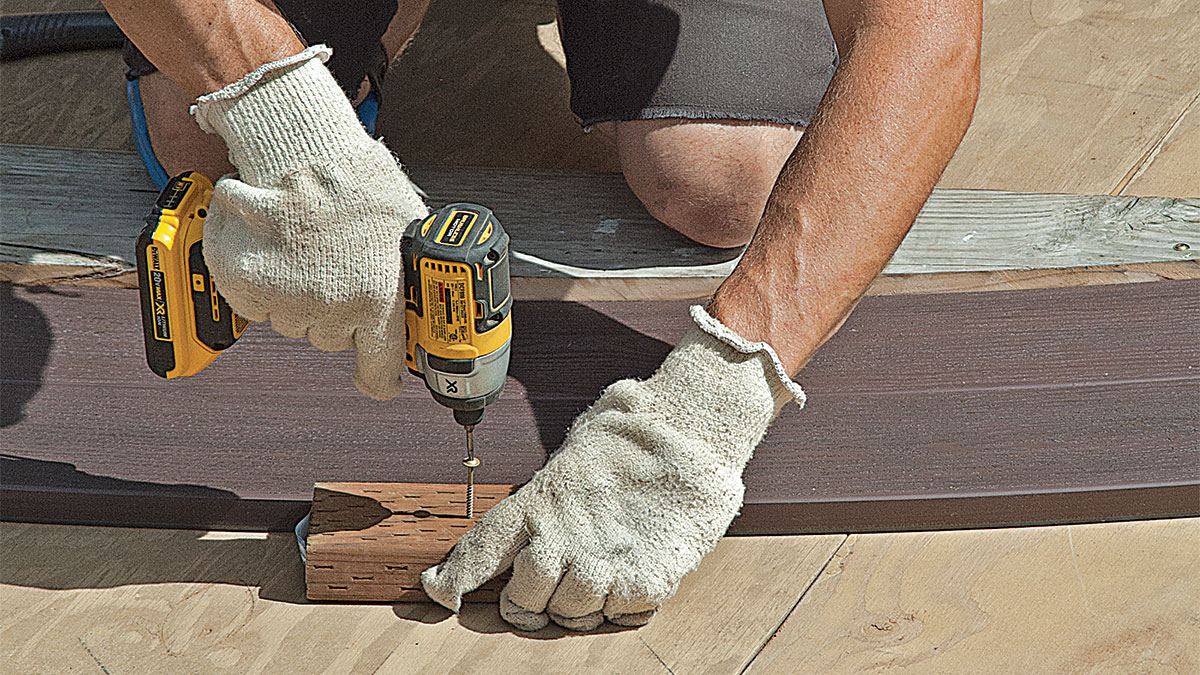
9. Add blocks. Fasten scraps of decking to hold the piece without denting. Double-check for any creases or bulges. Rub them out with a scrap of decking aided by careful use of a heat gun, if necessary.

10. Let it cool. After about 10 minutes, the piece should be cool and as stiff as it was in its original form.

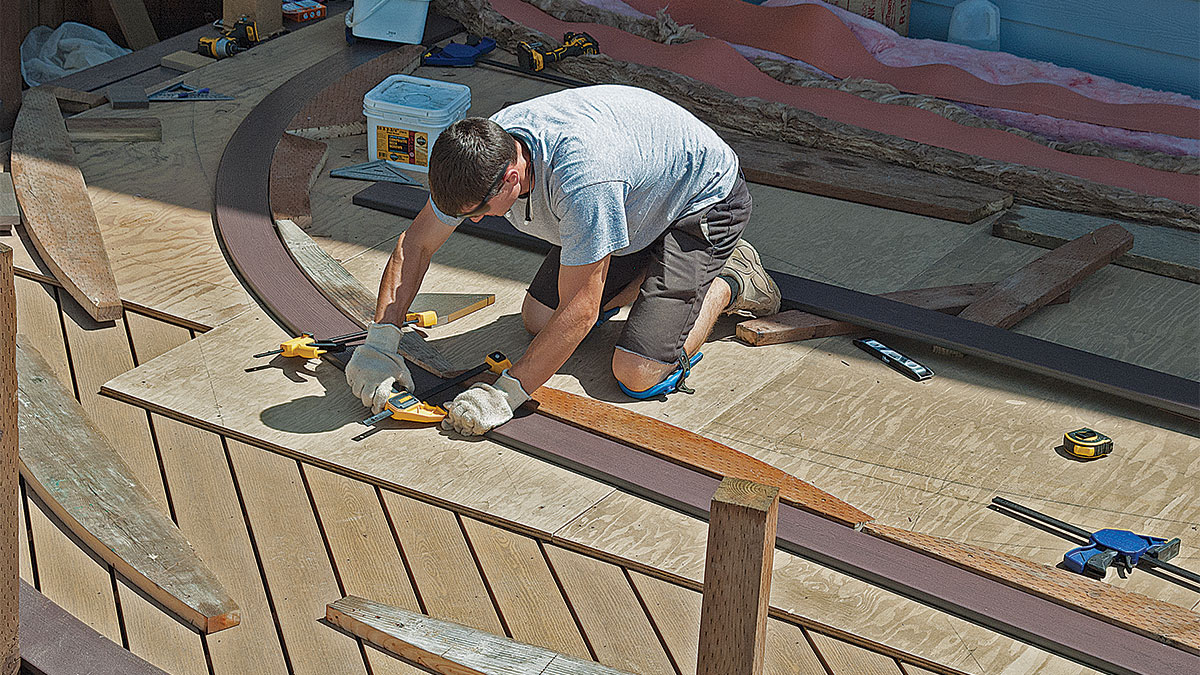
11. Complete the bends. By adapting the radius pieces already cut, you can make forms for the other edge pieces.

Sign up for eletters today and get the latest how-to from Fine Homebuilding, plus special offers.

Signing you up...

This site is protected by reCAPTCHA and the Google Privacy Policy and Terms of Service apply.
See all newsletters
See all newsletters
Previous: Multi-Feature Curved Deck: Installing Railing Posts and Skirting Next: Multi-Feature Curved Deck: Building the Stairs

Guide

Decks

Chapter

Complete Deck Builds

Log in or create an account to post a comment.

Sign up Log in

Become a member and get full access to FineHomebuilding.com

Decks

Decks

Hundreds of articles and videos by top deck-building pros on how to design and build a beautiful, sturdy, and safe deck

View Project Guide

View All Project Guides »

Become a member and get unlimited site access, including the Decks Project Guide.

Start Free Trial

Design & Planning
  • Basic Design Options
  • Generating Plans
  • Calculating Deck Loads
  • Code Compliance
Tools & Materials
  • Deck Building Tools
  • Foundation and Framing Materials
  • Decking Materials
  • Fasteners and Hardware
Footings & Foundations
  • Choosing a Foundation
  • Sizing and Laying Out Footings
  • Excavation
  • Pouring the Foundation
Framing a Deck
  • Framing Overview
  • Installing the Ledger
  • Setting Posts and Beams
  • Installing Joists
Installing Decking
  • Decking Basics
  • Installation Process
  • Adding Fascia and Other Decorative Elements
Installing Railings
  • Installing Deck Railing Posts
  • Building Wood Rails and Balustrades
  • Non-Wood Railing Options
  • Installing Nonwood Balustrades
Deck Stairs
  • Deck Stairs Overview
  • Laying Out, Cutting, and Installing the Stringers
  • Installing Treads, Risers, and Stair Railings
Custom Details
  • Benches, Planters, and Privacy Features
  • Pergolas
  • Lighting
Finishes, Repairs, and Maintenance
  • Deck Finishes
  • Cleaning and Refinishing
  • Inspection and Repair
Complete Deck Builds
  • Grade-Level Decks
  • Raised Decks

Fine Homebuilding

Follow

  • twitter
  • facebook
  • instagram
  • pinterest

Newsletter

Get home building tips, offers, and expert advice in your inbox

Signing you up...

This site is protected by reCAPTCHA and the Google Privacy Policy and Terms of Service apply.
See all newsletters
See all newsletters

Membership & Magazine

  • Online Archive
  • Start Free Trial
  • Magazine Subscription
  • Magazine Renewal
  • Gift a Subscription
  • Customer Support
  • Privacy Preferences

Taunton Network

  • Green Building Advisor
  • Fine Woodworking
  • Fine Gardening
  • Threads
  • About
  • Contact
  • Advertise
  • Careers
  • Copyright
  • Terms of Use
  • Site Map
  • Do not sell or share my information
  • Privacy Policy
  • Accessibility
  • California Privacy Rights

© 2023 The Taunton Press, Inc. All rights reserved.

X
X
This is a dialog window which overlays the main content of the page. The modal window is a 'site map' of the most critical areas of the site. Pressing the Escape (ESC) button will close the modal and bring you back to where you were on the page.

Main Menu

  • How-To
  • Design
  • Tools & Materials
  • Video
  • Blogs
  • Forum
  • Reader Projects
  • Magazine
  • Members
  • FHB House

Podcasts

  • FHB Podcast
  • ProTalk

Webinars

  • Upcoming and On-Demand

Podcasts

  • FHB Podcast
  • ProTalk

Webinars

  • Upcoming and On-Demand

Popular Topics

  • Kitchens
  • Business
  • Bedrooms
  • Roofs
  • Architecture and Design
  • Green Building
  • Decks
  • Framing
  • Safety
  • Remodeling
  • Bathrooms
  • Windows
  • Tilework
  • Ceilings
  • HVAC

Magazine

  • Current Issue
  • Past Issues
  • Magazine Index
  • Subscribe
  • Online Archive
  • Author Guidelines

All Access

  • Member Home
  • Start Free Trial
  • Gift Membership

Shop the Store

  • Books
  • DVDs
  • Taunton Workshops

More

  • FHB Ambassadors
  • Reader Projects
  • Podcast
  • FHB House
  • Customer Support

Account

  • Log In
  • Join

Newsletter

Get home building tips, offers, and expert advice in your inbox

Signing you up...

This site is protected by reCAPTCHA and the Google Privacy Policy and Terms of Service apply.
See all newsletters
See all newsletters

Follow

  • twitter
  • facebook
  • instagram
  • pinterest

Join All Access

Become a member and get instant access to thousands of videos, how-tos, tool reviews, and design features.

Start Your Free Trial

Subscribe

FHB Magazine

Start your subscription today and save up to 70%

Subscribe

We hope you’ve enjoyed your free articles. To keep reading, become a member today.

Get complete site access to expert advice, how-to videos, Code Check, and more, plus the print magazine.

Start your FREE trial

Already a member? Log in