The most solid railing post is one that is grounded on a pier and runs full length from the ground to the railing cap. However, most decks are cantilevered to minimize costly pier installation or, as in this case, to accommodate cylindrical levels. Simply bolting the post to the rim joist is adequate but will leave you with a post that is a bit spongy. Short of connecting a post to a pier, the surest route to a rock-solid post is to extend the post beneath the deck and brace it.
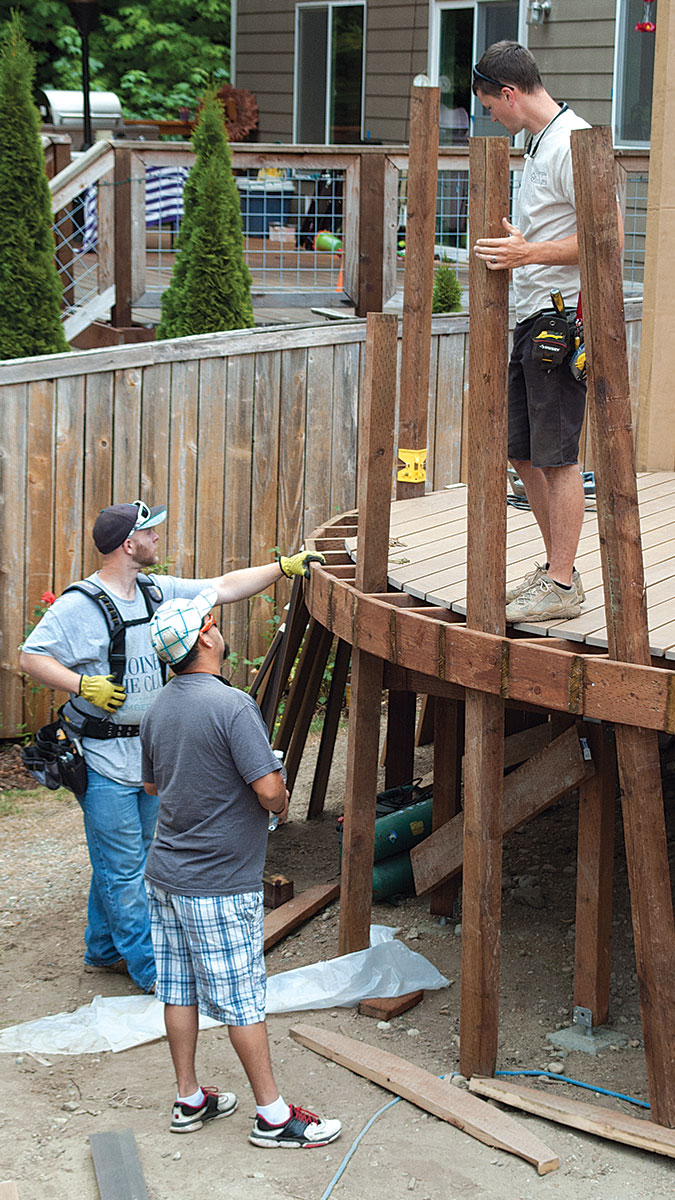
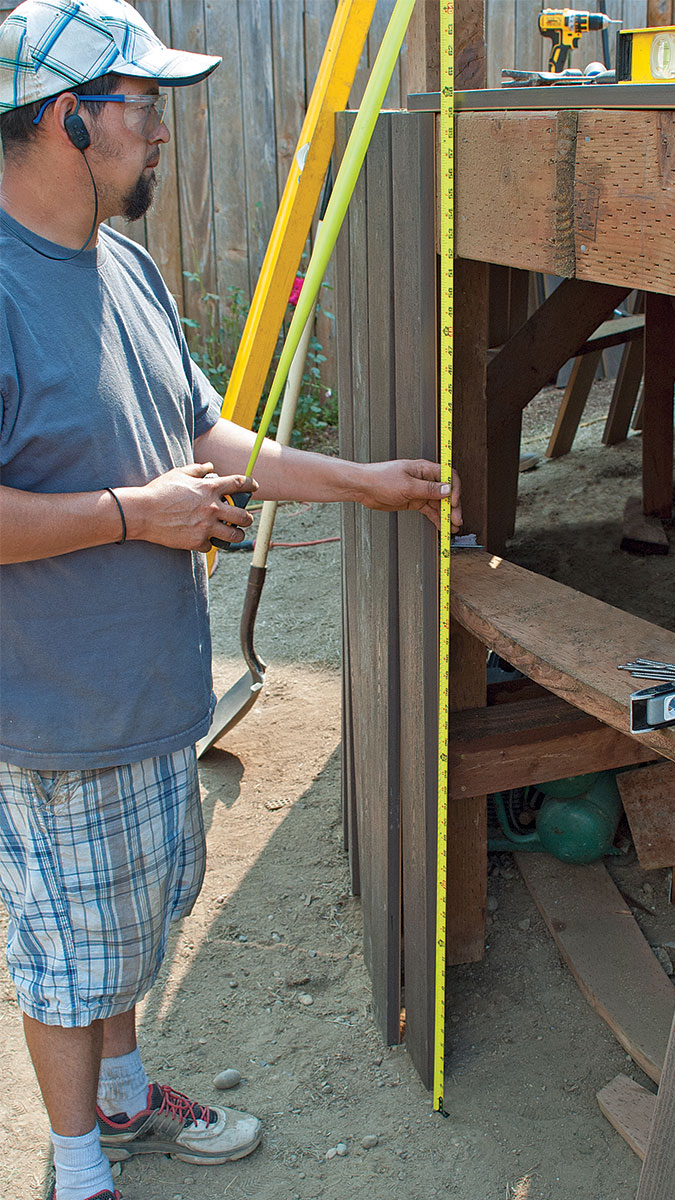
Positioning the posts is a challenge. You want even spacing while avoiding collision with joists. As you measure and mark, bear in mind that a variance of an inch or so will be all but invisible to the eye.
TIP
By installing the posts longer than you need them—letting them run wild a bit—plumbing and bracing them goes much easier. When all the posts are in place, you can mark and trim them at exactly the height you want. |
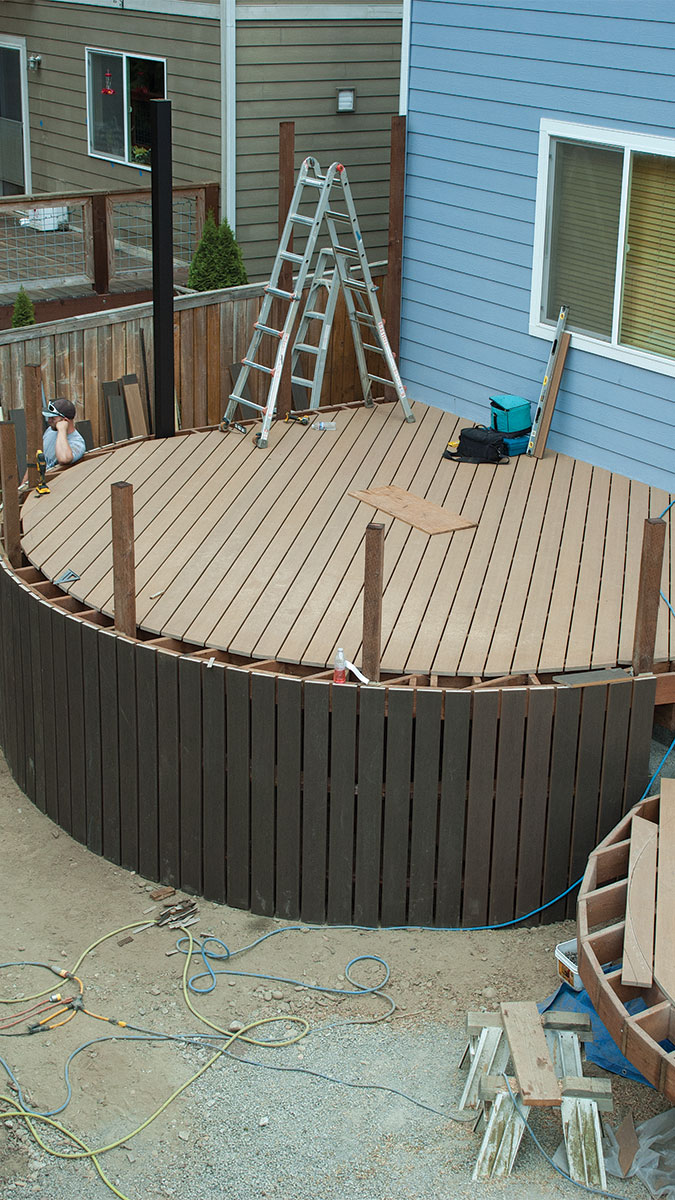
For a solid, attractive skirting, the designer of this deck opted to use vertical lengths of decking. Achieving a nicely cylindrical shape required careful shimming with composite shims and wedges. In addition, the cylindrical shape required arced bracing midway down and at grade. It takes a lot more work than adding a few sheets of PVC lattice but yields a handsome, substantial look.
| 1. Mark for the post positions. Posts should be no more than 6 ft. apart. Determine an even spacing less than 6 ft., and do a dry run to check appearance and to see if any joists are in the way. A notch here or there is fine, but placing a post directly over a joist is problematic and worth avoiding. |
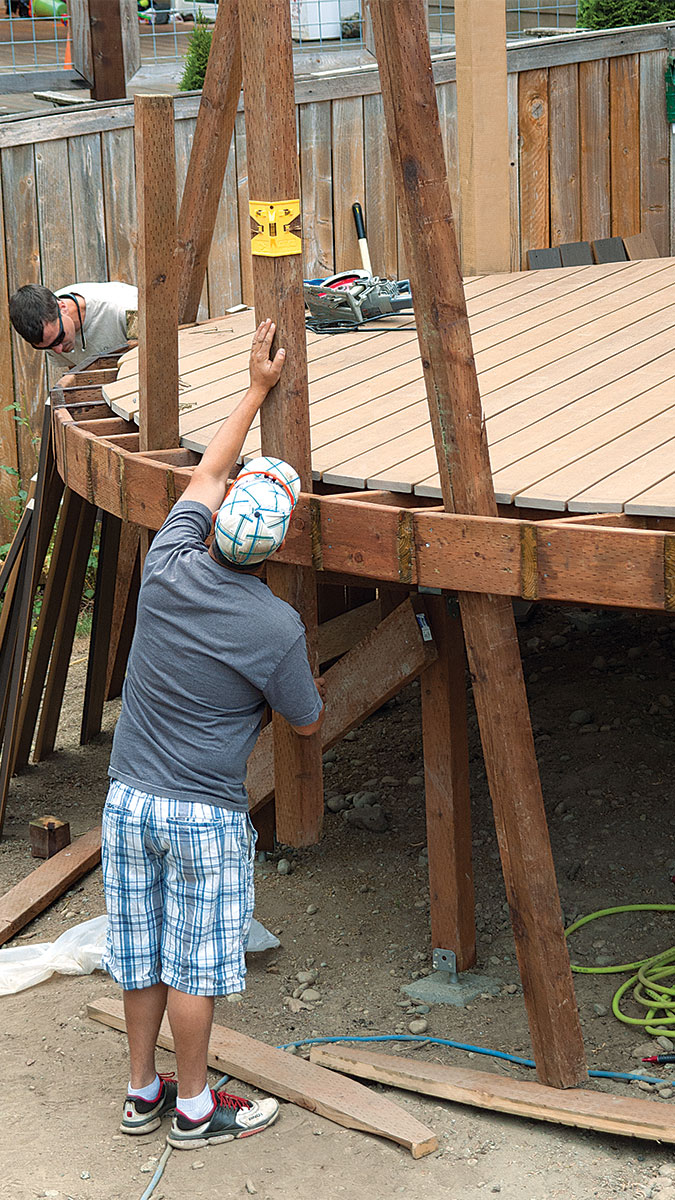
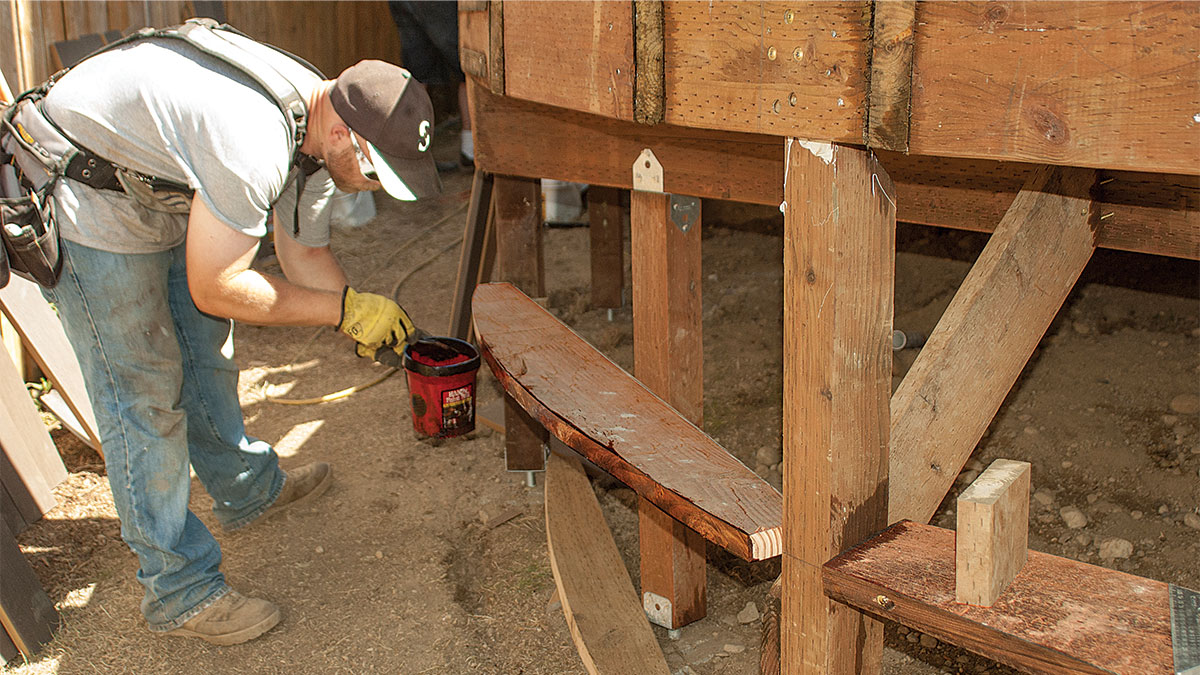
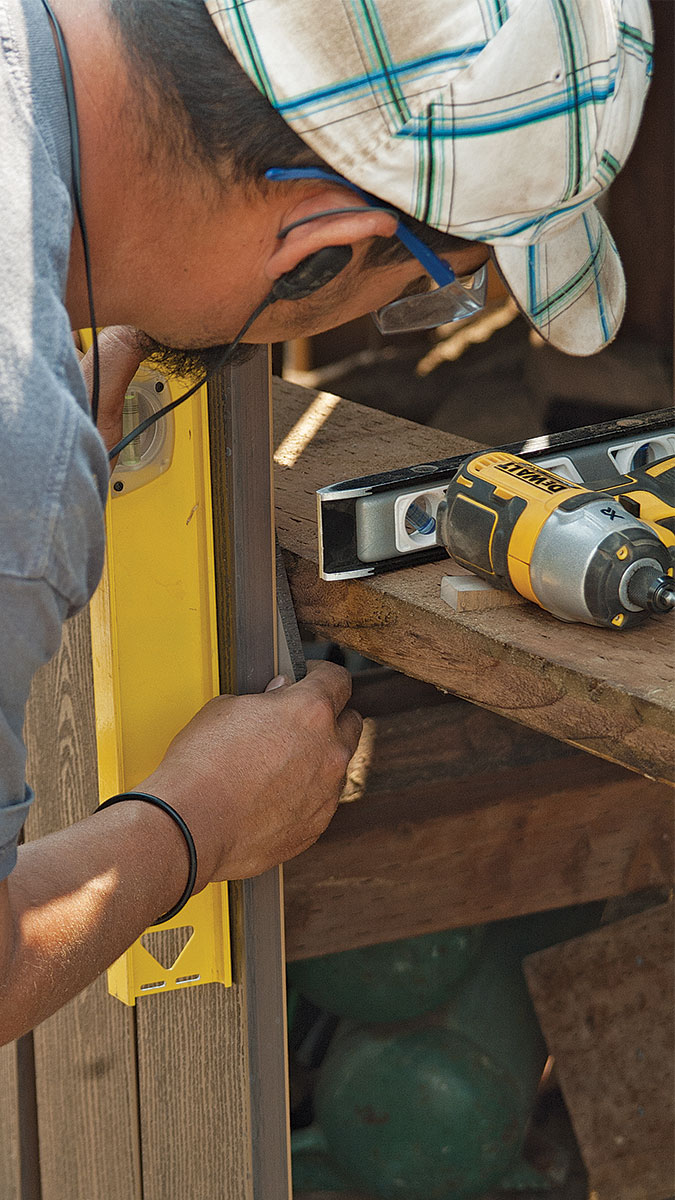
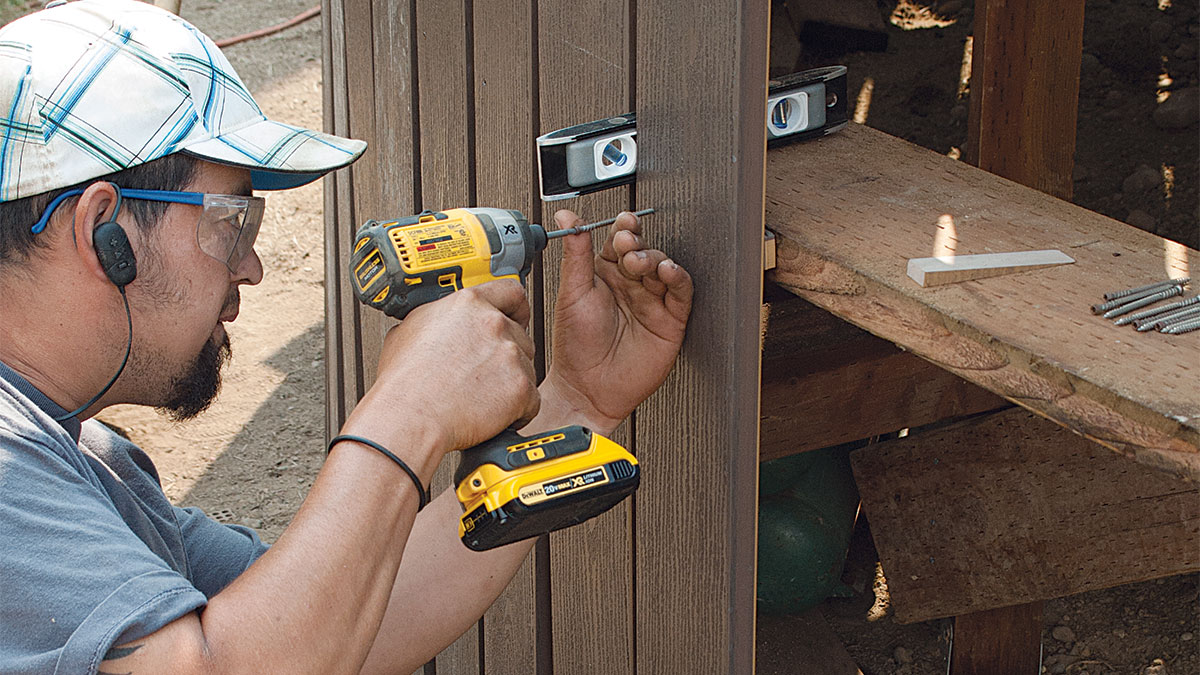
2. Attach the post. Leaving about 3 ft. of post hanging beneath the deck gives you enough length for bracing the post without getting in the way of the arced skirting brace you’ll install later (step 7). Fasten the post to the joist and/or blocking with a 4-in. to 6-in. structural screw. Using a post level as shown, check the post for plumb before attaching additional fasteners. |
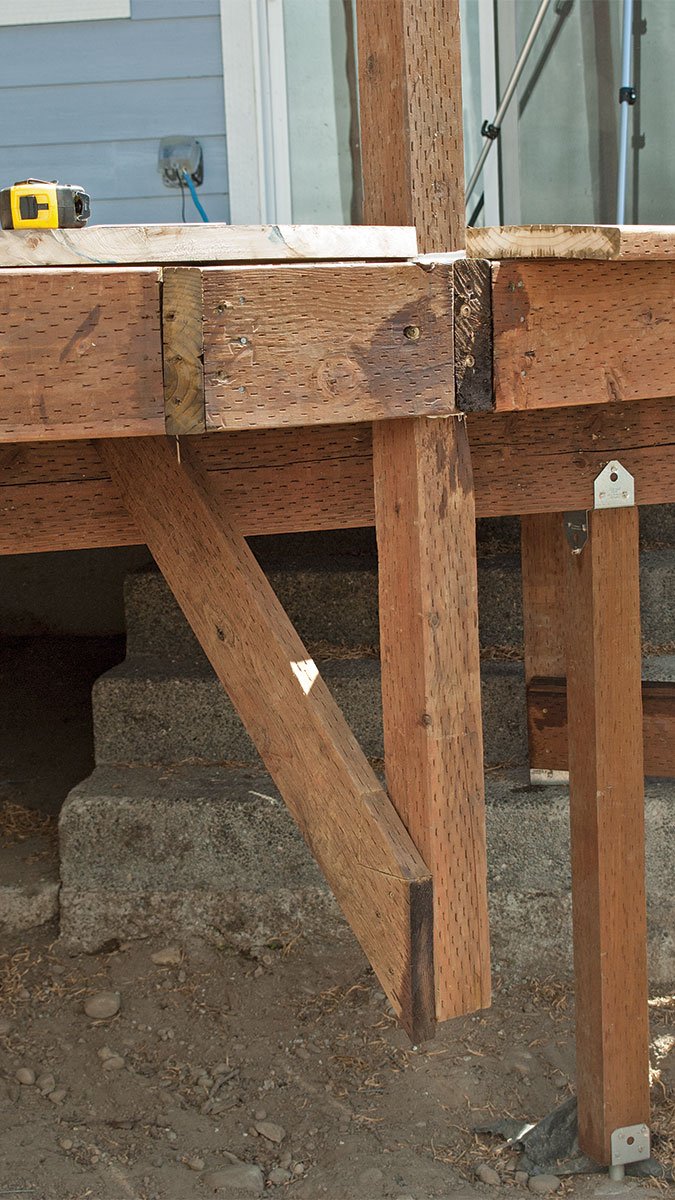
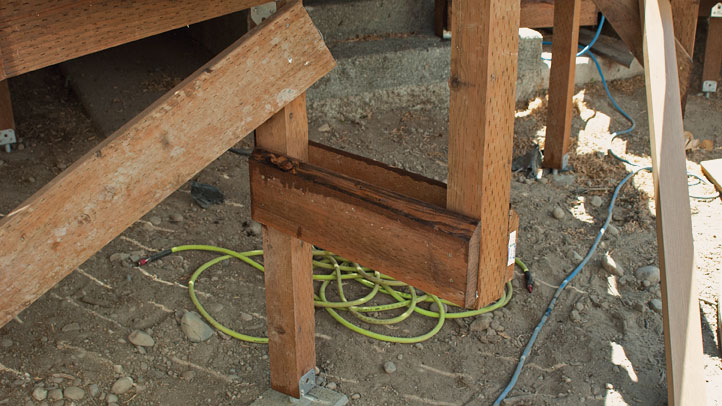
3. Brace the post. While a helper double-checks the post for plumb, attach a 2×6 brace running from the post to the framing. This stiffens the post impressively.
4. Seal the joint. Placing the post against the blocking creates a potential “rot pocket.” Give the area a good shot of sealant to deflect moisture.
| 5. Add alternative bracing. Where it is not possible to connect to a post, run diagonal 2×6 bracing to a beam or joist. |
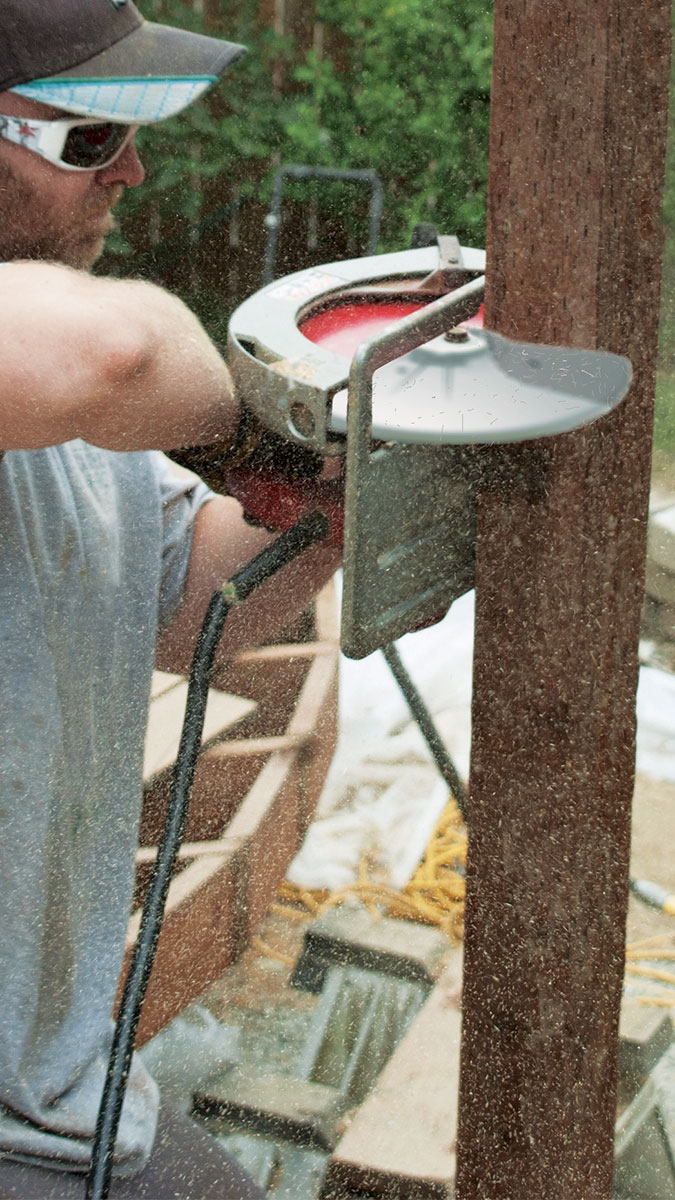
6. Trim the post. An oversize circular saw equipped with a 12-in. blade trims a 4×4 post in one cut. Warning: To avoid binding, it’s essential to have someone to provide gentle upward pressure on the cut end as the saw finishes—and keep the scrap from flying! Better yet, clamp the cutoff. |
TIP
Beveling the top edge of the post braces sheds moisture—another trick for avoiding areas of rot down the road.
|
TIP
The 7-1/4-in. blade standard on most circular saws will cut only about 2-3/8 in. deep. By marking around three sides of the post and clamping on a cutting guide, you can make a smooth cut. The rail cap will cover any slight variation. |
| 7. Cut an arced skirting brace. Create a template for the skirting brace by setting a 6-ft. 2×8 on the edge of the deck and tracing the radius curve. Using a jigsaw, cut the curve and use it as a template for cutting additional braces. |
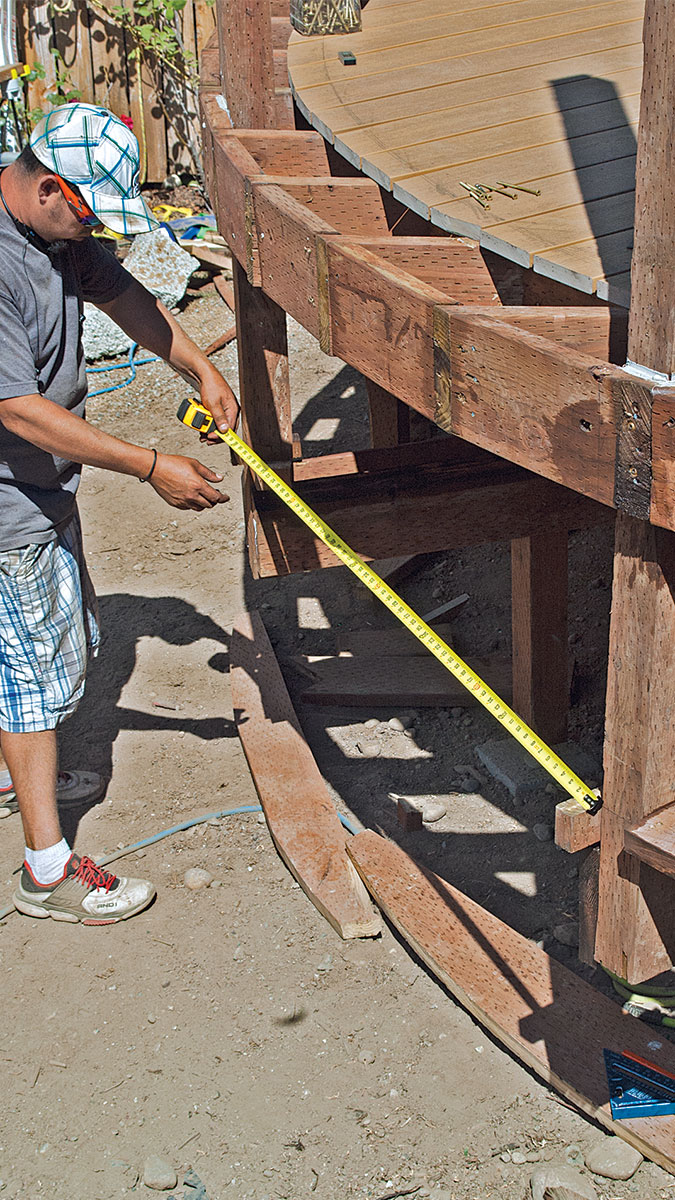
8. Trim the brace. Install a temporary block midway between the rim joist and the ground. Measure and trim the arced brace to fit between the posts. |
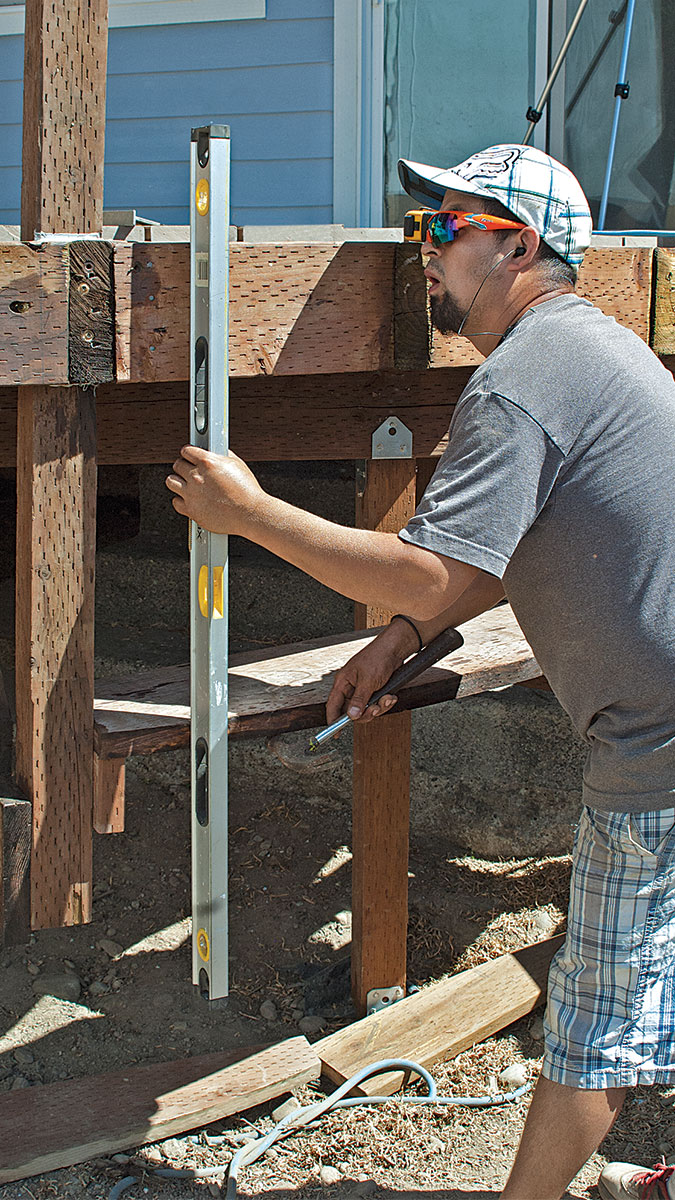
9. Position the brace. Use a level to check that the brace is lined up with the deck framing.
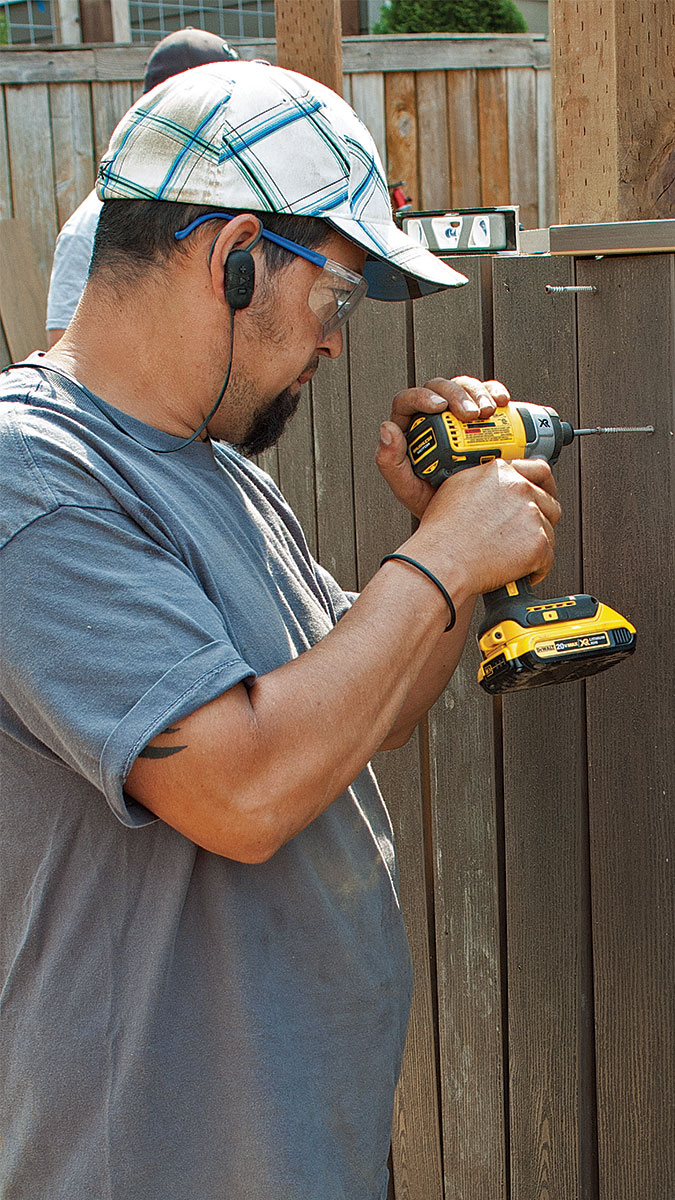
10. Fasten the brace. Fasten the brace using 6-in. and 8-in. structural screws. Although the structural screws shown are self-tapping, predrilling in such a situation avoids splits.
| 11. Remove the temporary support. Back out the screws to remove the support block once the brace is fastened. |
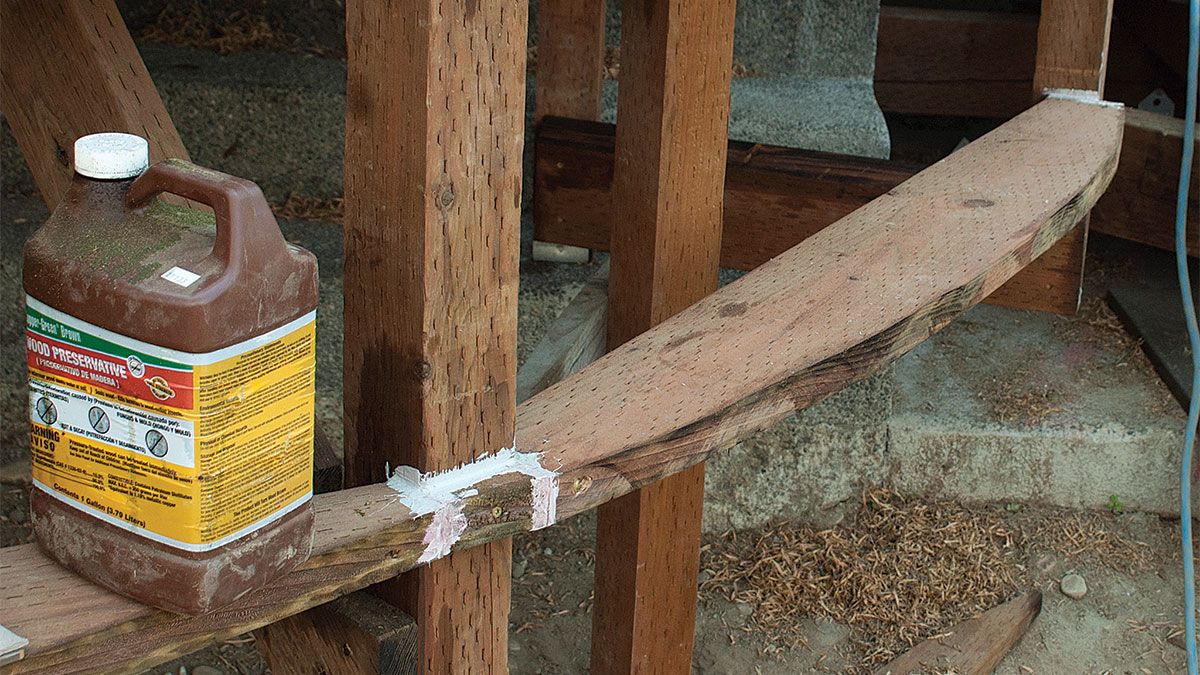
12. Add preservative. The long radius cut is a prime area for rot. Coat it thoroughly with preservative. |
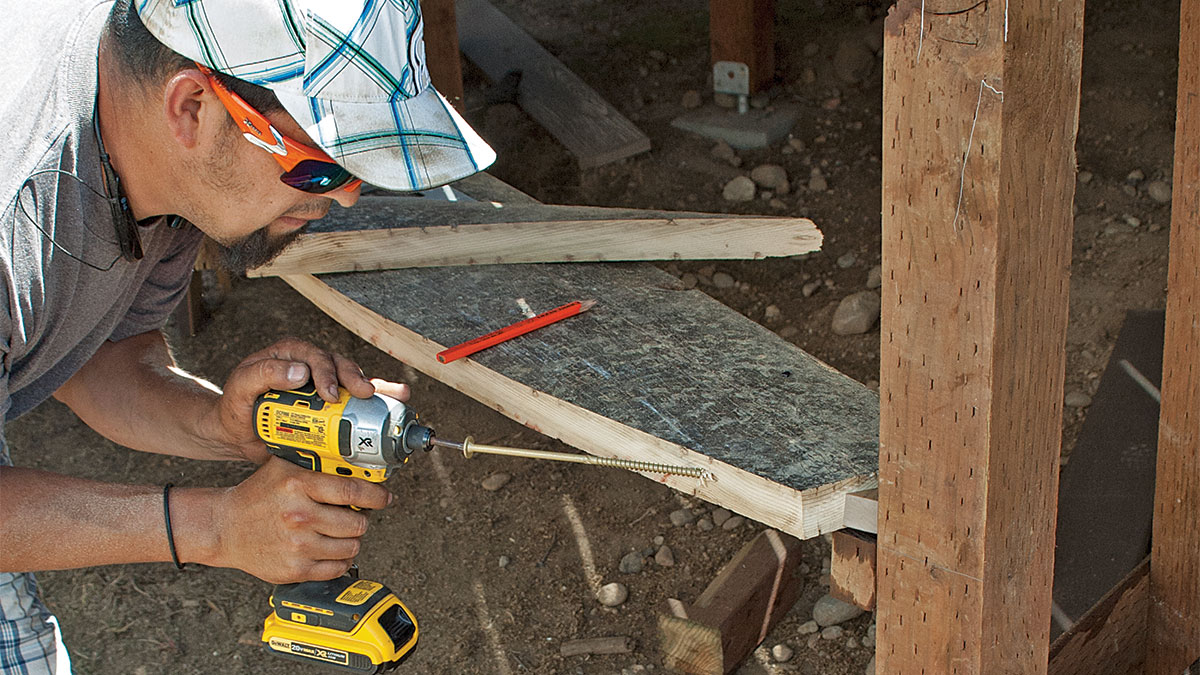
| 13. Add filler blocks. The radius skirting bracing protrudes beyond the posts. Add blocks to continue the bracing over the posts. To avoid splits, drill a pilot hole as shown before fastening. |
14. Seal gaps in the bracing. As with every joint that might be exposed to moisture, apply sealant around any filler blocks. |
| 15. Measure and cut the skirt pieces. On a level grade, skirting pieces can be gang-cut to the same length. In this case, an incline calls for measuring each piece. Landscaping will come later to cover the bottom of the skirting. With PVC decking, contact with soil is not a problem. |
16. Fasten the top of the skirting. Using 4-in. deck screws, fasten the top of each piece of skirting. Use a spacer to maintain a 5/8-in. gap between the planks. |
17. Plumb the skirting. Use a level to confirm that all is plumb. You may need to slip shims or precut wedges of decking behind each piece before fastening to achieve a smooth curve.
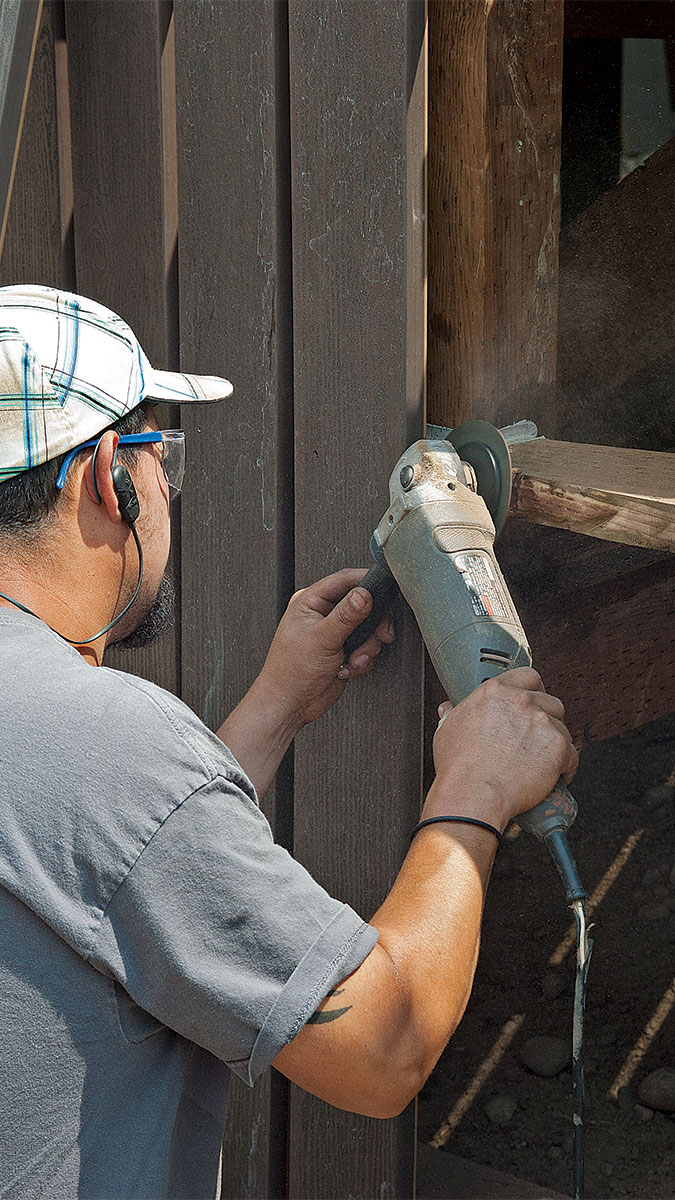
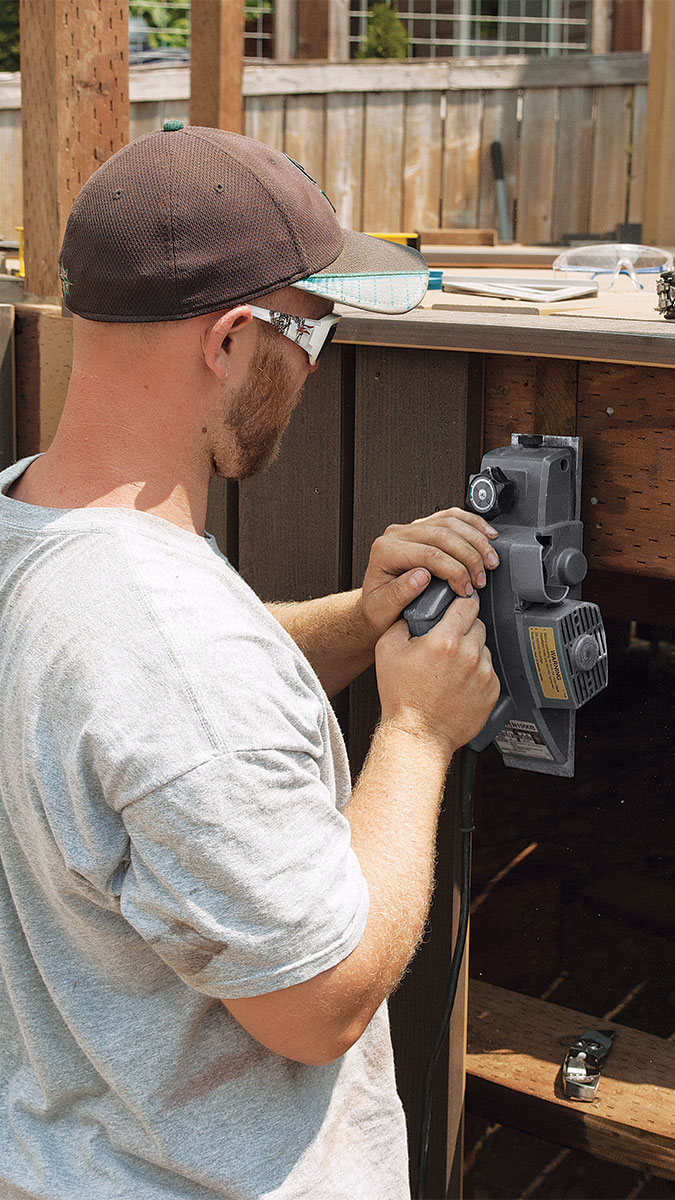
Smooth Out Imperfections
A grinder (far left) is a handy tool for smoothing out any protrusions that show up as you check for plumb. A belt sander (near left) works nearly as well.
|
18. Fasten the middle of the skirting. Insert a spacer (a torpedo level works nicely), recheck for plumb along the front and one side of the skirting, and install two fasteners.
19. Complete the skirting. Work your way around the deck, stopping short of the area where stairs will be framed. The result is a long-lasting, good-looking skirt.
Fine Homebuilding Recommended Products
Fine Homebuilding receives a commission for items purchased through links on this site, including Amazon Associates and other affiliate advertising programs.
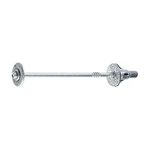
FastenMaster Screw Bolt Fastening System
These solid, time-saving bolts don't require pre-drilling and come in very handy when it comes to guard rail posts.
4-Gallon Piston Backpack Sprayer
This sprayer holds a large amount of solution and the backpack design keeps your hands free, making maintaining and cleaning a deck a breeze.
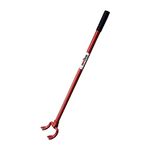
Angel Guard Deck Demon
Demo has never been easier with the deck demon. The tool keeps the worker in an upright position and uses leverage to remove decking from framing, a must have tool for demo.