
Building a Pergola: Install the Joists and Cut Off the Posts
Notch the joists to fit over the beams.
As with the beams, you’ll prepare one joist at a time and put it in position before moving on to the next one. The joists have the same end decoration as the beams, so as with the beams, you’ll start by cutting a joist to length and then cutting the decorative ends.

Each joist has four notches that fit over the beams. Cutting the notches is easy, but getting them in exactly the right spots to fit over both pairs of beams is tricky if you try to do it by measuring between posts.
To ensure success, you’ll measure and cut the two notches at one end of each joist, put those notches in place on the beams, and mark the positions of the other two notches at the other end of the joist. This means you need to lift each joist into place twice, but the extra work is worth it. Once the joists are installed, you’ll cut all the posts off at the same height.

1. Cut the end decoration and lay out the notches. Cut a joist to 182-1/2 in. long. Then strike a line across the joist located 15 in. from each end. Lay out and cut the end decorations as you did for the beams. Now lay out the two notches on one end as shown in the drawing “Joist Notch Layout.” To quickly lay out the correct notch widths, use a scrap of the 2×8 stock as a template. Place one side of the scrap squarely against the 15-in. layout line and scribe the width of the other side of the notch. Measure 5-1/2 in. from the first notch and use the scrap to scribe the width of the second notch.

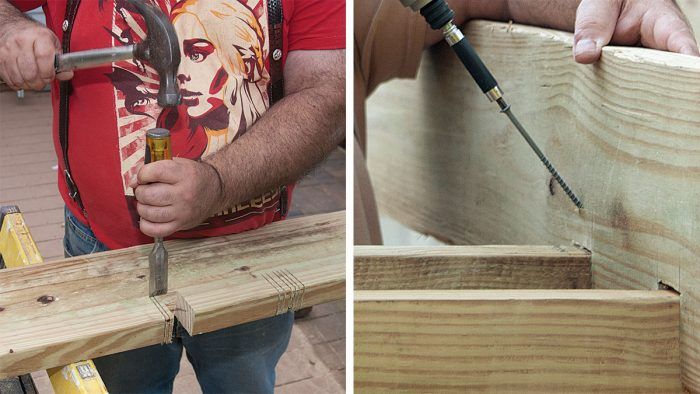
2. Kerf the joist notches. Use a square to transfer a notch layout to the bottom of the joist. Set the circular saw to cut 2 in. deep. Clamp the joist to sawhorses with the bottom facing up. Now make cuts to define the sides of a notch and then cut several kerfs across the bottom between the side cuts. Repeat for the second notch.
TIP: You know you made the space between notches 5-1/2 in. wide to match the post width, but somehow the notches are not aligning over the beam. Not to worry—one or both of the beams is bowed a bit. If the space between the notches is too wide, just use a clamp to pull the beams together until the notches fit over them. You can reverse the pads on some clamps to use as a spreader if the space is too narrow. Otherwise, cut a scrap to 5-1/2 in. as a temporary spacer and use a hammer to tap the scrap between the beams. Once the joist notches are fitted over the beams, knock the scraps out.
 |
 |
| 3. Clean out the notches. Lay the joist wide side down. Place the flat of a chisel at the bottom of the kerfs and hit it with a hammer to chop out the waste. | 4. Scribe and cut opposing notches. Put the joist in place along the layout lines on the opposing beams (see “Calculating Joist Spacing”) with the notches resting over the beams—no need to push the notches down. Then mark the positions for the remaining notches by placing a square against each side of the beam and scribing lines. Take the joist down and cut the notches. |
Calculating Joist Spacing
If posts are set exactly 12 ft. on center, there will be 135-1/2 in. between them, and the seven joists between the posts will be spaced 22-5/16 in. o.c. But in the real world, posts rarely get set exactly where you want them, and besides, you may be building a pergola with a post spacing other than 12 ft. o.c. Here’s how to calculate and lay out your joist spacing. To determine how many joists you need, start with the assumption that you want your joists to be spaced no farther apart than 24 in. o.c. Dividing the space between posts (135.5 in.) by 24 gives you 5.6. Round down to five joists. Then add in the four joists that will be attached to the posts to find that you need nine joists for posts 12 ft. o.c.  The next step is to subtract 1-1/2 in. from the space between the posts. This is because you want to calculate your on-center spacing from the center of each of the two joists that are attached to the inside of the posts. The result in our example is 134 in. Now divide 134 in. by the number of spaces between the joists. There will be six spaces between the seven between-post joists. That gives you joists that are 22-5/16 in. o.c. Lay out the joist spacing after you install the four joists that flank the posts. Working from your left side, place your tape measure against an inside flanking joist and mark the on-center intervals across the top of one of the beams. Do the same on one of the opposing beams. The interval measurements for a pergola with posts 12 ft. on center are given in the drawing below. Notice on that drawing that if you start measuring from the left, the joists are placed to the left side of the lines. |
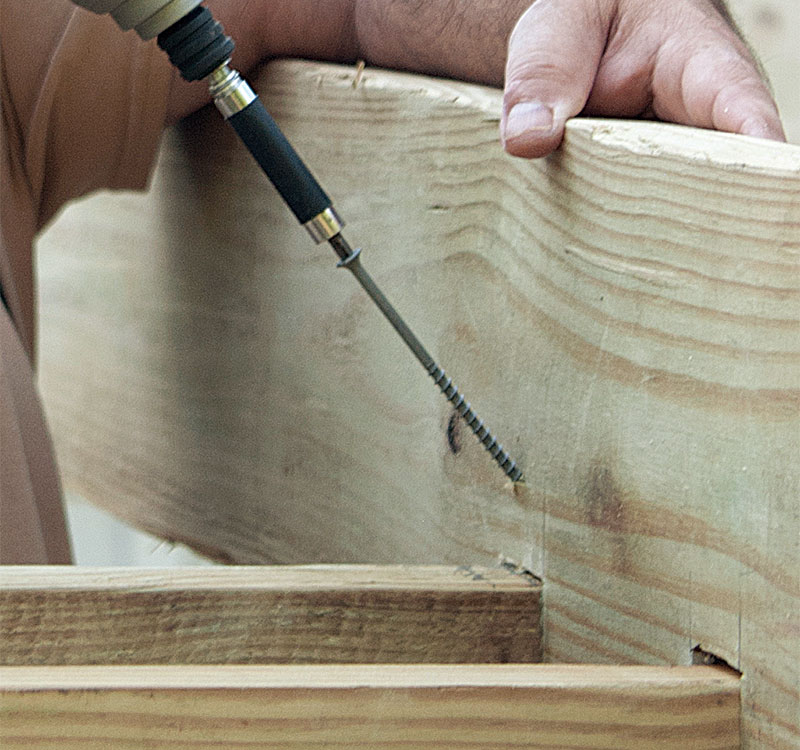
5. Install the joist. Put the joist in place along the layout line and push it down onto the notches. If the beam is against a post, attach it to the post with two staggered 4-in. deck screws. If the joist is not against a post, secure it with 4-in. deck screws, driving one screw at an angle into each beam. At each end, drive one screw through one side of the joist into one beam and the other screw into the other side of the joist into the neighboring beam.

6. Cut off the posts. You’ll cut the posts off so that they’ll protrude 2 in. above the 1-1/2-in. slats. Measure up 3-1/2 in. from the top of the joists and use a square to lay out the cut on three sides of the post. Make the cut with a 7-in. blade in a reciprocating saw. To give the posts a finished look, you can add copper post caps. Just put the caps on with construction adhesive.
Fine Homebuilding Recommended Products
Fine Homebuilding receives a commission for items purchased through links on this site, including Amazon Associates and other affiliate advertising programs.

Metal Connector Nailer

N95 Respirator

Lithium-Ion Cordless Palm Nailer
