FHB Logo Facebook LinkedIn Email Pinterest Twitter X Instagram Tiktok YouTube Plus Icon Close Icon Navigation Search Icon Navigation Search Icon Arrow Down Icon Video Guide Icon Article Guide Icon Modal Close Icon Guide Search Icon Skip to content
Subscribe
Log In
  • How-To
  • Design
  • Tools & Materials
  • Restoration
  • Videos
  • Blogs
  • Forum
  • Magazine
  • Members
  • FHB House
  • Podcast
Log In

Fine Homebuilding Project Guides

Decks

Guide Home
  • Design & Planning
  • Tools & Materials
  • Footings & Foundations
  • Framing a Deck
  • Installing Decking
  • Installing Railings
  • Deck Stairs
  • Custom Details
  • Finishes, Repairs, and Maintenance
  • Complete Deck Builds
How-To

Building and Installing a Site-Built Balustrade: Assembling the Balustrade

Use off-the-shelf hardwood balusters to complete the railing.

By Scott Grice
  • X
  • facebook
  • linkedin
  • pinterest
  • email
  • add to favorites Log in or Sign up to save your favorite articles

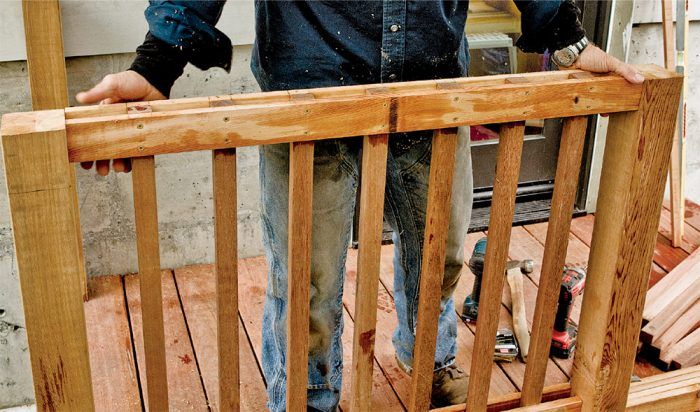
Establishing baluster spacing

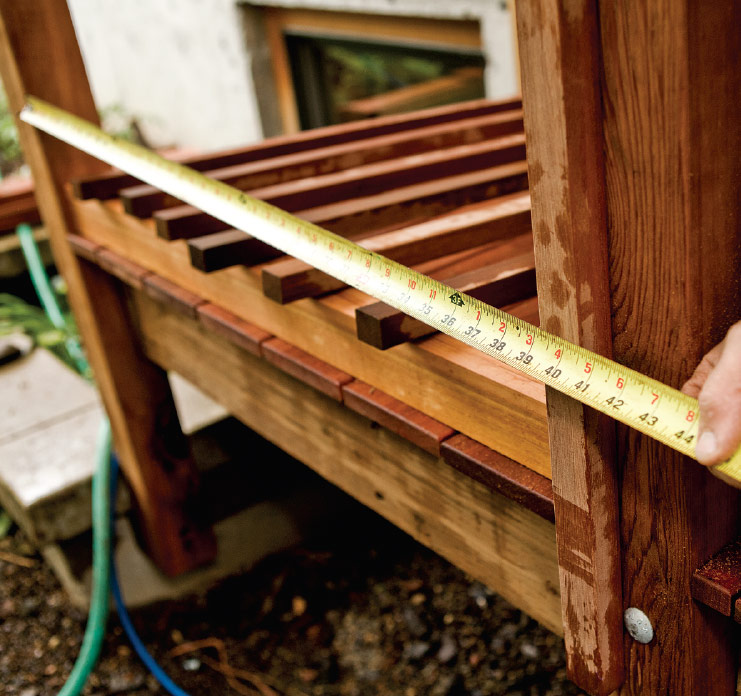
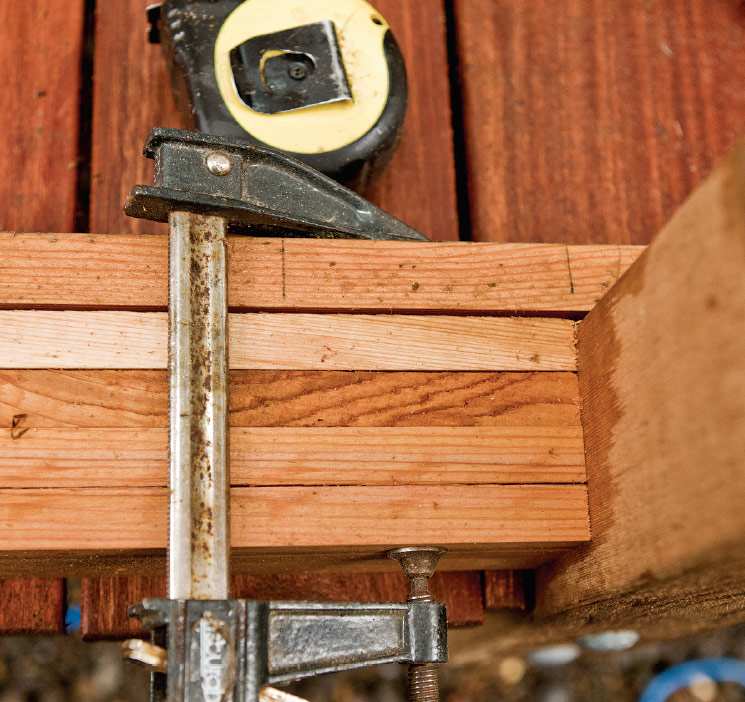
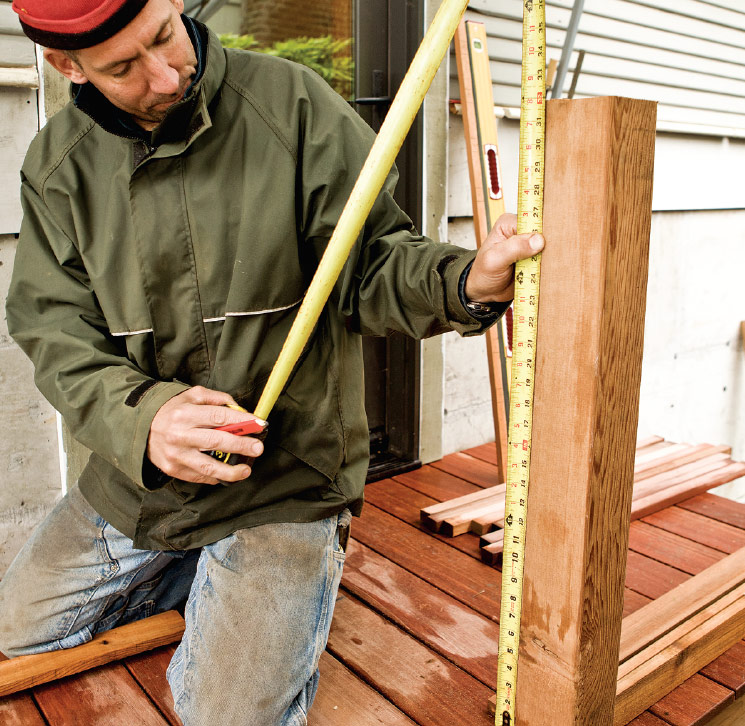
Calculating the baluster spacing is not difficult, but it does require a little back and forth. Unless the spacing between all the posts is perfectly uniform, it’s best to calculate the baluster spacing for each run separately. Typically, your eye will not pick up small differences in spacing from one run to the next but will immediately identify one space that is not the same as the rest in the run. To calculate the spacing, begin by measuring the distance between the posts (see photos below). To keep the measurements straight and to avoid error, it’s best to have a calculation sheet to write the measurements down on (see “Calculating the Baluster Spacing” below). To the distance between the posts add one baluster thickness.

1. Measure the distance between two posts to begin calculating the baluster spacing.

2. Add the width of one baluster to the post spacing to get the overall distance.


Calculating the baluster spacing

  • Distance between posts + One baluster thickness = Overall balustrade distance x estimated baluster-unit distance = Number of units fraction
  • Round number of units up to the next whole number = Final number of baluster units
  • Overall balustrade distance x Final baluster units = Final baluster-unit distance

Note that the final baluster-unit distance is what you use to lay out the balusters, but if you want to check the exact distance between the balusters, simply subtract the baluster thickness from the final baluster-unit distance.

Quick Tip: Mike Guertin demonstrates an alternative way to easily lay out good-looking baluster spacing using a piece of elastic band as a measuring tool in this video.


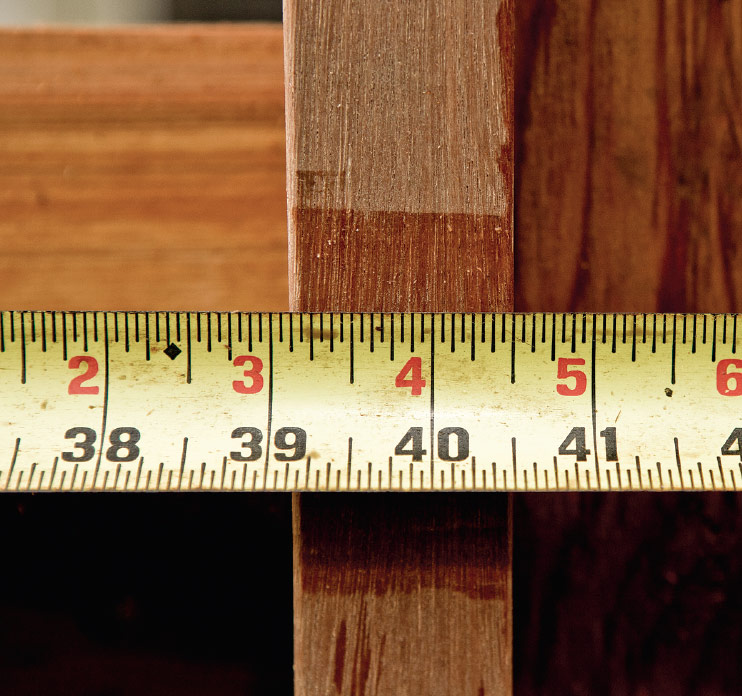
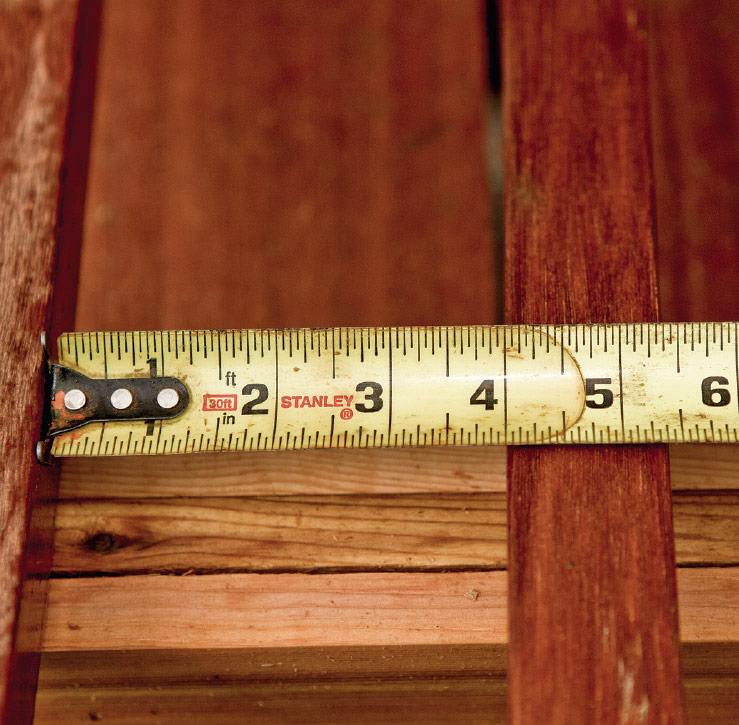
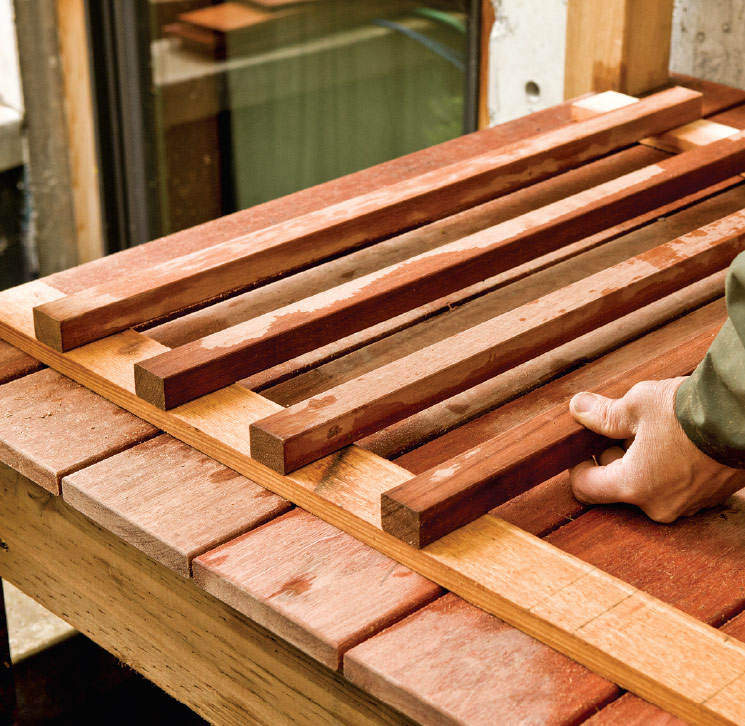
The maximum distance allowed between balusters by code is 4 in., so set two balusters down with a 4-in. gap between them and measure the space between the balusters plus one baluster thickness. This is the estimated baluster-unit distance. Now divide the overall distance by the unit distance to determine the number of units. In this case, the number is about 7-1/2. Round up to the next whole number and divide it back into the overall distance to get the final baluster-unit distance. In this case the baluster-unit distance is just over 5 in..

3. Calculate the baluster-unit distance by adding 4 in. to the width of one baluster.

4. Divide the overall distance by the unit distance and then round up.

5. Divide the number of spaces back into the overall distance.


Assembling and securing the balustrade

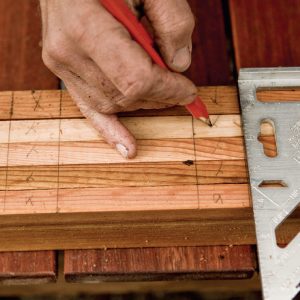
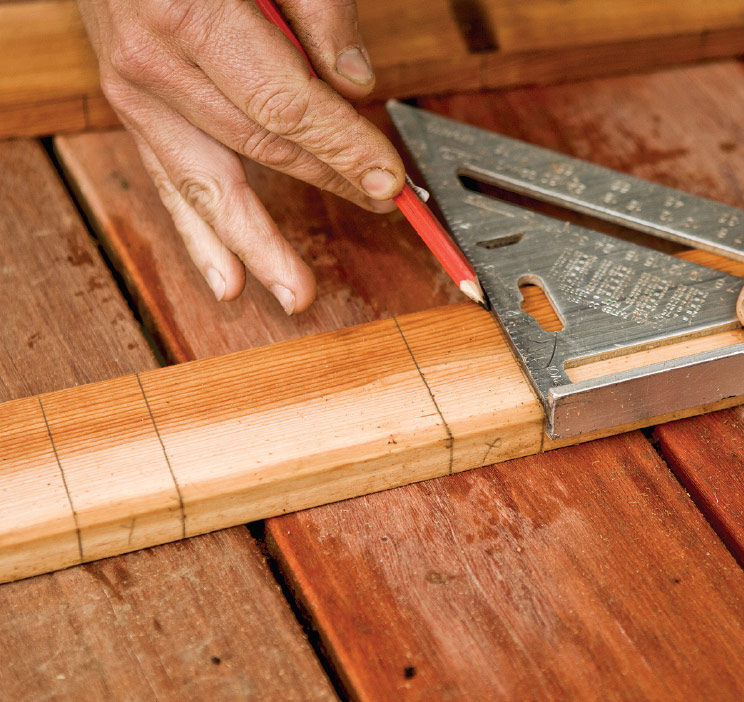
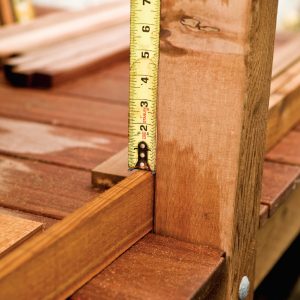
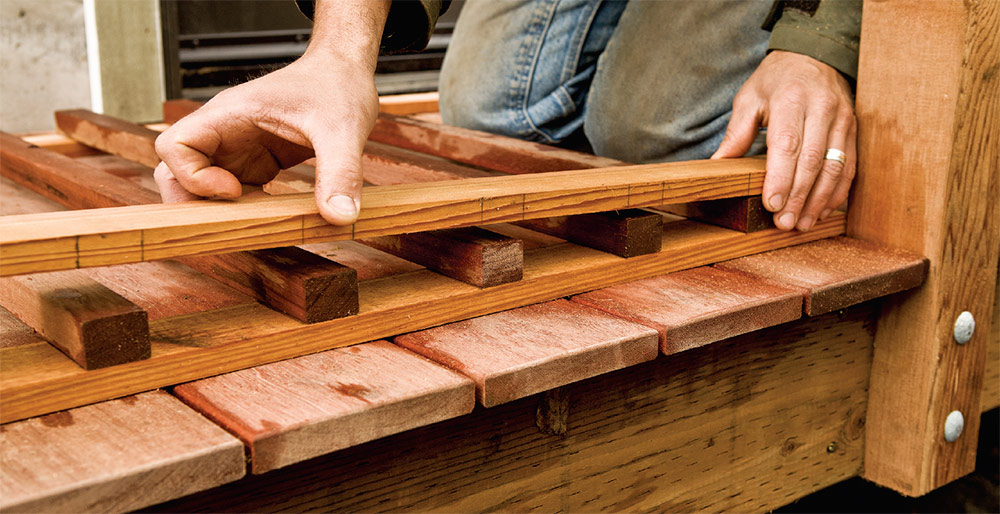
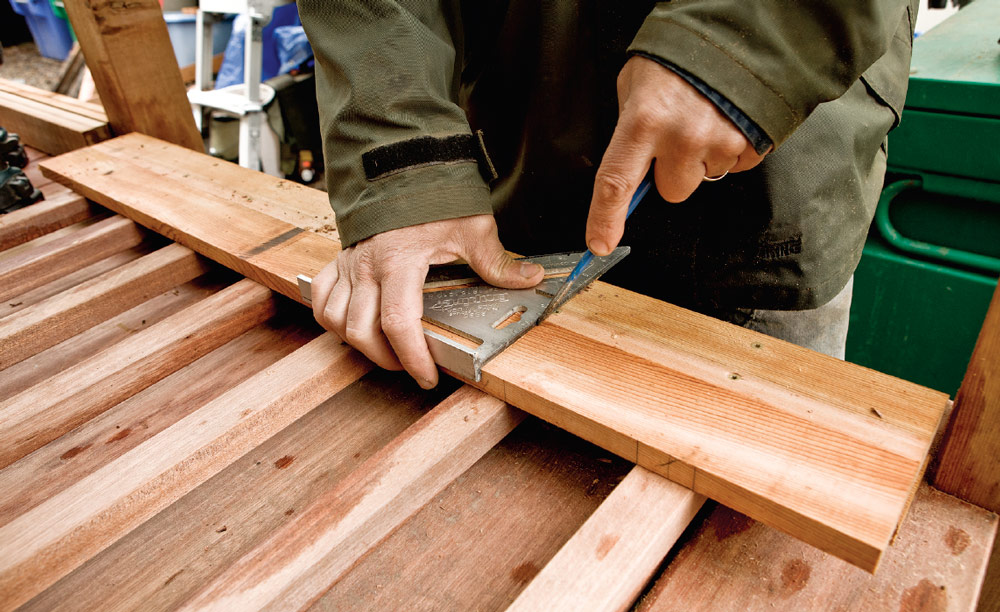
To increase efficiency and avoid mistakes, make a story pole of baluster spacing and clamp it in place with the actual balusters. Transfer the baluster layout to the rails, making an X for each baluster. Unclamp the rails and transfer the layout up the rails’ inside faces. By code, the maximum allowable gap between the decking and the rail bottom is also 4 in. To establish the correct baluster length, place a 4-in. (or less) spacer on the deck. Measure to the top of the post for the overall baluster length. Cut all the balusters and place them according to the layout on a top and bottom rail on the deck surface.

1. Clamp the story pole to the rails of a section positioned between the posts.

2. Transfer the layout from the story pole to the railings.

3. Continue the layout marks down the insides of the rails.

4. Place a spacer no more than 4 in. tall at the base of the post.
4. Place a spacer less than 4 in. tall at the base of the post.

5. Measure from the spacer to the top of the post to establish the baluster height.

6. Assemble the rails and balusters on the deck adjacent to their final position.

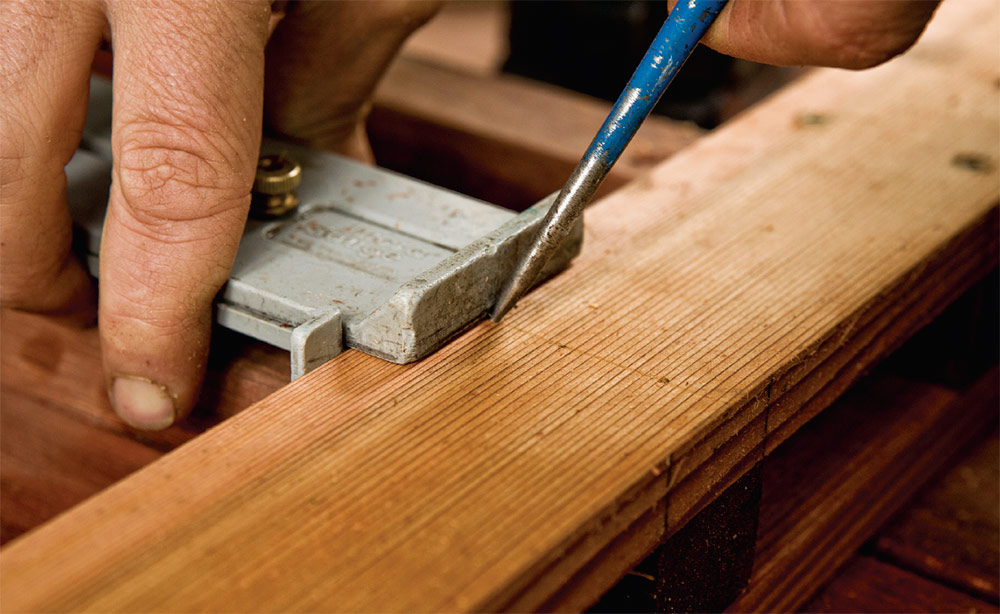
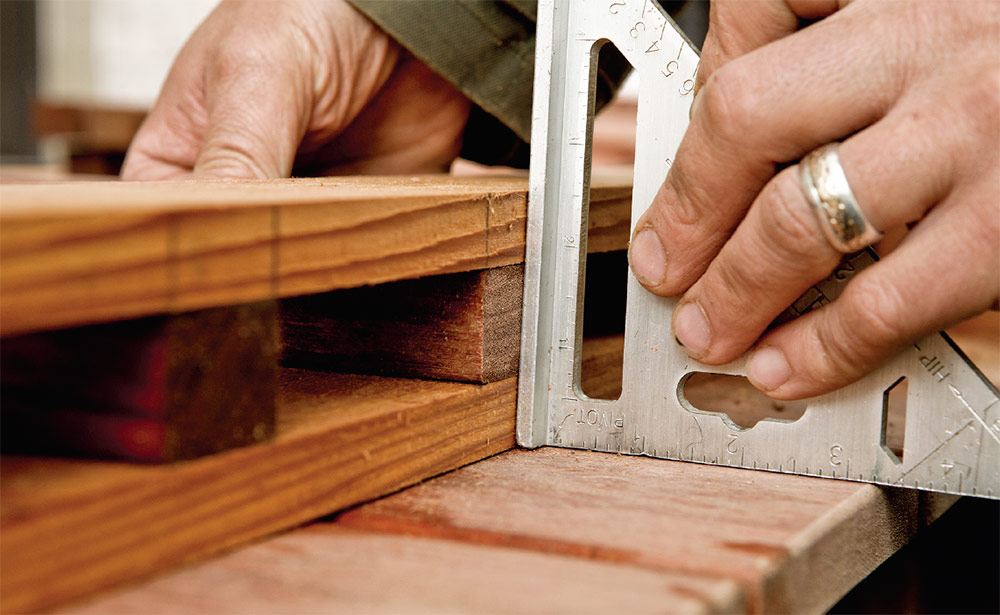
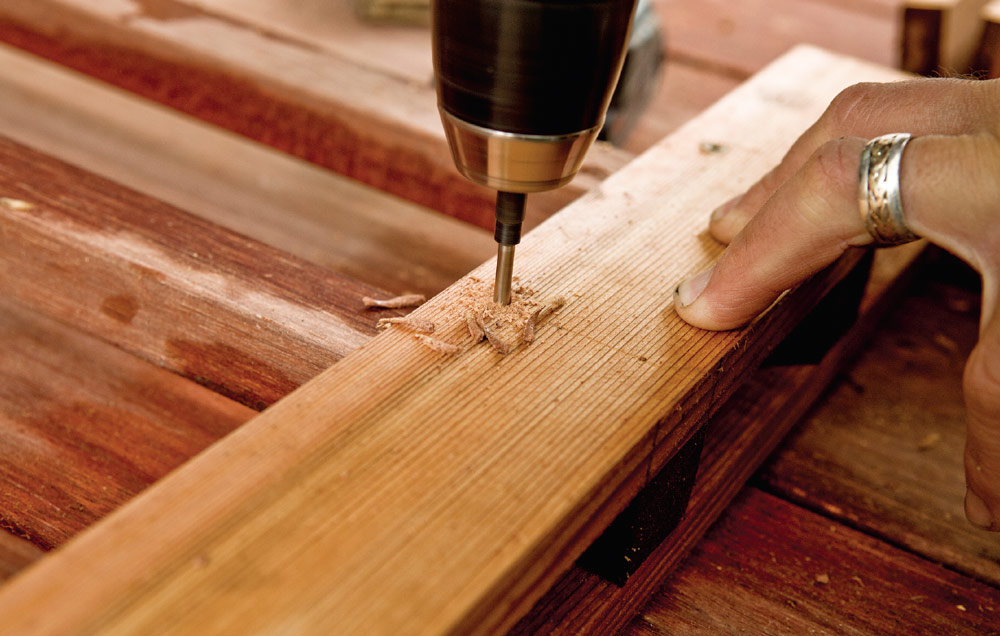
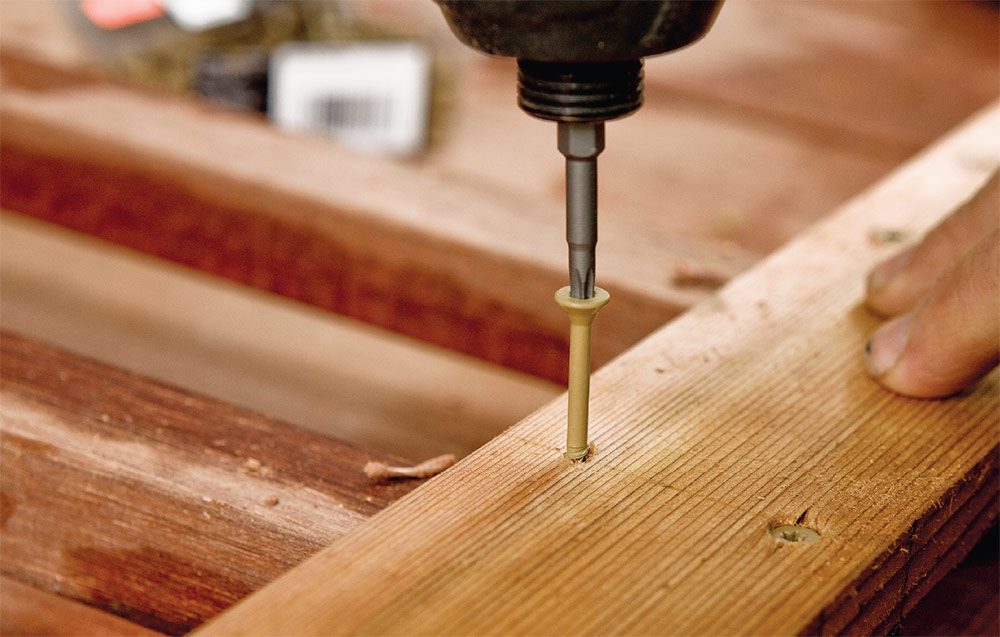
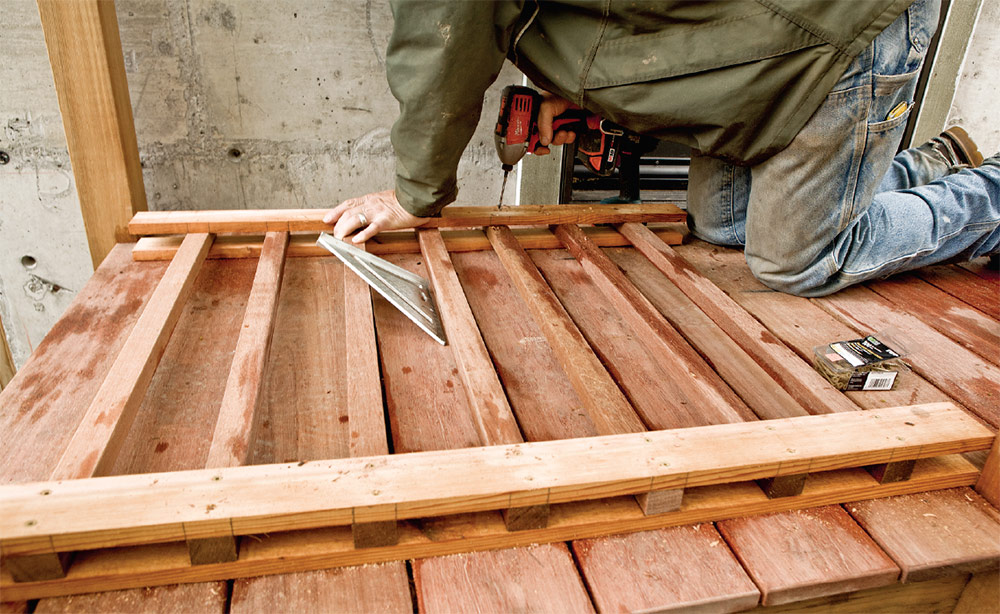
Place the other top and bottom rails over the balusters, being careful to align the ends and the layout marks. To create a uniform assembly, mark the fastener location with a stop or marking jig at every baluster location. As it’s easy for the individual boards to shift before they are secure, use a square to flush the baluster bottoms and rail edges before predrilling the holes. Hold the assembly firmly while predrilling the holes. Check the assembly again for alignment and then drive the fasteners to secure the bottom part of the balustrade.

Rather than measuring for the fastener locations in the top rail, align the top rail next to the bottom rail you just secured and transfer the fastener locations with a Speed Square. Repeat the process of drilling pilot holes and driving fasteners to secure the balusters and top rails. Test-fit the assembled balustrade to make sure it fits properly before attaching it permanently.

7. Position the opposing rail on top of the balusters. Take care to orient the rails appropriately.

8. Mark the fastener locations with a gauge to ensure that they are uniform. A slight depression from the awl will help guide the bit.

9. Flush the rails and balusters with a Speed Square before drilling the pilot holes.

10. Drill the pilot holes at each baluster location, taking care not to drive the bit into the decking below.

11. Drive a fastener into each hole to secure the rails and balusters.

12. Position the top rail adjacent to the bottom rail and transfer the baluster locations, again making a dimple with your awl.

13. Repeat the process of aligning and securing the rails to the balusters at the top of the assembly.

14. Test-fit the baluster and make any adjustments necessary to achieve a snug fit.


trim router
Trade secret:

Keep a trim router fitted with a small roundover bit handy. As you finish each section, quickly give the sharp edges a pass to remove splinters and give the balustrade a more finished look.


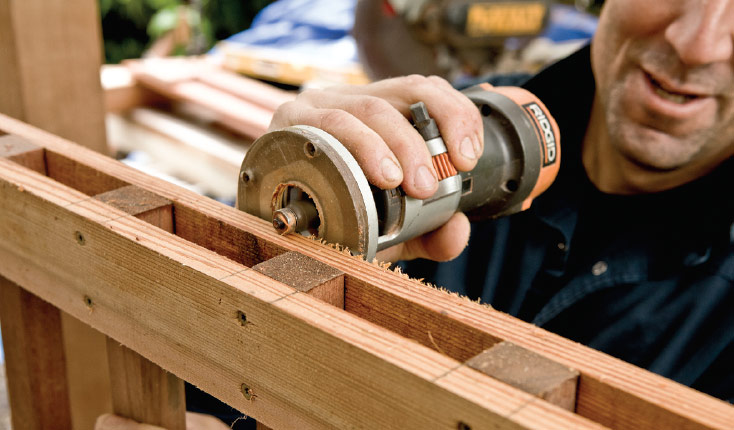
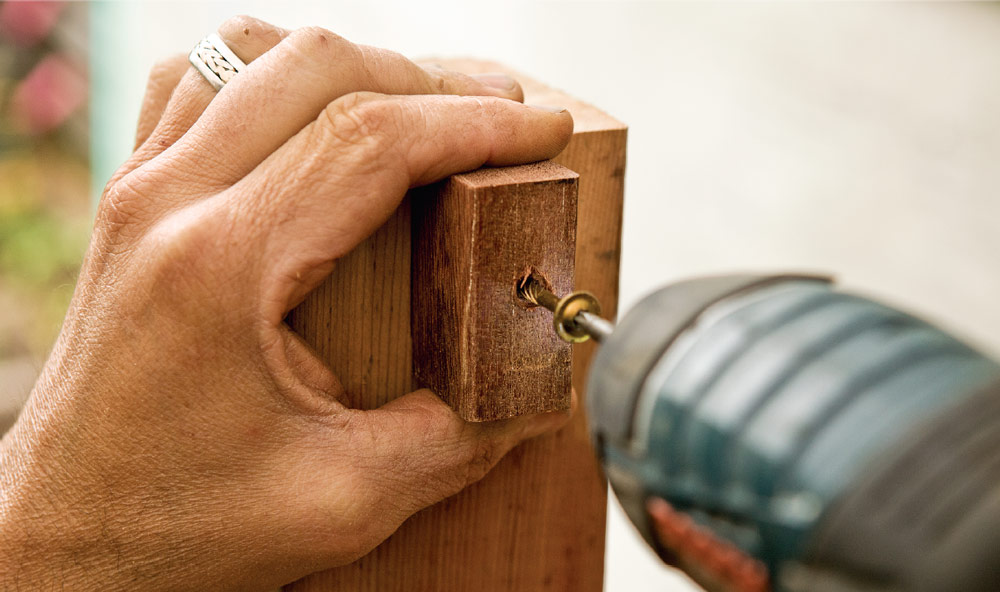
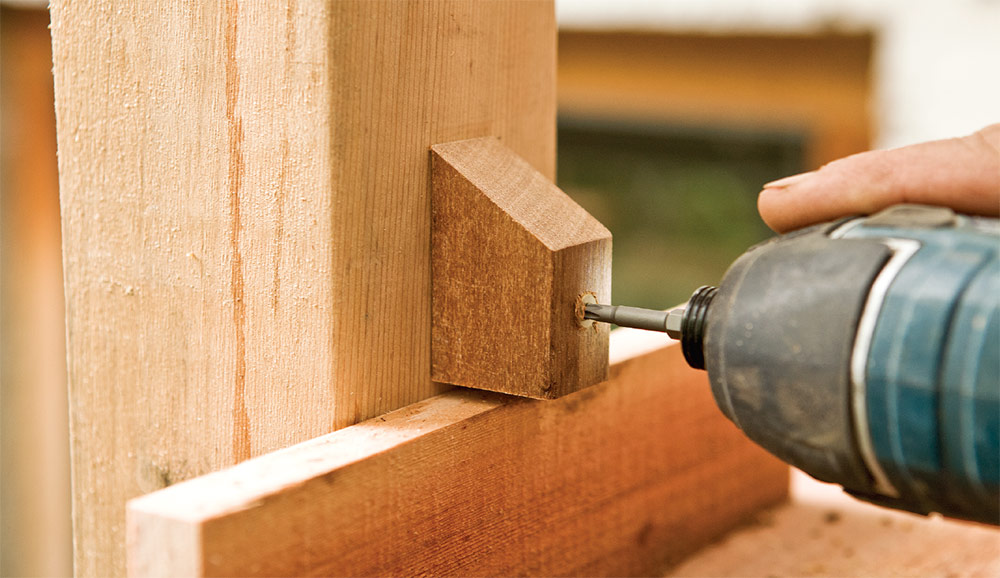
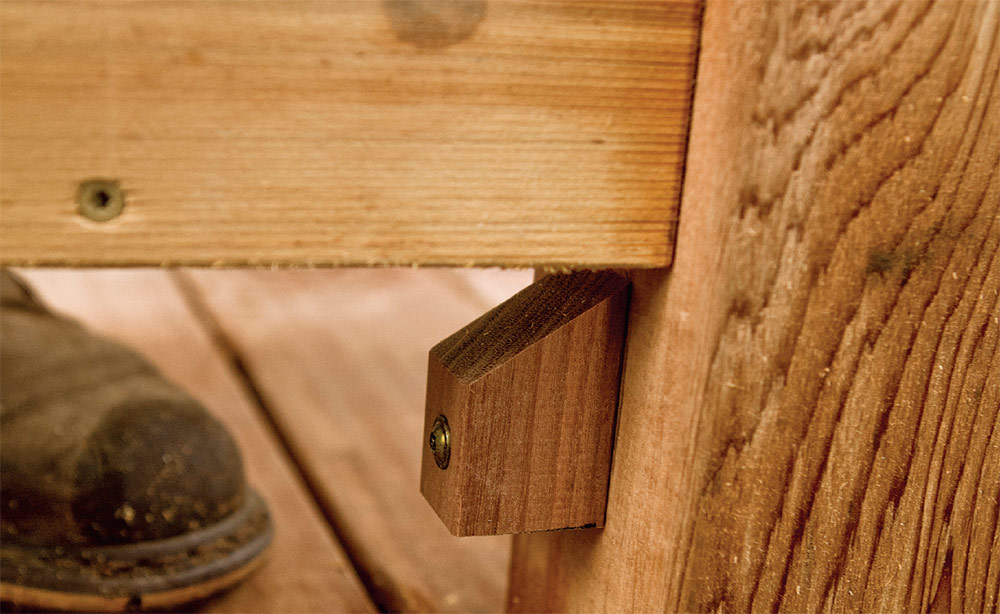
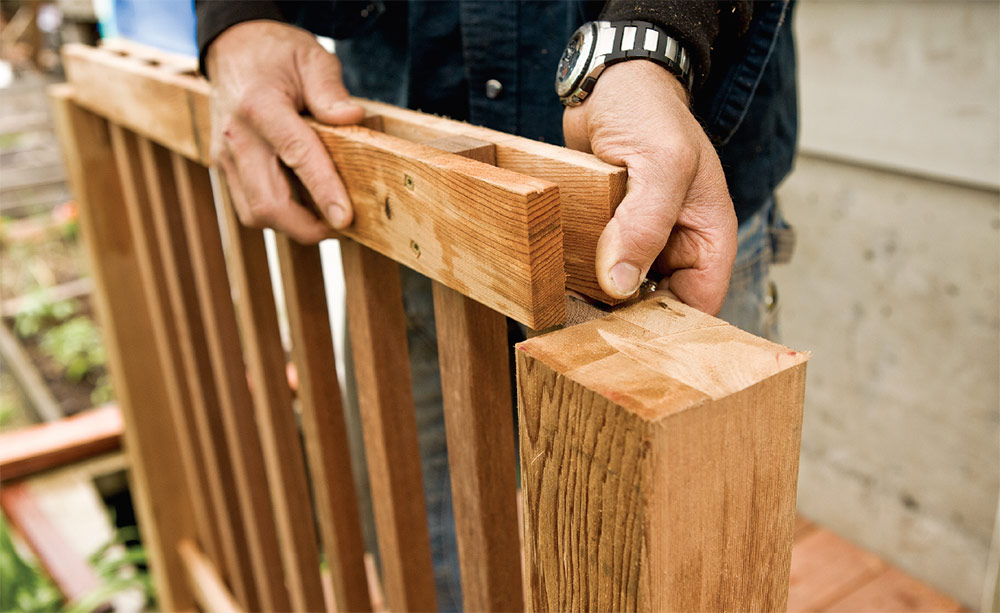
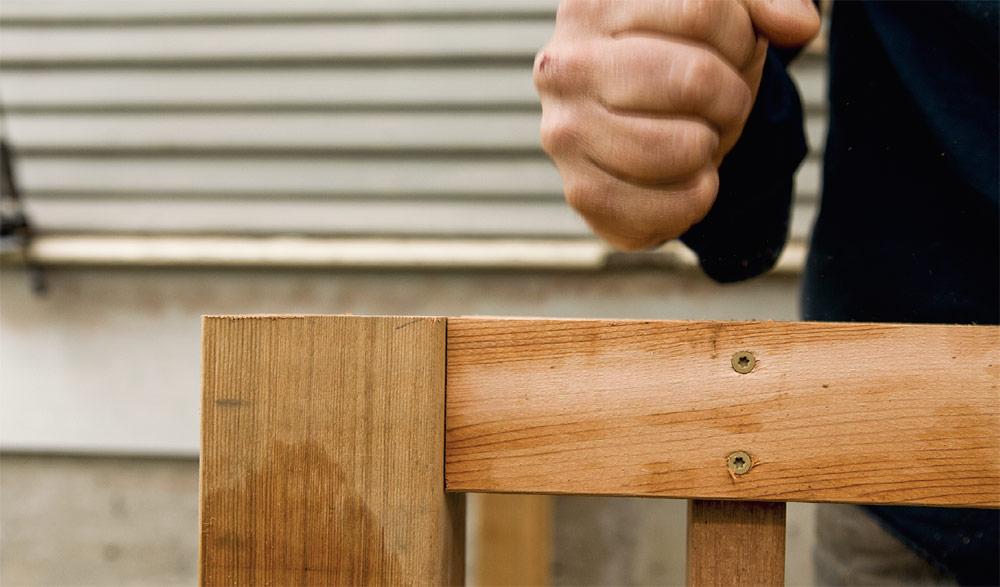
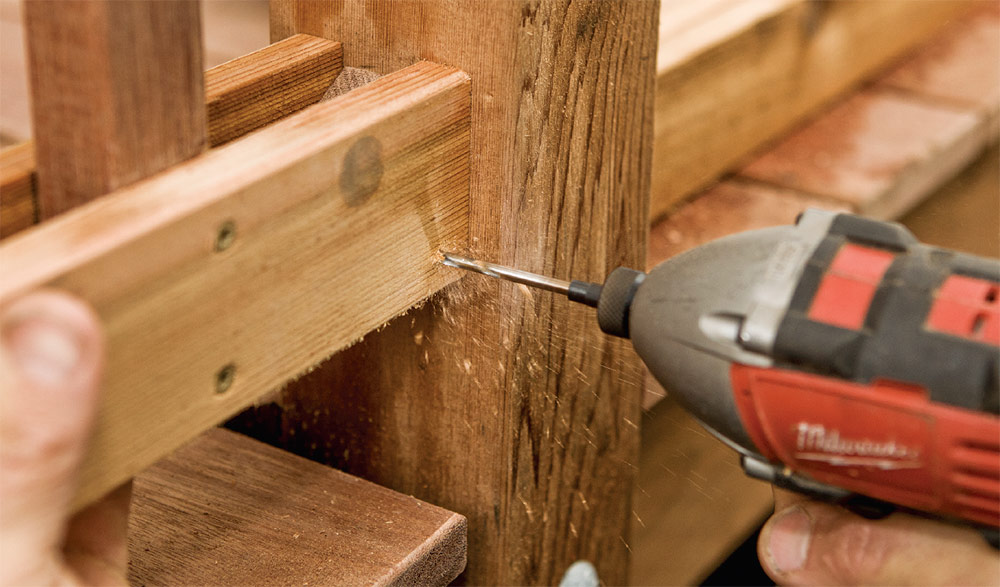
To secure the balustrade at the top, first cut a short section of baluster and fasten it to the post in the center. At the bottom, cut the top of the block at an angle to shed water and prevent rot, and then attach it where the bottom rail meets the post.  Slide the rail in from the side just above the blocks and then guide it down into place. Flush the top of the rail to the post top. If everything fits, you shouldn’t have to do more than some gentle tapping to persuade it into position. Finally, use fasteners to secure the rails to the blocks. Be careful with this process because the short blocks tend to split if you overdrive the fasteners or neglect to drill fastener pilot holes.

15. Fasten short lengths of baluster material to the posts between where the rails intersect the posts.

16. Angle the top of the blocks where they are exposed to the weather. This will help shed water and prevent rot.

17. Slide the balustrade in from the side just above where the rails intersect the blocks.

18. Slide the balustrades down into position so that all four blocks are hidden behind the rails.

19. Flush the top of the rail with the top of the posts. Double-check to make sure the balustrade is aligned the way you want it.

20. Secure the balustrade with fasteners at each of the four blocks.


Photos: John Ross

Fine Homebuilding Recommended Products

Fine Homebuilding receives a commission for items purchased through links on this site, including Amazon Associates and other affiliate advertising programs.

Jigsaw

When it comes to fitting and installing decking, a cordless jigsaw is a must-have for custom cuts — especially around posts.
Buy at Amazon

Metal Connector Nailer

This time-saving tool is the fastest way to install hardware. The tip is designed to locate the hole in the hardware, then all you have to do is pull the trigger.
Buy at Amazon

Drill Driver/Impact Driver

Whether you're pre-drilling holes or driving screws, this Milwaukee® compact cordless driver is the way to go when it comes to building decks.
Buy at Amazon
Previous: Building and Installing a Site-Built Balustrade: Cutting the Posts and Rails Next: How to Make Rot-Resistant Deck and Porch Railings

Guide

Decks

Chapter

Installing Railings

Sign up for eletters today and get the latest how-to from Fine Homebuilding, plus special offers.

Signing you up...

This site is protected by reCAPTCHA and the Google Privacy Policy and Terms of Service apply.
See all newsletters
See all newsletters

Log in or create an account to post a comment.

Sign up Log in

Become a member and get full access to FineHomebuilding.com

Decks

Decks

Hundreds of articles and videos by top deck-building pros on how to design and build a beautiful, sturdy, and safe deck

View Project Guide

View All Project Guides »

Become a member and get unlimited site access, including the Decks Project Guide.

Start Free Trial

Design & Planning
  • Basic Design Options
  • Generating Plans
  • Calculating Deck Loads
  • Code Compliance
Tools & Materials
  • Deck Building Tools
  • Foundation and Framing Materials
  • Decking Materials
  • Fasteners and Hardware
Footings & Foundations
  • Choosing a Foundation
  • Sizing and Laying Out Footings
  • Excavation
  • Pouring the Foundation
Framing a Deck
  • Framing Overview
  • Installing the Ledger
  • Setting Posts and Beams
  • Installing Joists
Installing Decking
  • Decking Basics
  • Installation Process
  • Adding Fascia and Other Decorative Elements
Installing Railings
  • Installing Deck Railing Posts
  • Building Wood Rails and Balustrades
  • Non-Wood Railing Options
  • Installing Nonwood Balustrades
Deck Stairs
  • Deck Stairs Overview
  • Laying Out, Cutting, and Installing the Stringers
  • Installing Treads, Risers, and Stair Railings
Custom Details
  • Benches, Planters, and Privacy Features
  • Pergolas
  • Lighting
Finishes, Repairs, and Maintenance
  • Deck Finishes
  • Cleaning and Refinishing
  • Inspection and Repair
Complete Deck Builds
  • Grade-Level Decks
  • Raised Decks

Fine Home Building

Newsletter Sign-up

  • Fine Homebuilding

    Home building tips, offers, and expert advice in your inbox.

  • Green Building Advisor

    Building science and energy efficiency advice, plus special offers, in your inbox.

  • Old House Journal

    Repair, renovation, and restoration tips, plus special offers, in your inbox.

Signing you up...

This site is protected by reCAPTCHA and the Google Privacy Policy and Terms of Service apply.
See all newsletters

Follow

  • Fine Homebuilding

    Dig into cutting-edge approaches and decades of proven solutions with total access to our experts and tradespeople.

    Start Free Trial Now
    • Facebook
    • Instagram
    • X
    • LinkedIn
  • GBA Prime

    Get instant access to the latest developments in green building, research, and reports from the field.

    Start Free Trial Now
    • Facebook
    • YouTube
  • Old House Journal

    Learn how to restore, repair, update, and decorate your home.

    Subscribe Now
    • Facebook
    • Instagram
    • X

Membership & Magazine

  • Online Archive
  • Start Free Trial
  • Magazine Subscription
  • Magazine Renewal
  • Gift a Subscription
  • Customer Support
  • Privacy Preferences
  • About
  • Contact
  • Advertise
  • Careers
  • Terms of Use
  • Site Map
  • Do not sell or share my information
  • Privacy Policy
  • Accessibility
  • California Privacy Rights

© 2025 Active Interest Media. All rights reserved.

Fine Homebuilding receives a commission for items purchased through links on this site, including Amazon Associates and other affiliate advertising programs.

  • Home Group
  • Antique Trader
  • Arts & Crafts Homes
  • Bank Note Reporter
  • Cabin Life
  • Cuisine at Home
  • Fine Gardening
  • Fine Woodworking
  • Green Building Advisor
  • Garden Gate
  • Horticulture
  • Keep Craft Alive
  • Log Home Living
  • Military Trader/Vehicles
  • Numismatic News
  • Numismaster
  • Old Cars Weekly
  • Old House Journal
  • Period Homes
  • Popular Woodworking
  • Script
  • ShopNotes
  • Sports Collectors Digest
  • Threads
  • Timber Home Living
  • Traditional Building
  • Woodsmith
  • World Coin News
  • Writer's Digest
Active Interest Media logo
X
X
This is a dialog window which overlays the main content of the page. The modal window is a 'site map' of the most critical areas of the site. Pressing the Escape (ESC) button will close the modal and bring you back to where you were on the page.

Main Menu

  • How-To
  • Design
  • Tools & Materials
  • Video
  • Blogs
  • Forum
  • Project Guides
  • Reader Projects
  • Magazine
  • Members
  • FHB House

Podcasts

  • FHB Podcast
  • ProTalk

Webinars

  • Upcoming and On-Demand

Podcasts

  • FHB Podcast
  • ProTalk

Webinars

  • Upcoming and On-Demand

Popular Topics

  • Kitchens
  • Business
  • Bedrooms
  • Roofs
  • Architecture and Design
  • Green Building
  • Decks
  • Framing
  • Safety
  • Remodeling
  • Bathrooms
  • Windows
  • Tilework
  • Ceilings
  • HVAC

Magazine

  • Current Issue
  • Past Issues
  • Magazine Index
  • Subscribe
  • Online Archive
  • Author Guidelines

All Access

  • Member Home
  • Start Free Trial
  • Gift Membership

Online Learning

  • Courses
  • Project Guides
  • Reader Projects
  • Podcast

More

  • FHB Ambassadors
  • FHB House
  • Customer Support

Account

  • Log In
  • Join

Newsletter

Get home building tips, offers, and expert advice in your inbox

Signing you up...

This site is protected by reCAPTCHA and the Google Privacy Policy and Terms of Service apply.
See all newsletters
See all newsletters

Follow

  • X
  • YouTube
  • instagram
  • facebook
  • pinterest
  • Tiktok

Join All Access

Become a member and get instant access to thousands of videos, how-tos, tool reviews, and design features.

Start Your Free Trial

Subscribe

FHB Magazine

Start your subscription today and save up to 70%

Subscribe

You have 1 free article remaining.

Get complete site access, including thousands of videos, how-to tips, tool reviews, and design features.

Start your FREE trial

Already a member? Log in

We hope you’ve enjoyed your free articles. To keep reading, become a member today.

Get complete site access to expert advice, how-to videos, Code Check, and more, plus the print magazine.

Start your FREE trial

Already a member? Log in

Privacy Policy Update

We use cookies, pixels, script and other tracking technologies to analyze and improve our service, to improve and personalize content, and for advertising to you. We also share information about your use of our site with third-party social media, advertising and analytics partners. You can view our Privacy Policy here and our Terms of Use here.

Cookies

Analytics

These cookies help us track site metrics to improve our sites and provide a better user experience.

Advertising/Social Media

These cookies are used to serve advertisements aligned with your interests.

Essential

These cookies are required to provide basic functions like page navigation and access to secure areas of the website.

Delete My Data

Delete all cookies and associated data