FHB Logo Facebook LinkedIn Email Pinterest Twitter X Instagram Tiktok YouTube Plus Icon Close Icon Navigation Search Icon Navigation Search Icon Arrow Down Icon Video Guide Icon Article Guide Icon Modal Close Icon Guide Search Icon Skip to content
Subscribe
Log In
  • How-To
  • Design
  • Tools & Materials
  • Restoration
  • Videos
  • Blogs
  • Forum
  • Magazine
  • Members
  • FHB House
  • Podcast
Log In

Fine Homebuilding Project Guides

Decks

Guide Home
  • Design & Planning
  • Tools & Materials
  • Footings & Foundations
  • Framing a Deck
  • Installing Decking
  • Installing Railings
  • Deck Stairs
  • Custom Details
  • Finishes, Repairs, and Maintenance
  • Complete Deck Builds
How-To

Building and Installing a Site-Built Balustrade: Cutting the Posts and Rails

Follow along with deck builder Scott Grice as he lays out and cuts the frame for a cedar railing.

By Scott Grice
  • X
  • facebook
  • linkedin
  • pinterest
  • email
  • add to favorites Log in or Sign up to save your favorite articles

Of all the railing options, installing a site-built deck railing will probably get you the most bang for your buck without the hassle of product research, ordering, and an installation learning curve. The balustrade installation outlined here uses off-the-shelf hardwood balusters chosen because they match the decking but also because they have a slightly smaller profile than a typical softwood baluster. The rails are made of cedar 1x lumber, ripped on site, to match the cedar posts and custom cap.

Cutting the posts and rails

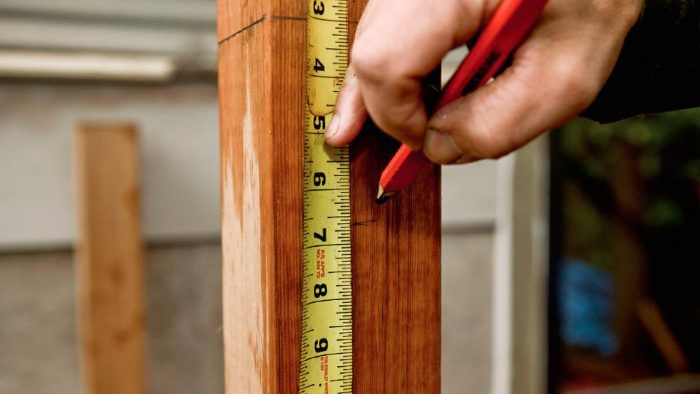
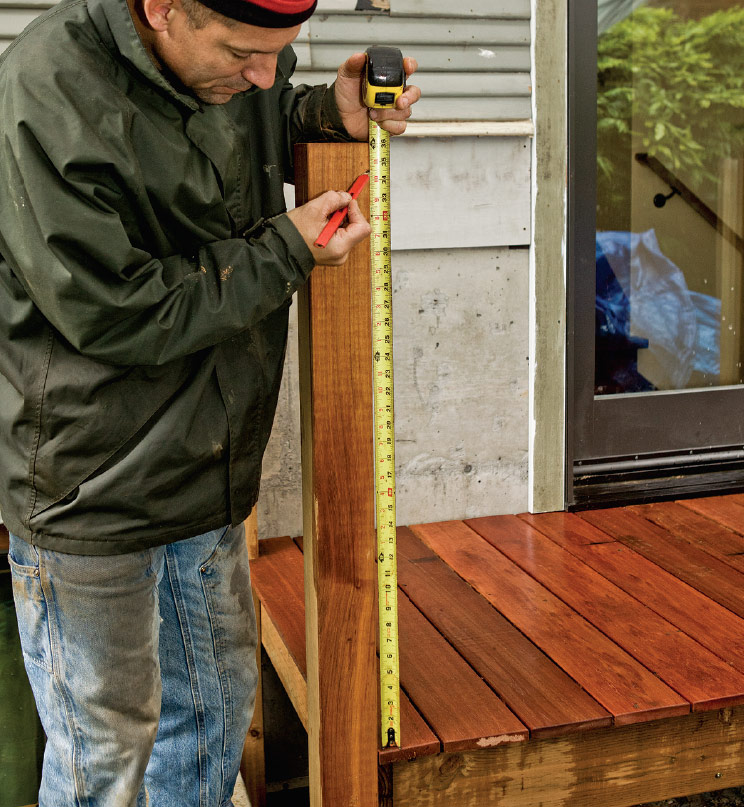
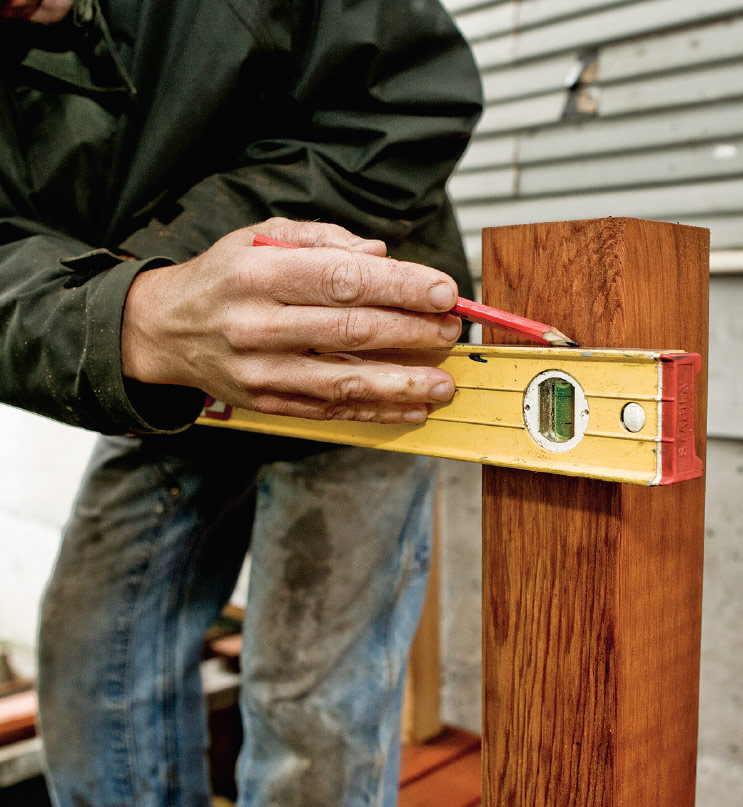
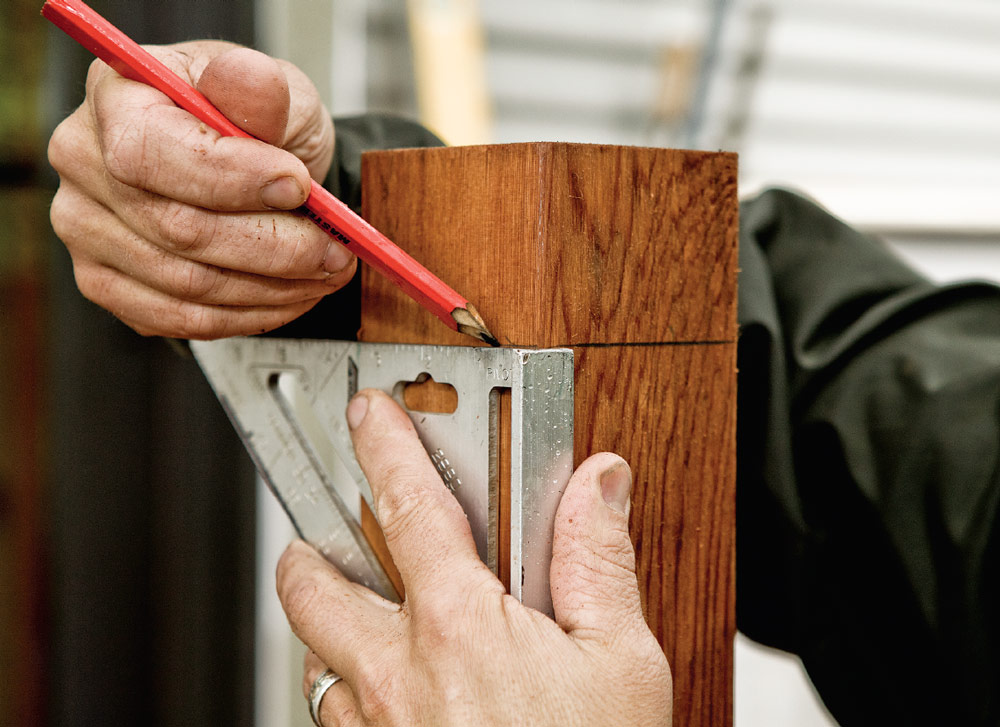
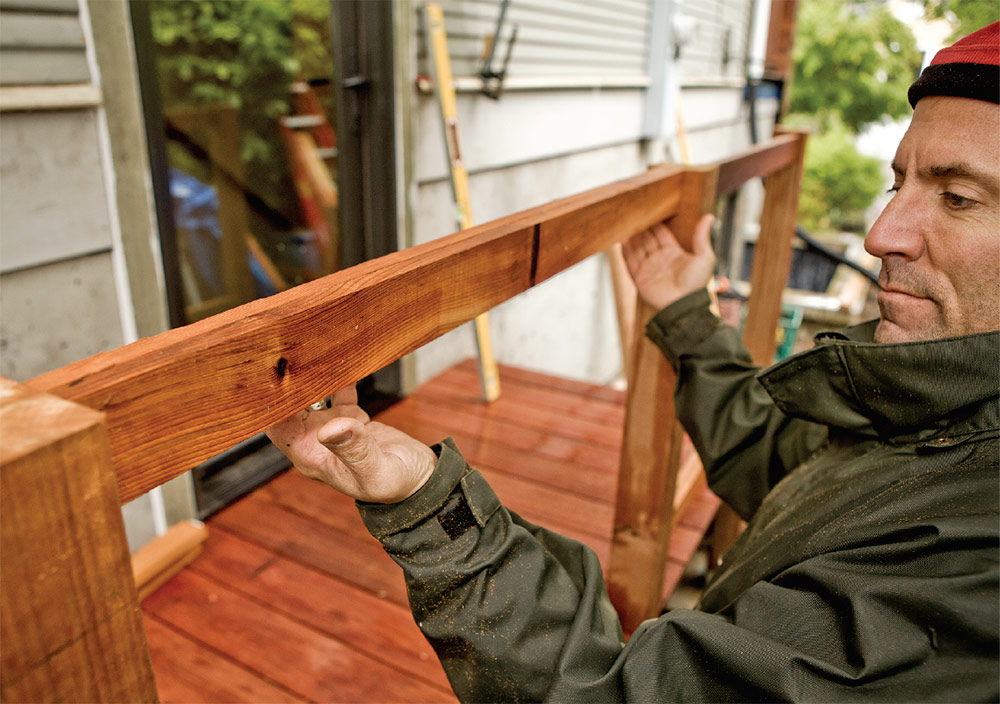
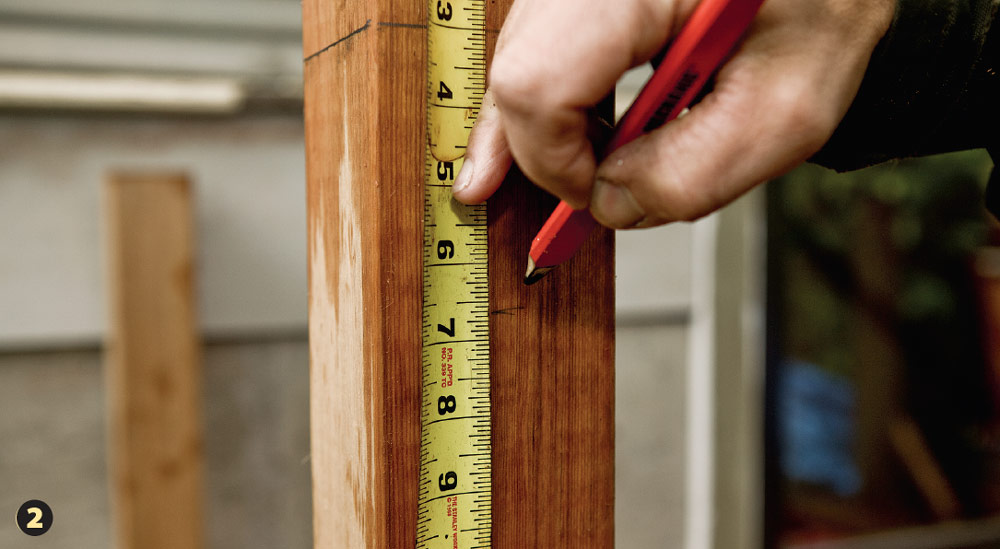
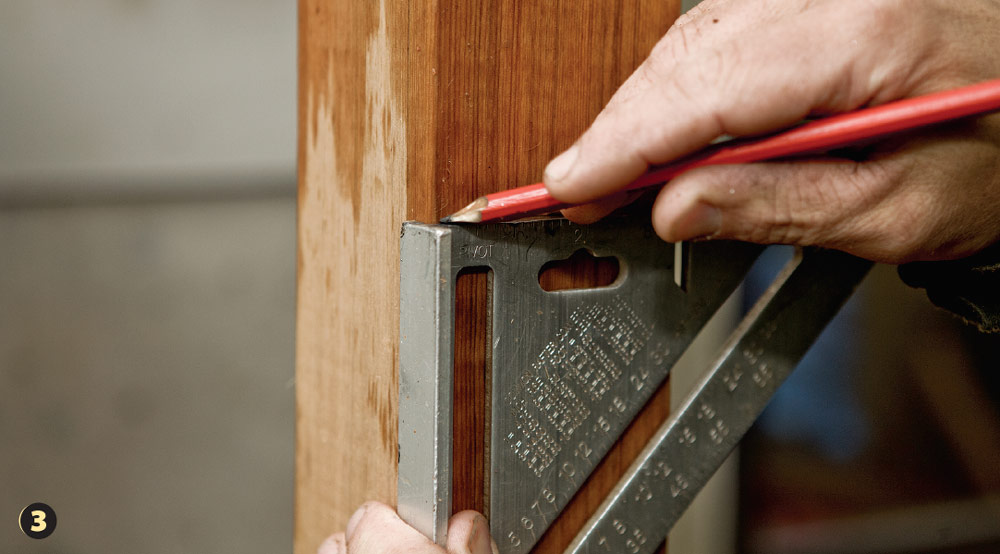
It’s important to cut all the posts at an even height so the finished cap doesn’t wander up and down. To avoid transferring discrepancies from the decking to the railing, establish the height of one post and then transfer that elevation to the other posts. First, measure up from the finished deck height to the location of the underside of the railing to establish the top of the posts. For a 36-in. railing height with a 2×6 cap, the cutline will be 34-1/2 in. Use a long spirit level or a laser level to transfer that elevation to all the posts. With a Speed Square, continue the elevation line all the way around each post to ensure a continuous guide for the sawblade. Cut all the posts to the same height. A good check is to eye down the tops of the posts to make sure they are all aligned.

1. Measure up from the finished deck to the underside of the railing cap.

2. For a standard residential railing height of 36 in., the cutline will be at 34-1/2 in.

3. Level between the posts to transfer the cutline elevation to all the posts.

4. Draw the cutline all the way around each post to provide a good reference for the cut.

5. Cut all the posts to the same height. For reference, sight down the line of posts to check that they are all the same height.

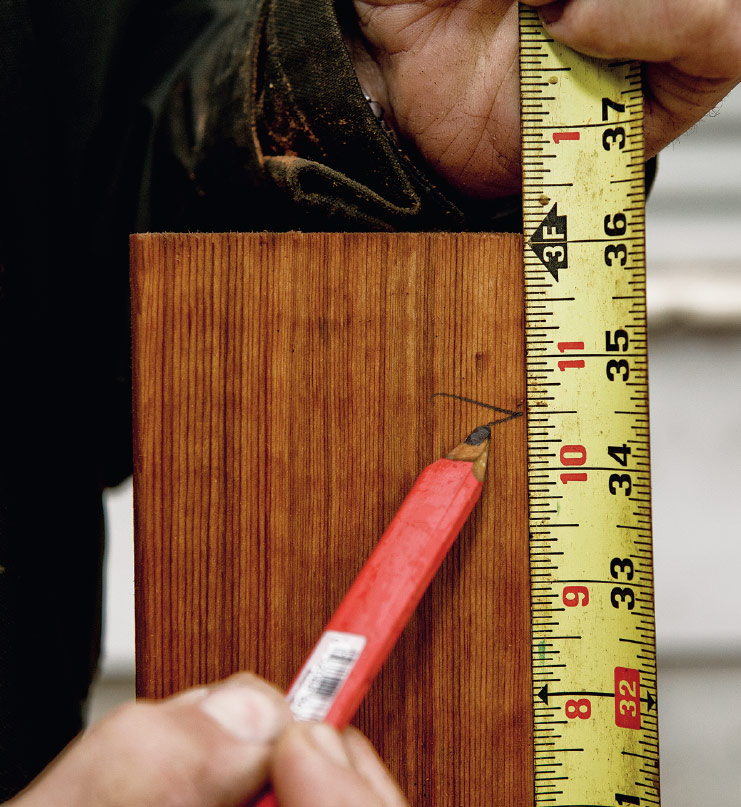
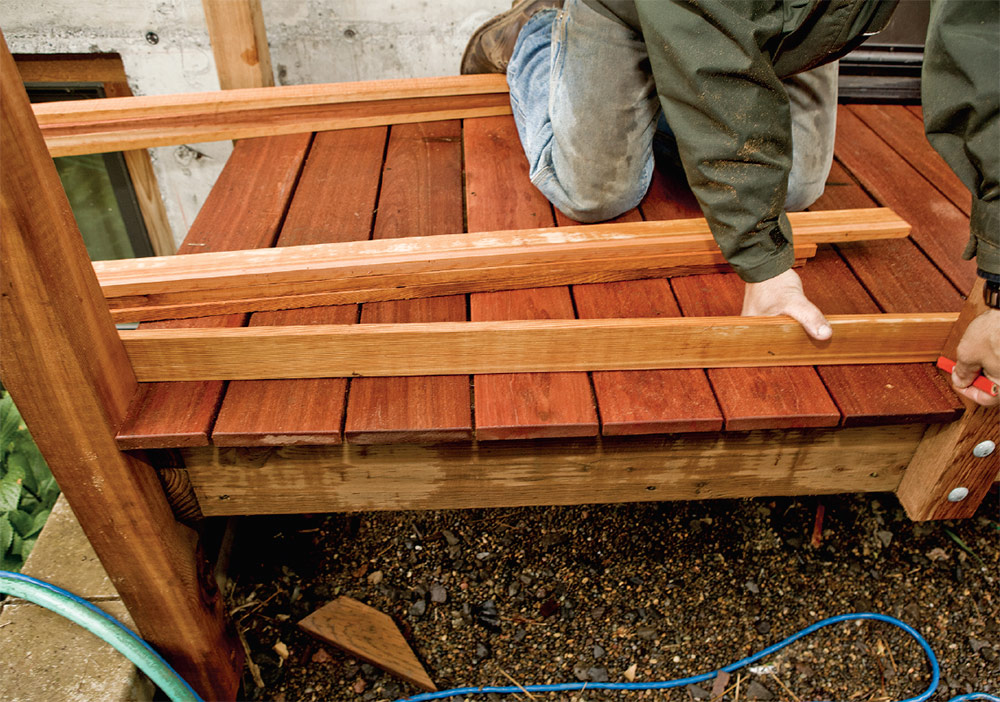
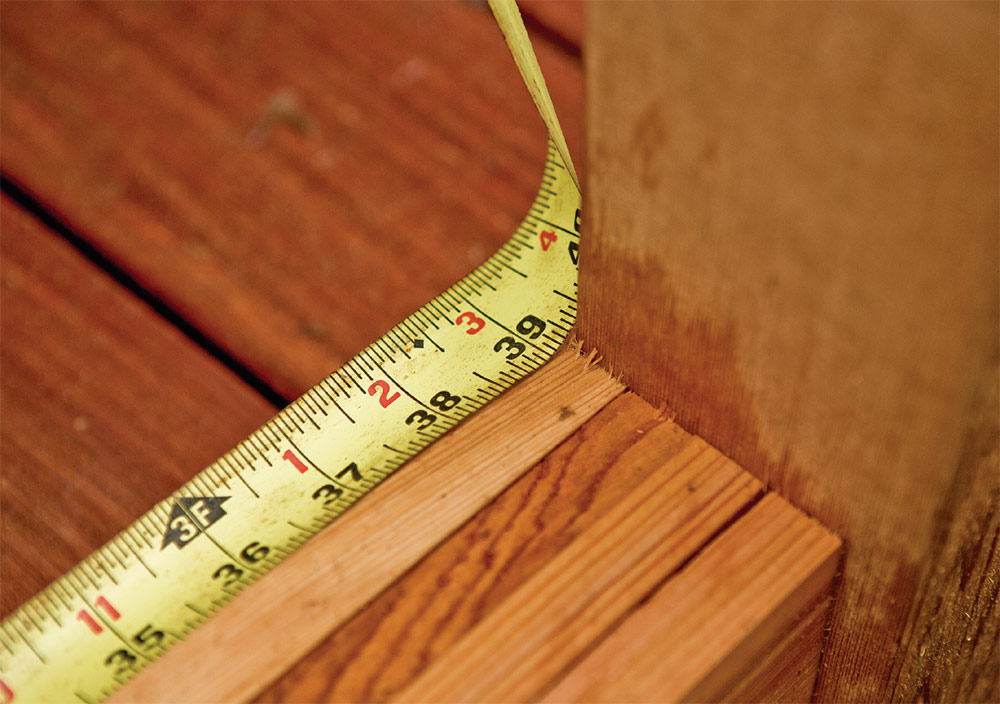
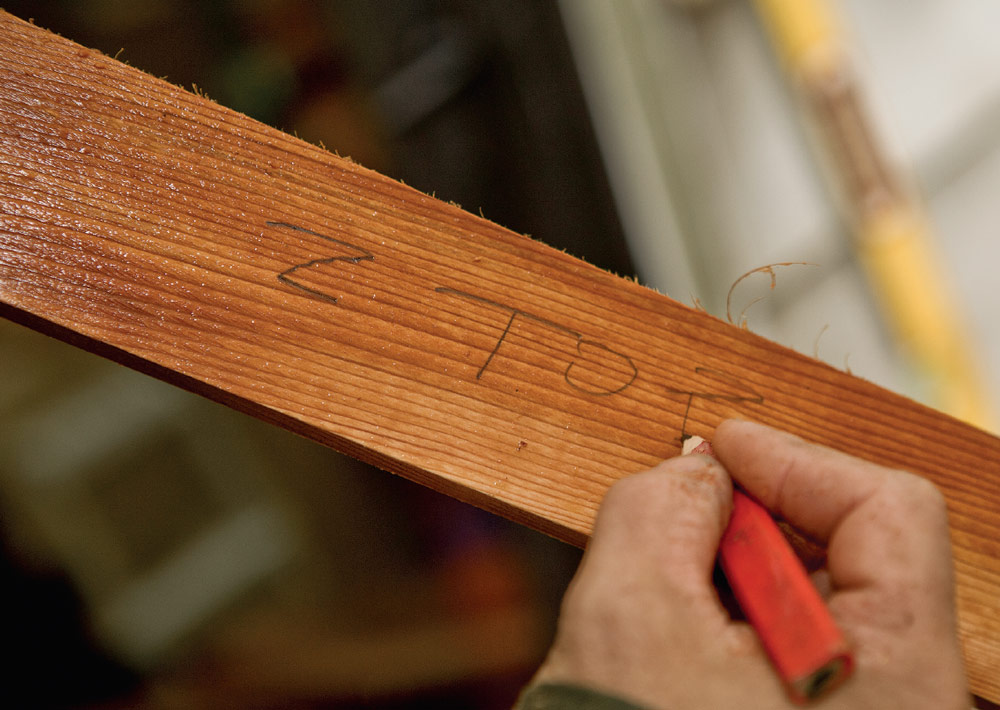
To determine the rail length, place a 1x between the posts at the bottom and mark the length. For the deck shown here, there is a pair of rails for the bottom and a pair for the top (inside and outside for each). If you’ve been careful to keep everything plumb, the distance between the posts shouldn’t differ from the top and bottom. If the distance is within an 1/8 in. or so, just treat the measurements as identical and cut all four rails the same length; test-fit them at the bottom. Sometimes post distance will vary a little from top to bottom, and it’s more work than it’s worth to adjust them. In these cases, treat the bottom and top separately and fit them as pairs of railings. Identify the show face (the better-looking side) and label the rails on the back to indicate where they go.

6. Mark the distance between two posts on a length of rail. This will become a story pole on which to mark the baluster locations.

7. Cut four rail pieces to that length and test-fit them between the posts.

8. Test-fit two of the rail pieces between the posts at the height of installation.

9. Identify where the railing pieces go by writing their location on the back after you’ve fit them.


Use a guide for a perfect cut

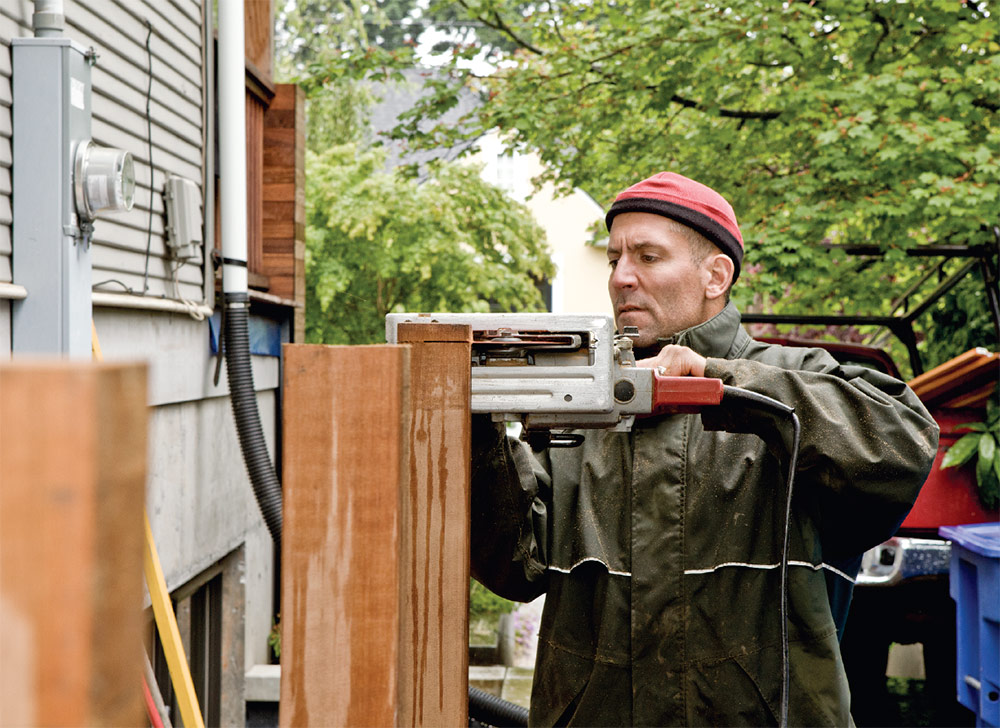
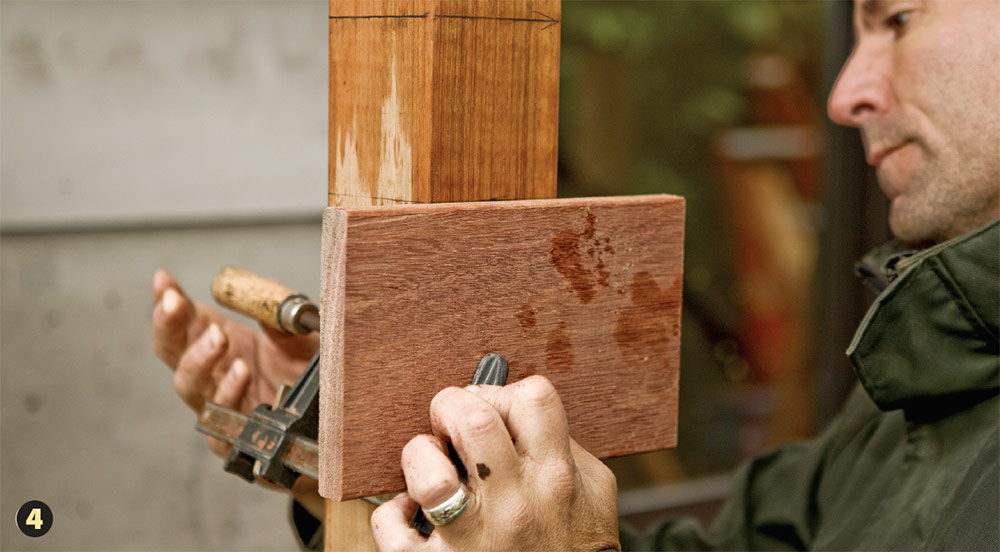
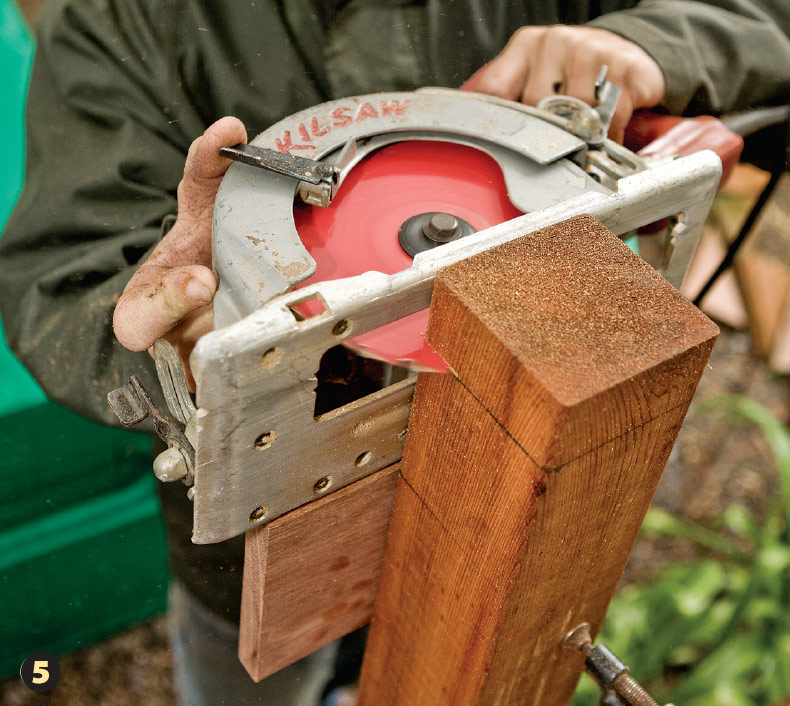
If you’re not confident about freehanding a straight cut on the posts, it takes only a minute to set up a guide that will ensure a perfect cut every time.

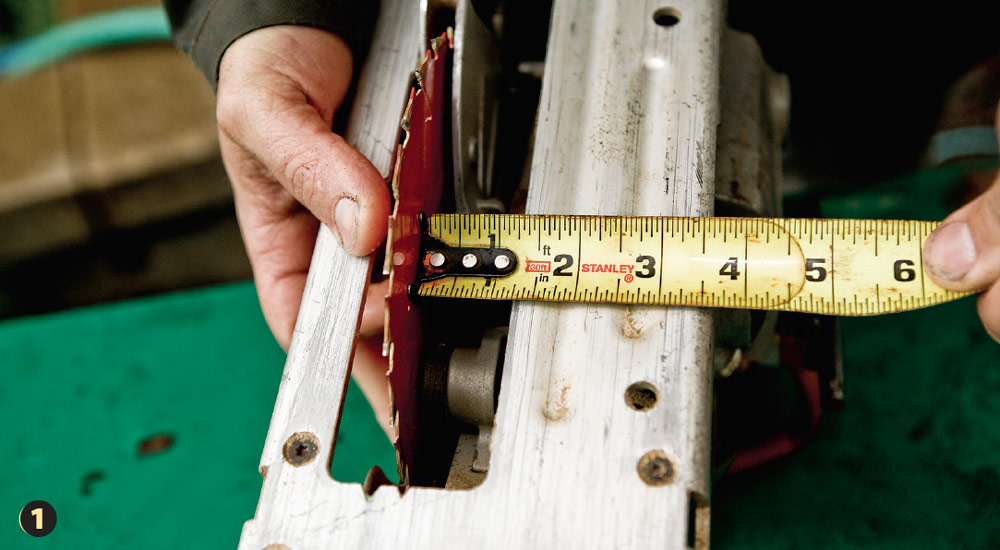
Measure the distance from the side of the blade to the edge of the saw base. This is the blade offset. Measure the distance of the offset down from the elevation line and make a mark. Square the mark across the face of the post and around all four sides. Clamp a guide board aligned to the lower line. Use the block to guide the saw. After the first cut, reposition the block on the opposite face to finish the cut.

1. Measure the distance from the side of the blade to the edge of the saw base.

2. This is the blade offset. Measure the distance of the offset down from the elevation line and make a mark.

3. Square the mark across the face of the post and around all four sides.

4. Clamp a guide board aligned to the lower line.

5. Use the block to guide the saw. After the first cut, reposition the block on the opposite face to finish the cut.


Photos: John Ross

Fine Homebuilding Recommended Products

Fine Homebuilding receives a commission for items purchased through links on this site, including Amazon Associates and other affiliate advertising programs.

Cepco BoWrench Decking Tool

This tool makes straightening deck boards a breeze during installation.
Buy at Amazon

Drill Driver/Impact Driver

Whether you're pre-drilling holes or driving screws, this Milwaukee® compact cordless driver is the way to go when it comes to building decks.
Buy at Amazon

Jigsaw

When it comes to fitting and installing decking, a cordless jigsaw is a must-have for custom cuts — especially around posts.
Buy at Amazon
Previous: Better-Built Wood Railings Next: Building and Installing a Site-Built Balustrade: Assembling the Balustrade

Guide

Decks

Chapter

Installing Railings

Sign up for eletters today and get the latest how-to from Fine Homebuilding, plus special offers.

Signing you up...

This site is protected by reCAPTCHA and the Google Privacy Policy and Terms of Service apply.
See all newsletters
See all newsletters

Log in or create an account to post a comment.

Sign up Log in

Become a member and get full access to FineHomebuilding.com

Decks

Decks

Hundreds of articles and videos by top deck-building pros on how to design and build a beautiful, sturdy, and safe deck

View Project Guide

View All Project Guides »

Become a member and get unlimited site access, including the Decks Project Guide.

Start Free Trial

Design & Planning
  • Basic Design Options
  • Generating Plans
  • Calculating Deck Loads
  • Code Compliance
Tools & Materials
  • Deck Building Tools
  • Foundation and Framing Materials
  • Decking Materials
  • Fasteners and Hardware
Footings & Foundations
  • Choosing a Foundation
  • Sizing and Laying Out Footings
  • Excavation
  • Pouring the Foundation
Framing a Deck
  • Framing Overview
  • Installing the Ledger
  • Setting Posts and Beams
  • Installing Joists
Installing Decking
  • Decking Basics
  • Installation Process
  • Adding Fascia and Other Decorative Elements
Installing Railings
  • Installing Deck Railing Posts
  • Building Wood Rails and Balustrades
  • Non-Wood Railing Options
  • Installing Nonwood Balustrades
Deck Stairs
  • Deck Stairs Overview
  • Laying Out, Cutting, and Installing the Stringers
  • Installing Treads, Risers, and Stair Railings
Custom Details
  • Benches, Planters, and Privacy Features
  • Pergolas
  • Lighting
Finishes, Repairs, and Maintenance
  • Deck Finishes
  • Cleaning and Refinishing
  • Inspection and Repair
Complete Deck Builds
  • Grade-Level Decks
  • Raised Decks

Fine Home Building

Newsletter Sign-up

  • Fine Homebuilding

    Home building tips, offers, and expert advice in your inbox.

  • Green Building Advisor

    Building science and energy efficiency advice, plus special offers, in your inbox.

  • Old House Journal

    Repair, renovation, and restoration tips, plus special offers, in your inbox.

Signing you up...

This site is protected by reCAPTCHA and the Google Privacy Policy and Terms of Service apply.
See all newsletters

Follow

  • Fine Homebuilding

    Dig into cutting-edge approaches and decades of proven solutions with total access to our experts and tradespeople.

    Start Free Trial Now
    • Facebook
    • Instagram
    • X
    • LinkedIn
  • GBA Prime

    Get instant access to the latest developments in green building, research, and reports from the field.

    Start Free Trial Now
    • Facebook
    • YouTube
  • Old House Journal

    Learn how to restore, repair, update, and decorate your home.

    Subscribe Now
    • Facebook
    • Instagram
    • X

Membership & Magazine

  • Online Archive
  • Start Free Trial
  • Magazine Subscription
  • Magazine Renewal
  • Gift a Subscription
  • Customer Support
  • Privacy Preferences
  • About
  • Contact
  • Advertise
  • Careers
  • Terms of Use
  • Site Map
  • Do not sell or share my information
  • Privacy Policy
  • Accessibility
  • California Privacy Rights

© 2025 Active Interest Media. All rights reserved.

Fine Homebuilding receives a commission for items purchased through links on this site, including Amazon Associates and other affiliate advertising programs.

  • Home Group
  • Antique Trader
  • Arts & Crafts Homes
  • Bank Note Reporter
  • Cabin Life
  • Cuisine at Home
  • Fine Gardening
  • Fine Woodworking
  • Green Building Advisor
  • Garden Gate
  • Horticulture
  • Keep Craft Alive
  • Log Home Living
  • Military Trader/Vehicles
  • Numismatic News
  • Numismaster
  • Old Cars Weekly
  • Old House Journal
  • Period Homes
  • Popular Woodworking
  • Script
  • ShopNotes
  • Sports Collectors Digest
  • Threads
  • Timber Home Living
  • Traditional Building
  • Woodsmith
  • World Coin News
  • Writer's Digest
Active Interest Media logo
X
X
This is a dialog window which overlays the main content of the page. The modal window is a 'site map' of the most critical areas of the site. Pressing the Escape (ESC) button will close the modal and bring you back to where you were on the page.

Main Menu

  • How-To
  • Design
  • Tools & Materials
  • Video
  • Blogs
  • Forum
  • Project Guides
  • Reader Projects
  • Magazine
  • Members
  • FHB House

Podcasts

  • FHB Podcast
  • ProTalk

Webinars

  • Upcoming and On-Demand

Podcasts

  • FHB Podcast
  • ProTalk

Webinars

  • Upcoming and On-Demand

Popular Topics

  • Kitchens
  • Business
  • Bedrooms
  • Roofs
  • Architecture and Design
  • Green Building
  • Decks
  • Framing
  • Safety
  • Remodeling
  • Bathrooms
  • Windows
  • Tilework
  • Ceilings
  • HVAC

Magazine

  • Current Issue
  • Past Issues
  • Magazine Index
  • Subscribe
  • Online Archive
  • Author Guidelines

All Access

  • Member Home
  • Start Free Trial
  • Gift Membership

Online Learning

  • Courses
  • Project Guides
  • Reader Projects
  • Podcast

More

  • FHB Ambassadors
  • FHB House
  • Customer Support

Account

  • Log In
  • Join

Newsletter

Get home building tips, offers, and expert advice in your inbox

Signing you up...

This site is protected by reCAPTCHA and the Google Privacy Policy and Terms of Service apply.
See all newsletters
See all newsletters

Follow

  • X
  • YouTube
  • instagram
  • facebook
  • pinterest
  • Tiktok

Join All Access

Become a member and get instant access to thousands of videos, how-tos, tool reviews, and design features.

Start Your Free Trial

Subscribe

FHB Magazine

Start your subscription today and save up to 70%

Subscribe

You have 1 free article remaining.

Get complete site access, including thousands of videos, how-to tips, tool reviews, and design features.

Start your FREE trial

Already a member? Log in

We hope you’ve enjoyed your free articles. To keep reading, become a member today.

Get complete site access to expert advice, how-to videos, Code Check, and more, plus the print magazine.

Start your FREE trial

Already a member? Log in

Privacy Policy Update

We use cookies, pixels, script and other tracking technologies to analyze and improve our service, to improve and personalize content, and for advertising to you. We also share information about your use of our site with third-party social media, advertising and analytics partners. You can view our Privacy Policy here and our Terms of Use here.

Cookies

Analytics

These cookies help us track site metrics to improve our sites and provide a better user experience.

Advertising/Social Media

These cookies are used to serve advertisements aligned with your interests.

Essential

These cookies are required to provide basic functions like page navigation and access to secure areas of the website.

Delete My Data

Delete all cookies and associated data