FHB Logo Facebook LinkedIn Email Pinterest Twitter X Instagram Tiktok YouTube Plus Icon Close Icon Navigation Search Icon Navigation Search Icon Arrow Down Icon Video Guide Icon Article Guide Icon Modal Close Icon Guide Search Icon Skip to content
Subscribe
Log In
  • How-To
  • Design
  • Tools & Materials
  • Restoration
  • Videos
  • Blogs
  • Forum
  • Magazine
  • Members
  • FHB House
  • Podcast
Log In

Fine Homebuilding Project Guides

Decks

Guide Home
  • Design & Planning
  • Tools & Materials
  • Footings & Foundations
  • Framing a Deck
  • Installing Decking
  • Installing Railings
  • Deck Stairs
  • Custom Details
  • Finishes, Repairs, and Maintenance
  • Complete Deck Builds
How-To

Installing a Picture-Frame Border on a Deck

If you include this common detail in your deck project, set the border before filling in the field for the best results.

By Scott Grice
  • X
  • facebook
  • linkedin
  • pinterest
  • email
  • add to favorites Log in or Sign up to save your favorite articles

If you choose to surround your deck with a picture-frame border, it can be installed before or after the field decking. One technique is to install the field decking first, letting the ends run long then cut them all at once to accommodate the border. The advantage of this method is that it saves time over cutting and fitting each board to length. The disadvantage is the increased risk of tearout from the circular saw at the board ends. Also, if you’ve chosen to round the corners of the butt cut, you’ll spend extra time on your knees making those cuts. Unless pressed for time, we like to install the border first because we find we get better results when we cut the ends and round the edges individually.

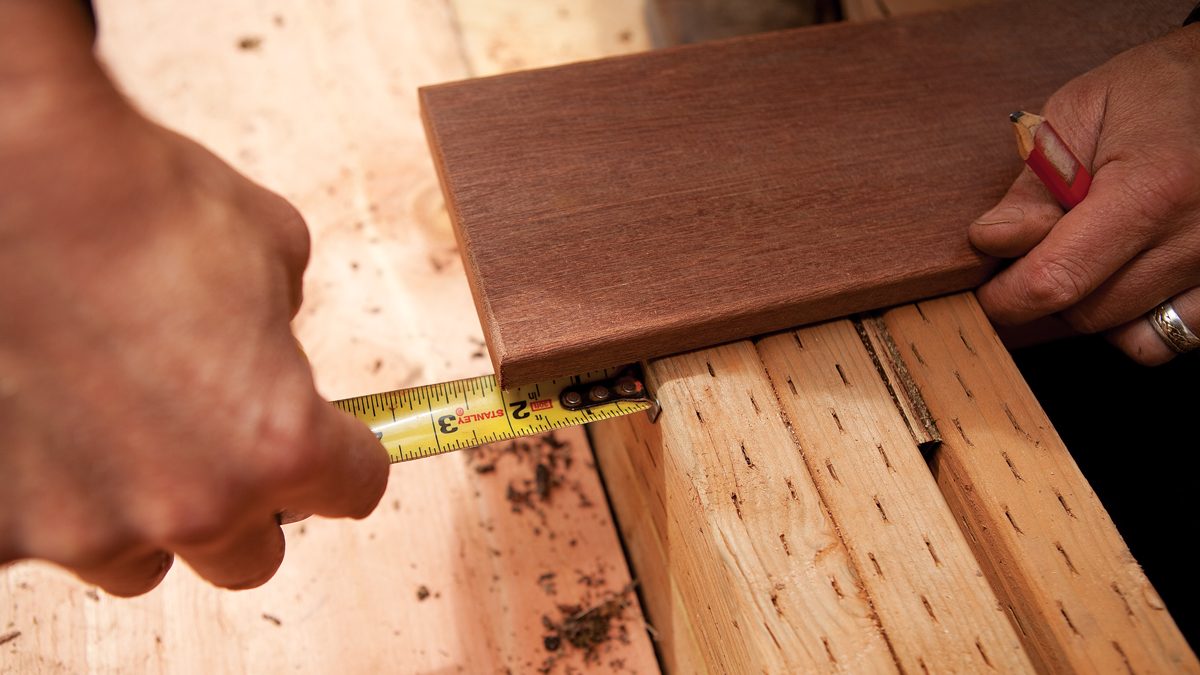
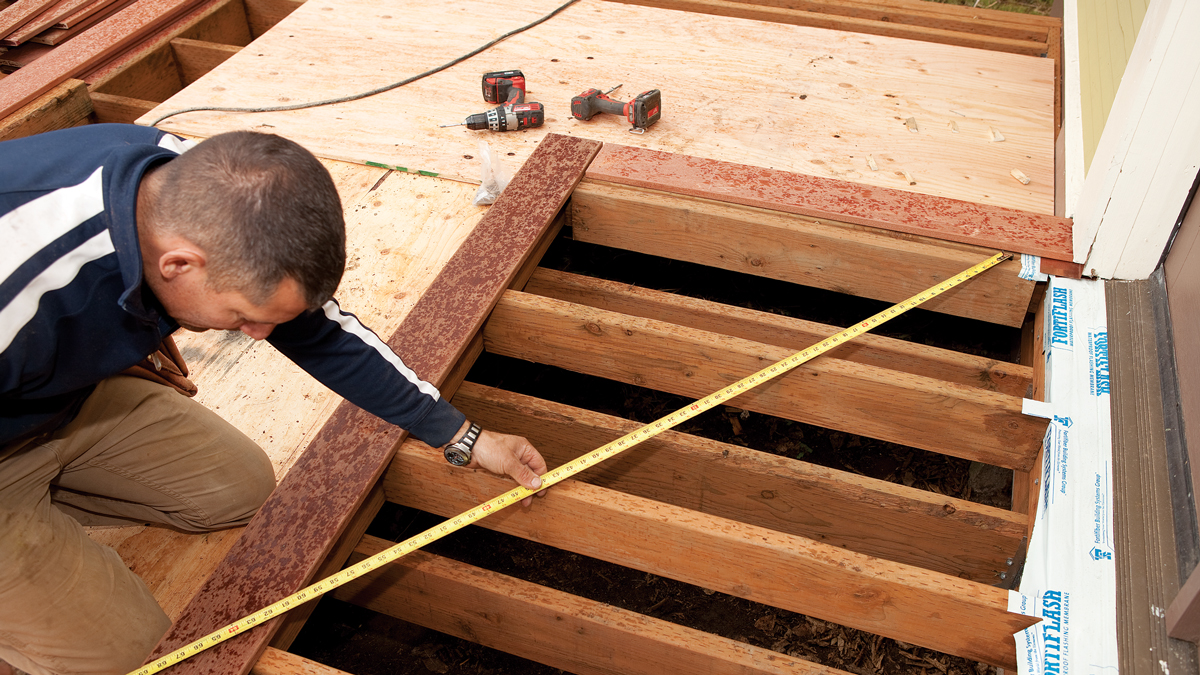
Usually every section of the deck gets a border, but the steps are the same for large and small sections alike. The first step is to establish the overhang, which depends on the thickness of the fascia material you choose. To establish the overhang from the framing, add the desired overhang, typically 3/4 in. to 1-1/4 in., to the fascia’s thickness. For the deck shown here, a 1-1/4-in. overhang with a 3/4-in. fascia equaled a 2-in. overhang from the framing. Mark the edge of the decking board on both ends and then snap a chalkline across the framing to mark the board’s edge. Measure and cut the end board to length, remembering to add enough for the overhang, in this case 4 in. (2 in. for each side).

Trade secret

Instead of measuring the overhang with a tape, cut a block that matches the overhang from the framing. The gauge block is much quicker to use than pulling out the tape and provides both a visual and tactile way to ensure the decking is positioned correctly.

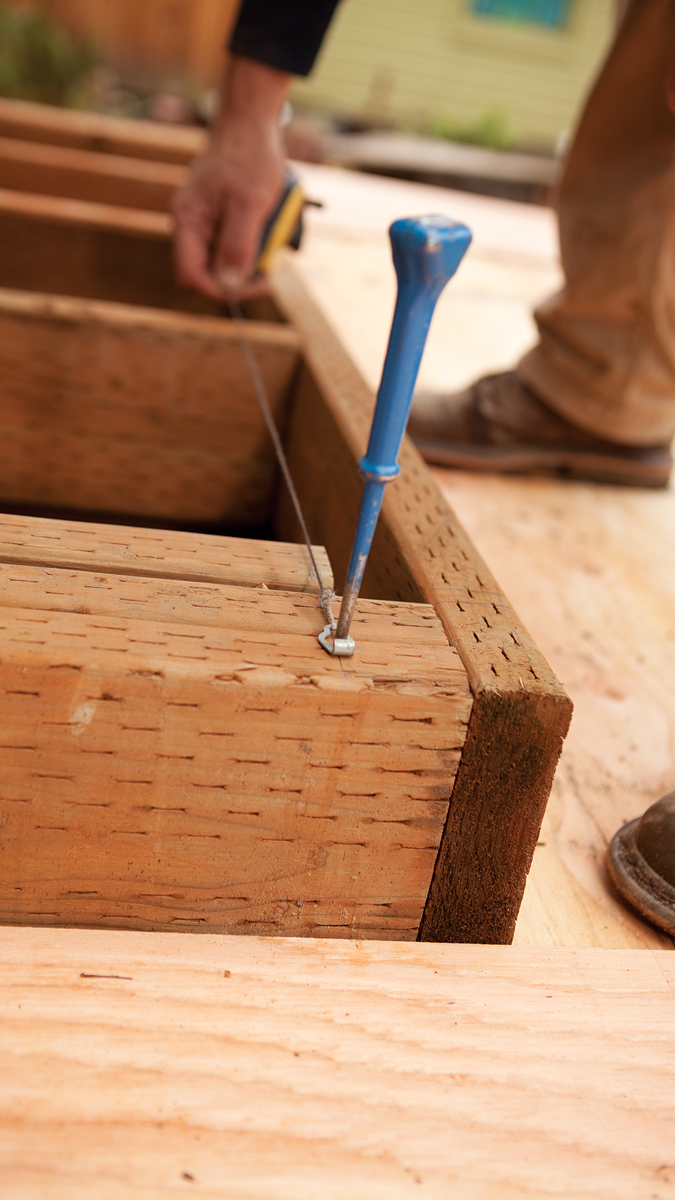
Depending on the fastener system, part or the entire border will require top screwing. Three simple techniques will help keep the appearance of the top screws clean. First, use a Speed Square to align the holes across the board. While it is easy enough to hit the framing below by just eyeballing the fastener location, the uniformity of the fasteners’ locations adds a sense of order to the deck that is subliminal yet effective. To avoid splinters and messy tearout, countersink the screw heads. Later you can decide to plug the holes and sand them flush or leave them as they are. Also, to avoid splitting hardwoods, it’s a good idea to predrill all fastener holes. Finally, if you’re installing hardwood, use a small-headed fastener and matching countersink. For softwoods you’ll have to use a standard deck fastener to prevent the head from pulling through. While securing the board, reference the chalkline you snapped earlier.

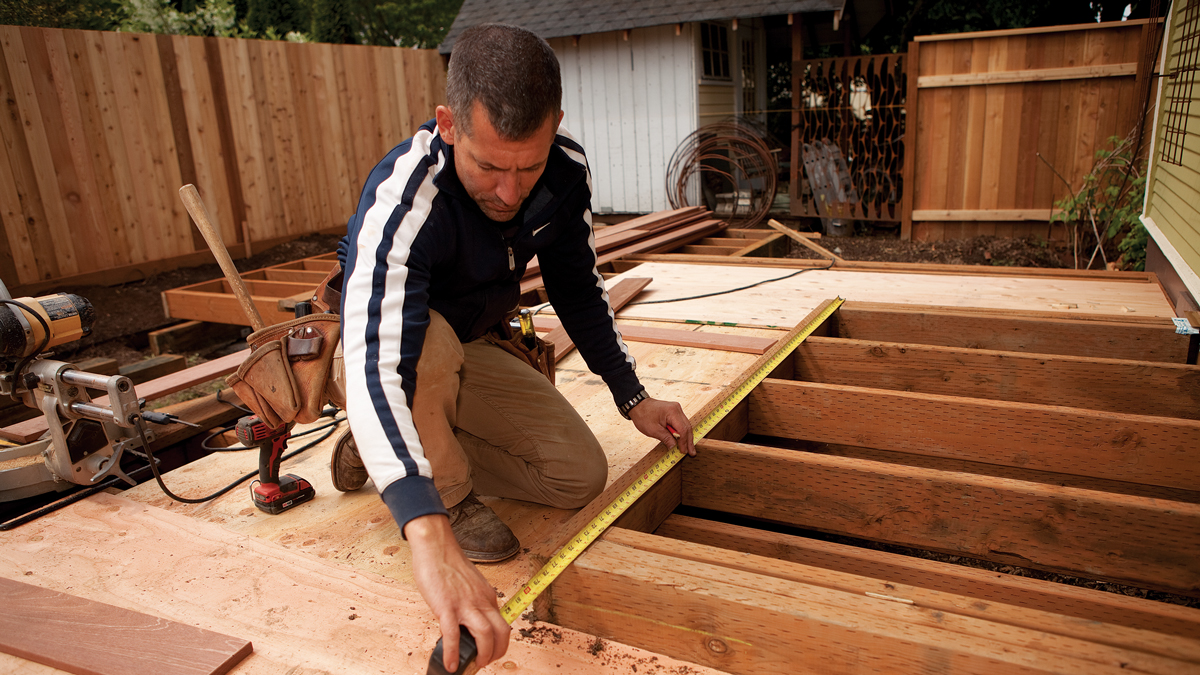
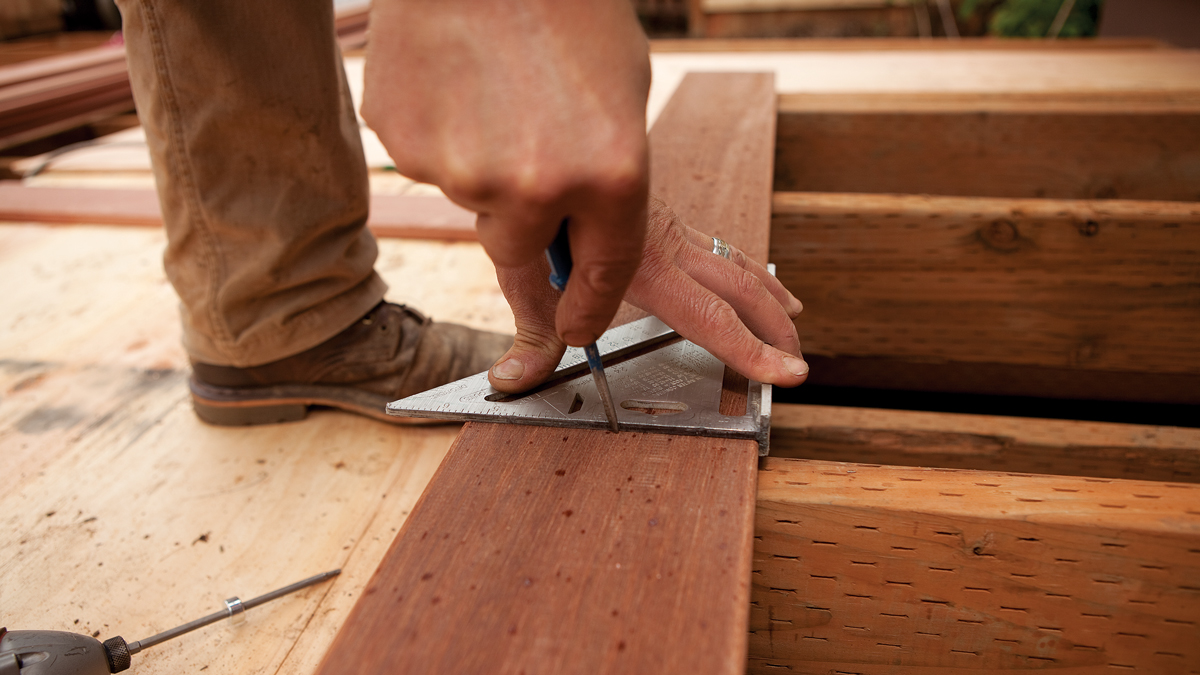
Once the end board is installed, measure and cut the sides of the picture frame. The length of the side board will match the measurement you took for layout. Align the sides with a spacer and Speed Square. Then secure the end with the same top-screw method. Before fastening the loose end, square the picture frame using the 3-4-5 method.

Here’s how it’s done:

1. Calculate the overhang from the framing by adding the desired overhang to the fascia thickness.

2. Snap a chalkline on the layout for the inside edge of the perimeter board.

3. Add the deck width plus two times the overhang to calculate the end board of the picture frame.

4. Mark the fastener locations using a Speed Square and an awl. Typically, the perimeter boards will require top-screw fasteners.

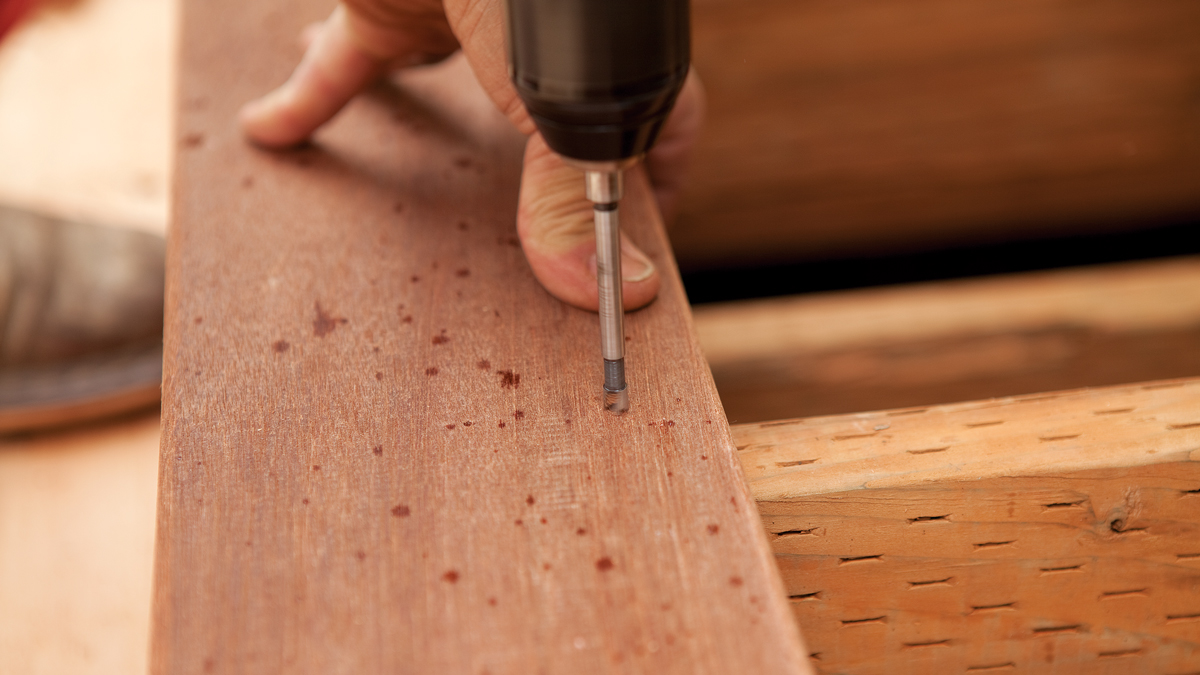
5. Countersink the fastener heads below the decking surface to avoid splinters and a general messiness.

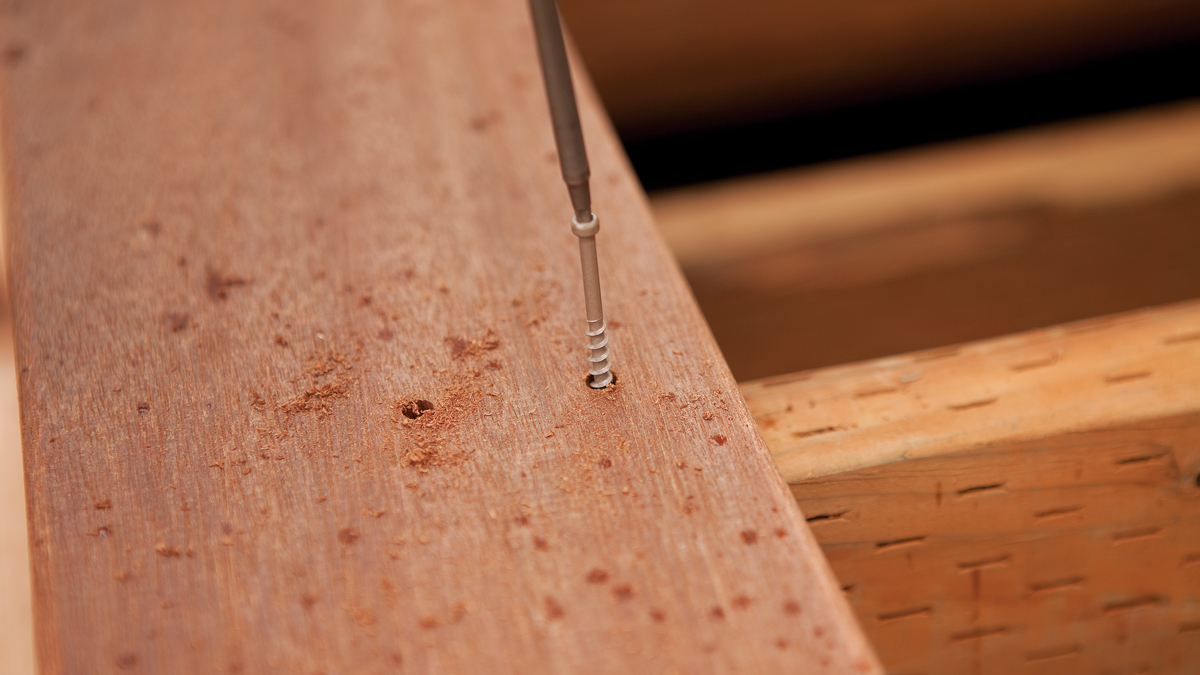
6. Predrill and drive fasteners to secure the perimeter. For hardwoods, use a small-headed fastener.

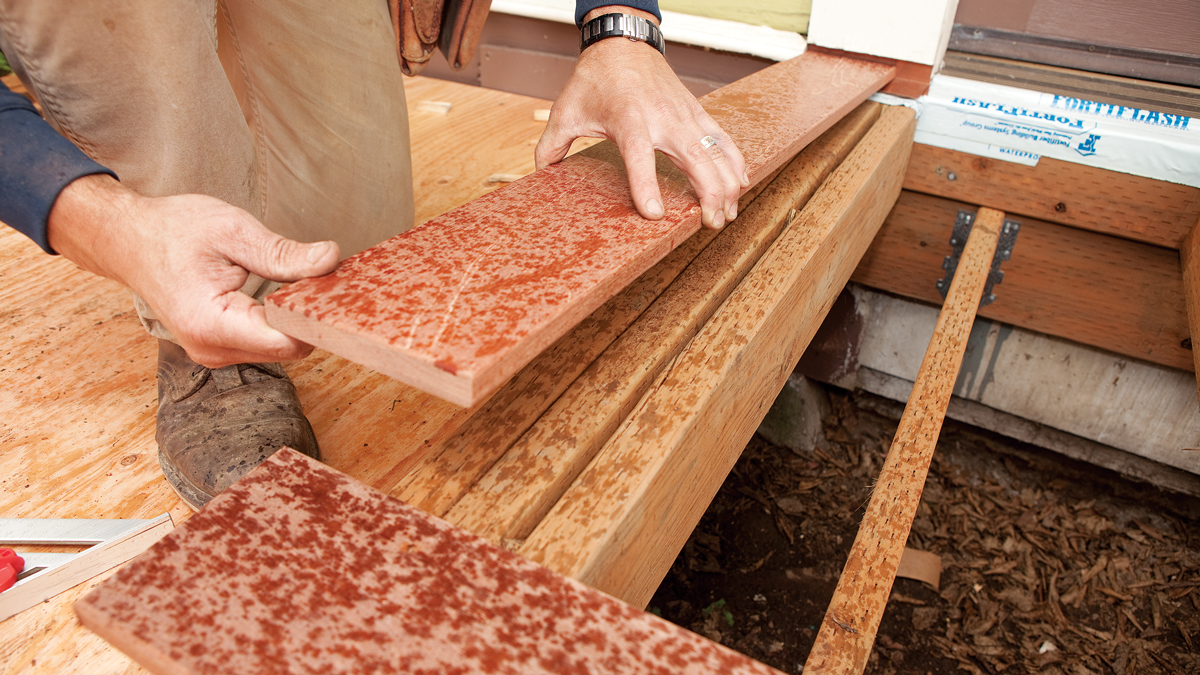
7. Locate the perimeter’s side boards. If the side of the deck is longer than a few feet, locate and snap a chalkline.

8. Align the corner with a spacer and square. Any deviations in the pattern will be more noticeable at the corners.

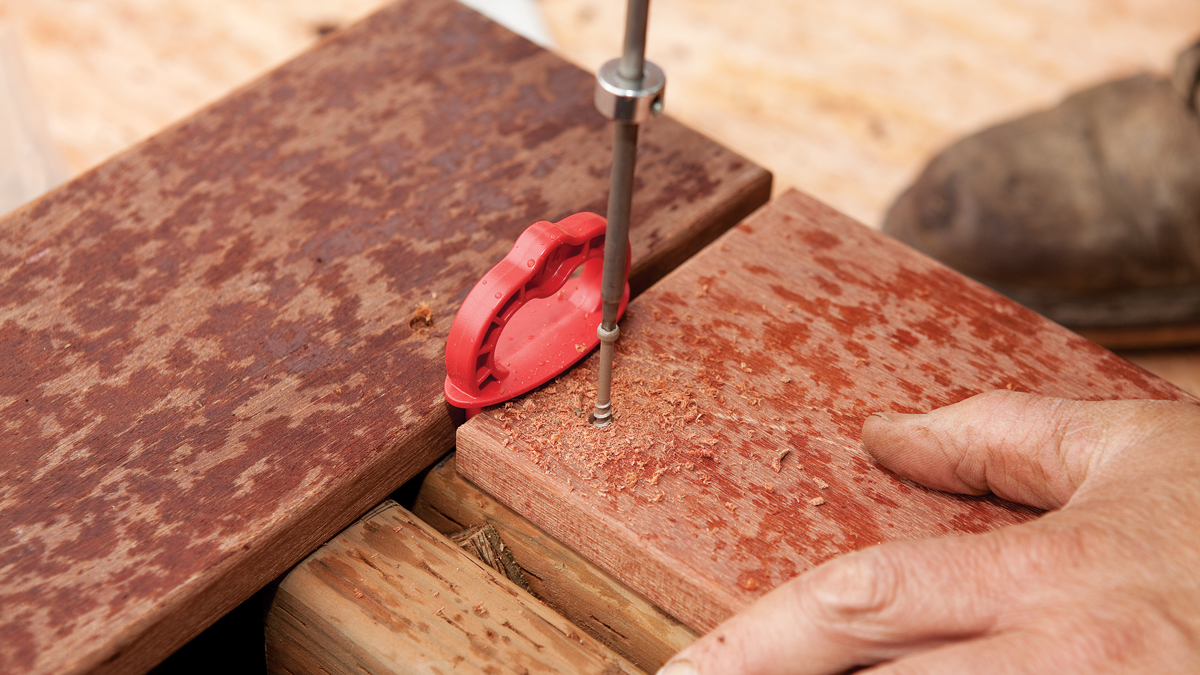
9. Secure the perimeter board at the corner first. Predrill and drive fasteners through the face.

10. Check for square before fastening the rest of the perimeter board.

Fine Homebuilding Recommended Products

Fine Homebuilding receives a commission for items purchased through links on this site, including Amazon Associates and other affiliate advertising programs.

N95 Respirator

PPE is a must, especially when cutting and sanding. We recommend you always have a box of respirator masks on the job site.
Buy at Amazon

MicroFoam Nitrile Coated Work Gloves

These gloves are comfortable and have a good grip, making for splinter-free work.
Buy at Amazon

Jigsaw

When it comes to fitting and installing decking, a cordless jigsaw is a must-have for custom cuts — especially around posts.
Buy at Amazon
Previous: Decorative Decking Patterns Next: Oil-Canning Deck Fascia

Guide

Decks

Chapter

Installing Decking

Sign up for eletters today and get the latest how-to from Fine Homebuilding, plus special offers.

Signing you up...

This site is protected by reCAPTCHA and the Google Privacy Policy and Terms of Service apply.
See all newsletters
See all newsletters

View Comments

  1. COcarpenter | Sep 01, 2020 01:50pm | #1

    It looks like the picture frame board and the ends of the regular boards will all rest on a sold joist piece. My experience is that this will collect water and organic material not letting it drain and creating rot faster. I personally haven't come up with a picture frame method that doesn't require a lot of extra framing, so would love to hear what others have come up with.

Log in or create an account to post a comment.

Sign up Log in

Become a member and get full access to FineHomebuilding.com

Decks

Decks

Hundreds of articles and videos by top deck-building pros on how to design and build a beautiful, sturdy, and safe deck

View Project Guide

View All Project Guides »

Become a member and get unlimited site access, including the Decks Project Guide.

Start Free Trial

Design & Planning
  • Basic Design Options
  • Generating Plans
  • Calculating Deck Loads
  • Code Compliance
Tools & Materials
  • Deck Building Tools
  • Foundation and Framing Materials
  • Decking Materials
  • Fasteners and Hardware
Footings & Foundations
  • Choosing a Foundation
  • Sizing and Laying Out Footings
  • Excavation
  • Pouring the Foundation
Framing a Deck
  • Framing Overview
  • Installing the Ledger
  • Setting Posts and Beams
  • Installing Joists
Installing Decking
  • Decking Basics
  • Installation Process
  • Adding Fascia and Other Decorative Elements
Installing Railings
  • Installing Deck Railing Posts
  • Building Wood Rails and Balustrades
  • Non-Wood Railing Options
  • Installing Nonwood Balustrades
Deck Stairs
  • Deck Stairs Overview
  • Laying Out, Cutting, and Installing the Stringers
  • Installing Treads, Risers, and Stair Railings
Custom Details
  • Benches, Planters, and Privacy Features
  • Pergolas
  • Lighting
Finishes, Repairs, and Maintenance
  • Deck Finishes
  • Cleaning and Refinishing
  • Inspection and Repair
Complete Deck Builds
  • Grade-Level Decks
  • Raised Decks

Fine Home Building

Newsletter Sign-up

  • Fine Homebuilding

    Home building tips, offers, and expert advice in your inbox.

  • Green Building Advisor

    Building science and energy efficiency advice, plus special offers, in your inbox.

  • Old House Journal

    Repair, renovation, and restoration tips, plus special offers, in your inbox.

Signing you up...

This site is protected by reCAPTCHA and the Google Privacy Policy and Terms of Service apply.
See all newsletters

Follow

  • Fine Homebuilding

    Dig into cutting-edge approaches and decades of proven solutions with total access to our experts and tradespeople.

    Start Free Trial Now
    • Facebook
    • Instagram
    • X
    • LinkedIn
  • GBA Prime

    Get instant access to the latest developments in green building, research, and reports from the field.

    Start Free Trial Now
    • Facebook
    • YouTube
  • Old House Journal

    Learn how to restore, repair, update, and decorate your home.

    Subscribe Now
    • Facebook
    • Instagram
    • X

Membership & Magazine

  • Online Archive
  • Start Free Trial
  • Magazine Subscription
  • Magazine Renewal
  • Gift a Subscription
  • Customer Support
  • Privacy Preferences
  • About
  • Contact
  • Advertise
  • Careers
  • Terms of Use
  • Site Map
  • Do not sell or share my information
  • Privacy Policy
  • Accessibility
  • California Privacy Rights

© 2025 Active Interest Media. All rights reserved.

Fine Homebuilding receives a commission for items purchased through links on this site, including Amazon Associates and other affiliate advertising programs.

  • Home Group
  • Antique Trader
  • Arts & Crafts Homes
  • Bank Note Reporter
  • Cabin Life
  • Cuisine at Home
  • Fine Gardening
  • Fine Woodworking
  • Green Building Advisor
  • Garden Gate
  • Horticulture
  • Keep Craft Alive
  • Log Home Living
  • Military Trader/Vehicles
  • Numismatic News
  • Numismaster
  • Old Cars Weekly
  • Old House Journal
  • Period Homes
  • Popular Woodworking
  • Script
  • ShopNotes
  • Sports Collectors Digest
  • Threads
  • Timber Home Living
  • Traditional Building
  • Woodsmith
  • World Coin News
  • Writer's Digest
Active Interest Media logo
X
X
This is a dialog window which overlays the main content of the page. The modal window is a 'site map' of the most critical areas of the site. Pressing the Escape (ESC) button will close the modal and bring you back to where you were on the page.

Main Menu

  • How-To
  • Design
  • Tools & Materials
  • Video
  • Blogs
  • Forum
  • Project Guides
  • Reader Projects
  • Magazine
  • Members
  • FHB House

Podcasts

  • FHB Podcast
  • ProTalk

Webinars

  • Upcoming and On-Demand

Podcasts

  • FHB Podcast
  • ProTalk

Webinars

  • Upcoming and On-Demand

Popular Topics

  • Kitchens
  • Business
  • Bedrooms
  • Roofs
  • Architecture and Design
  • Green Building
  • Decks
  • Framing
  • Safety
  • Remodeling
  • Bathrooms
  • Windows
  • Tilework
  • Ceilings
  • HVAC

Magazine

  • Current Issue
  • Past Issues
  • Magazine Index
  • Subscribe
  • Online Archive
  • Author Guidelines

All Access

  • Member Home
  • Start Free Trial
  • Gift Membership

Online Learning

  • Courses
  • Project Guides
  • Reader Projects
  • Podcast

More

  • FHB Ambassadors
  • FHB House
  • Customer Support

Account

  • Log In
  • Join

Newsletter

Get home building tips, offers, and expert advice in your inbox

Signing you up...

This site is protected by reCAPTCHA and the Google Privacy Policy and Terms of Service apply.
See all newsletters
See all newsletters

Follow

  • X
  • YouTube
  • instagram
  • facebook
  • pinterest
  • Tiktok

Join All Access

Become a member and get instant access to thousands of videos, how-tos, tool reviews, and design features.

Start Your Free Trial

Subscribe

FHB Magazine

Start your subscription today and save up to 70%

Subscribe

This is your last free article.

Don't miss another expert tip or technique from building pros. Start your free trial today.

Start your FREE trial

Already a member? Log in

We hope you’ve enjoyed your free articles. To keep reading, become a member today.

Get complete site access to expert advice, how-to videos, Code Check, and more, plus the print magazine.

Start your FREE trial

Already a member? Log in

Privacy Policy Update

We use cookies, pixels, script and other tracking technologies to analyze and improve our service, to improve and personalize content, and for advertising to you. We also share information about your use of our site with third-party social media, advertising and analytics partners. You can view our Privacy Policy here and our Terms of Use here.

Cookies

Analytics

These cookies help us track site metrics to improve our sites and provide a better user experience.

Advertising/Social Media

These cookies are used to serve advertisements aligned with your interests.

Essential

These cookies are required to provide basic functions like page navigation and access to secure areas of the website.

Delete My Data

Delete all cookies and associated data